
Circus Ring SAL - Week 3
Welcome to week 3 of the Circus Ring quilt SAL! We’re in the back half now! We have two goals this week and are only going to sew 8 seams on the quilt top. Very easy and straightforward! Not exactly straight, since we’re sewing curved seams. We tackled some gentle curves last week with the corner pieces. This week, we’re sewing the long, elegant curves of the arc melons, and following instructions on the top half of page 5 of the pattern.
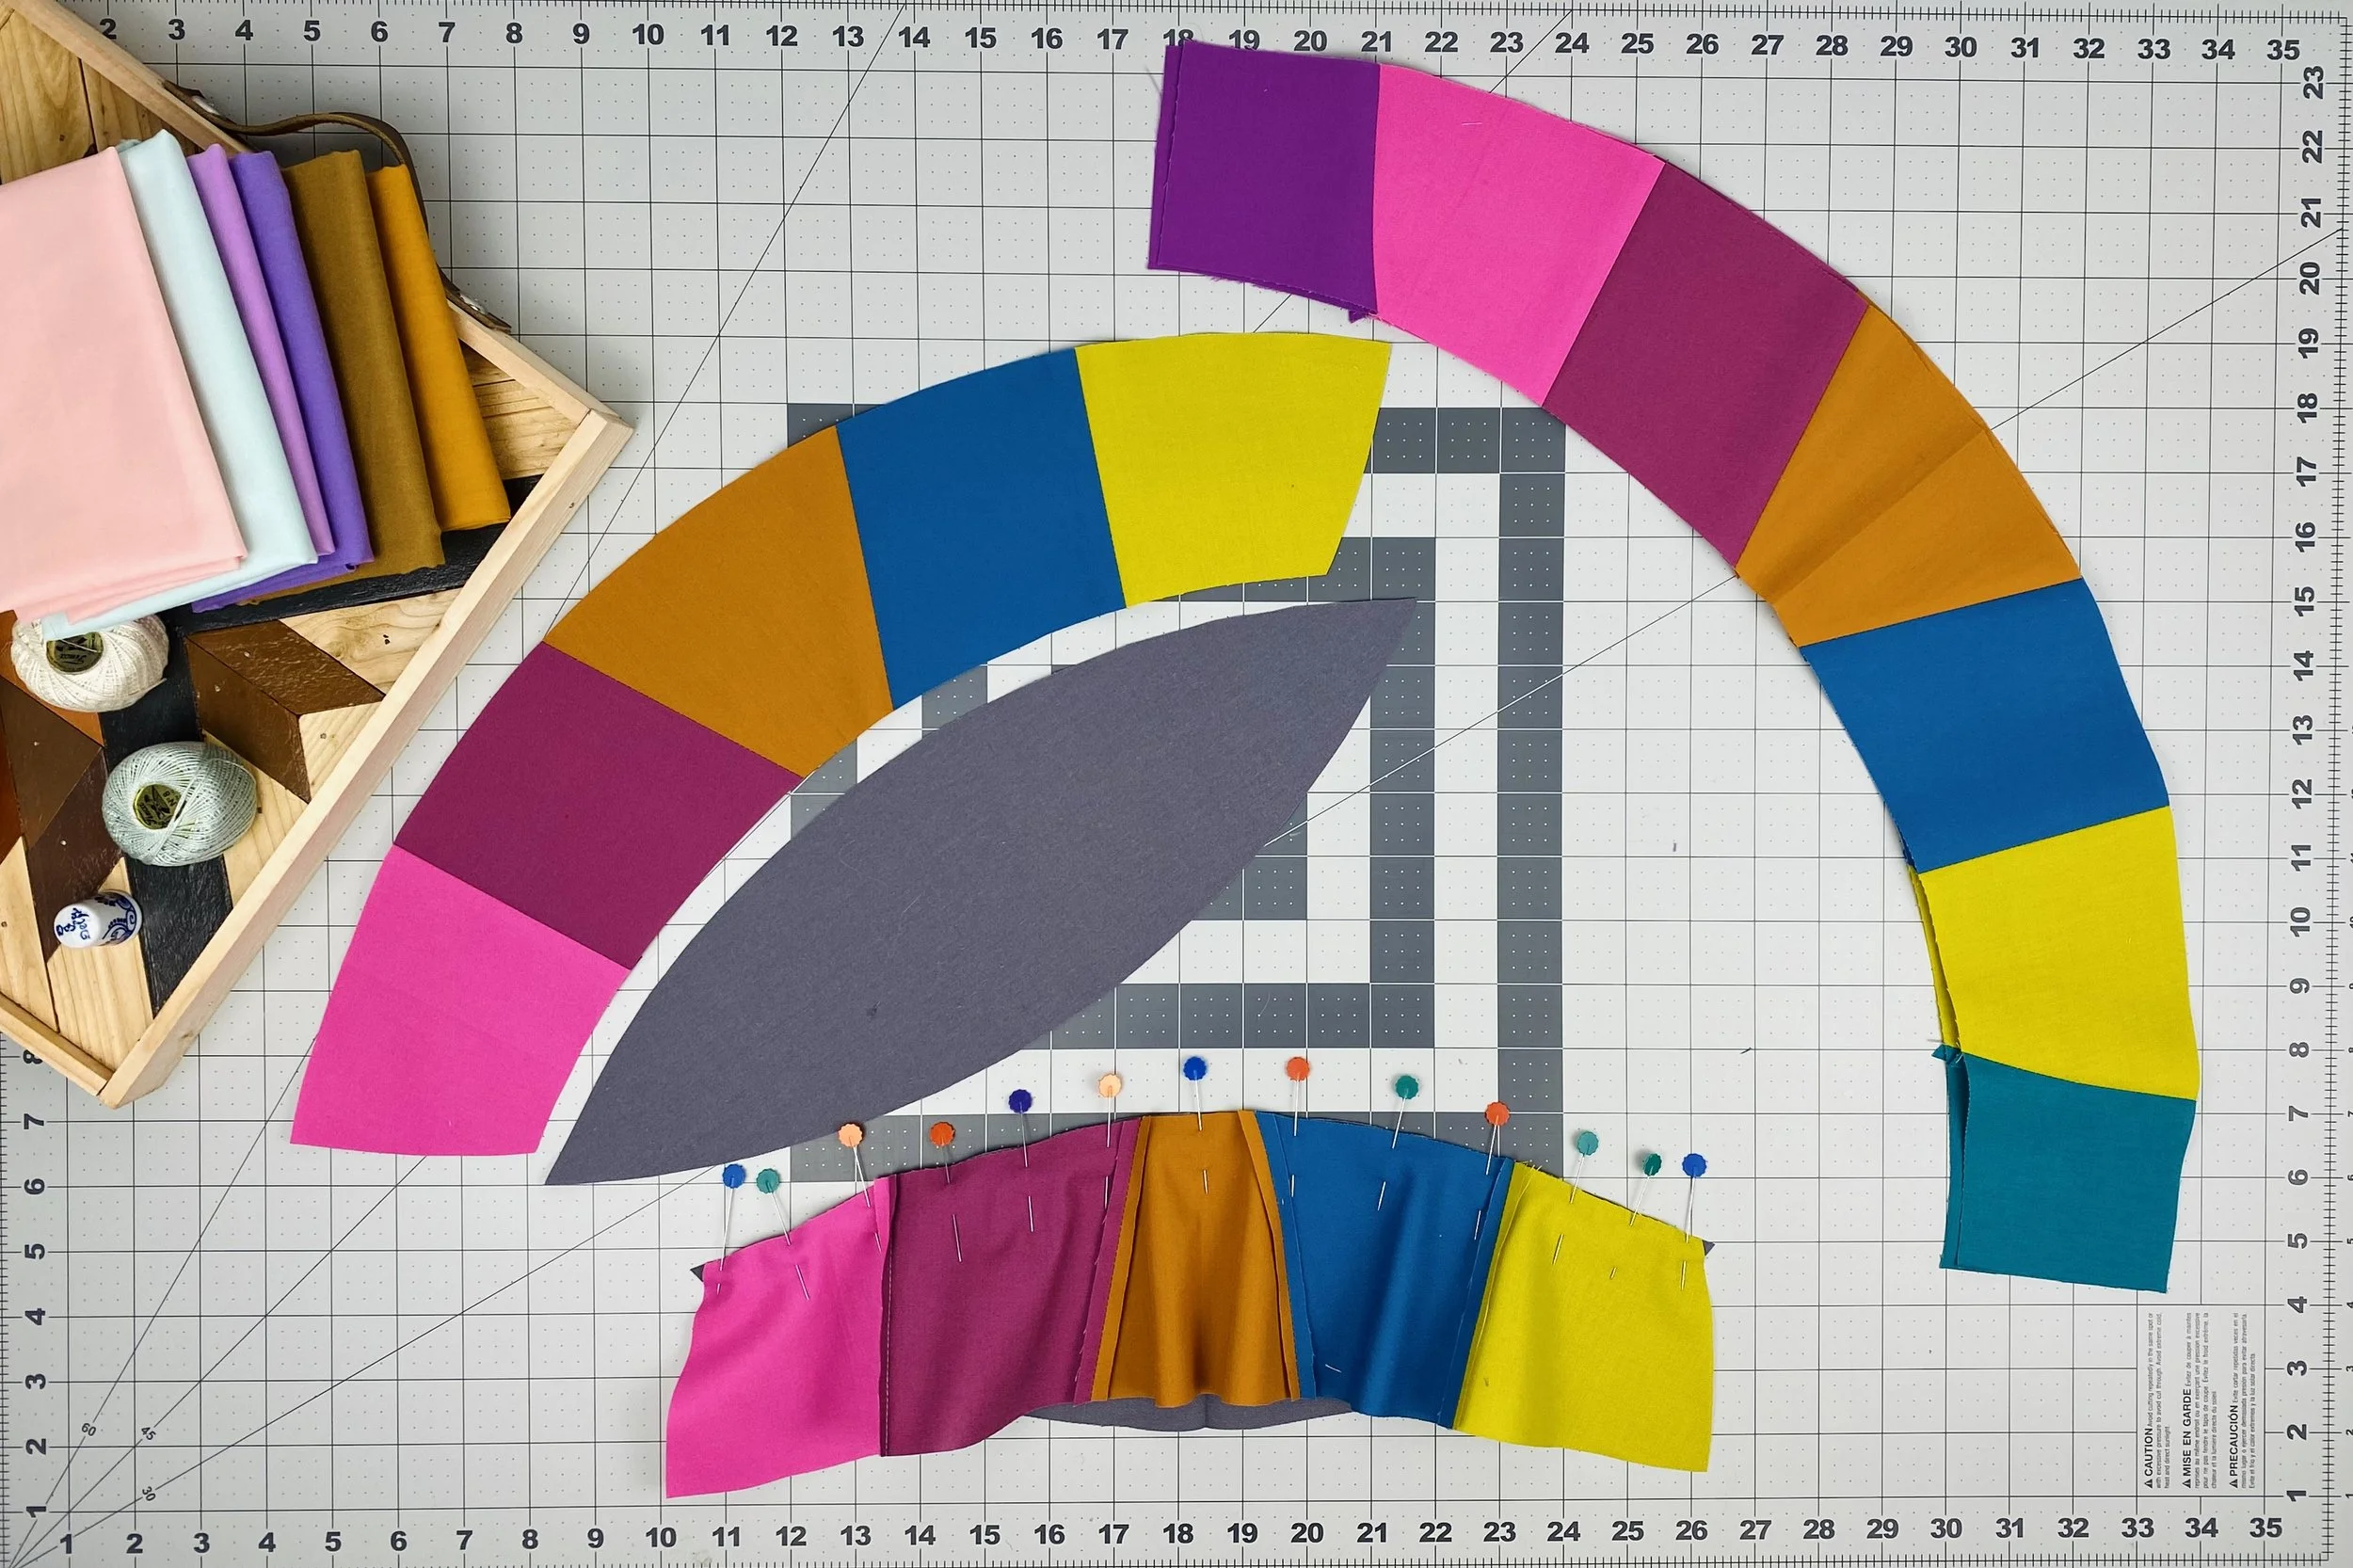
Before we make our first stitch, let’s get all our pieces organized. If you have room on a flat surface or design wall, lay out all the arcs, melons and the center background piece. This helps ensure that we’re always sewing things in the correct orientation. And it’s particularly helpful if you’re using directional fabric.
First, we’ll sew a melon to the inside curve of an arc piece without corners. Match and pin at the center, and continue pinning as much as you like. I love using pins, so I use multiple pins per wedge piece. Once sewn and opened, the unsewn side of the melon should form one smooth curve with the outer wedge pieces.
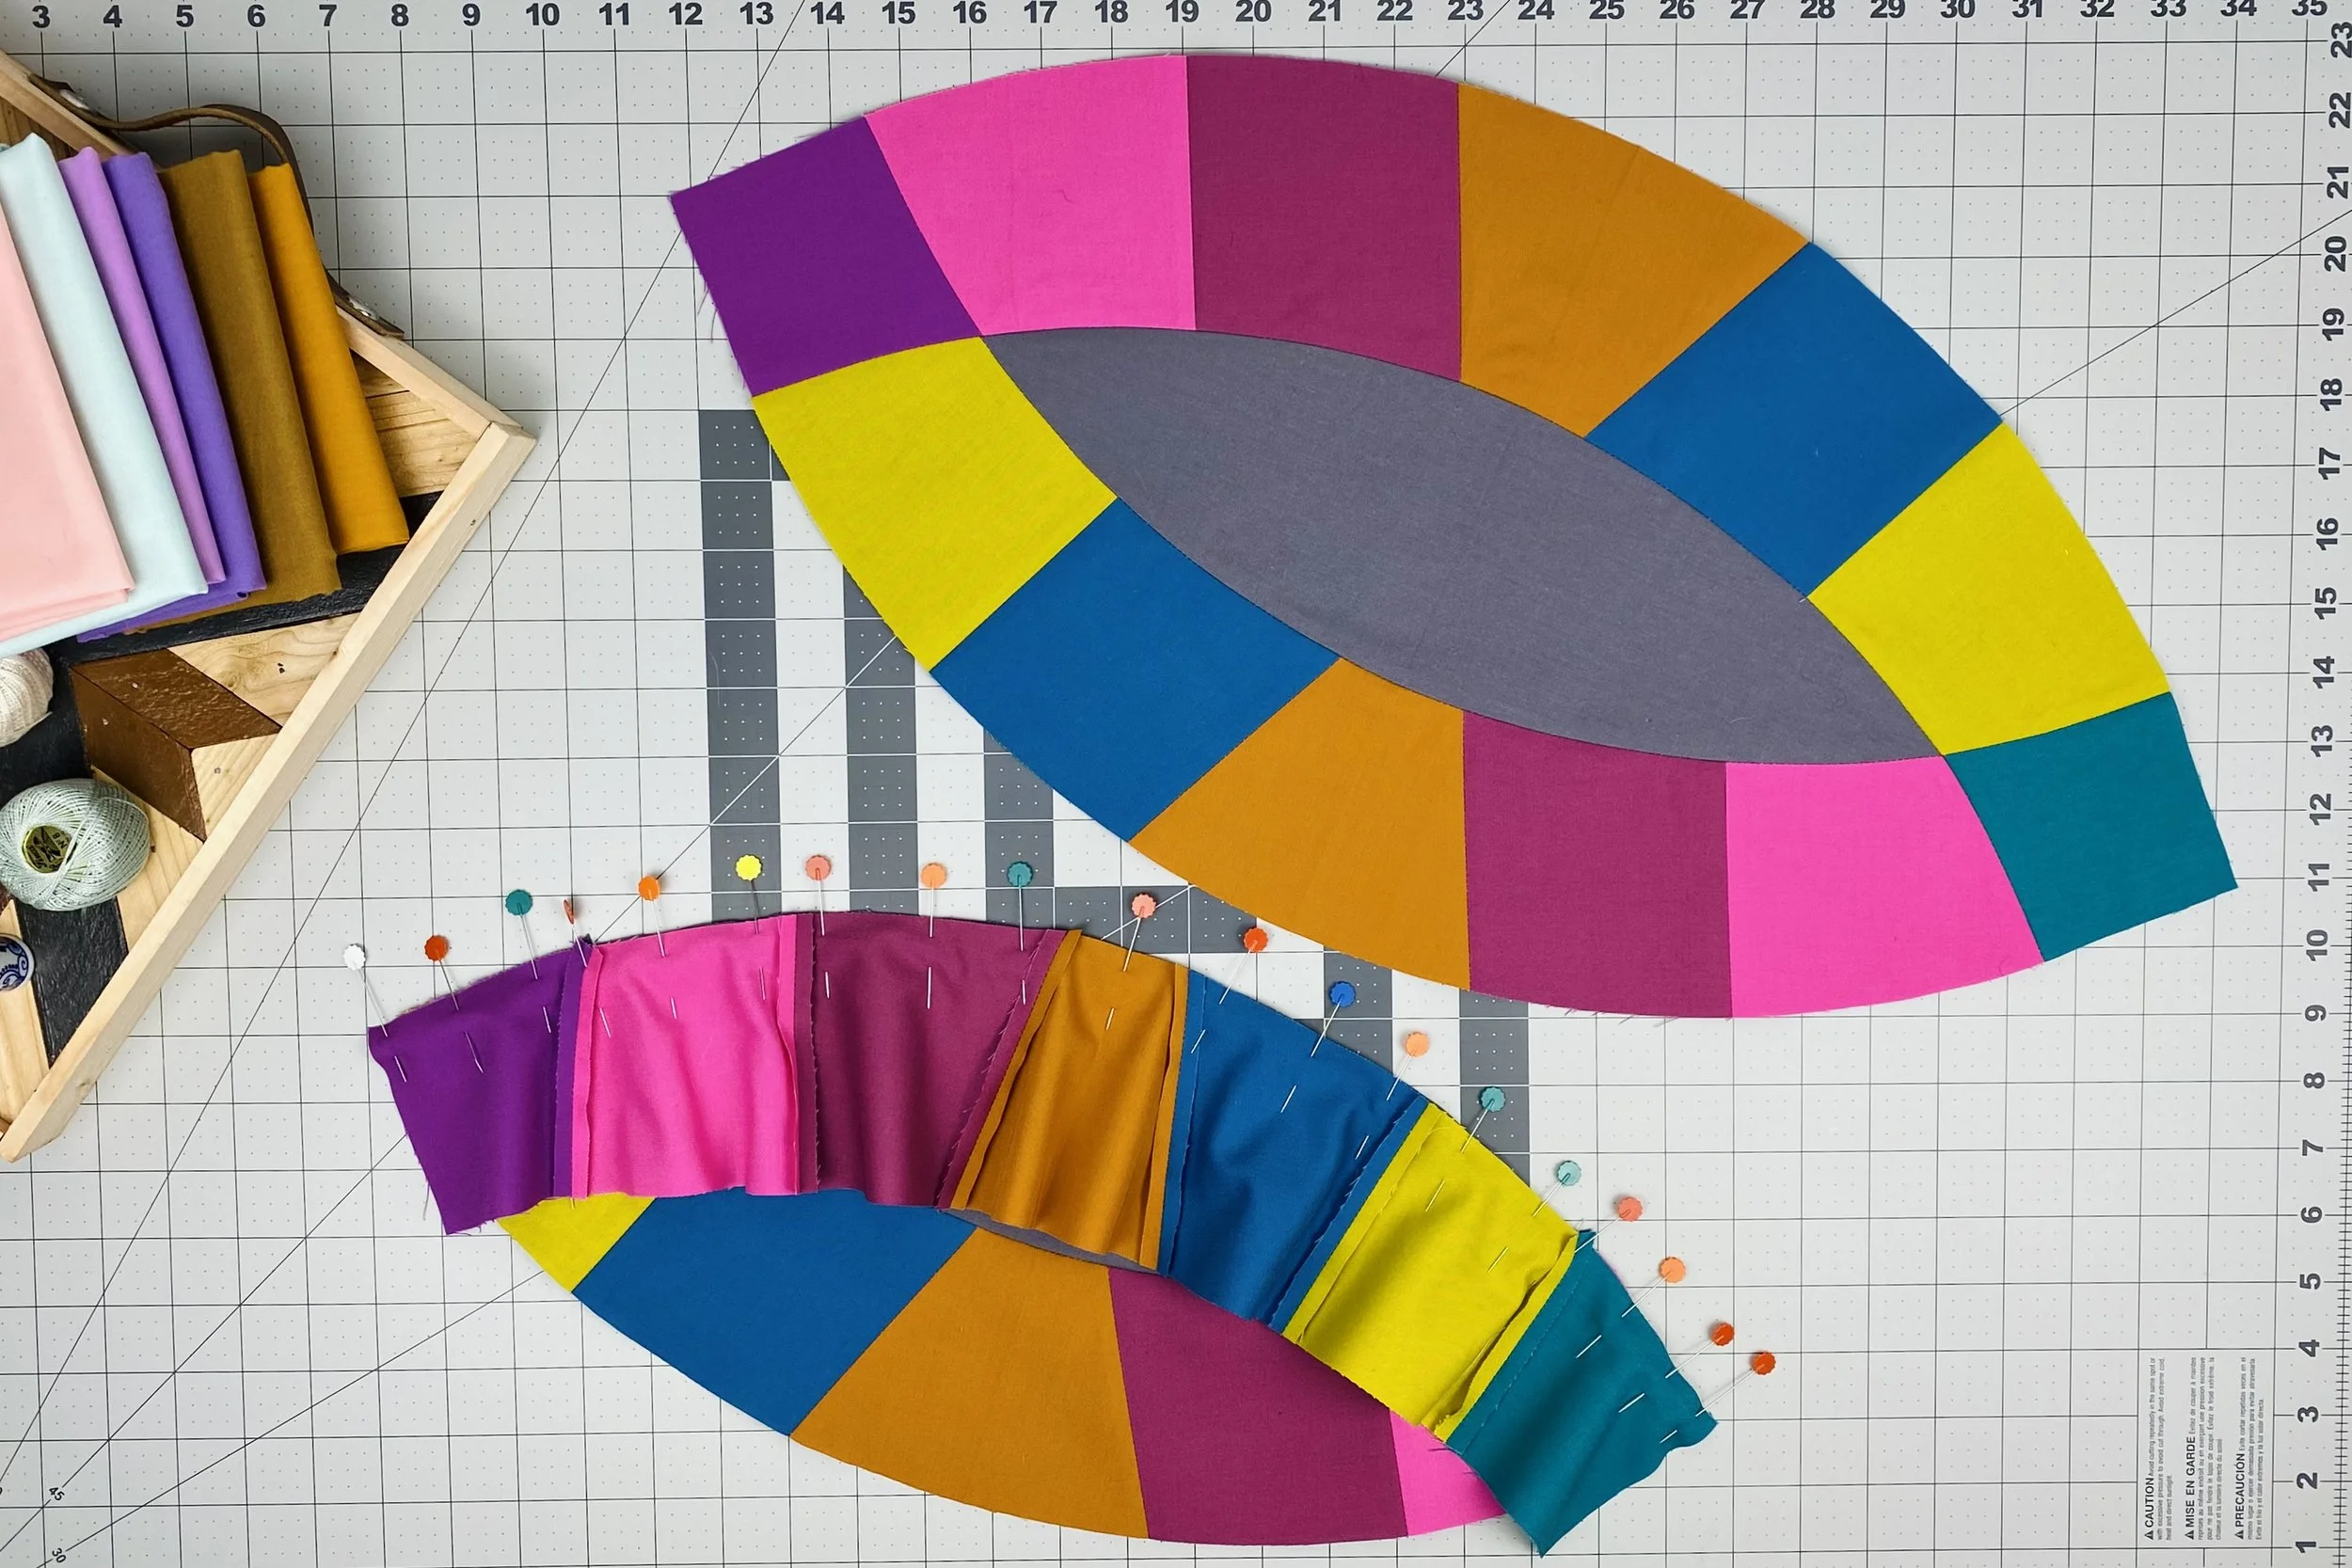
Next, we’re sewing the arc with corners to the half arc melon. Moving forward, each progressive step requires a little more accuracy and attention to detail. Move slowly, and forgive yourself if your first attempt doesn’t look as good as the fourth attempt. We’re all learning together here.
Figure 9 on page 5 of the pattern shows 4 black dots. These dots are ¼” in along the seam, and indicate exactly where you should pin and sew in order to get the sharpest points on your arc melons. Match and pin the units at center and at the indicated points. Again, I pin with abandon and use multiple per wedge.
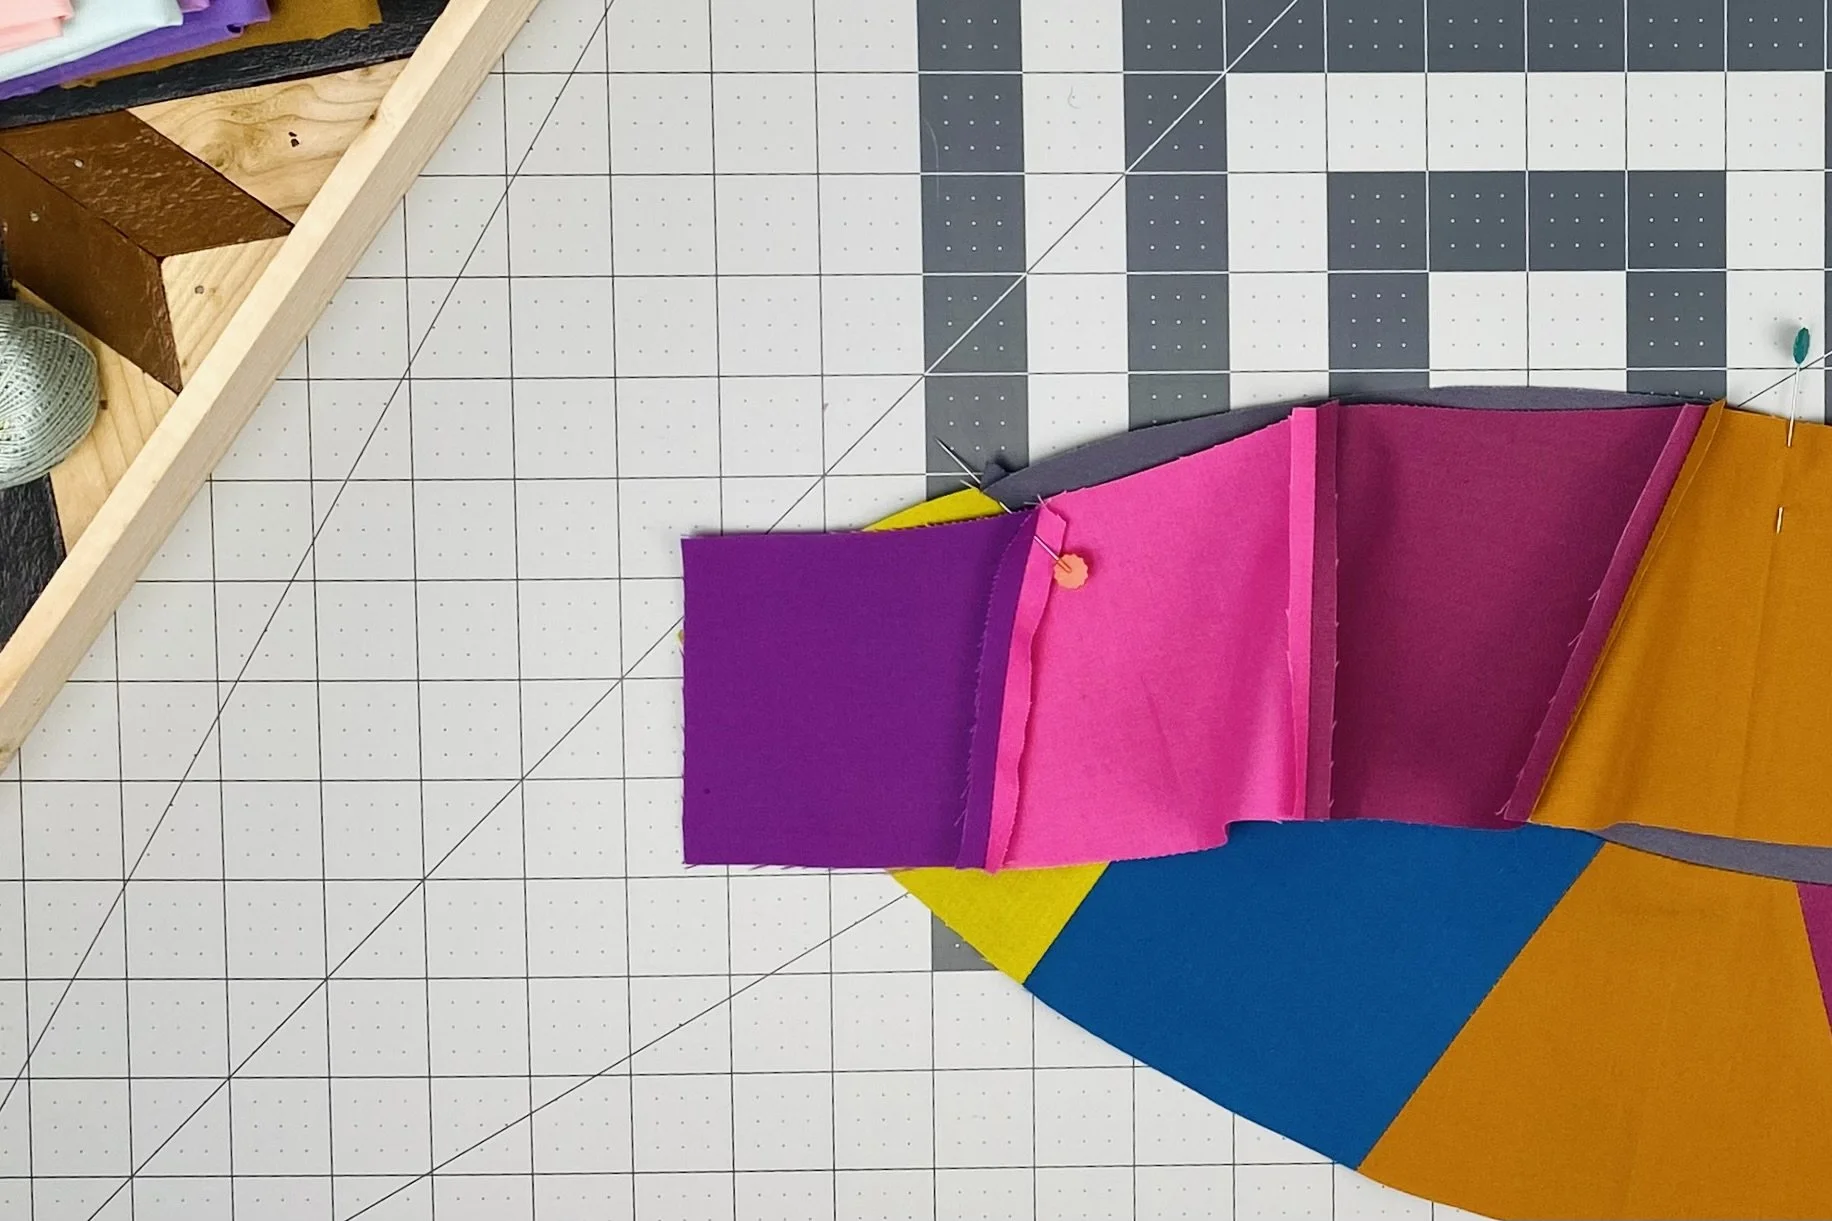
Pay attention to the purple corner piece and the hot pink and yellow wedges pictured below. The purple corner is already sewn to the hot pink wedge. When sewing the second arc to the half arc melon, the seam between the purple corner and yellow wedge will behave exactly like the seam between the purple corner and hot pink wedge. Take your time pinning these in place. Once sewn and pressed open, the arc melon should have smooth, continuous curves on both sides.
Repeat sewing the arcs and melons until you have four arc melons.
I want to make one last point before moving on to our next goal. One of the most common issues with DWR quilts is fullness, or too much fabric in the center and melons. I combat this by using a full ¼” seam allowance. In my experience with this pattern, using a scant ¼” seam allowance resulted in more fullness and less accuracy.
Our second goal this week is to make bias binding tape. This is so you have no excuses to not quilt and bind this project once the SAL is done! Follow this tutorial - or your favorite method - for turning a FQ into double fold bias binding tape.
That’s it! We really only sewed 8 seams on the Circus Ring quilt - can you believe that? We’re flying through this quilt top and learning so much along the way. Share your progress over on Instagram using #CircusRingQuilt and #mijapatterns. Next week, we tackle our biggest challenge yet - the center piece.