
Circus Ring SAL - Week 2
Welcome to week two of the Circus Ring Quilt SAL! This week, we’re working through page 4 of the pattern.
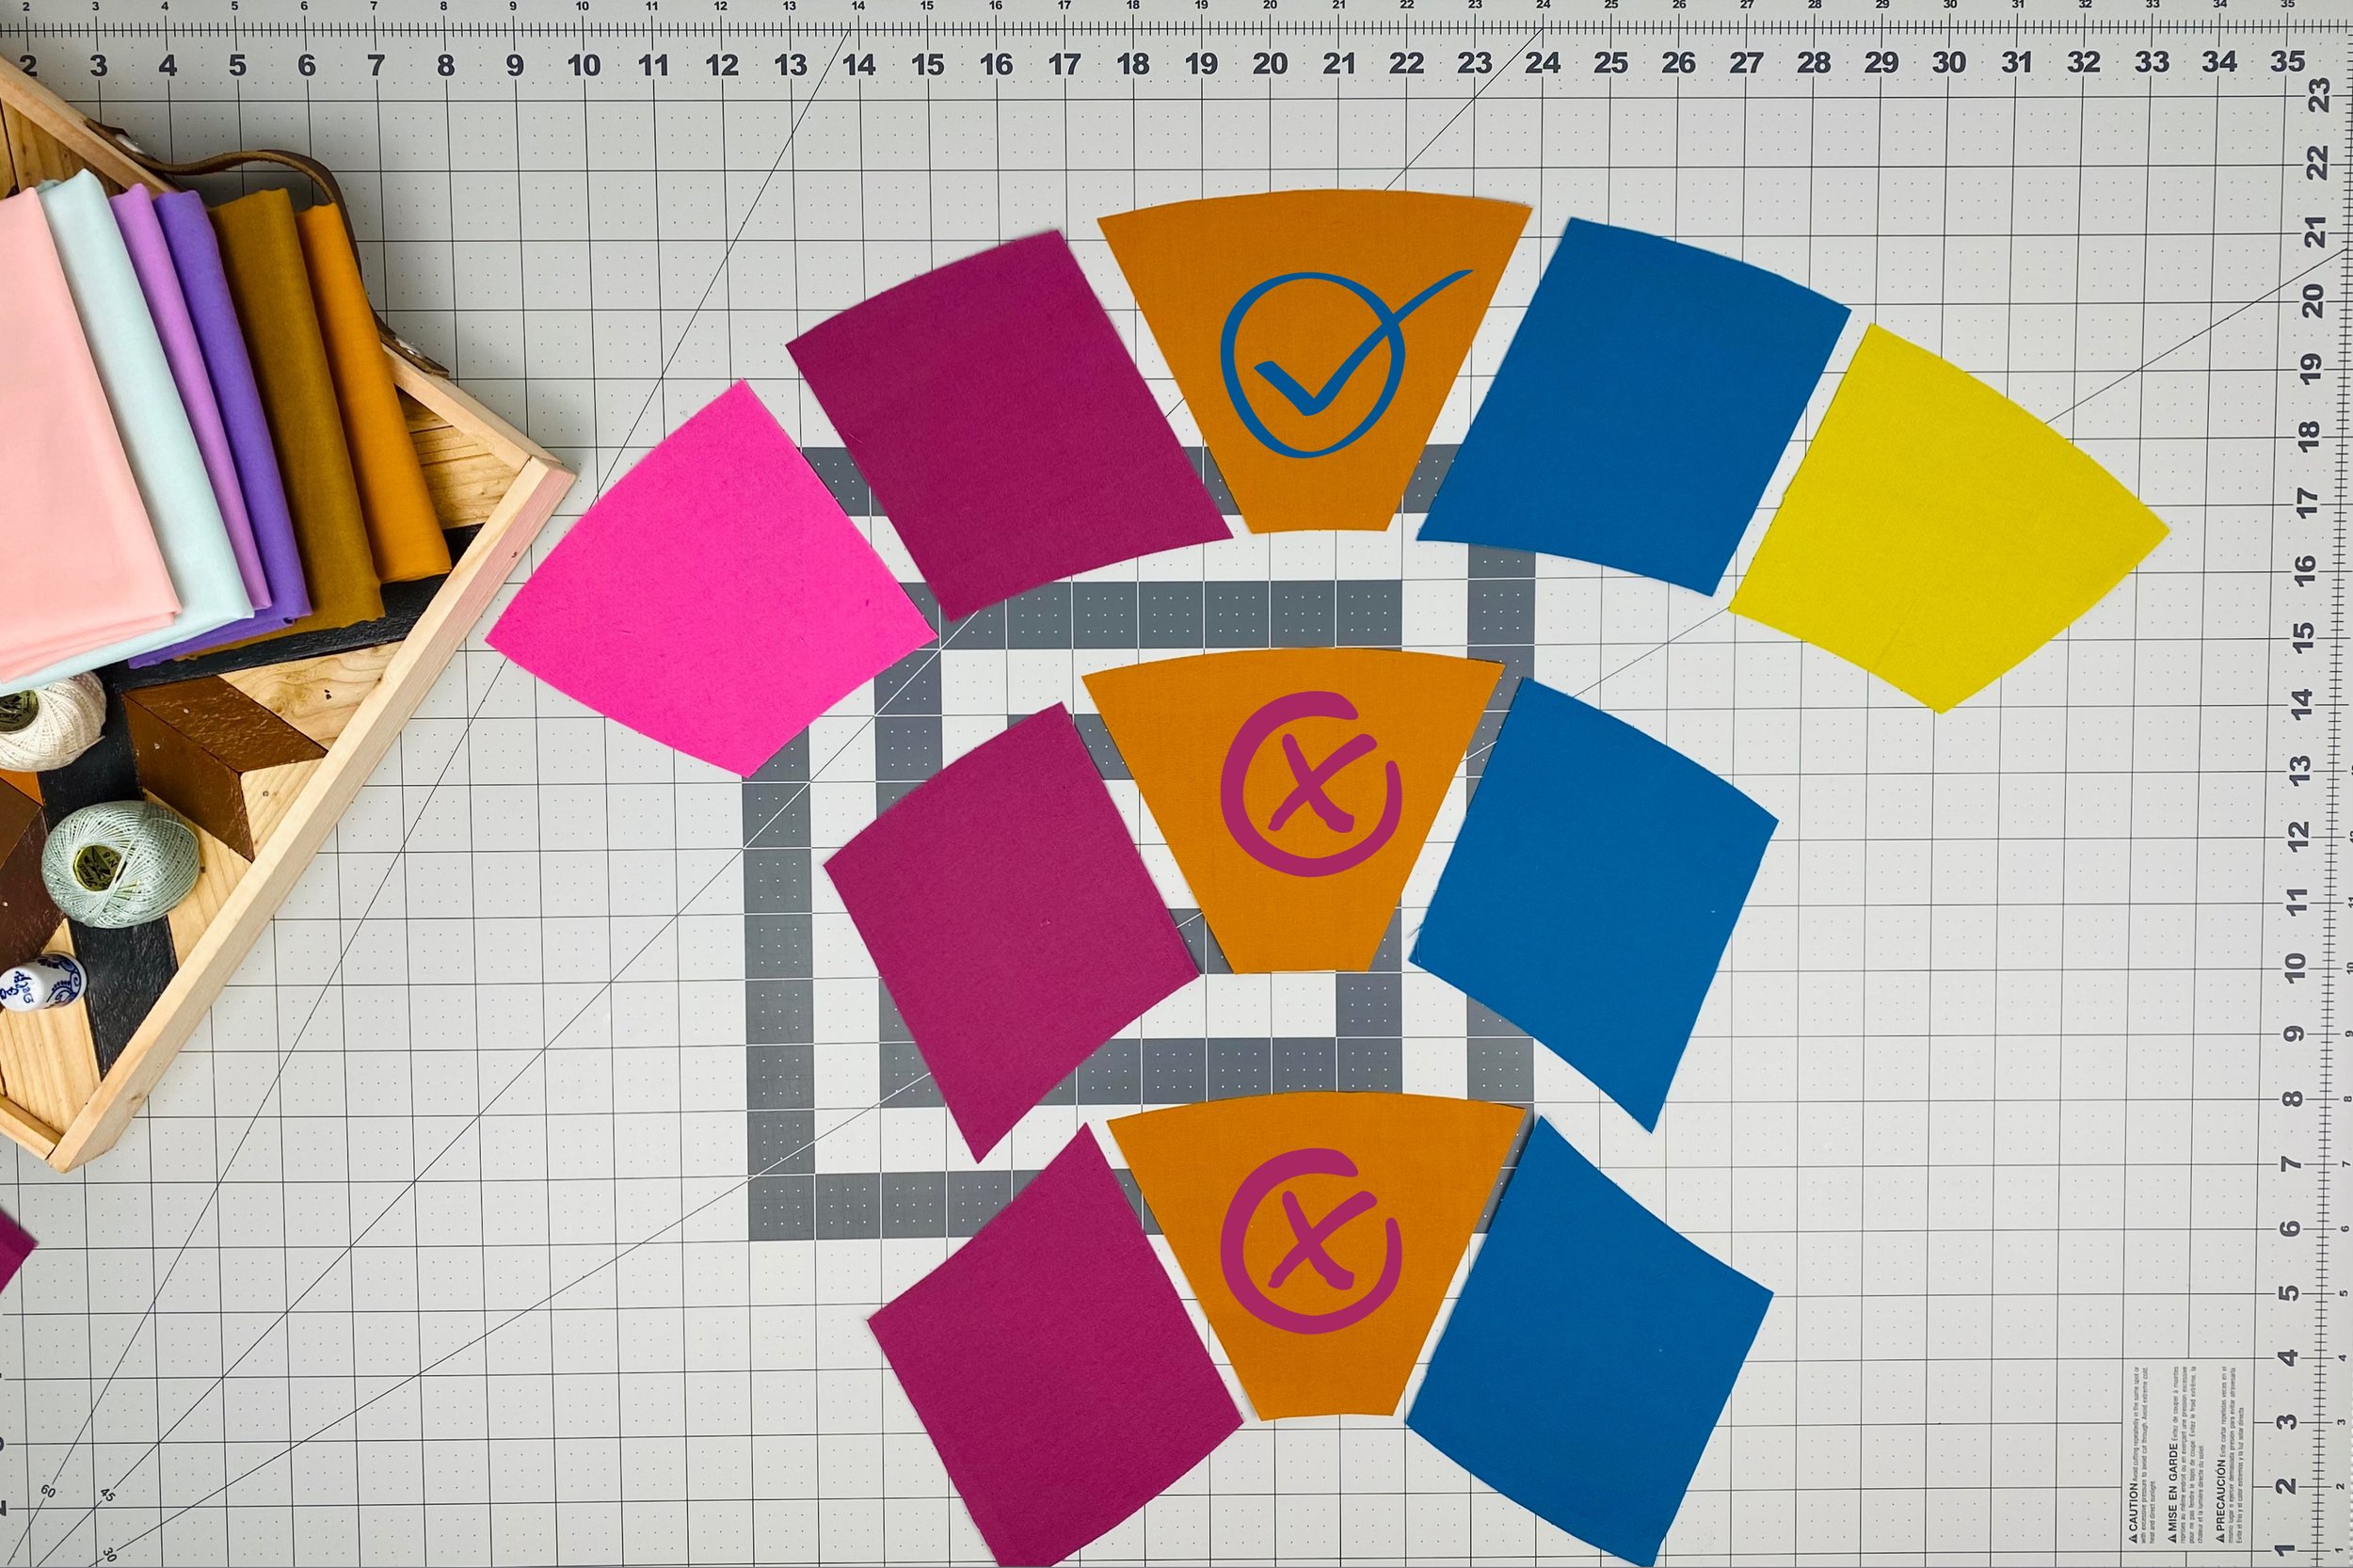
First, we will sew the wedges together to make arcs. If you are using a coordinated color layout, pay attention to your color arrangements. If your arcs are going to be different colors, I suggest sewing one colorway at a time, and only chain piecing once you’ve grown comfortable with the pieces and you’re confident you have your colorways in order. If you are making a solid arc colorway, skip the part about sewing wedges and move straight to sewing corners to the arcs.
It is possible to sew the wedges together incorrectly. Take your time and reference the pattern or the photo below to make sure each wedge is oriented correctly. Pay attention to Figure 2 and Figure 3. When matching wedges 1 and 2, and 4 and 5, there is no need to offset any seam allowance. Wedge 3, however, needs to be offset by ¼”.
If you keep an accurate seam allowance, when you open up the arc and press the seams open, you should have a perfect curve on the inside and outside of the arc. If you’re human like the rest of us, your curves may be a little jagged. And that’s ok! We’ll deal with that in a minute.

Second, we’re going to trim the entire arc using the arc template. Just match the template and the arc at center, then trim away the excess. It is important to note that all edges of the arc template are curves - even the short sides. Use a fresh blade and cut with confidence. I like to use a 2 lb dumbbell to weigh down my arc and the arc template.

Our third and final task this week is to sew the corners to the arcs. About the corner pieces: two of the sides are straight edges and two are curved. This week, we are sewing one of the curved edges to an arc. Pin often and sew slowly until you grow comfortable with the curve. Figure 6 illustrates which corner to match exactly, and which corner to offset by ¼”.

If you are using a coordinated color layout, pay attention here. If your arcs are different colors, use identical arcs in this step. If you are planning to coordinate the colors of the corners, always sew the same color to the same side of the arc.
I’m getting excited now! The Circus Ring quilt is so manageable and we’re halfway done already! I can practically see the whole thing complete, can you? Share your progress on Instagram #CircusRingQuilt and #mijapatterns so I can see it too! I’ll meet you back here next week to sew the arc melons.