
Circus Ring SAL - Week 4
Are you ready for week 4 of the Circus Ring quilt SAL? We only have one task this week - sew the arc melons to the center. If you’ve never made a DWR quilt before, this step will be the least familiar. Nothing lays in a straight line. Nothing looks like a traditional quilt block. Nothing even gets pressed (!!) until we’re completely finished. Hang tight, reference all the photos below and illustrations in the pattern, and you’ll quickly find that this is all completely manageable.
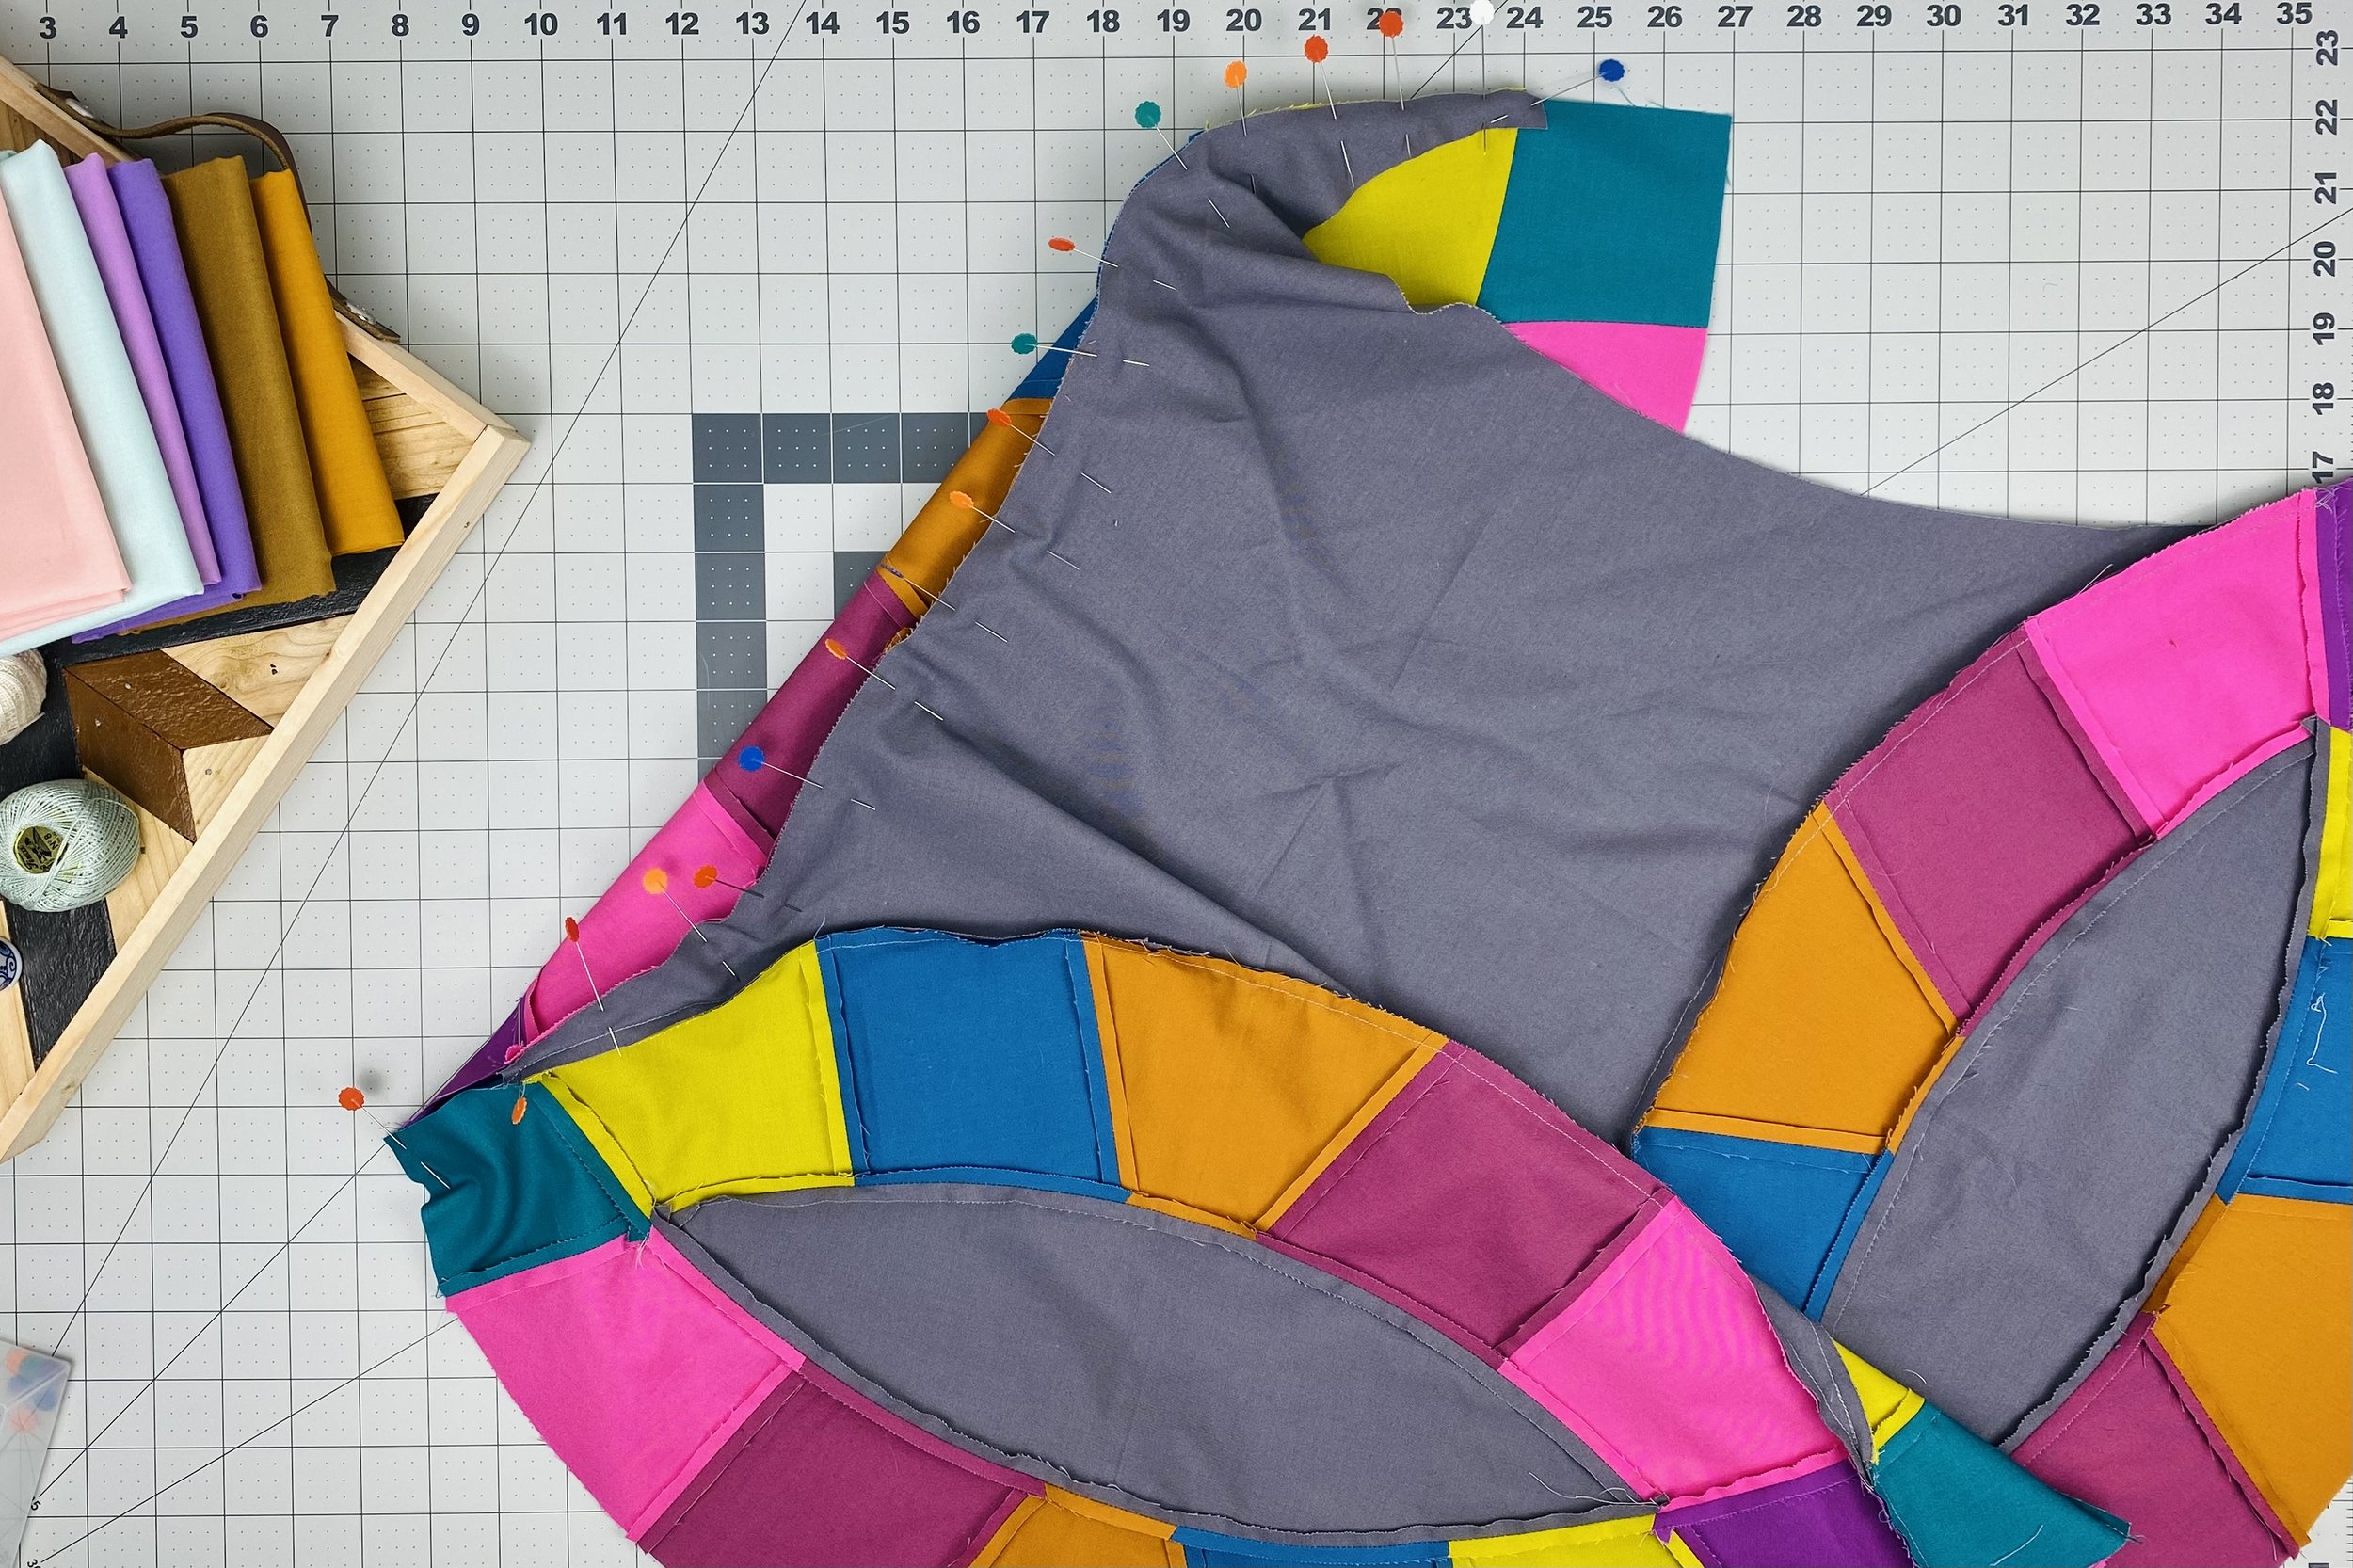
Rather than reiterate the directions in the pattern, I’ll spend some time talking about the long arms of the center piece. When you sew the first arc melon to the center, you will sew it to two un-sewn long arms. With the second and third arc melons, you will sew the arc melons to one sewn long arm and one un-sewn long arm. The fourth arc melon will be sewn to two sewn long arms.

The un-sewn long arms are the easiest to sew. Simply follow the illustrations in Figure 12 and Figure 13 to sew on and off the corner of the arms. When the first arc melons is attached, the intersection should look… weird. Not a straight edge in sight and the corner of the long arm hangs off like a tag.
It’s sewing a sewn long arm to another arc melon that is trickier. It’s helpful to keep in mind that we’re still always concerned with the block dots highlighted in Figures 12 through 15. These are 1/4" in on all the indicated seams. When sewing an arc melon to a sewn long arm, the first pins I put in are the center pin and the pin pictured below.

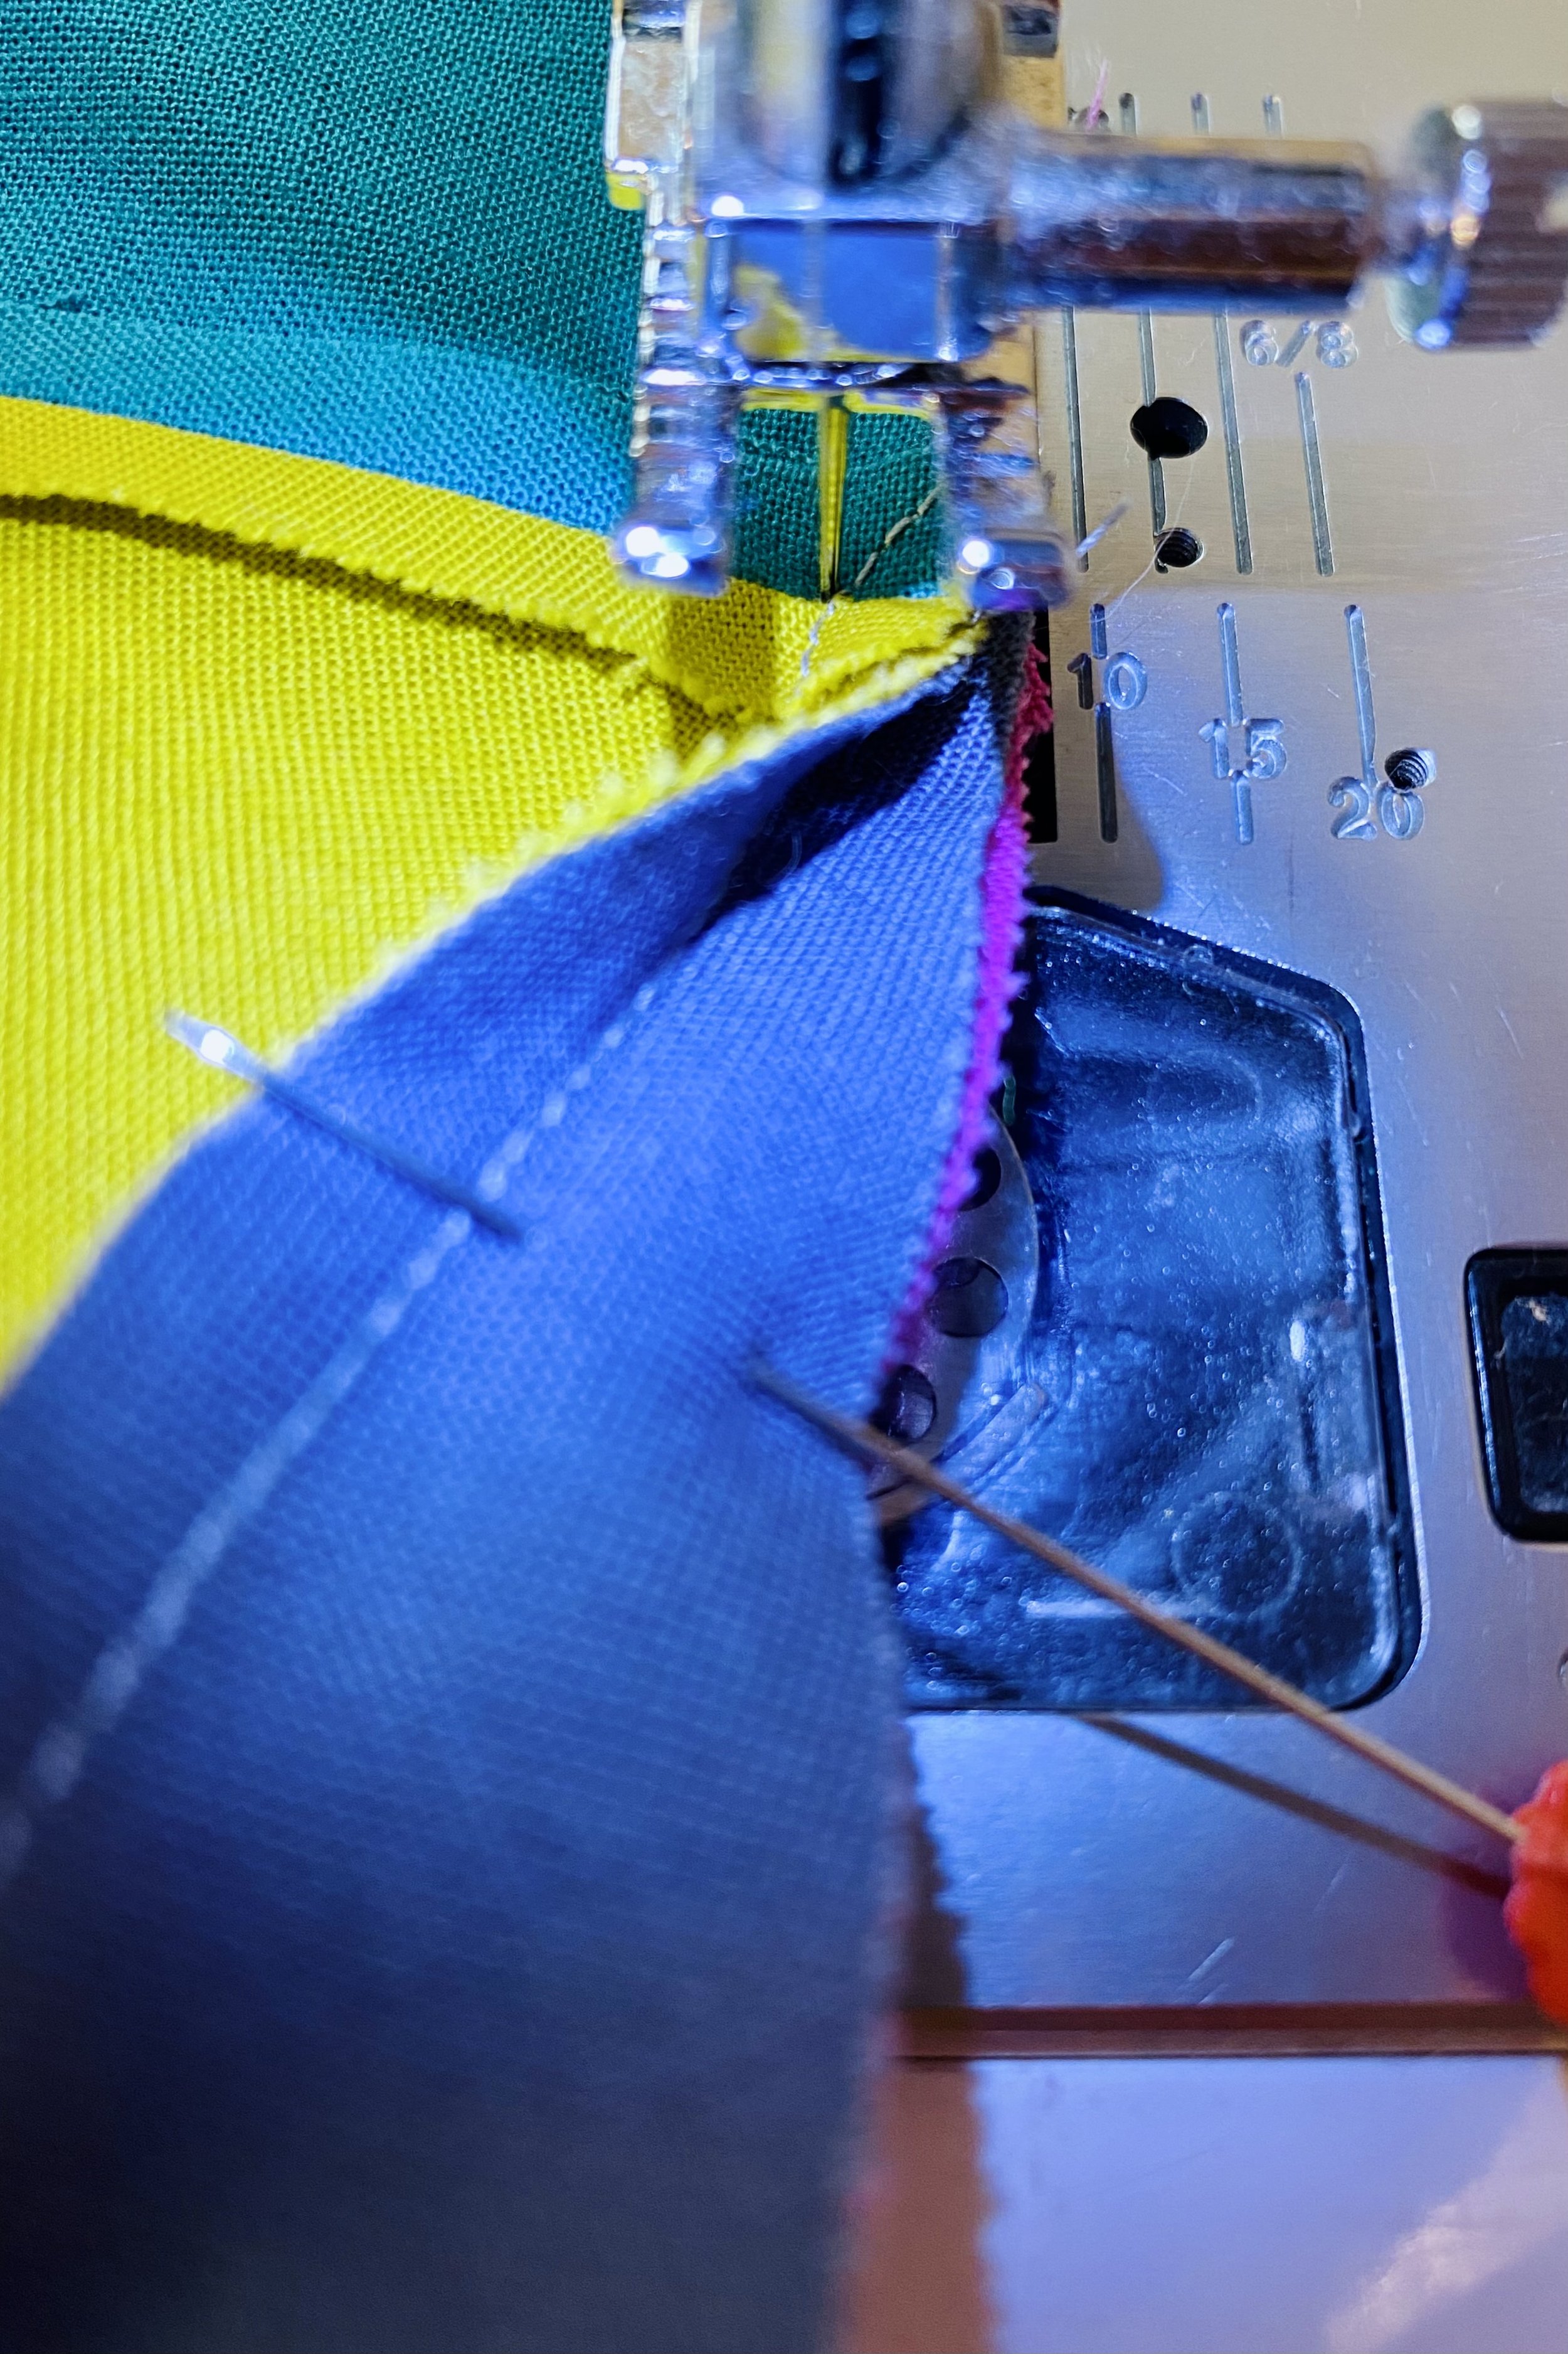
I continue pinning the curved seam, making liberal use of my pins. I’d rather fuss with the fabric before moving to the machine than fuss with the fabric once it’s under the needle. At your machine, the units should look like the pictures below.
Remember that the seam between the corner pieces is actually a straight seam. Hold the seam allowance of the first wedge piece out of the way. Sew straight until you get exactly to the intersection. Keep the needle down and lift the presser foot.
I know things have felt weird, but it’s about to get weirder. The only way to continue sewing the long arm of the center piece to the arc melon is to flip the seam allowance back under the presser foot and SMUSH it into as small a fold of fabric as possible. Drop the presser foot and sew forward like you’re driving over a speed bump.
You want the needle to meet up with the previously sewn line as soon as possible. That will give you sharp points on the front of the quilt.


Continue sewing the curved seam. For the first three arc melons, you’ll follow Figure 13 for ending the seam line. For the fourth arc melon, you’ll treat the second long arm the same as pictured above, but sewn in reverse. These intersections are definitely the trickiest of the whole quilt. Be patient with yourself and remember that all these edges are bias edges. If you need to seam rip (which is likely) remove the stitches carefully.
Ta da! You’ve made a double wedding ring quilt. I hope you’ve learned something new, challenged your skills, and had fun! Go forth and quilt your top (a 1 1/2" grid pattern looks STUNNING on this quilt top) and finish it using the bias binding we made last week. Share your progress and your quilt top using #circusringquilt and #mijapatterns.