
Make bias binding from a FQ
Binding a quilt is simultaneously my favorite and least favorite part of quilting. I’m happy that I'm stitches away from a completed quilt, but slightly annoyed that there is one more thing to do before I have a completed quilt. To make binding more exciting, I’ve started curving the edges of my quilts and finishing with bias binding, like in the Sparks Fly quilt below.
Below, I’ll walk you through the fastest way to make double fold, bias binding from a fat quarter. One fat quarter won’t get you enough for much more than a baby quilt, but mixing and matching colors and prints makes for an exciting finish to any project.
Necessary Materials:one FQ
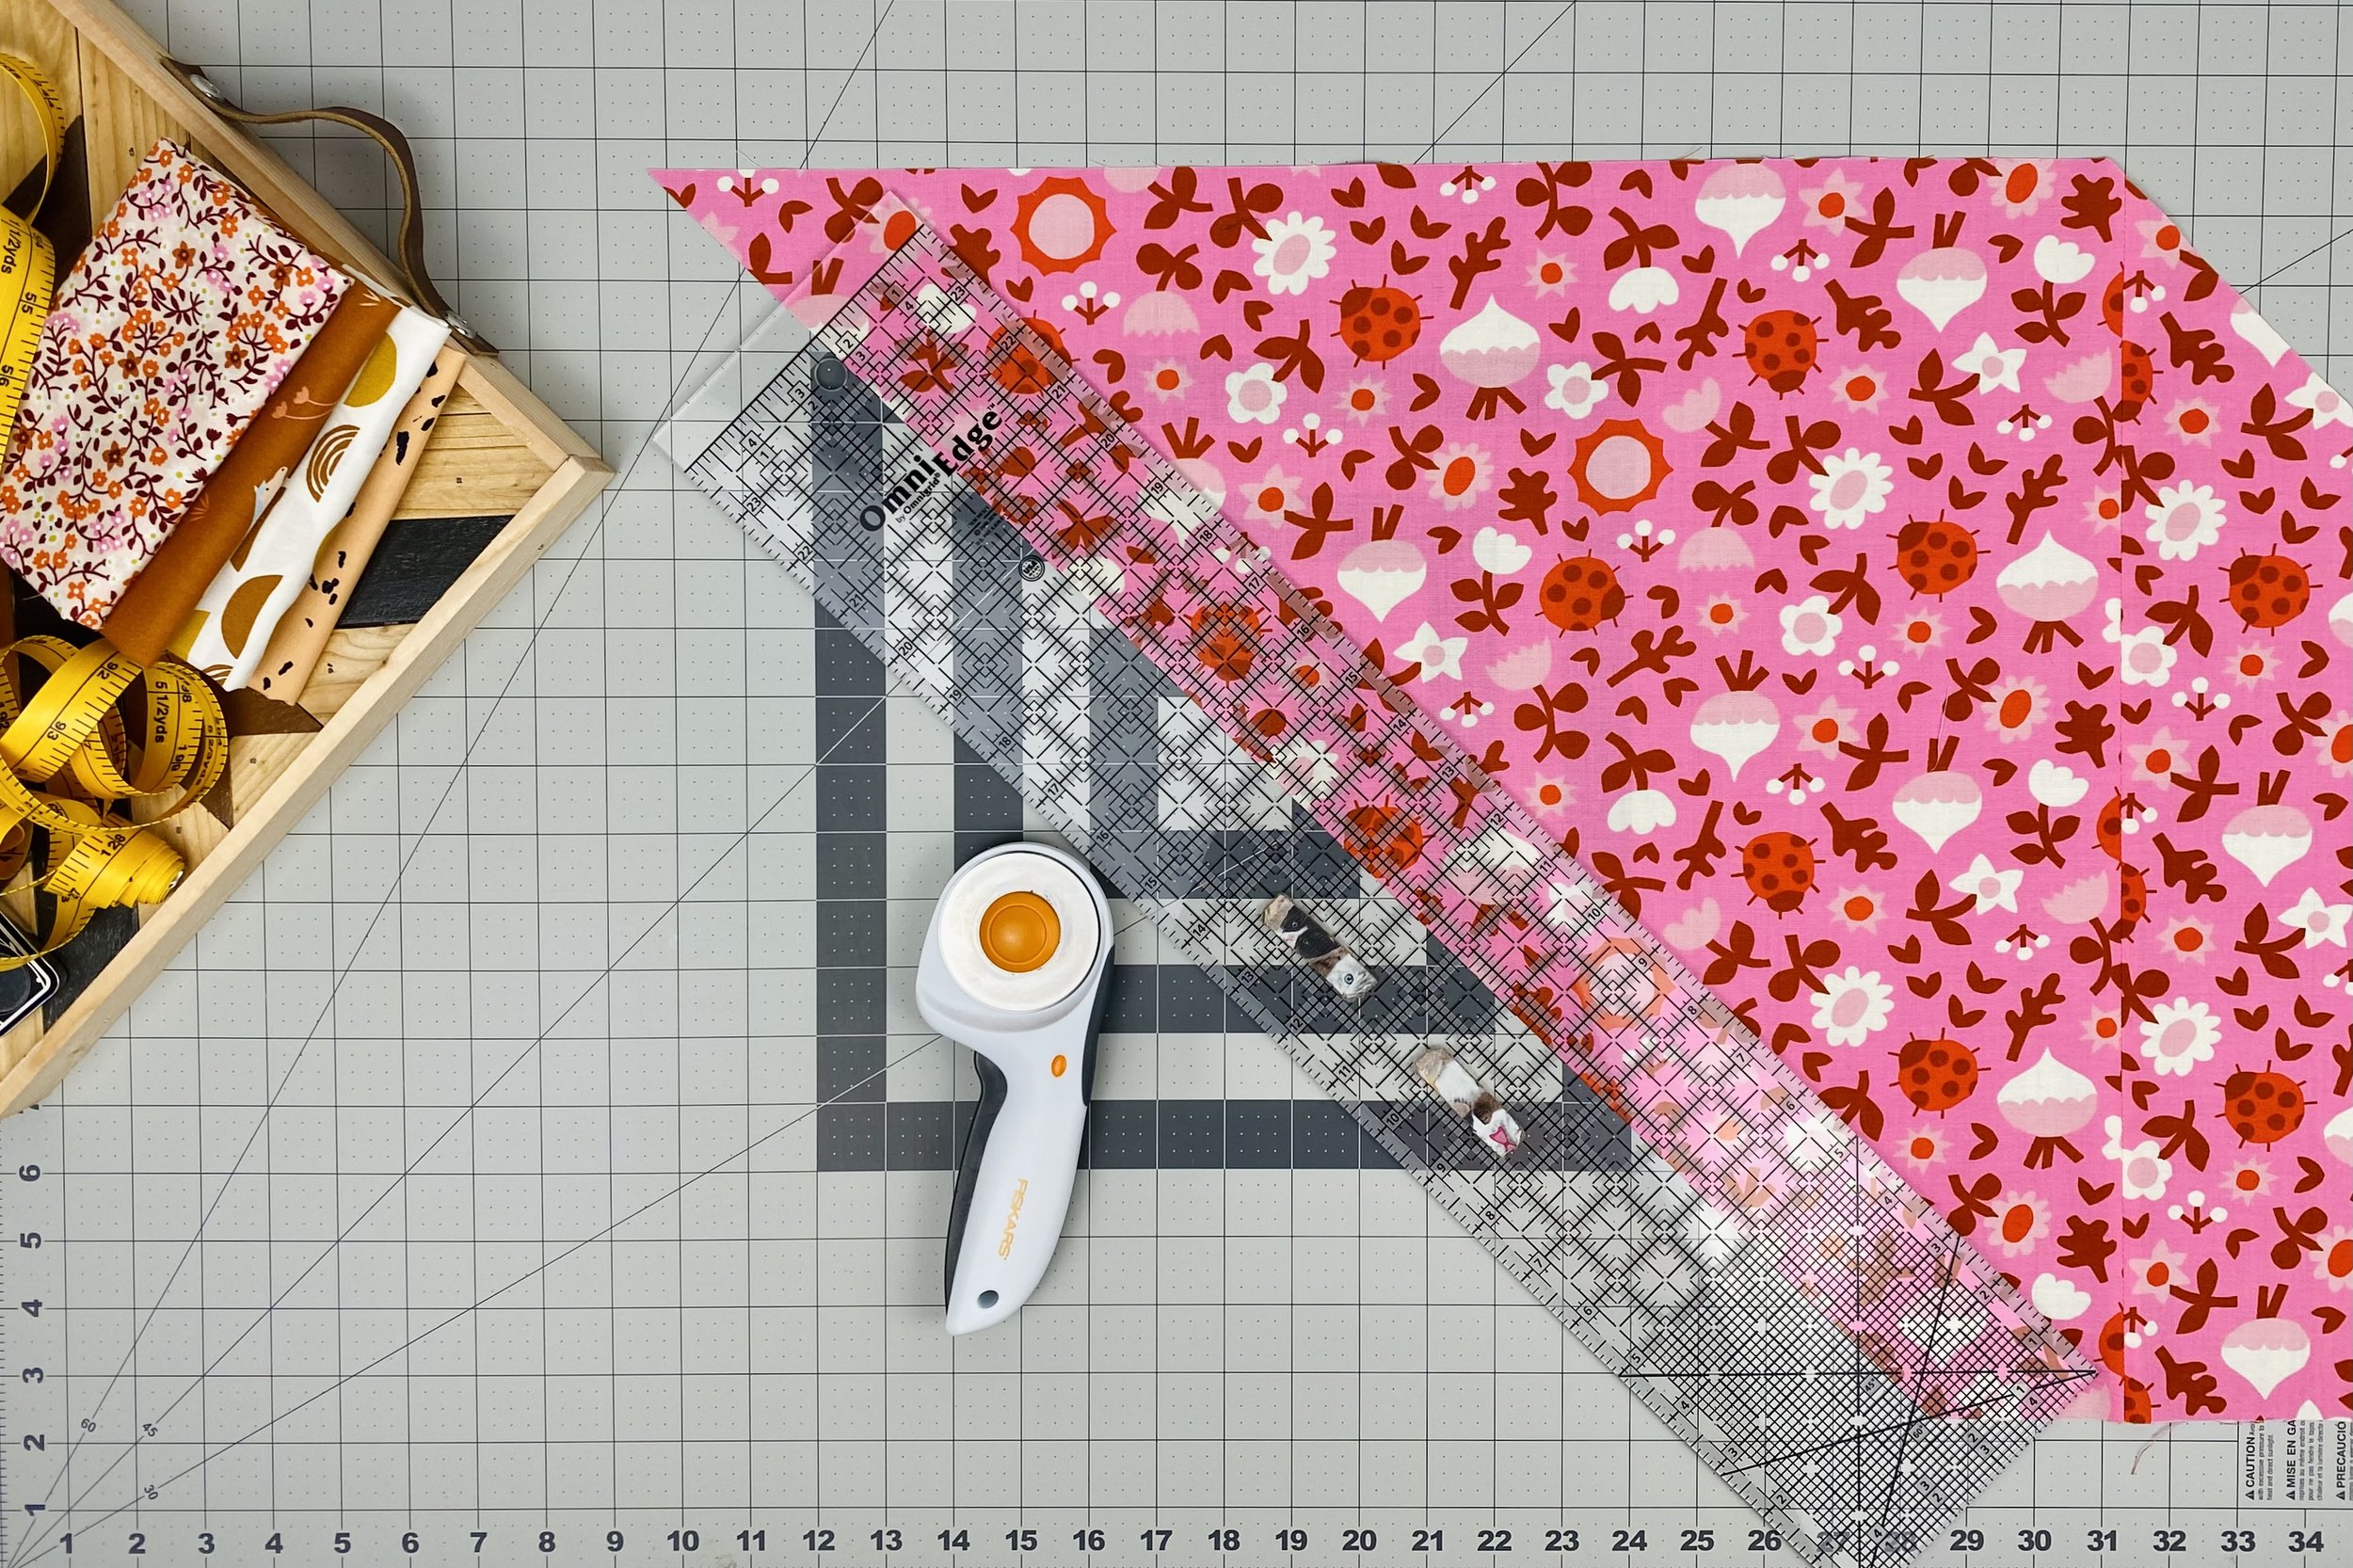
the longest ruler you have, preferably 24”
sewing machine
thread
rotary cutter or scissors
Less Necessary Materials:a hand weight or something to weigh down your ruler
iron
double fold bias binding tape maker
seam ripper
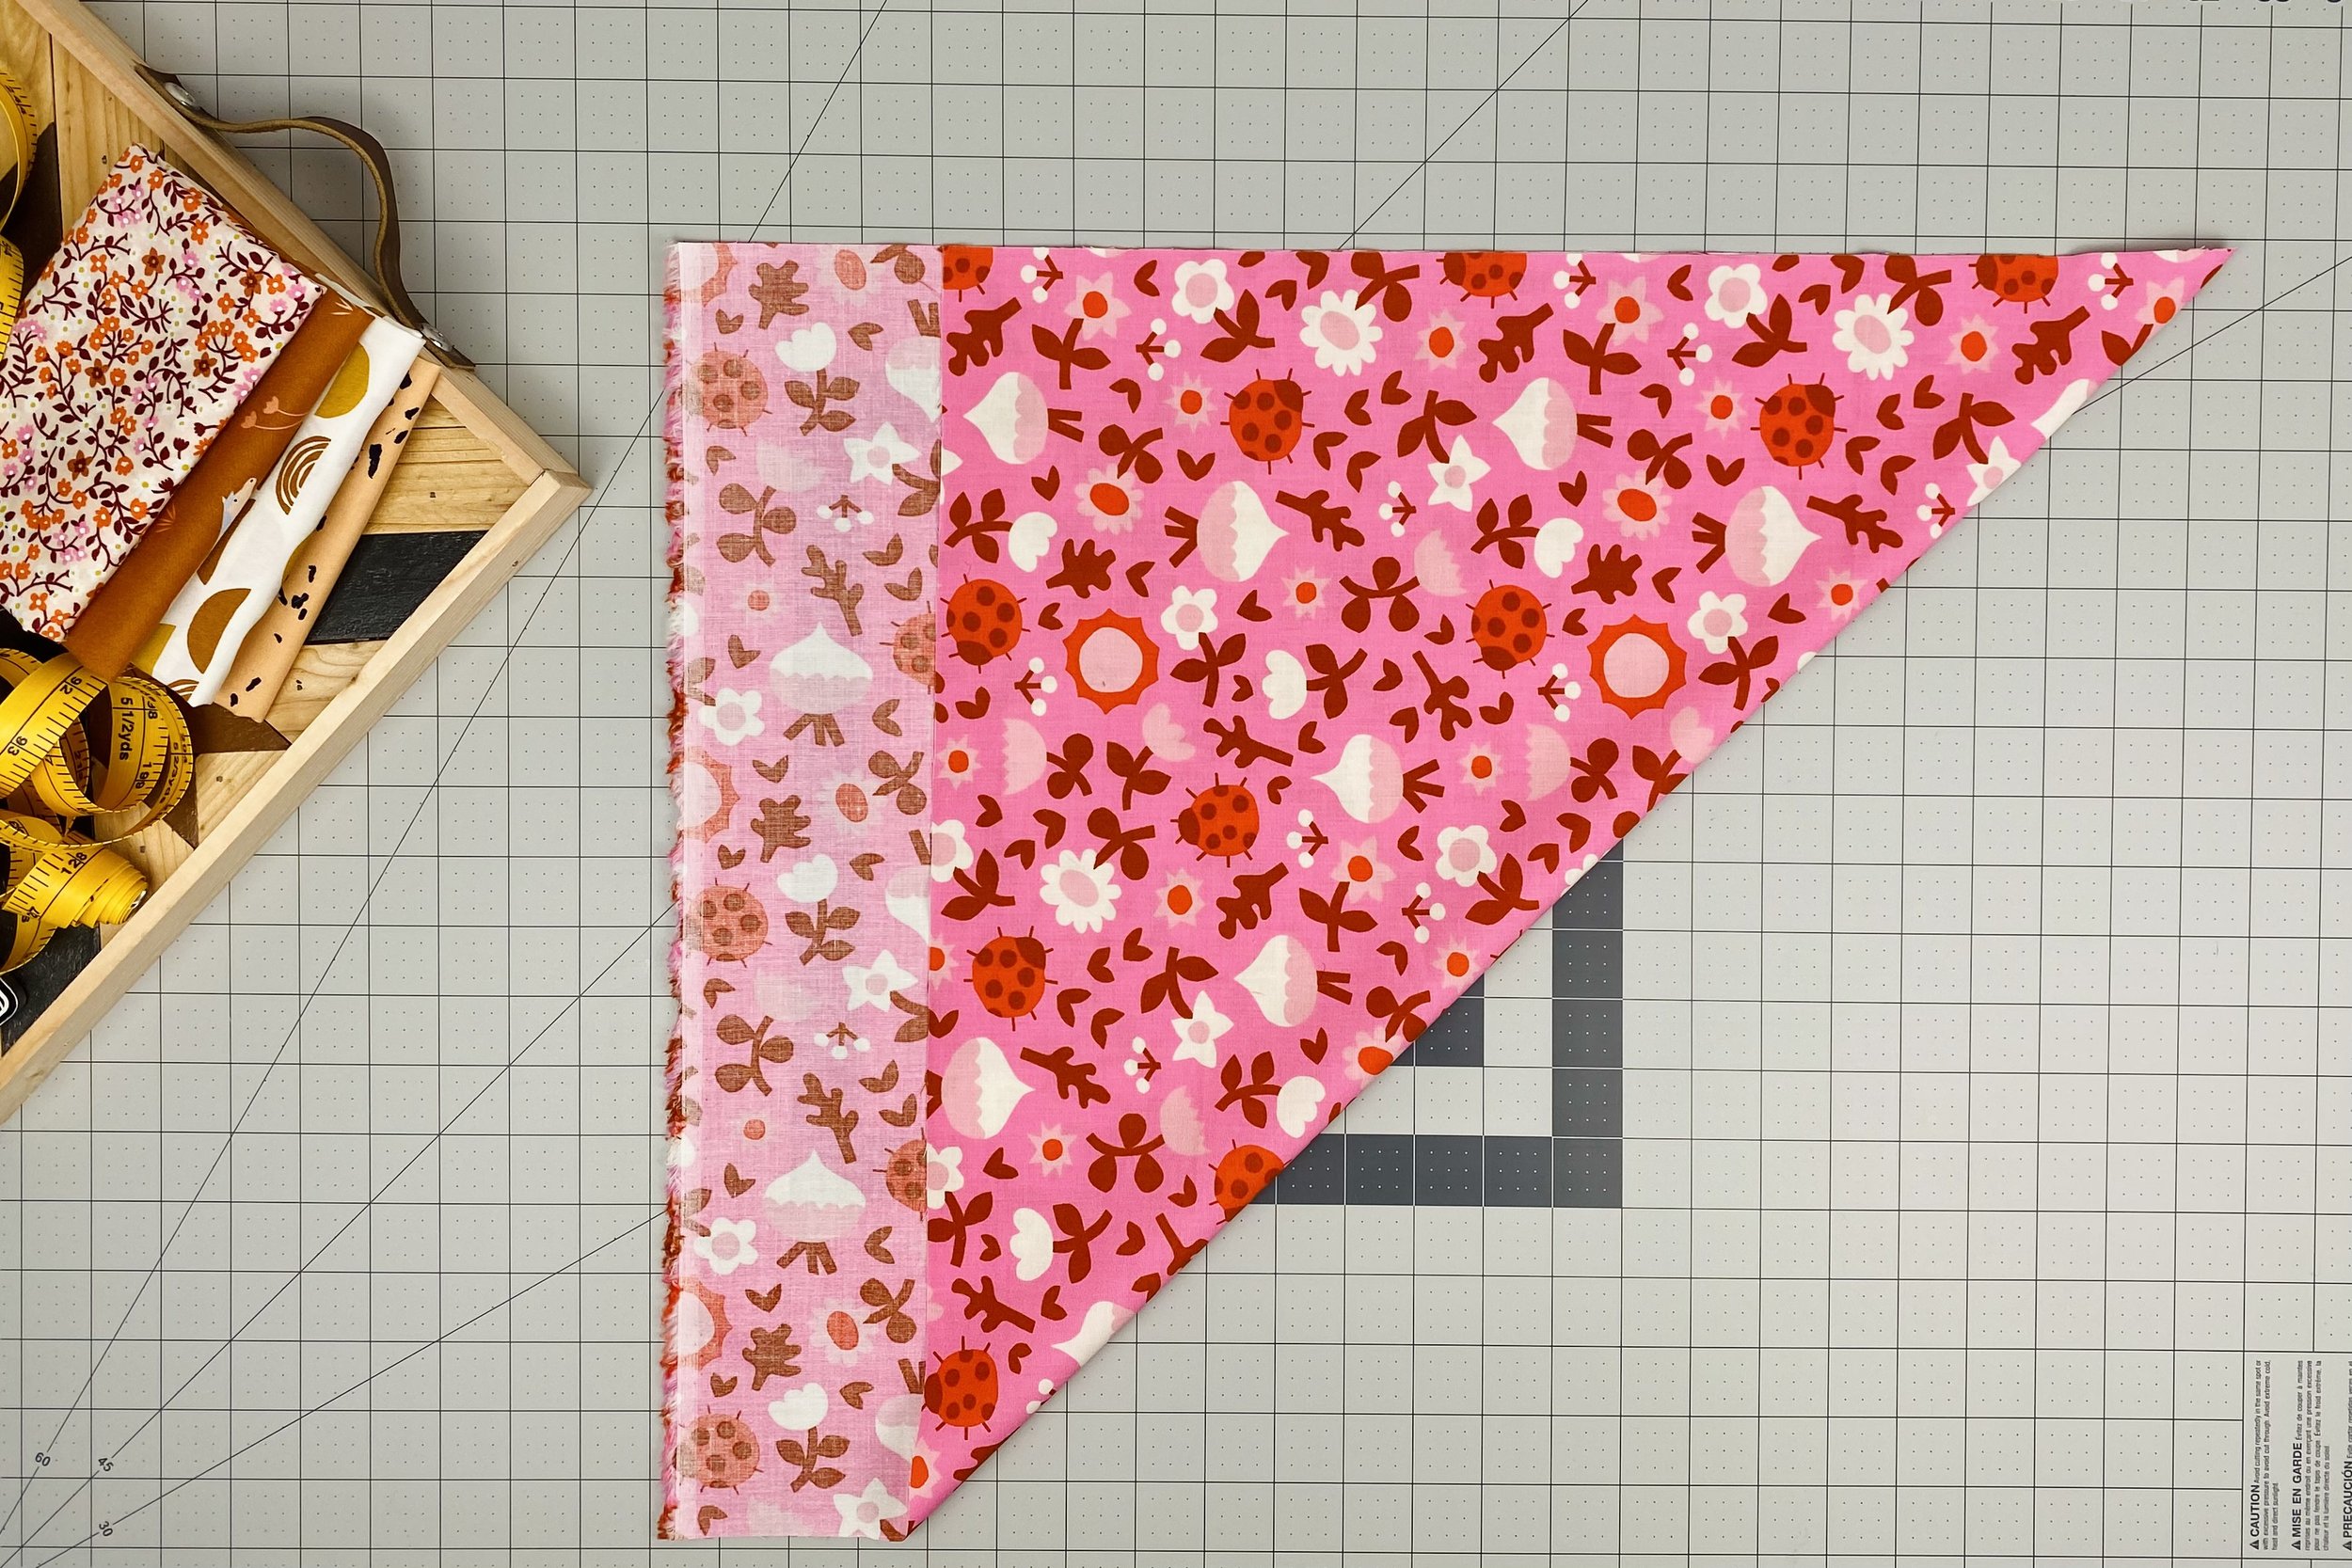
1) Wave the double fold bias binding tape maker in the air and TADA! You’re done. Just kidding! Fold the 18” edge of the FQ to meet the 22” edge, creating a 45 degree fold. Press or crease firmly. You can finger press or you can pick everything up and move to your ironing station. Plug in your iron and wait approximately 15 seconds before you get too impatient and press the crease with a moderately warm iron.
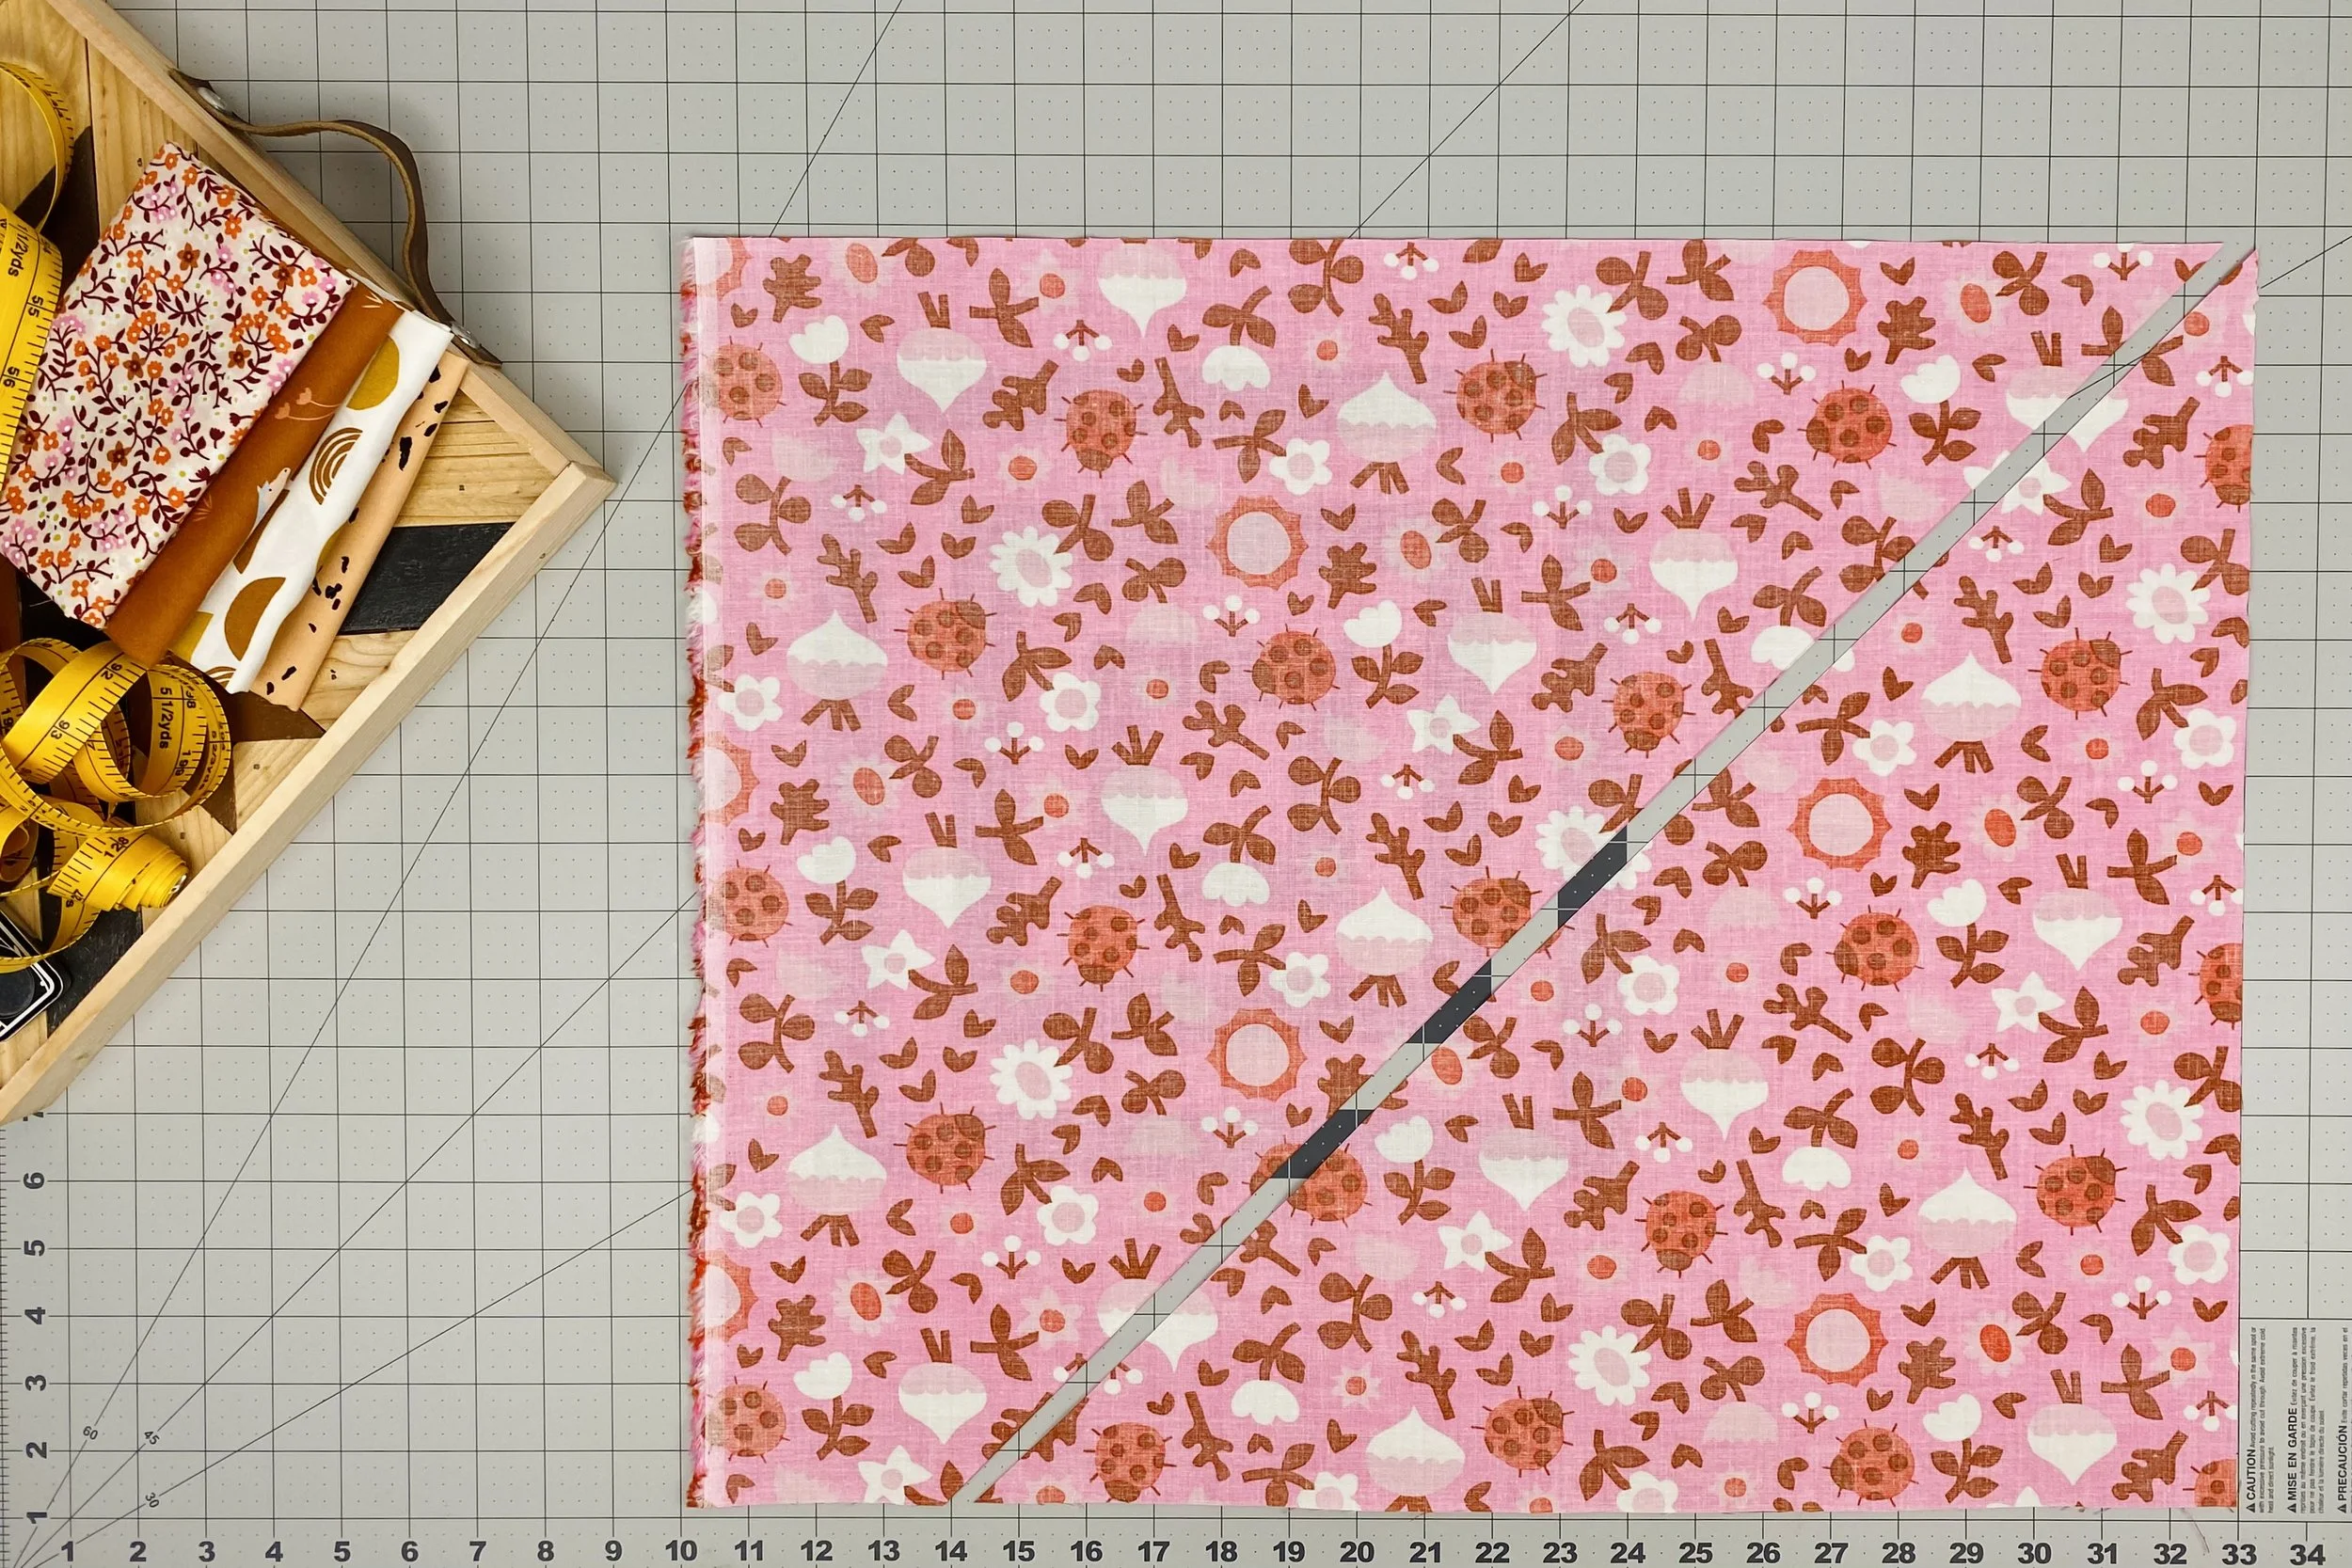
2) If you’ve picked up and moved to your ironing board, repeat that step and move back to your cutting board. Cut the FQ along the crease you just made. The FQ pictured below shows the wrong side of the fabric.
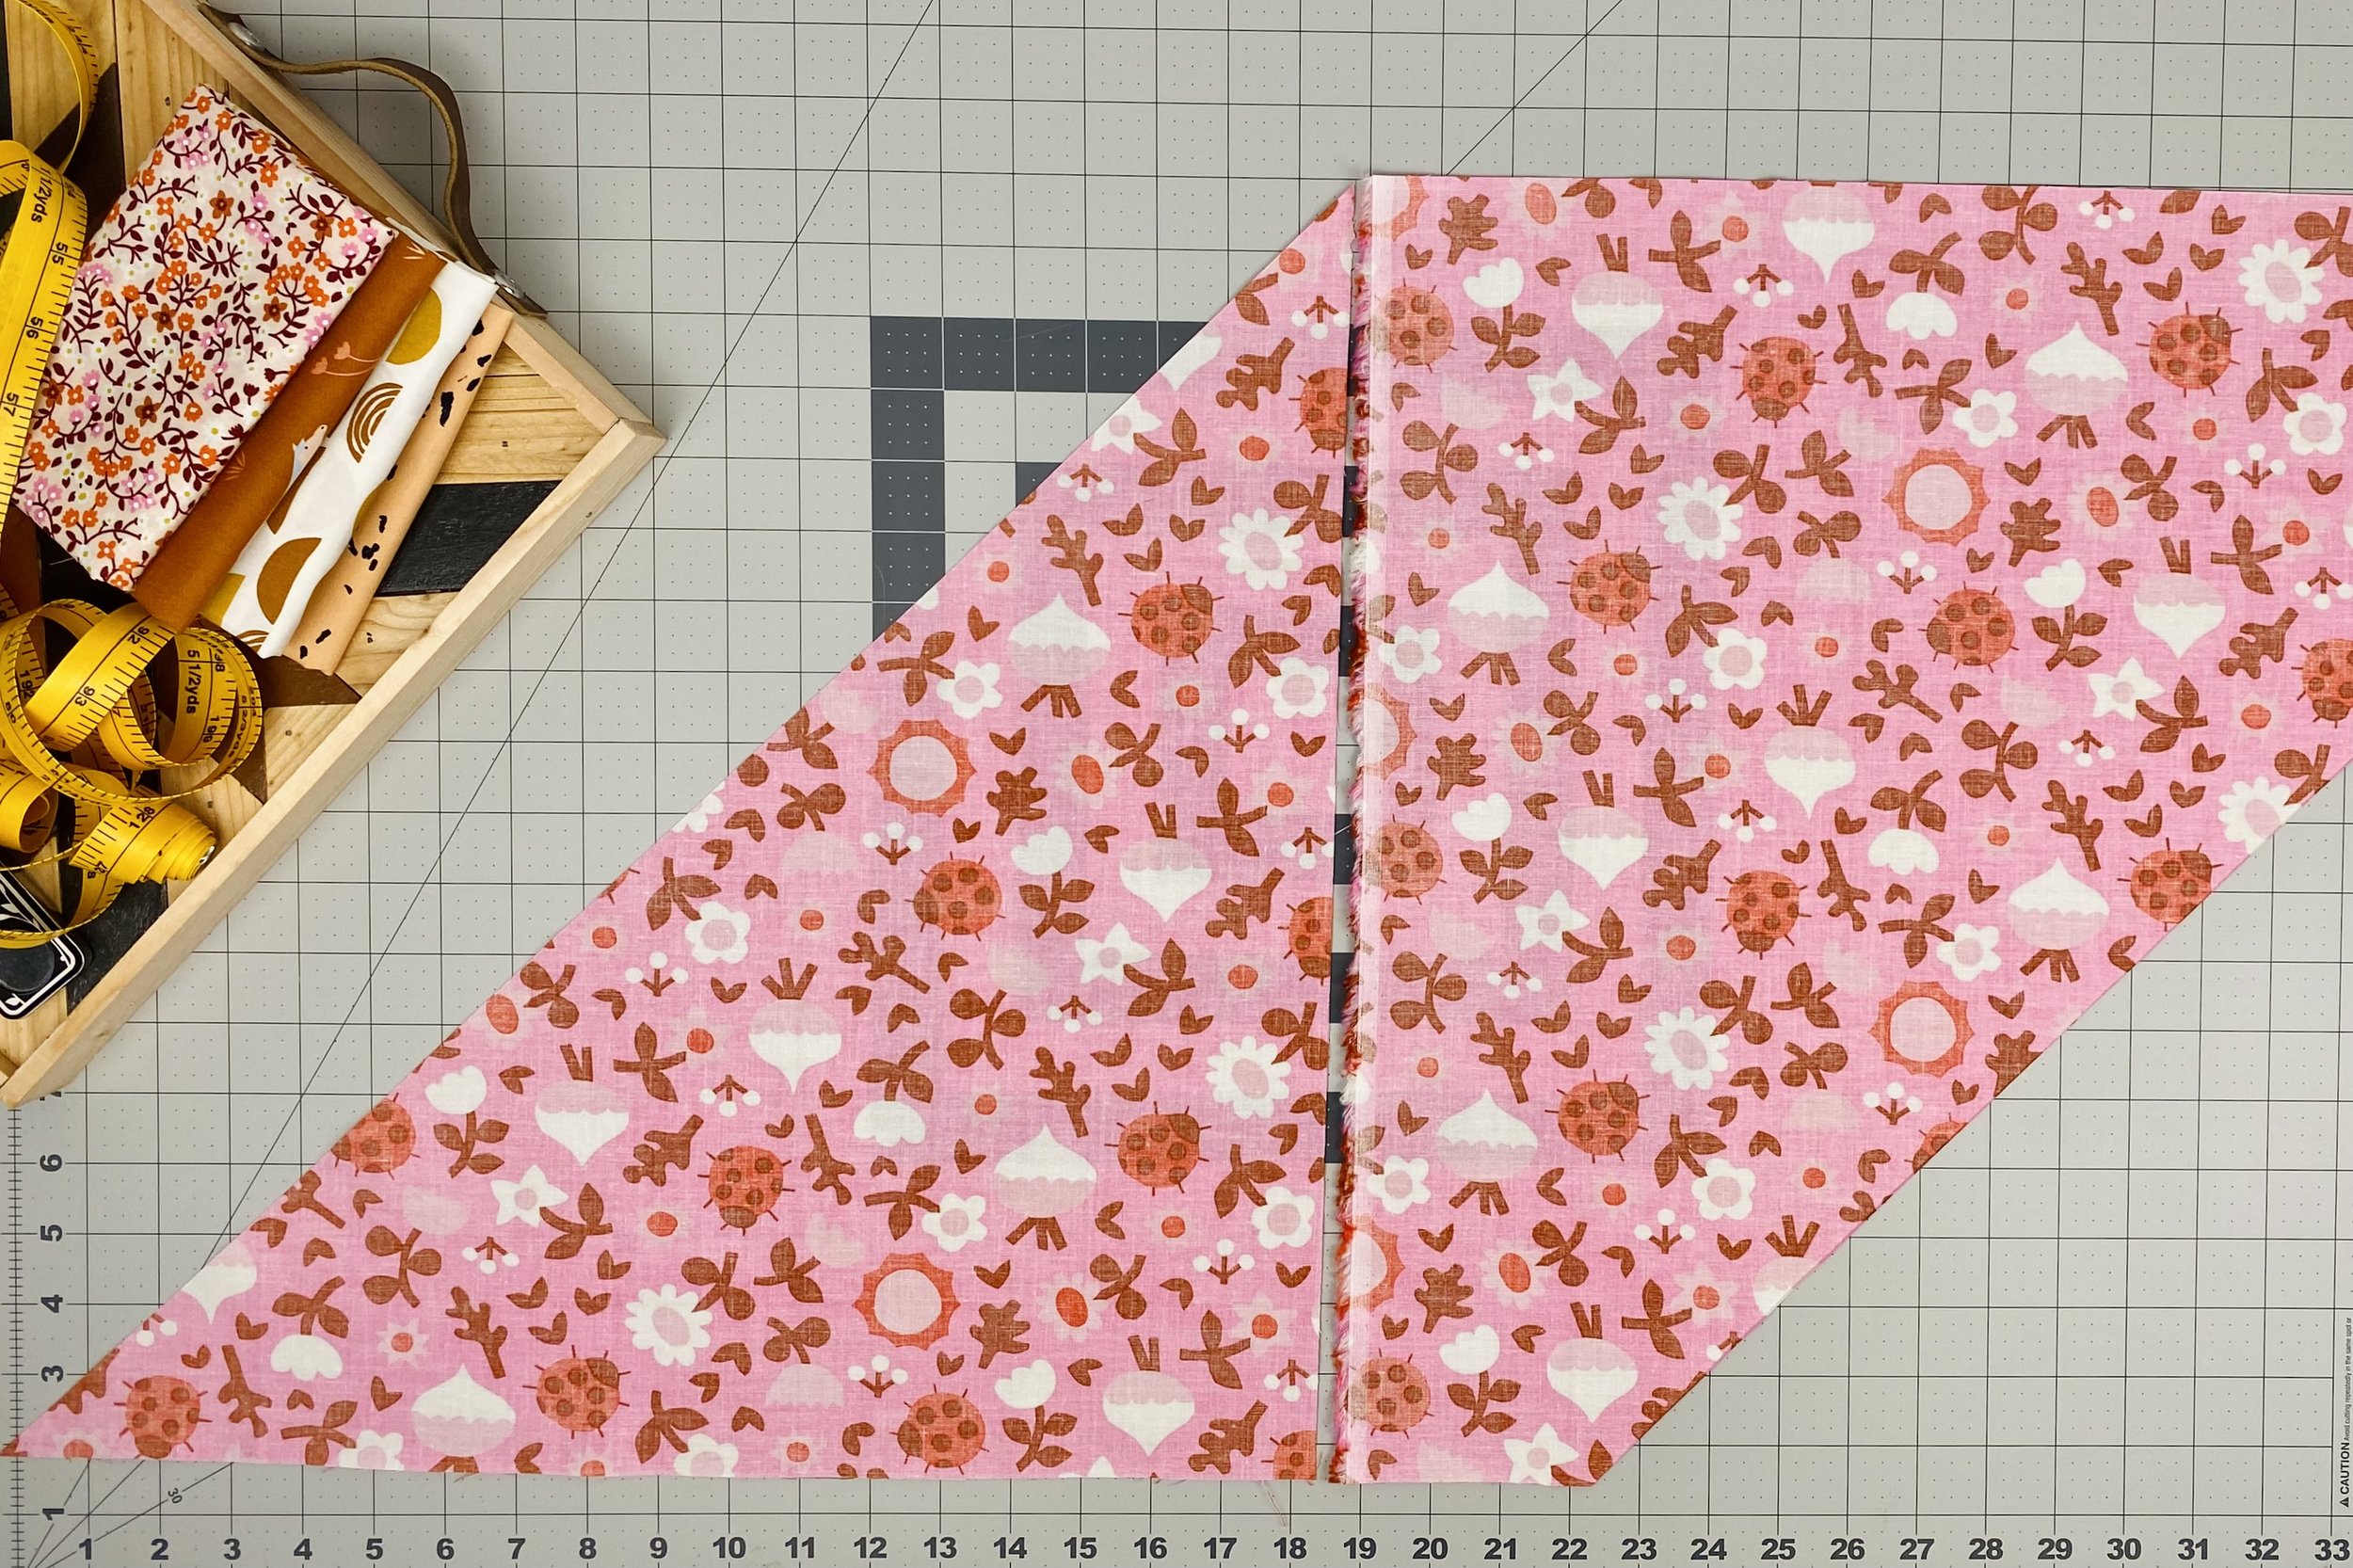
3) Swap the piece on the left side with the piece on the right side. Match and sew the two 18” sides, RST, using a 1/4” seam (remove the selvedge, if necessary). Press open.
4) Cut binding strips parallel to the 45 degree line. Cut the width of your strips according to your quilt pattern directions or to your preference. I prefer 2 1/4” strips. A 24” ruler is not quite long enough to cut the entire strip in one go, so you’ll have to cut a short distance, then move the ruler up. I like to secure the ruler by weighing it down with a hand weight.
5) Sew all the strips end-to-end to make continuous binding. Make sure to offset the strips by 1/4” at each seam, as pictured below. If you don’t know why, try sewing without the offset corners and see what happens. One thorn of experience is worth a wilderness of warning, as they say. Just keep your seam ripper handy. Press open and clip the excess triangles at the seam allowance.

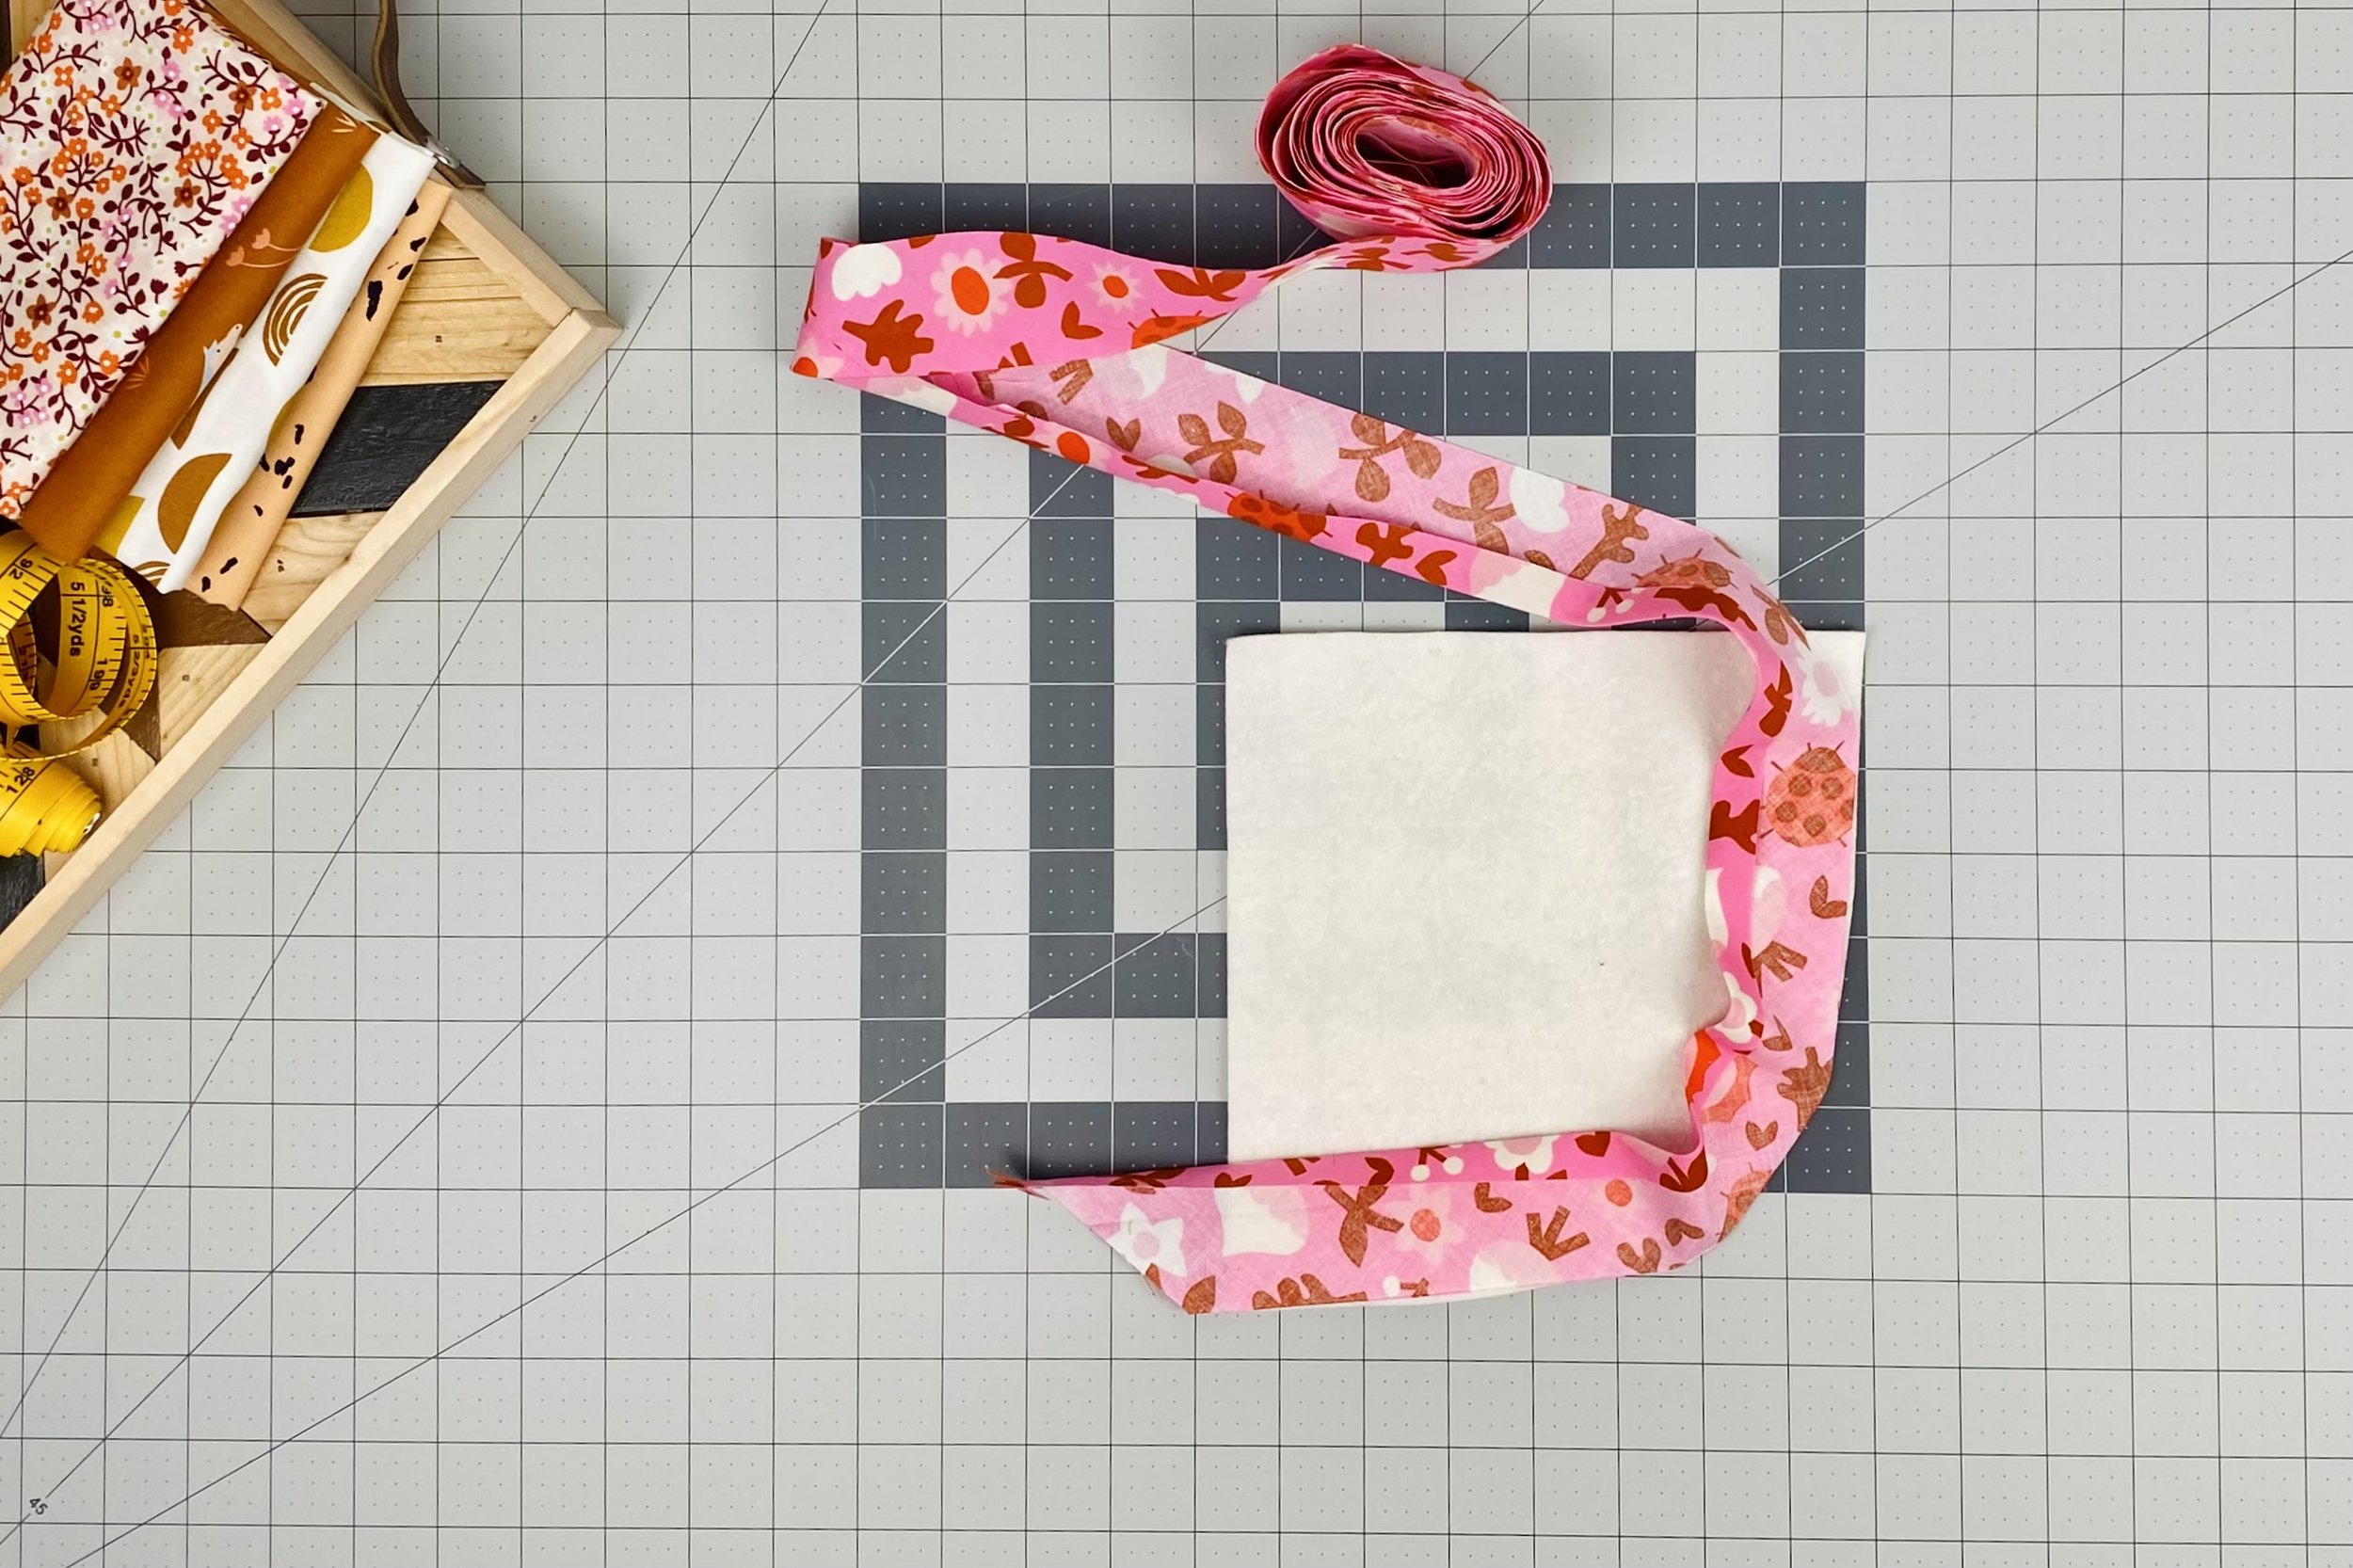
6) Use the bias tape maker to create the double fold. If you don’t have a bias tape maker, press the continuous strip in half lengthwise, wrong sides together. Here, you’re supposed to open the strip and press both long edges to meet at the crease, then fold the edges in one more time, and press a final time. I only fold and press one edge to the center. Imagine the scrap batting pictured below is the front of the quilt. I make sure to sew the unfolded edge of the bias tape to the front of the quilt, then wrap the folded edge to the back.
Congratulations, you’re done! Now you have no excuse to not finish the WIP sitting at the back of your pile. Just curve the corners and use a bunch of bias tape to make it exciting again!