
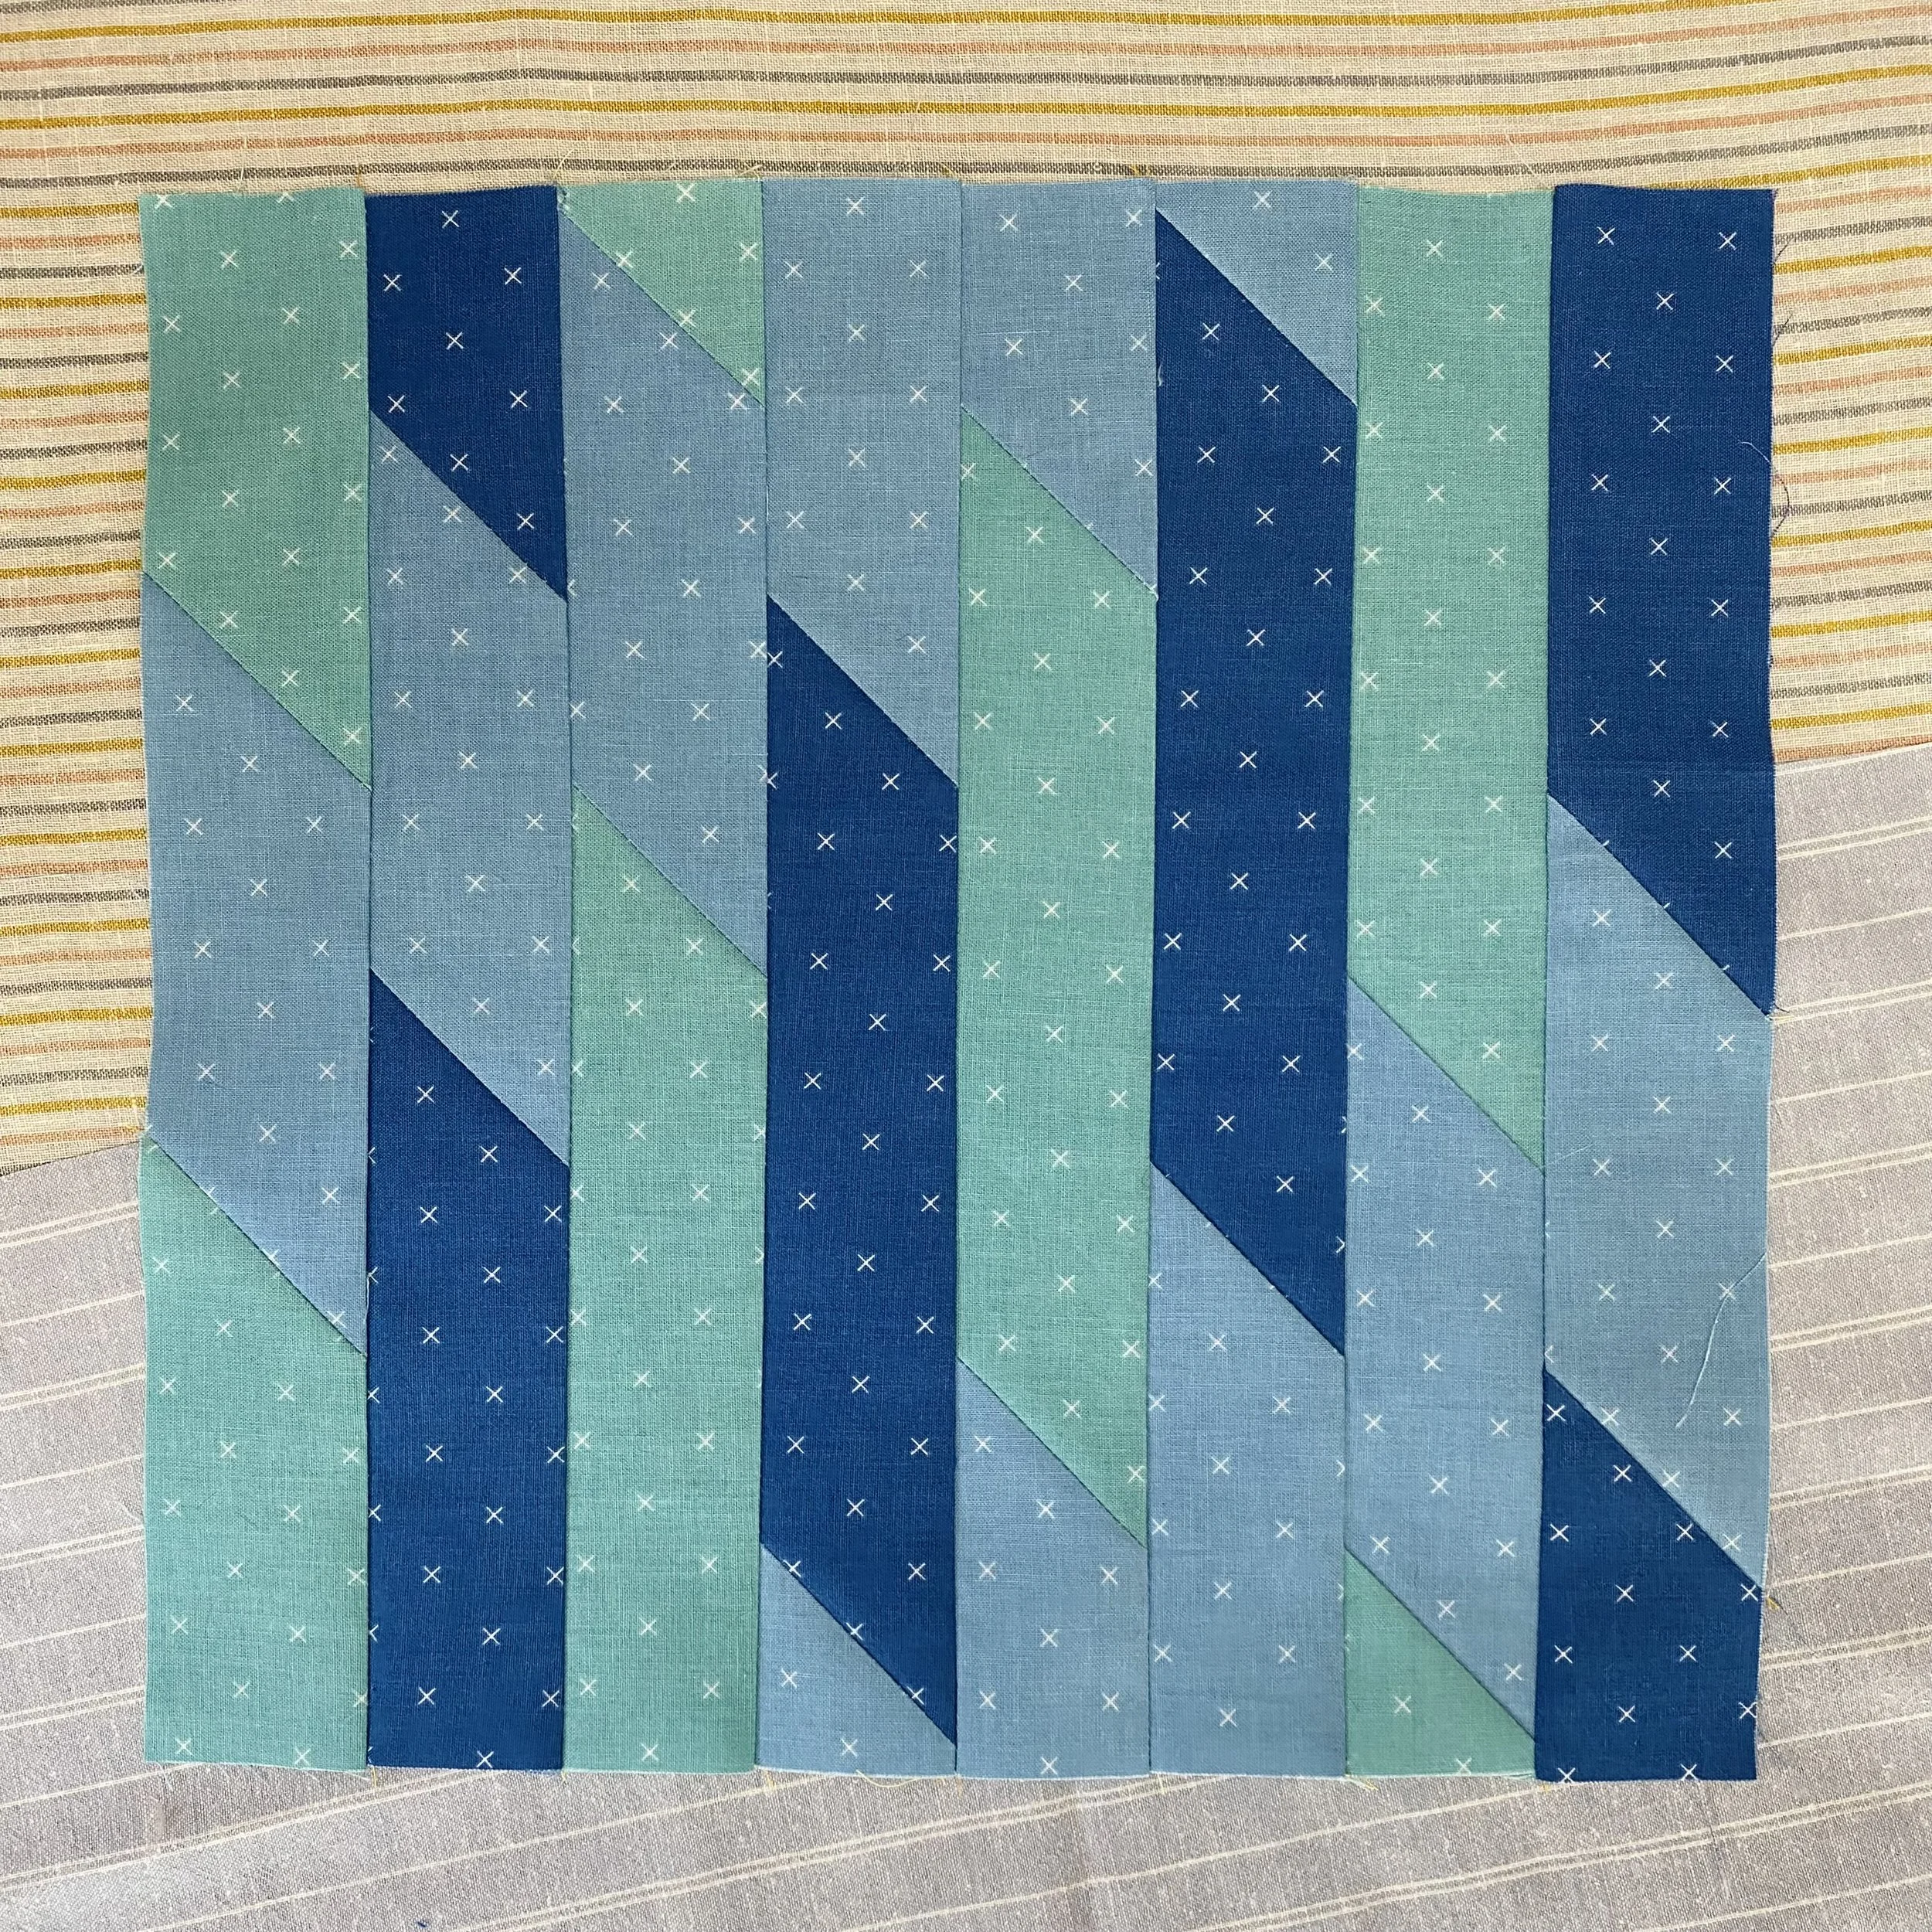
Hiking is a big deal here in Colorado - I couldn’t pass up the chance to make a block that celebrates hiking up big inclines and mountain sides!
We get another respite from sewing curves this month, but we’re still practicing our piecing skills. This month, we dial in our seam allowance with some long, skinny strips.
The fabrics I’m using are Bee Cross Stitch, designed by Lori Holt for Riley Blake Designs. Fabrics were provided by Riley Blake Designs.
Denim
Cottage
Soldier
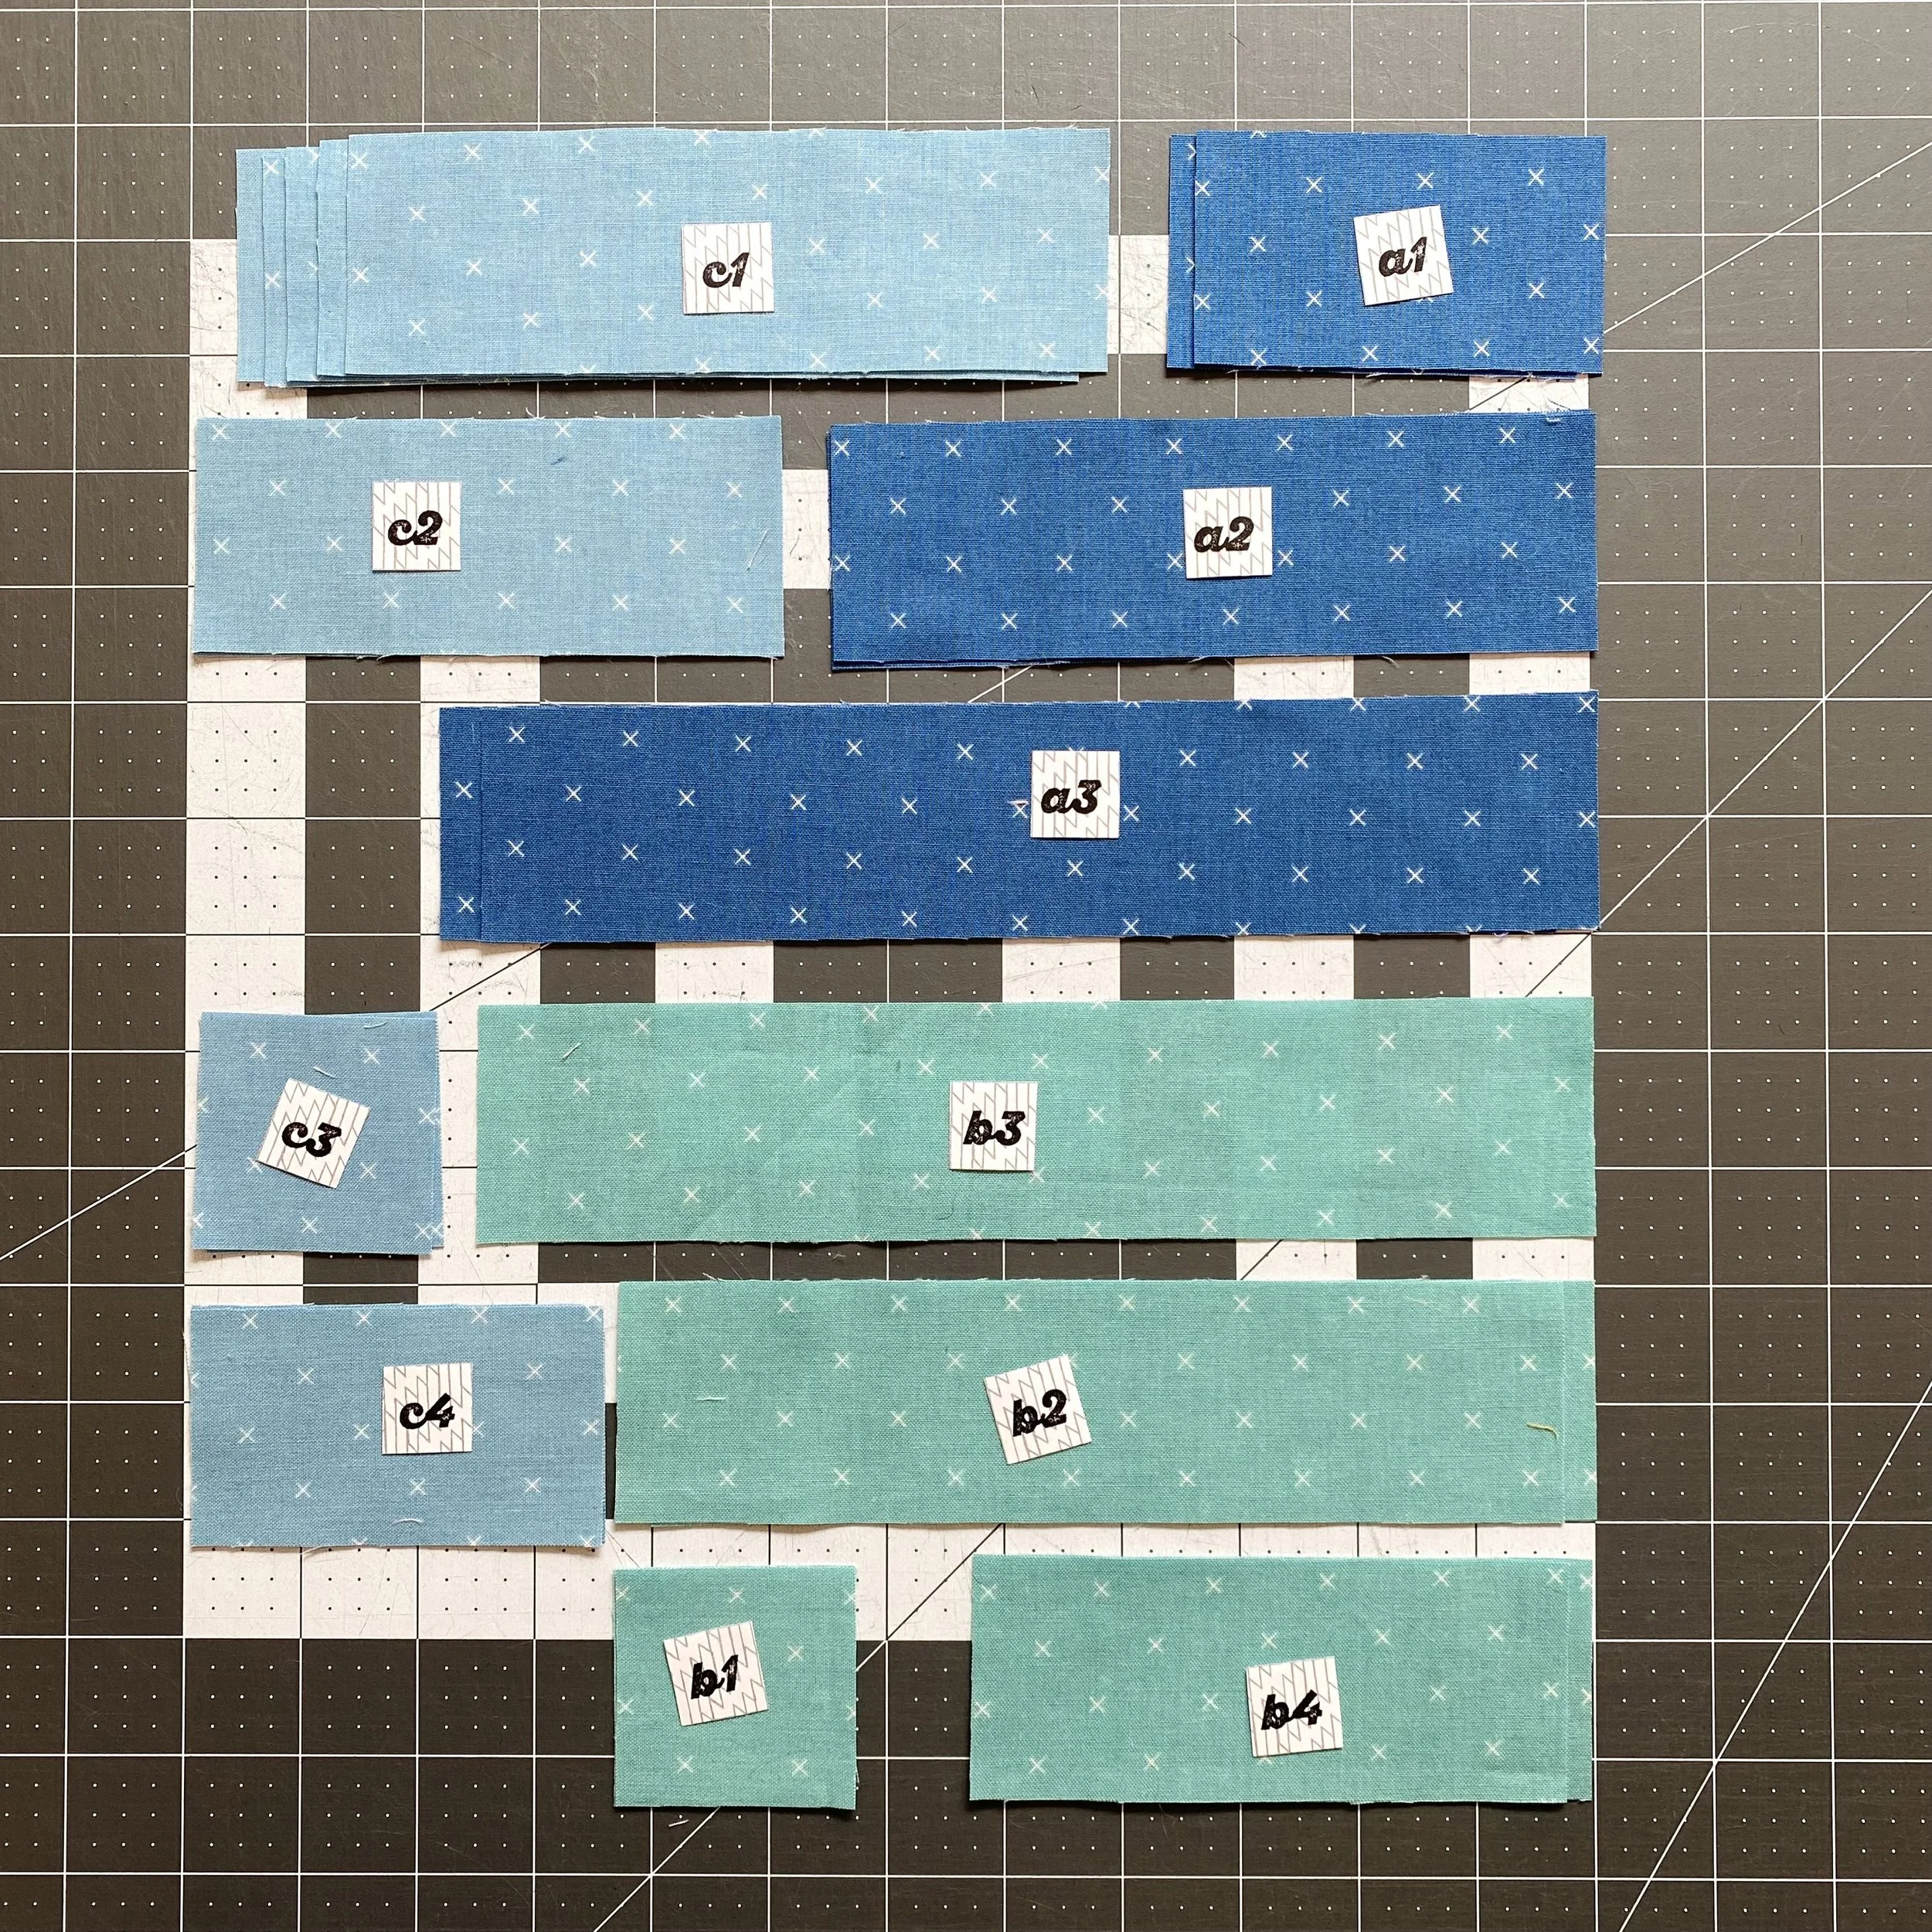
Cutting the units is a straightforward affair again. And - if you’re taking a scrappy approach to these blocks - the Incline block is another opportunity to play with directional fabric.
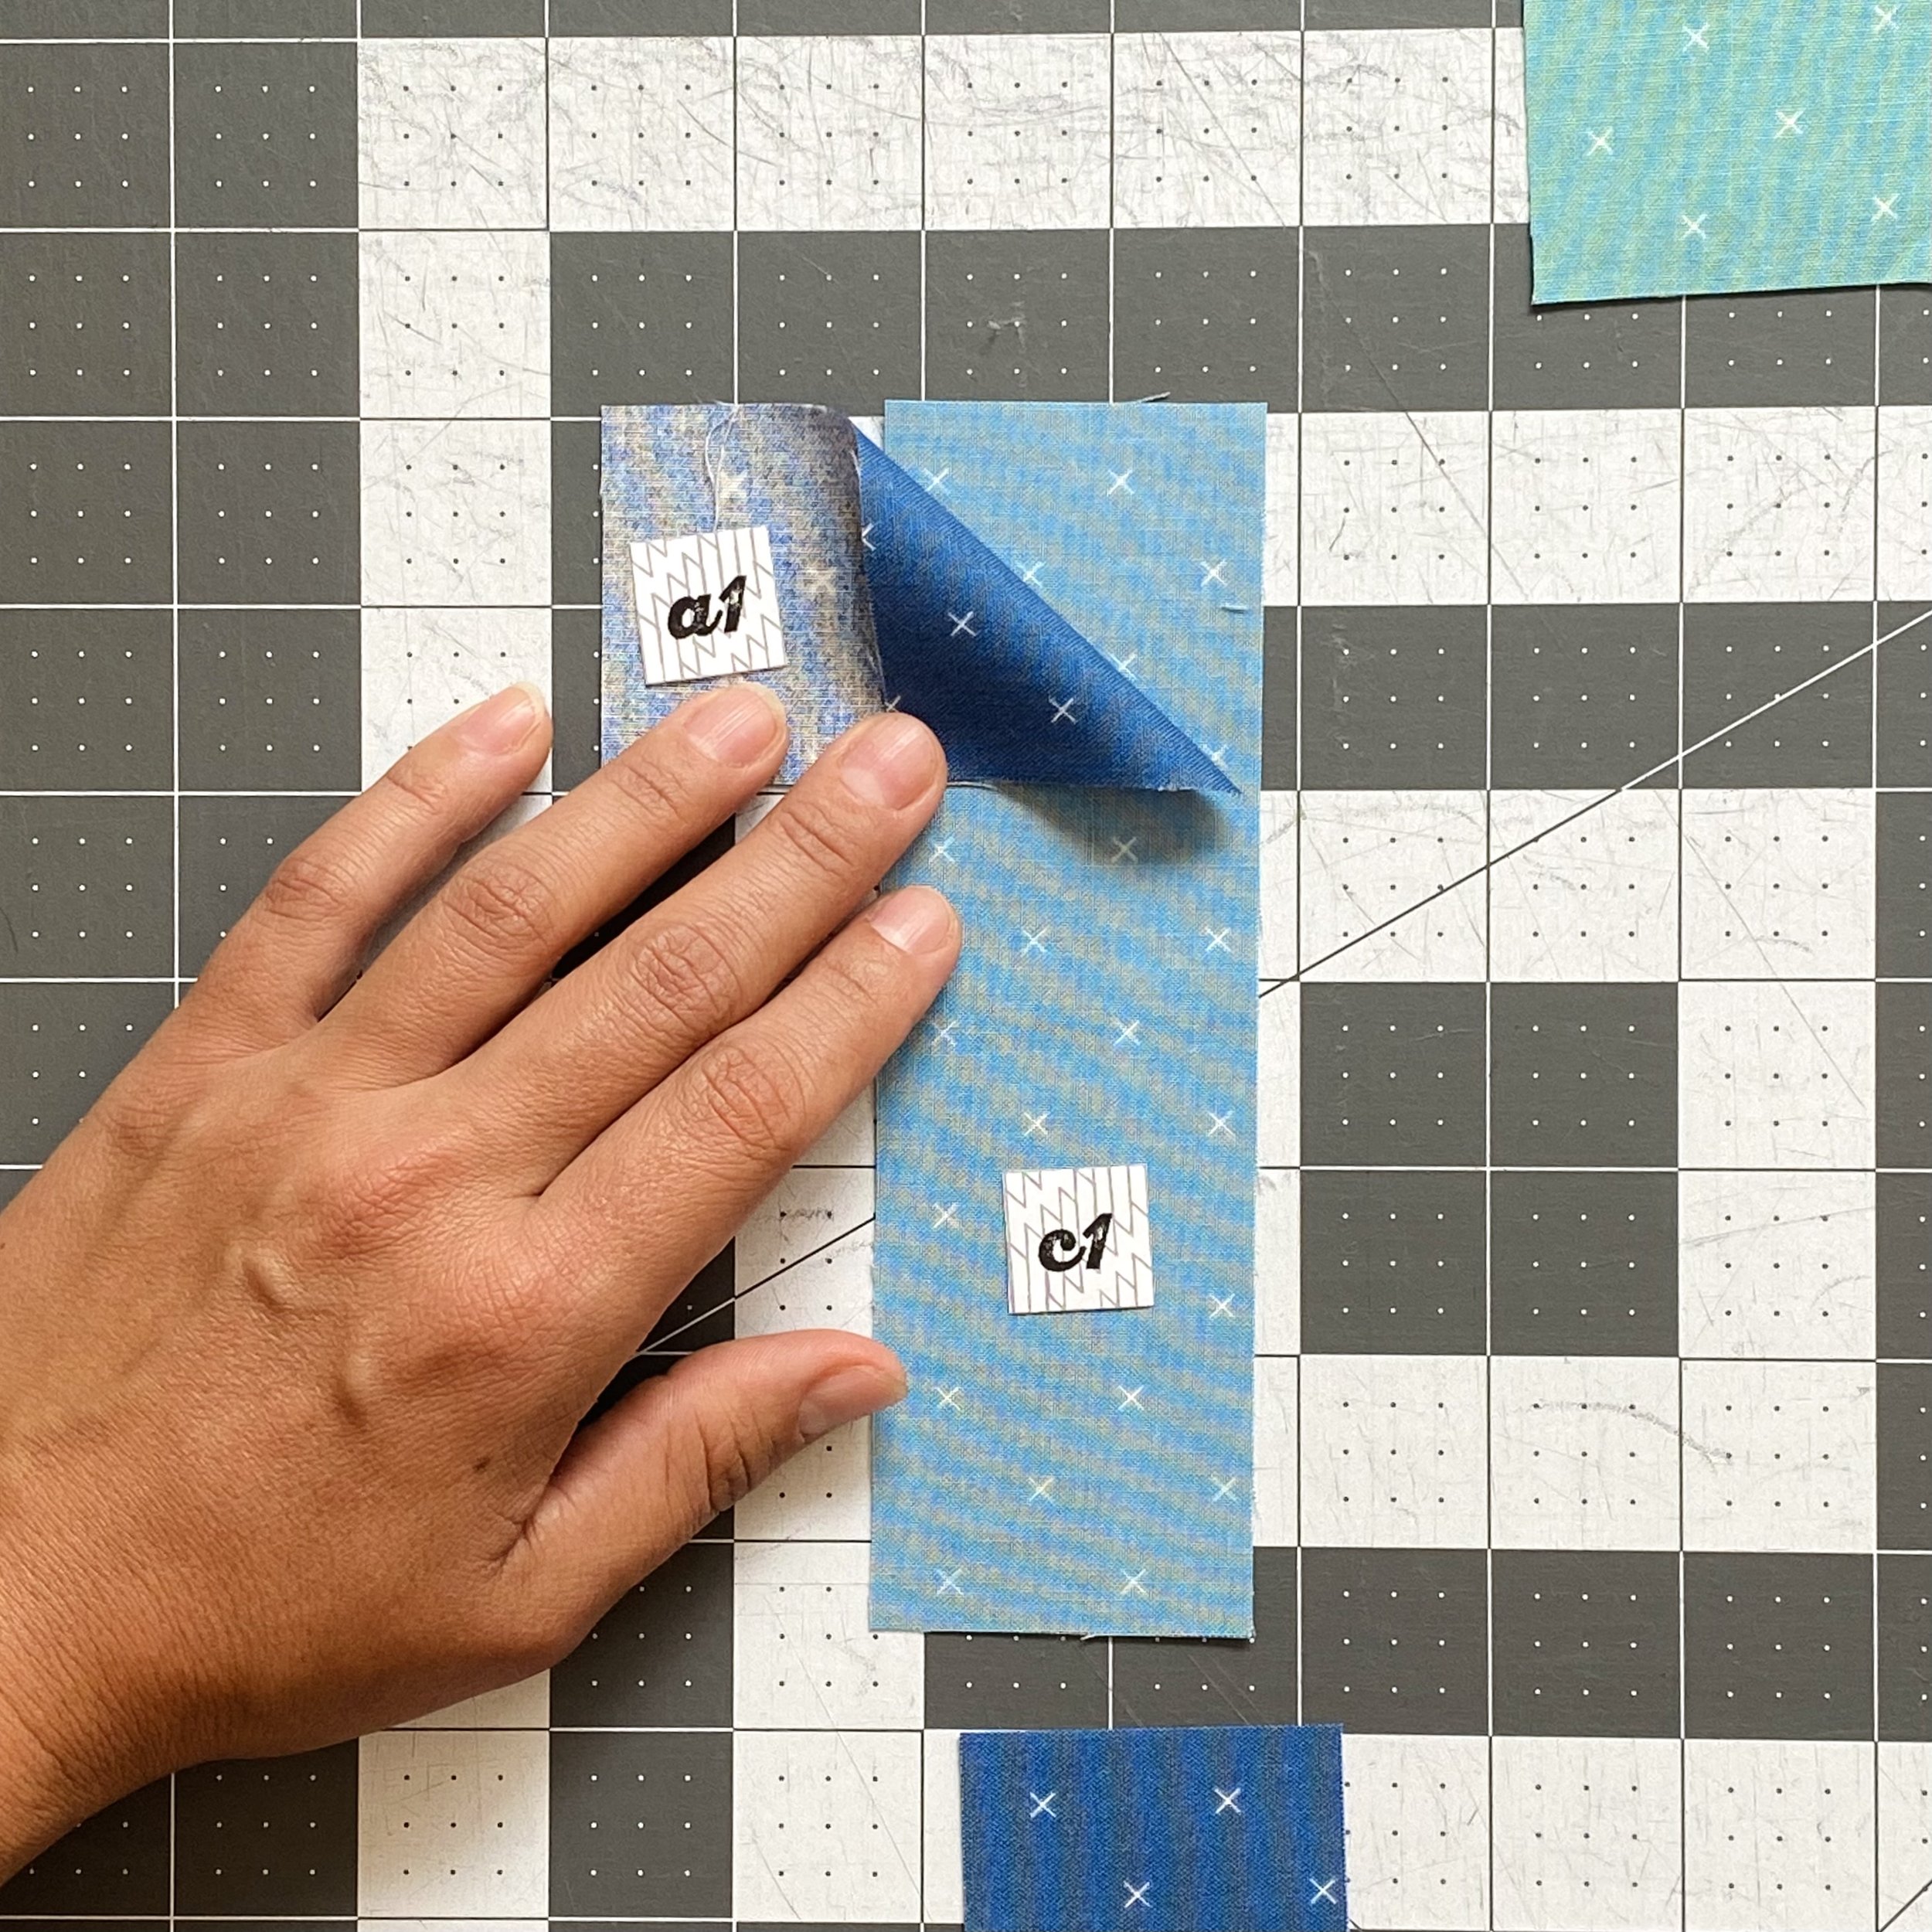
The pattern walks you through the stitch and flip method used to make all the columns. You have two options to mark the diagonal sewing line. Pictured here is the option to simply fold the top unit along the diagonal, mark the crease and use the crease as the sewing guide.
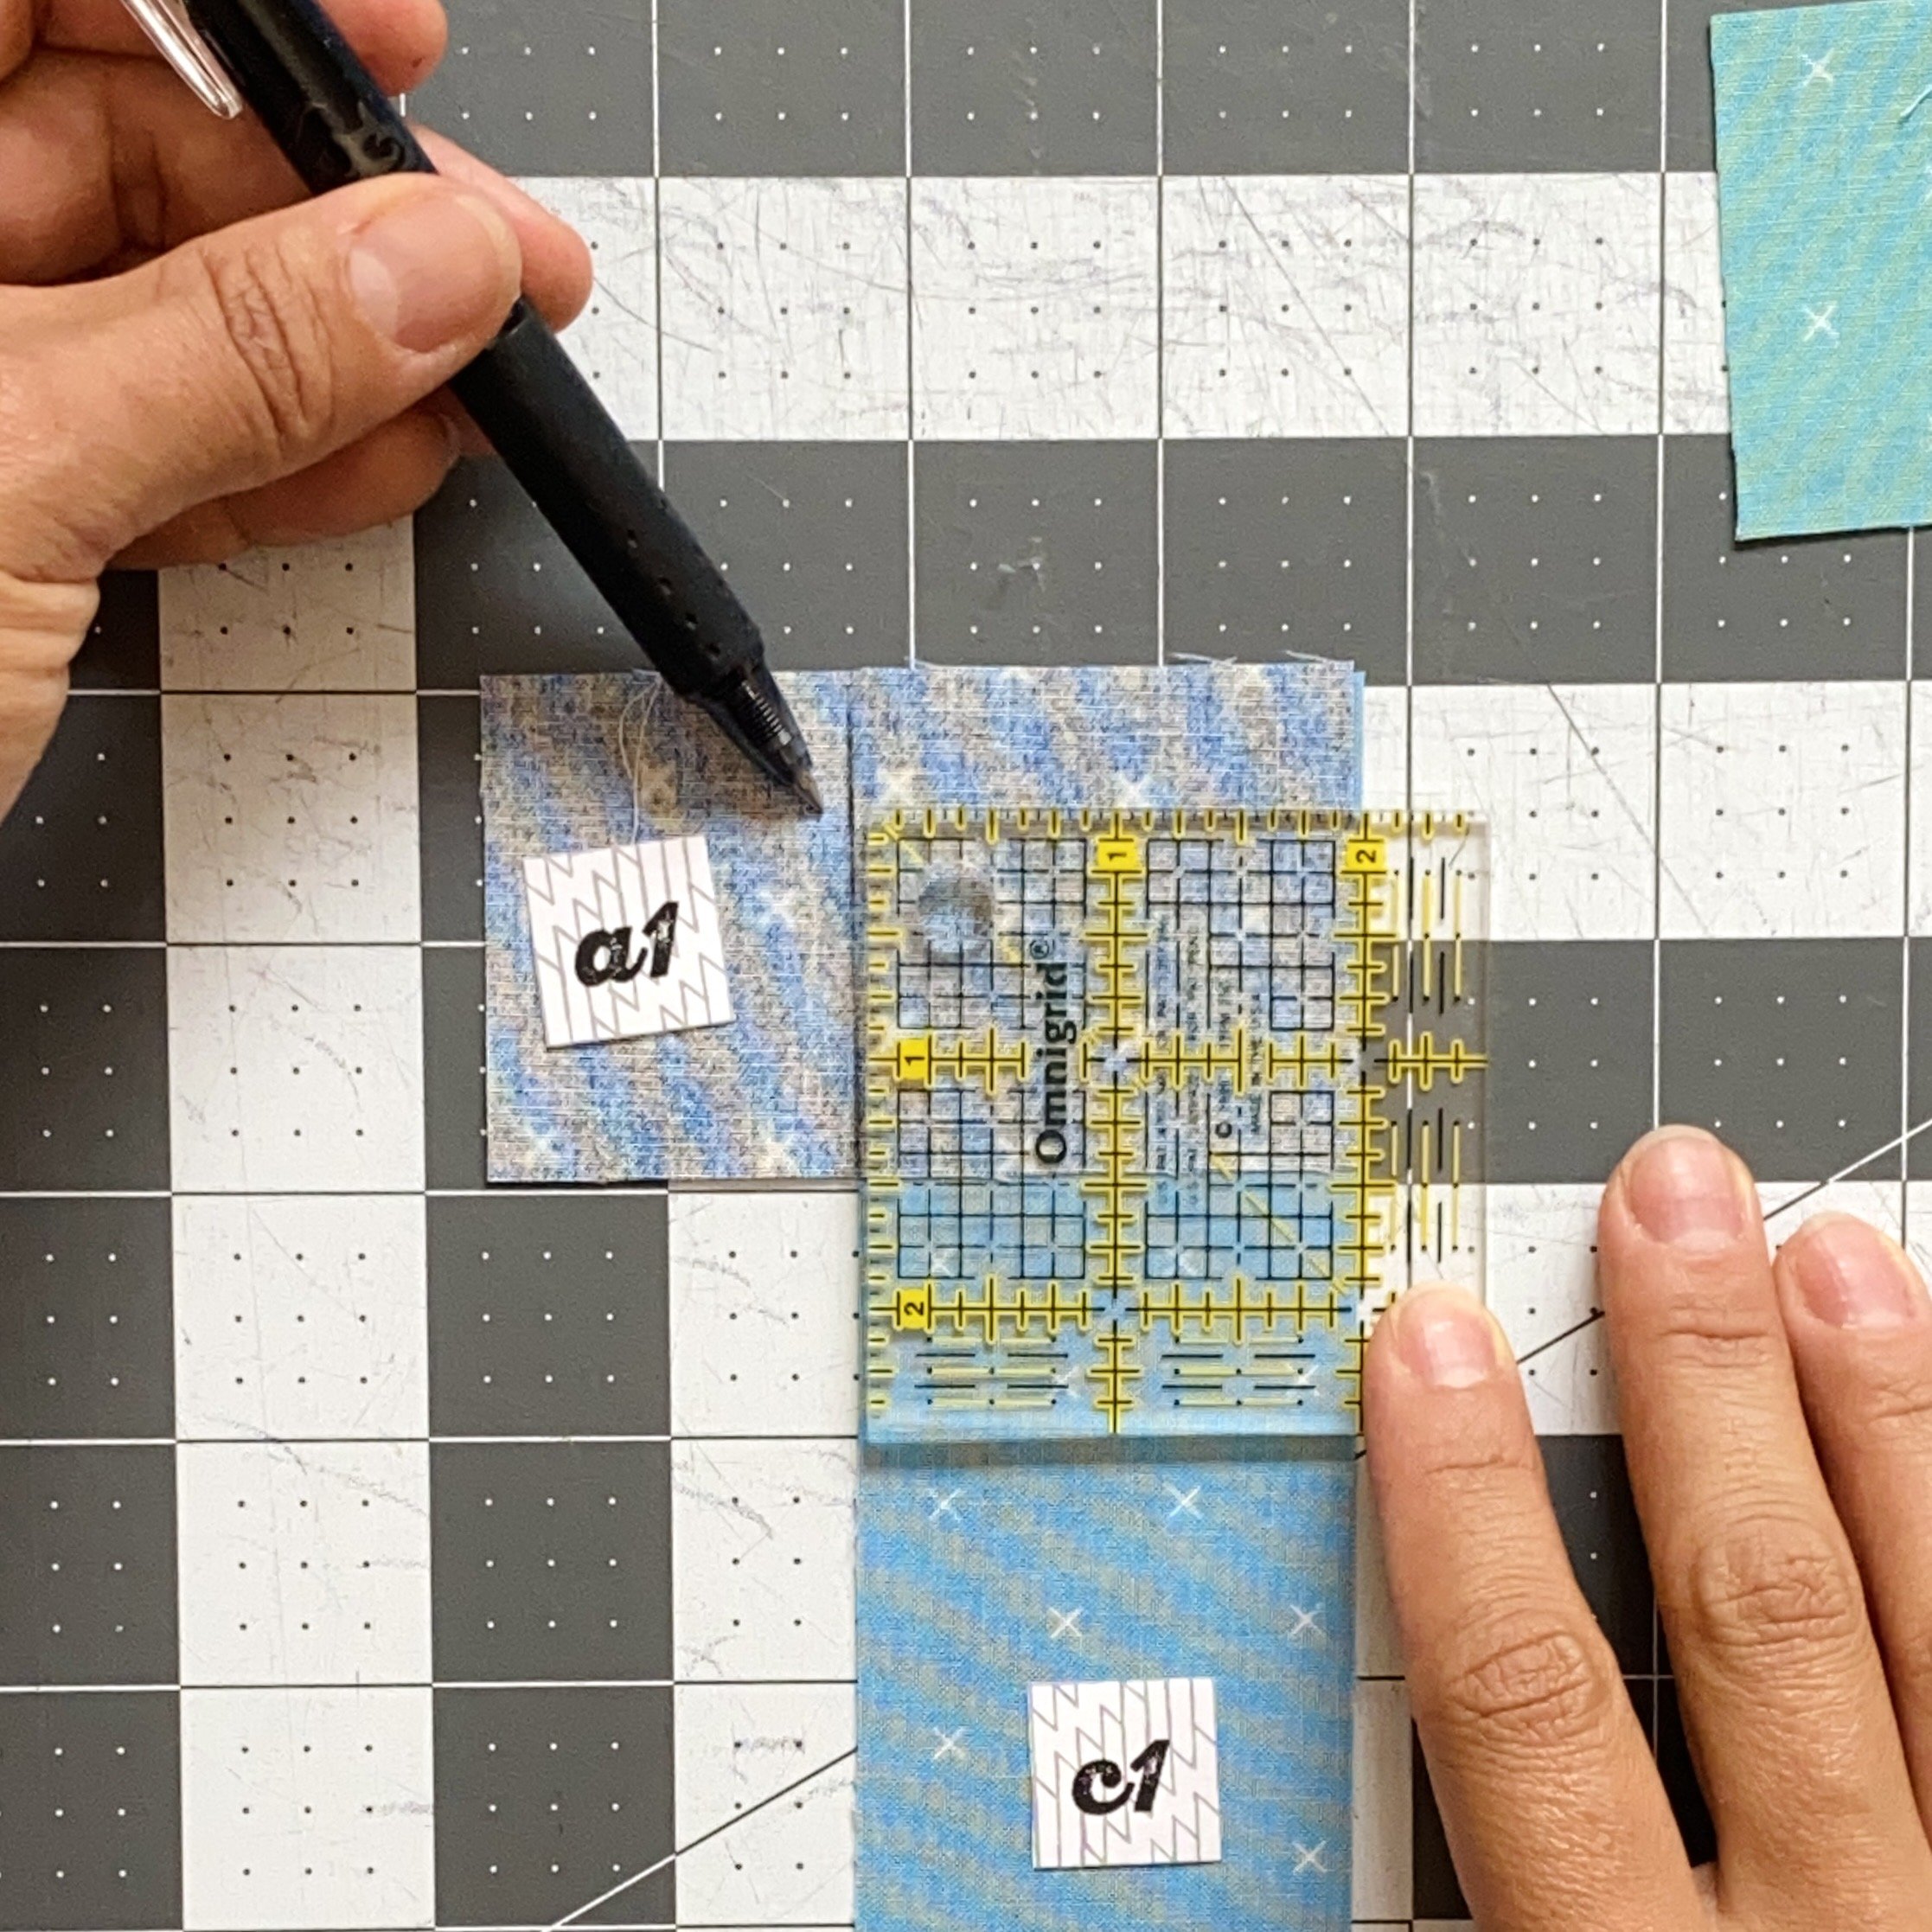
The second option is a little slower, but I think it offers just a little more precision. On the wrong side of the top unit, measure 2" in from the “right” edge (this is actually the bottom edge when everything is assembled, but to make the stitch and flip method work, we’ve rotated the unit 90 degrees).
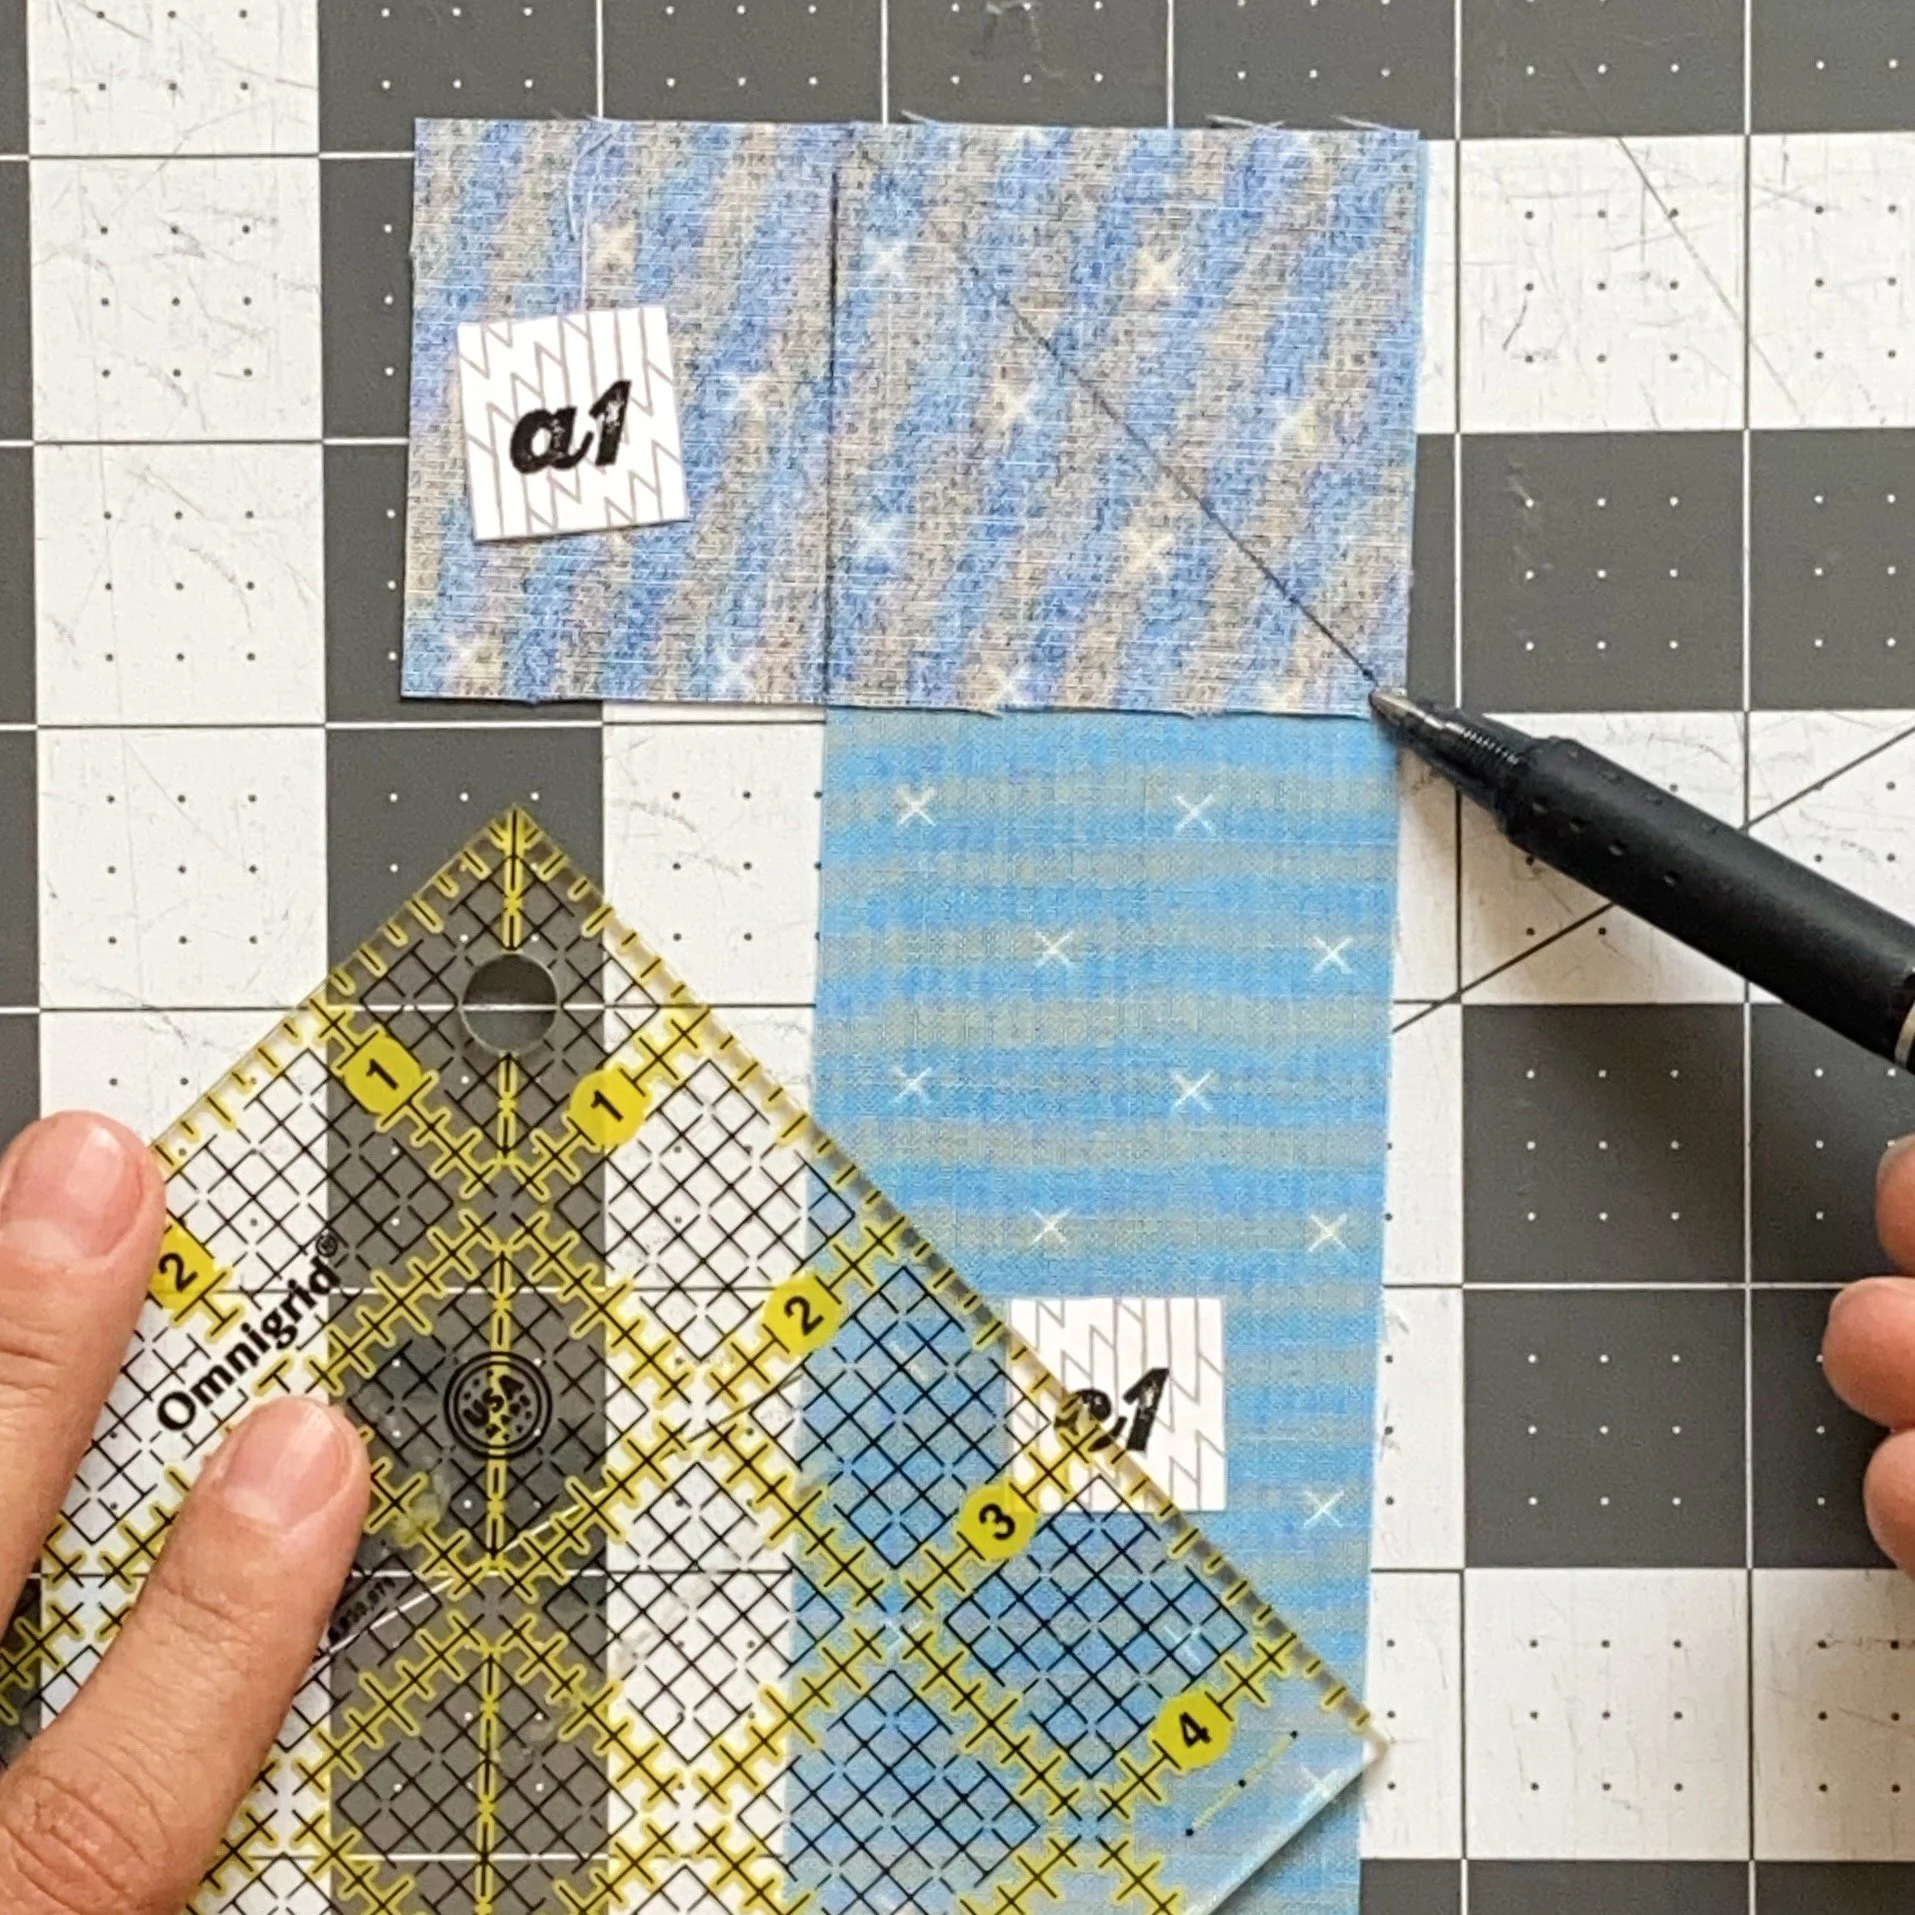
Once the 2" mark is made, draw a diagonal line to the bottom right corner.
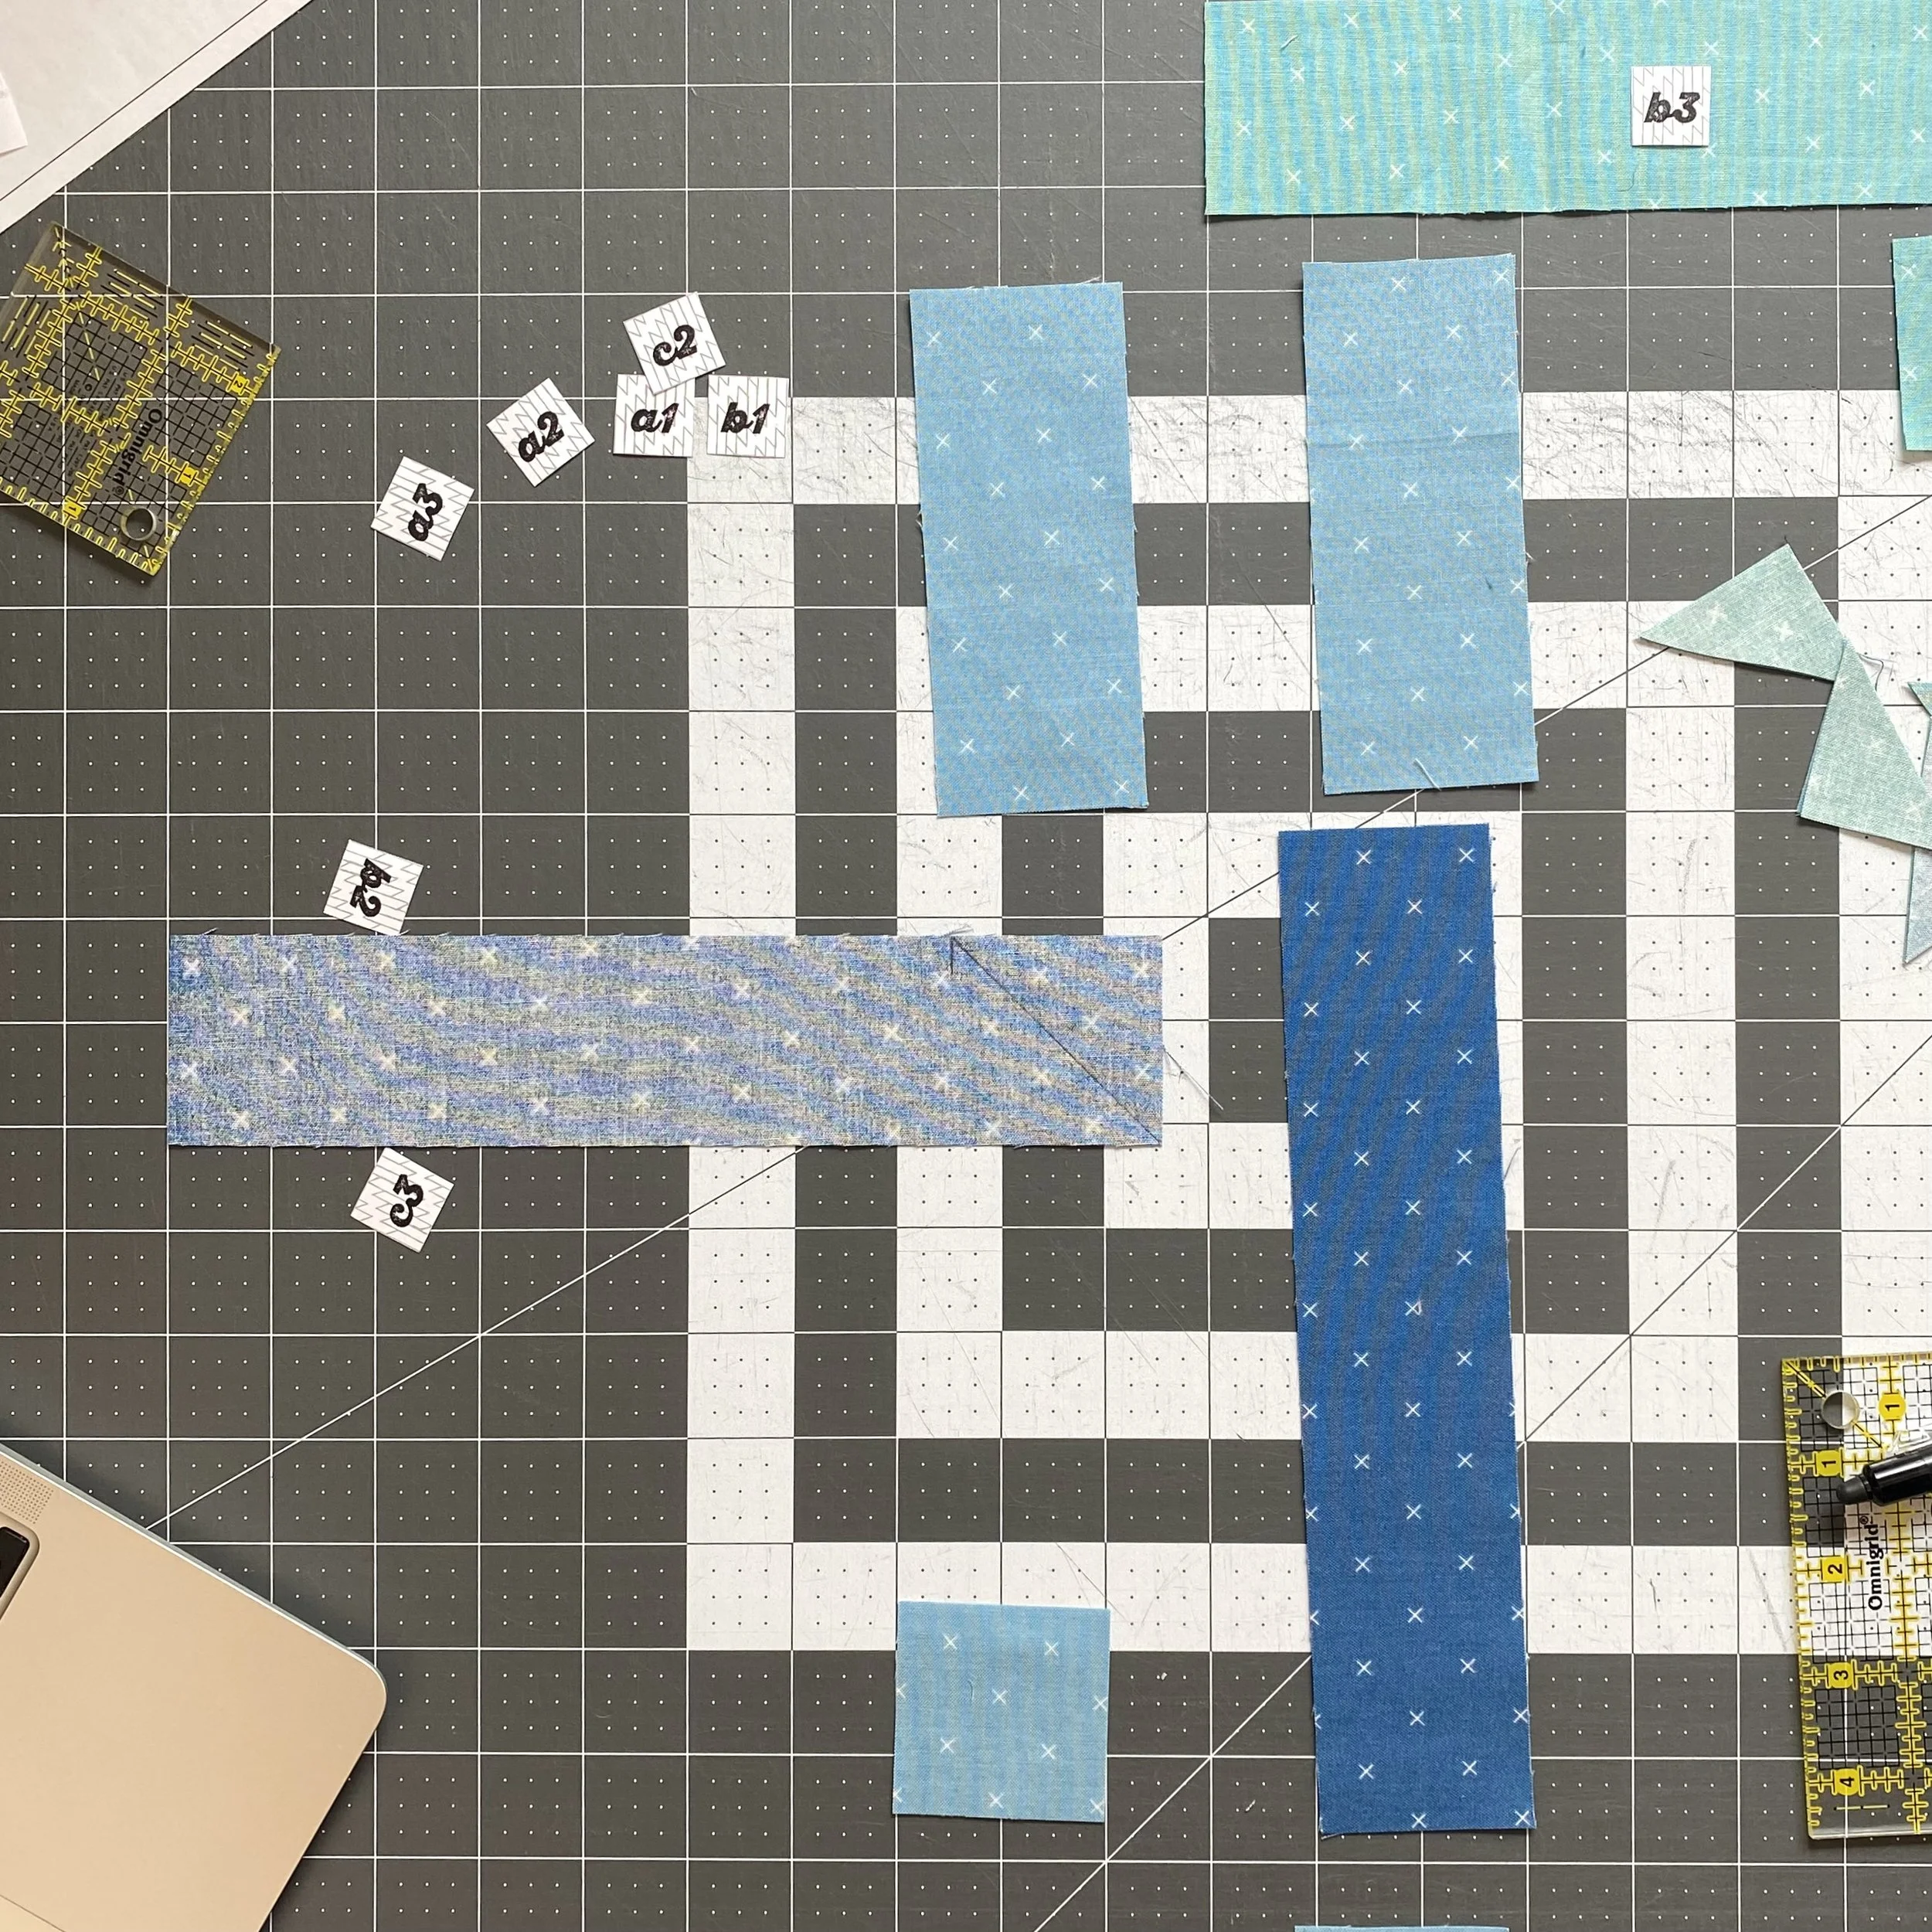
I like to work with one column at a time so I don’t get confused. In this picture, I have laid out all the units for Column 3. Working from the top towards the bottom, I draw the diagonal lines on the top two units of each column.
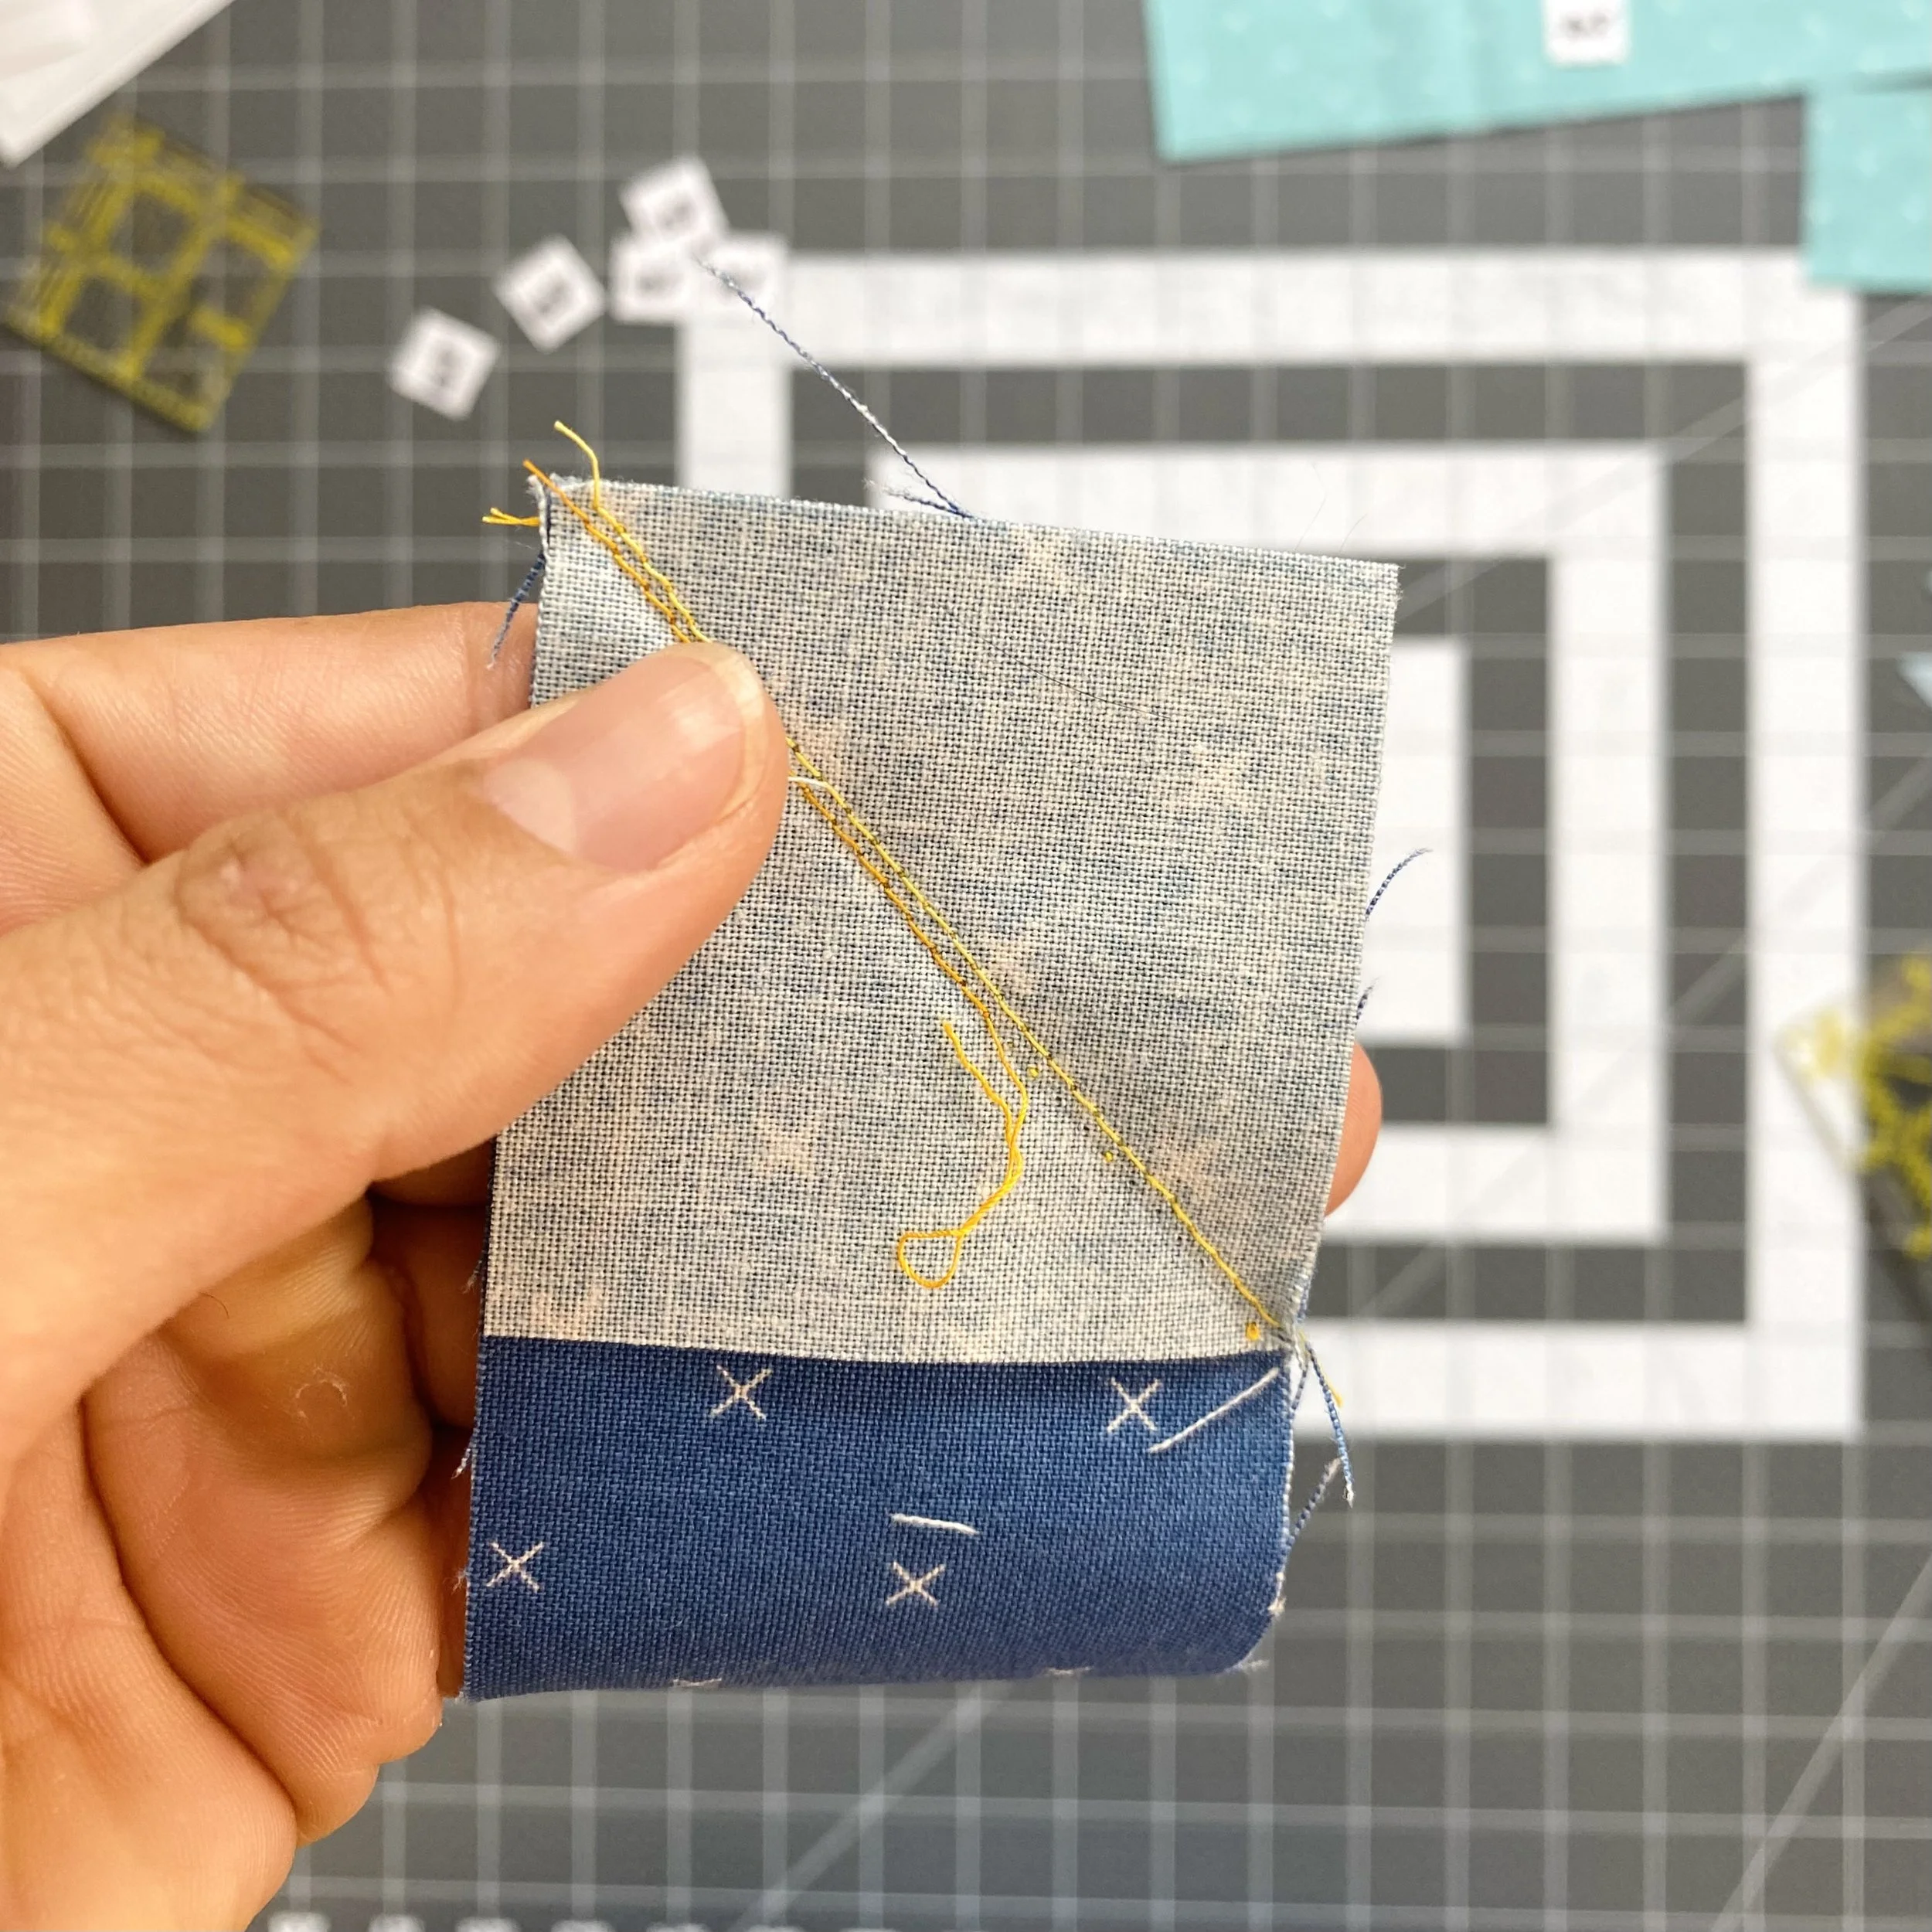
I like to sew just one thread width away from the drawn line. See the picture below for what this offset stitching line looks like. Before pressing and trimming, I suggest flipping the unit back and checking that you like how everything is aligned. In the second picture below, you can see an example where I did not like how the unit turned out and sewed a new stitching line. I don’t unpick the original stitching until I’ve resewn the unit.

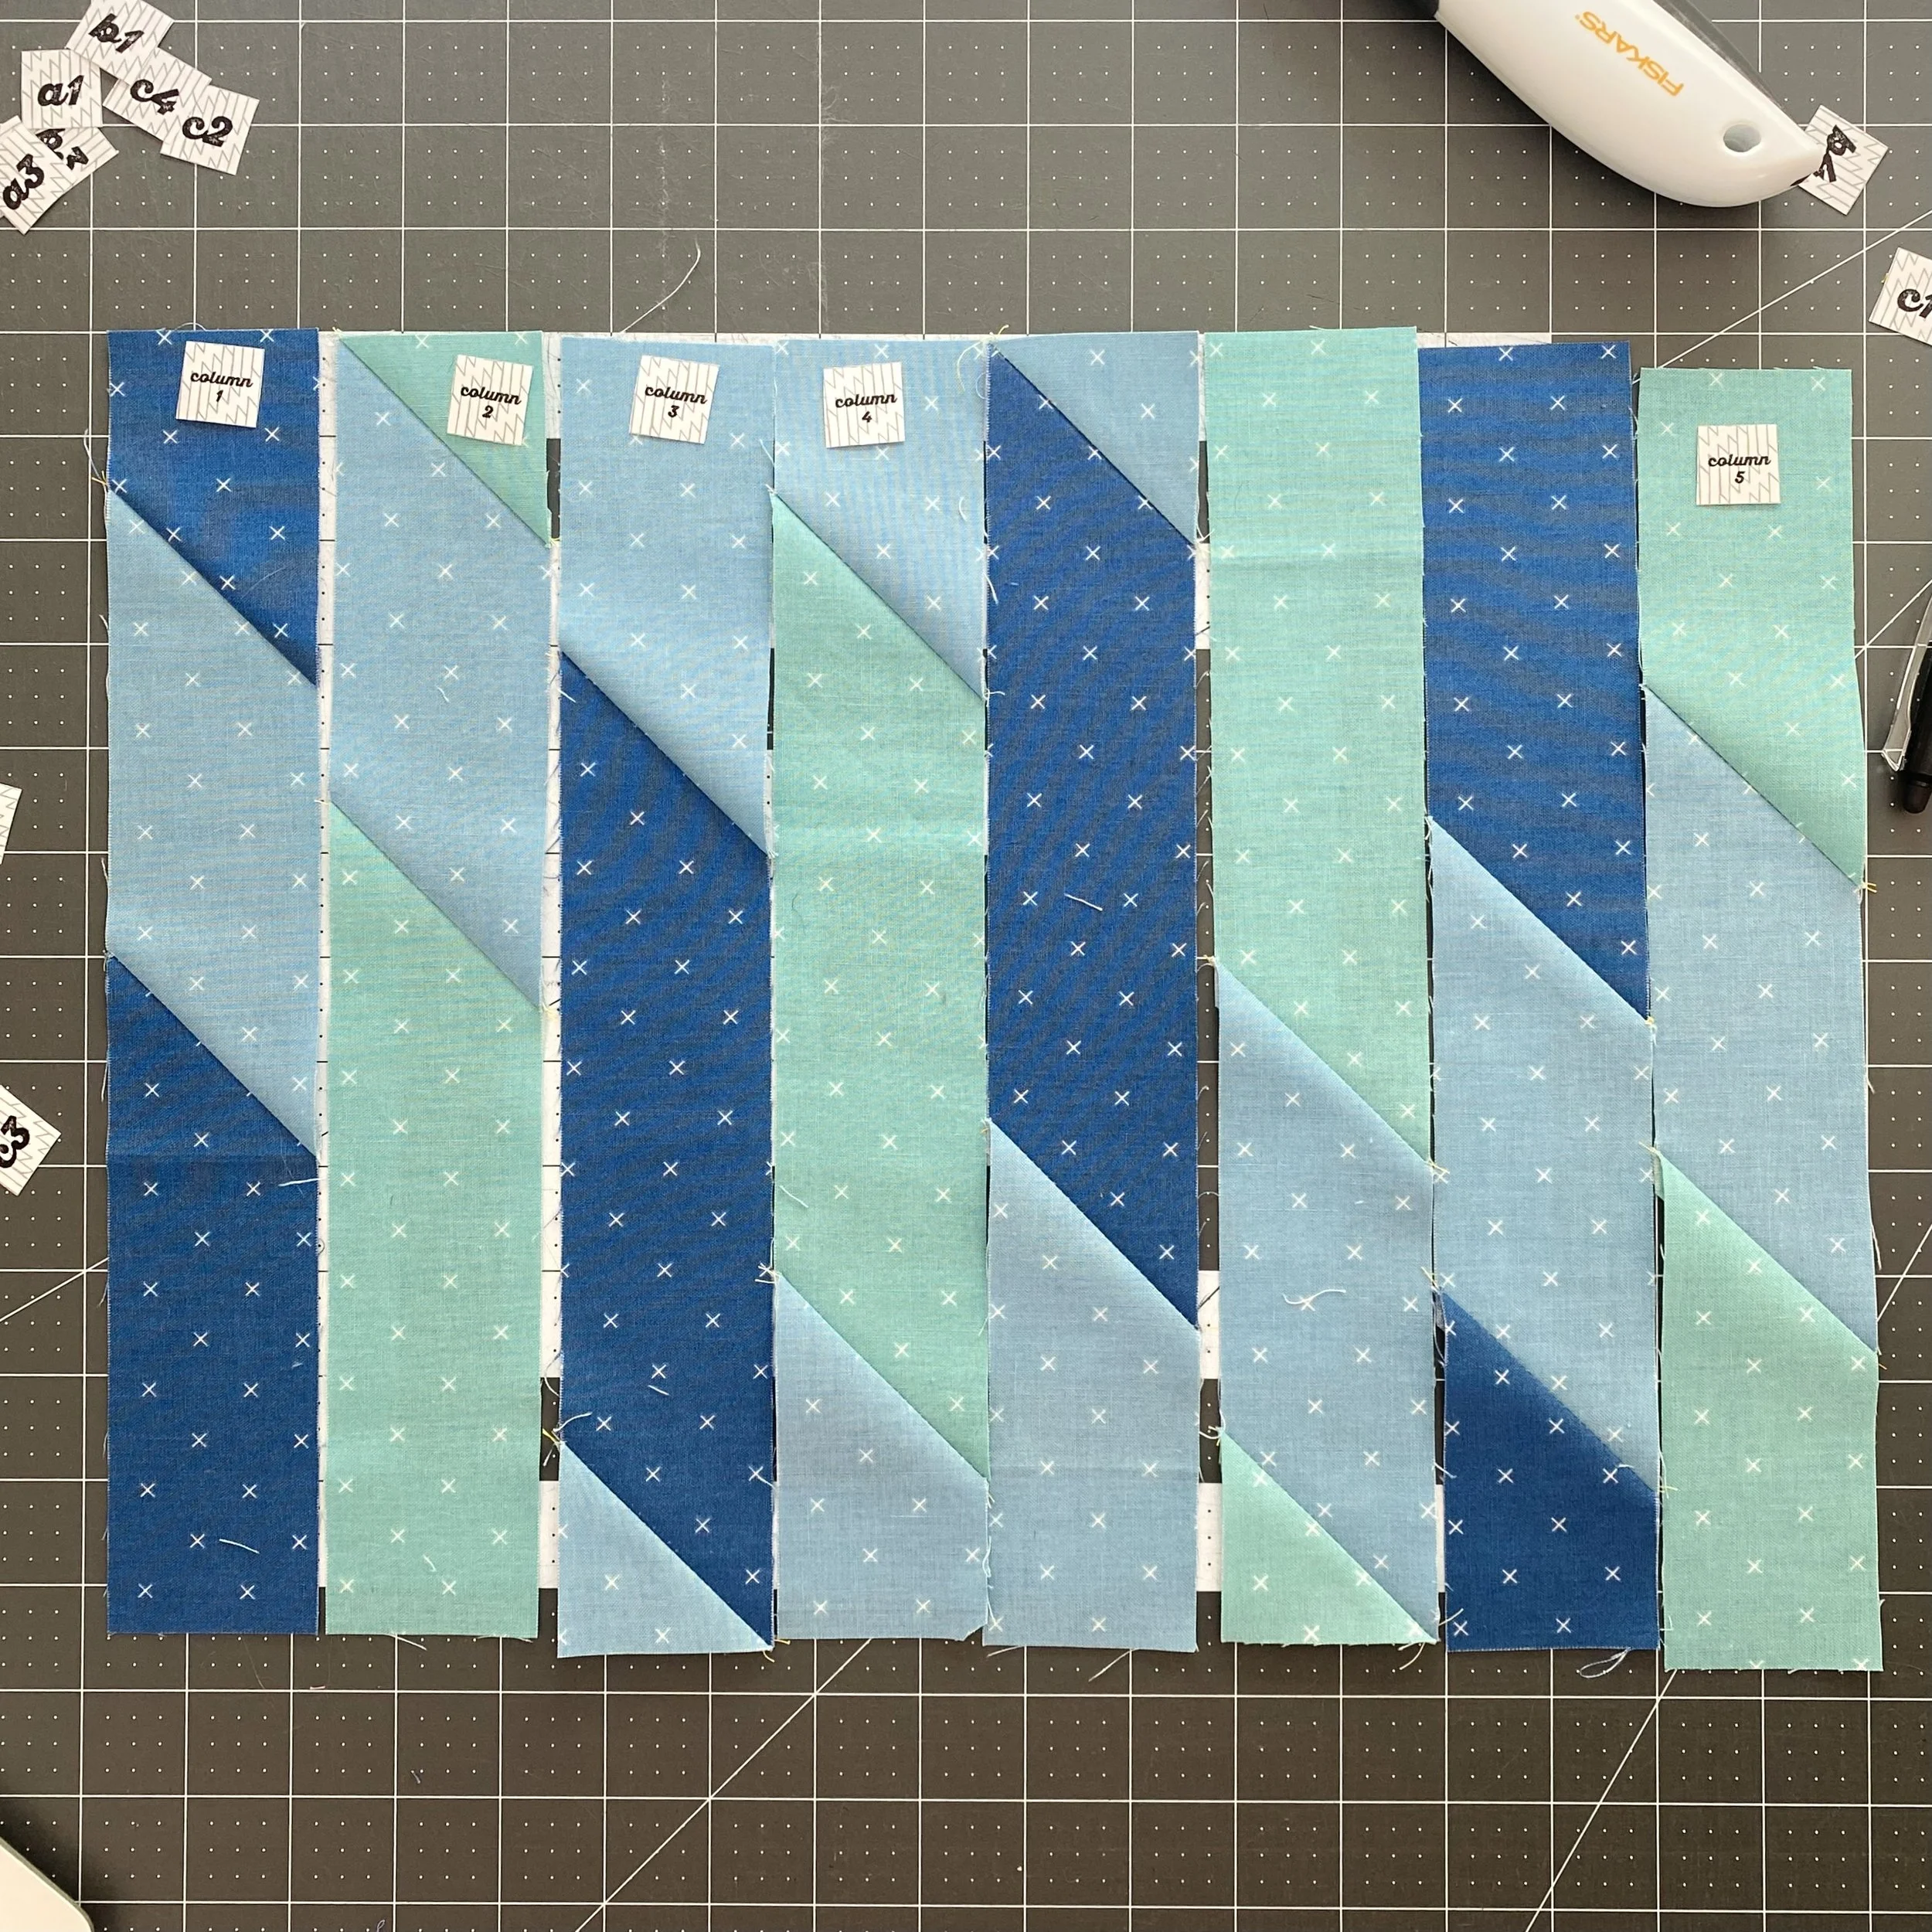
These columns come together so quickly! Laying them out can be a bit confusing, so I like to pay attention to the smallest unit in the column to help me orient everything correctly. Column 1 is used in the first spot - I look to see if the smallest unit is at the top or bottom. Column 2 is placed next - it’s a little more obvious that the smallest unit is at the top. The second Column 2 is used in the sixth spot of the block. You can see that the smallest unit is at the bottom, so I know to flip that block around.
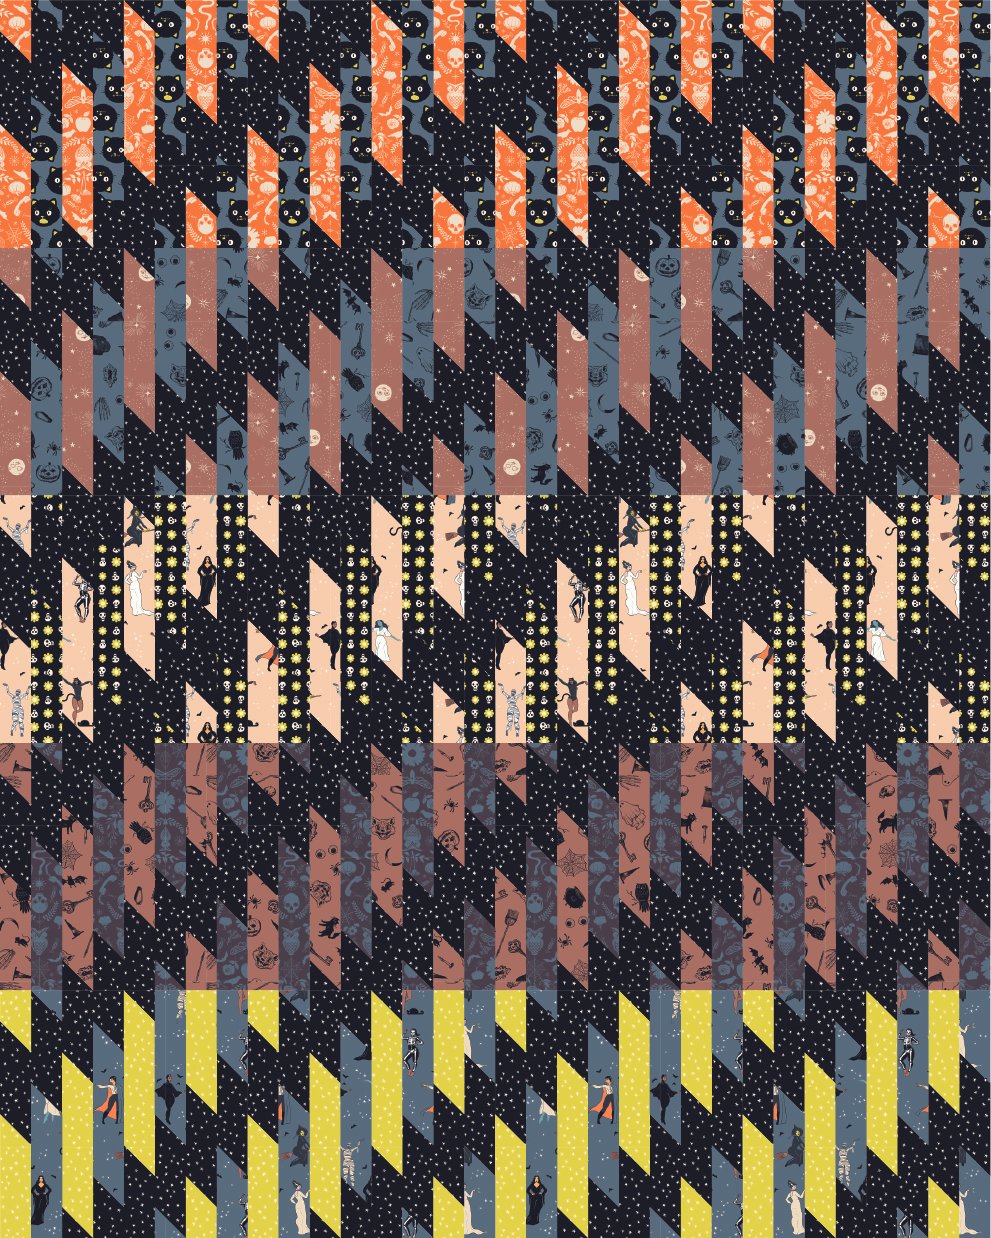
The Incline block is meant to tesselate perfectly when several blocks are sewn together! Make sure you download the bonus sheet - it walks you through how to use yardage to turn the block pattern into a throw size quilt pattern!
Because Halloween is coming up, I couldn’t help but mock up the block up in some spooky fabrics. Check out this version using Ruby Star Society’s Good spirits collection.
Fabric C: Mini Starry Black
Pairs of fabrics are as follows:
Creepy Damask/Scaredy Cats Ghostly
Wise Moons S’mores/Curios Ghostly
Hey Boo Creme Brulee/Loves Me Not Black
Curios S’mores/Creepy Damask Caviar
Mini Starry Citron/Hey Boo Ghostly

If you want something more appropriate to use year round, here it is in the new RSS Speckled fabric. I think this version works particularly well when you use one color in different values for each row.
Fabric C: Creme Brulee
Pairs of fabrics are as follows:
Chambray/Water Blue
Goldenrod/Golden Hour
Playful/Flamingo
Verdant/Pistachio
Lupine/Macaron
What do you think of these mock ups? Let me know how your block came together. Send me an email, or share your progress on Instagram with #learningcurvesbom and #inclinequiltblock.