
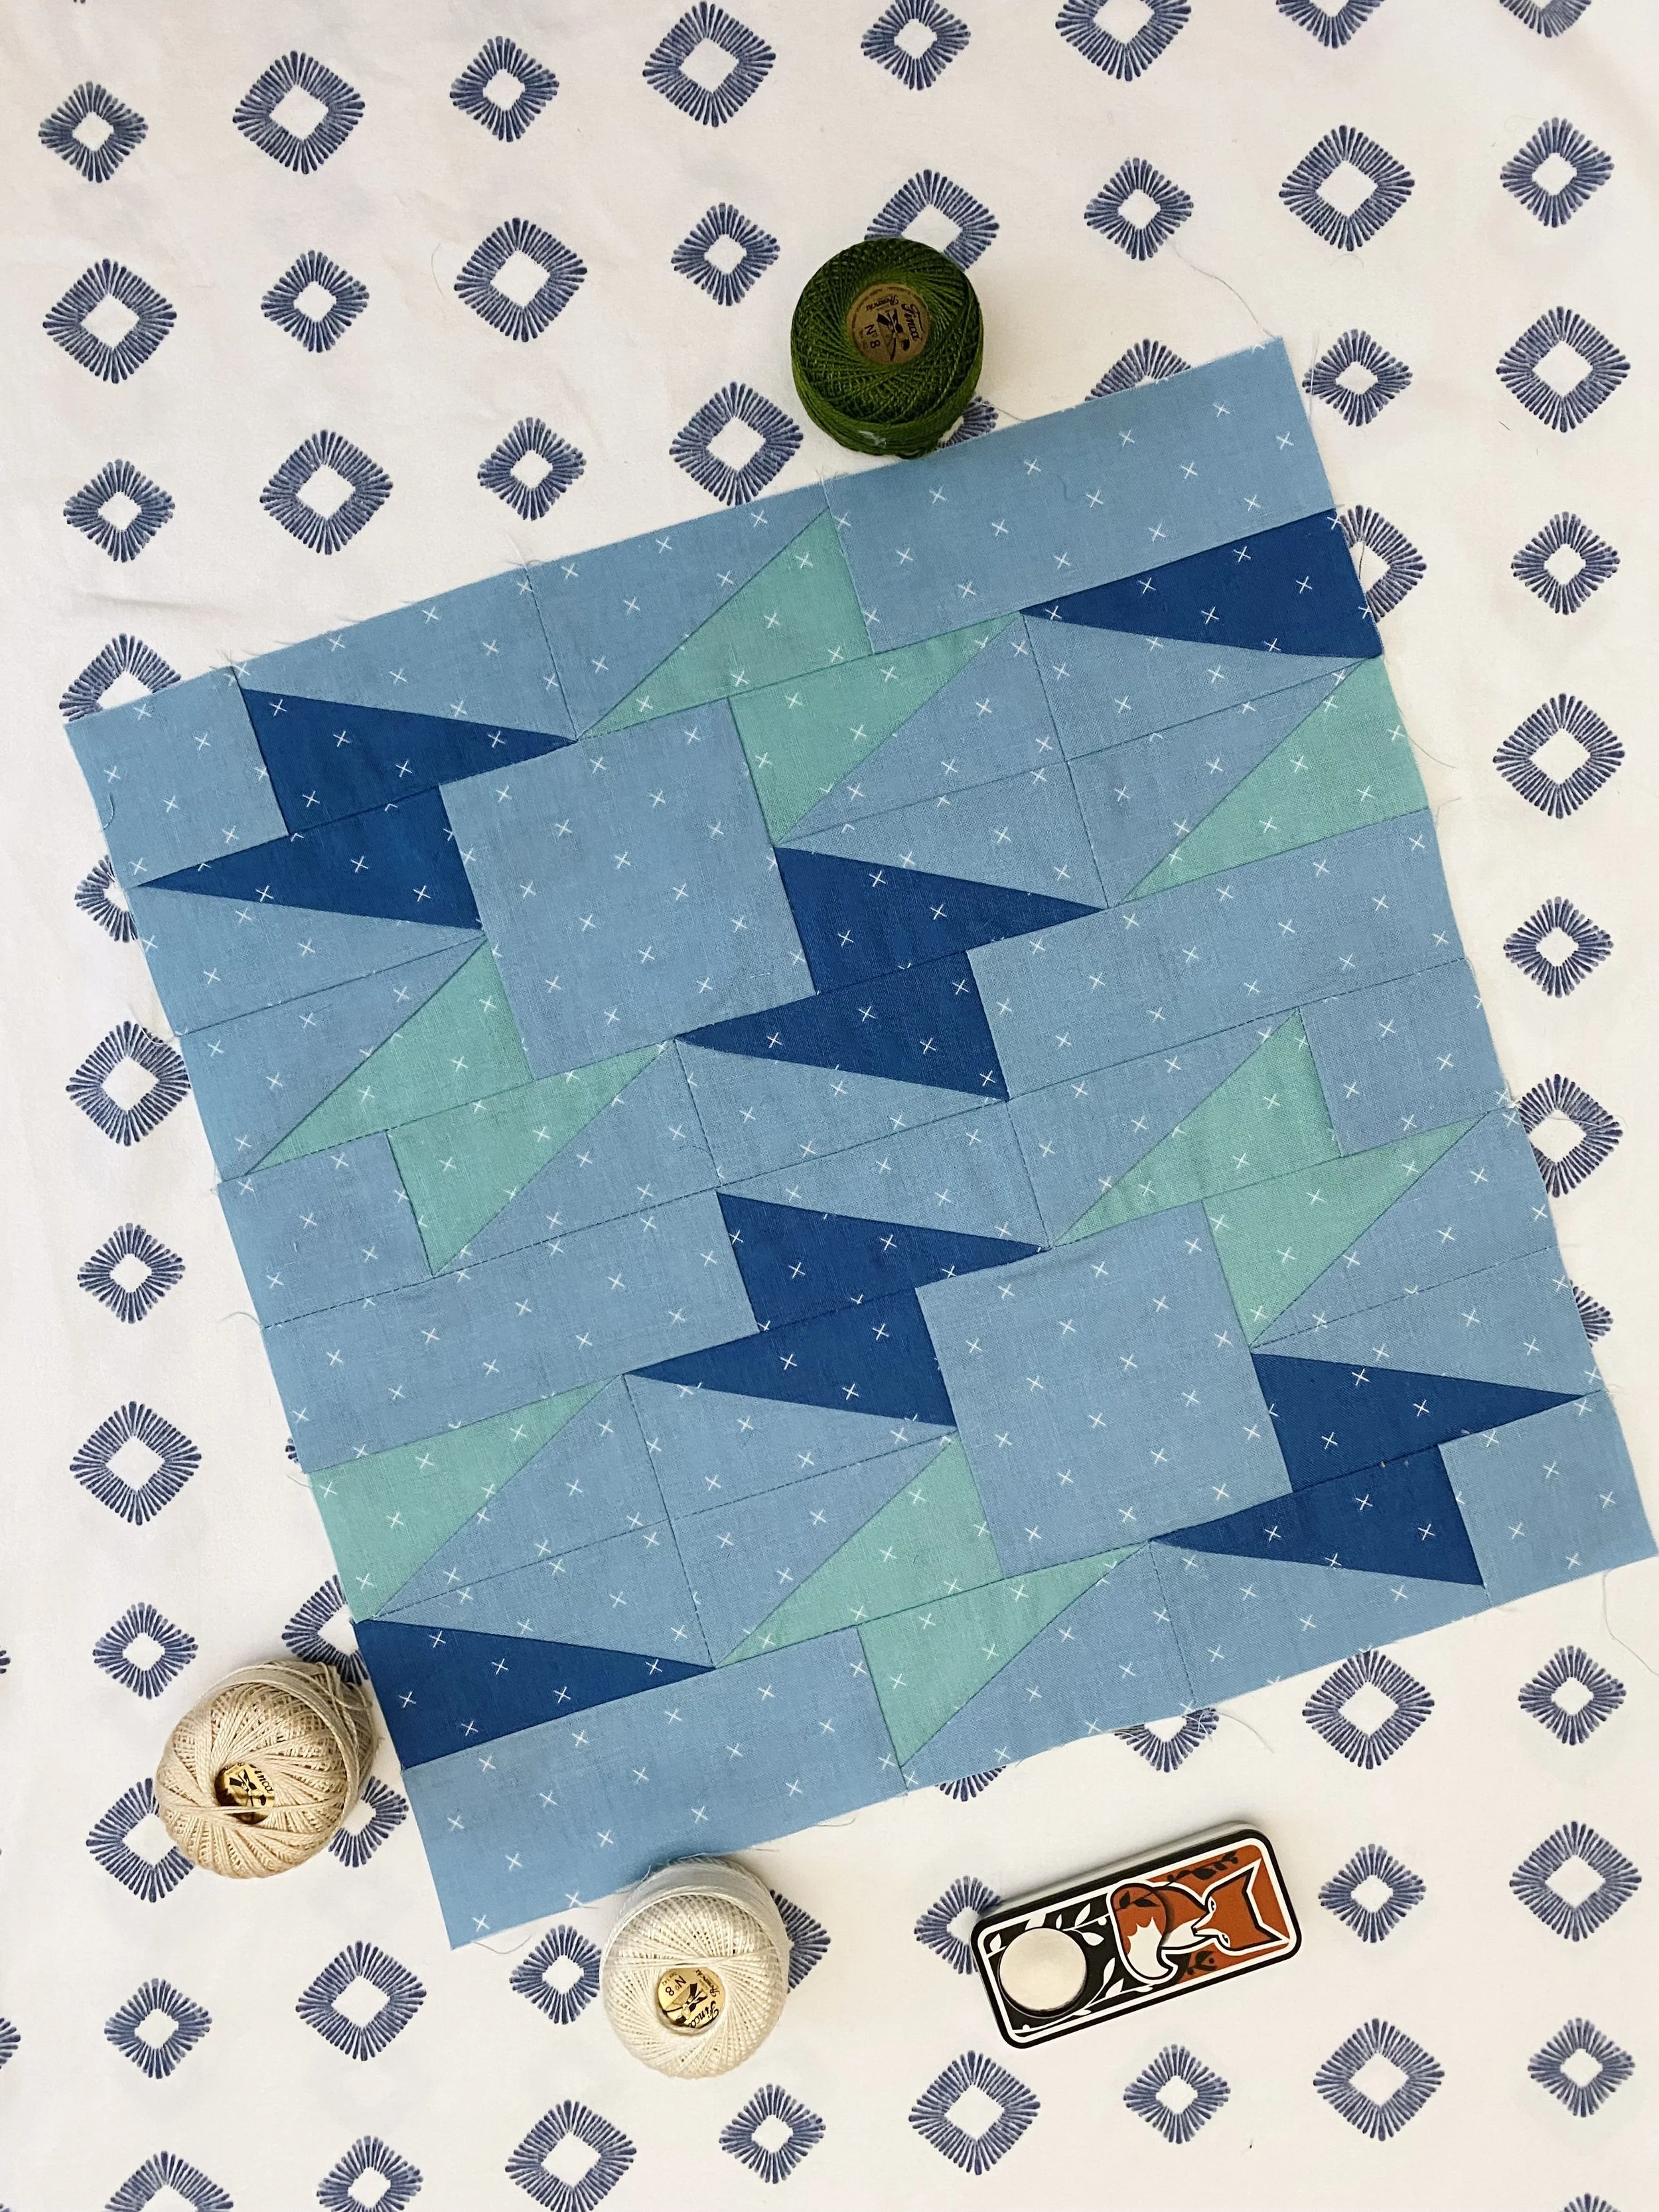
This month, we’re getting a respite from curves.
Instead, we’re working on HRTS. I know, I know. I think HRTs can be even more controversial than curves, but they are among my favorite quilt blocks. Startle was the last of the non-curve blocks I designed for the Learning Curves BOM. By then, I knew that I wanted all the blocks to either tesselate perfectly or look beautiful when laid out in a full quilt top. Startle is definitely in my top 3 when I consider what the block looks like when laid out as a full quilt top.
The fabrics I’m using are Bee Cross Stitch, designed by Lori Holt for Riley Blake Designs.
Fabric A: Denim
Fabric B: Cottage
Fabric C: Soldier
Fabrics were provided by Riley Blake Designs.
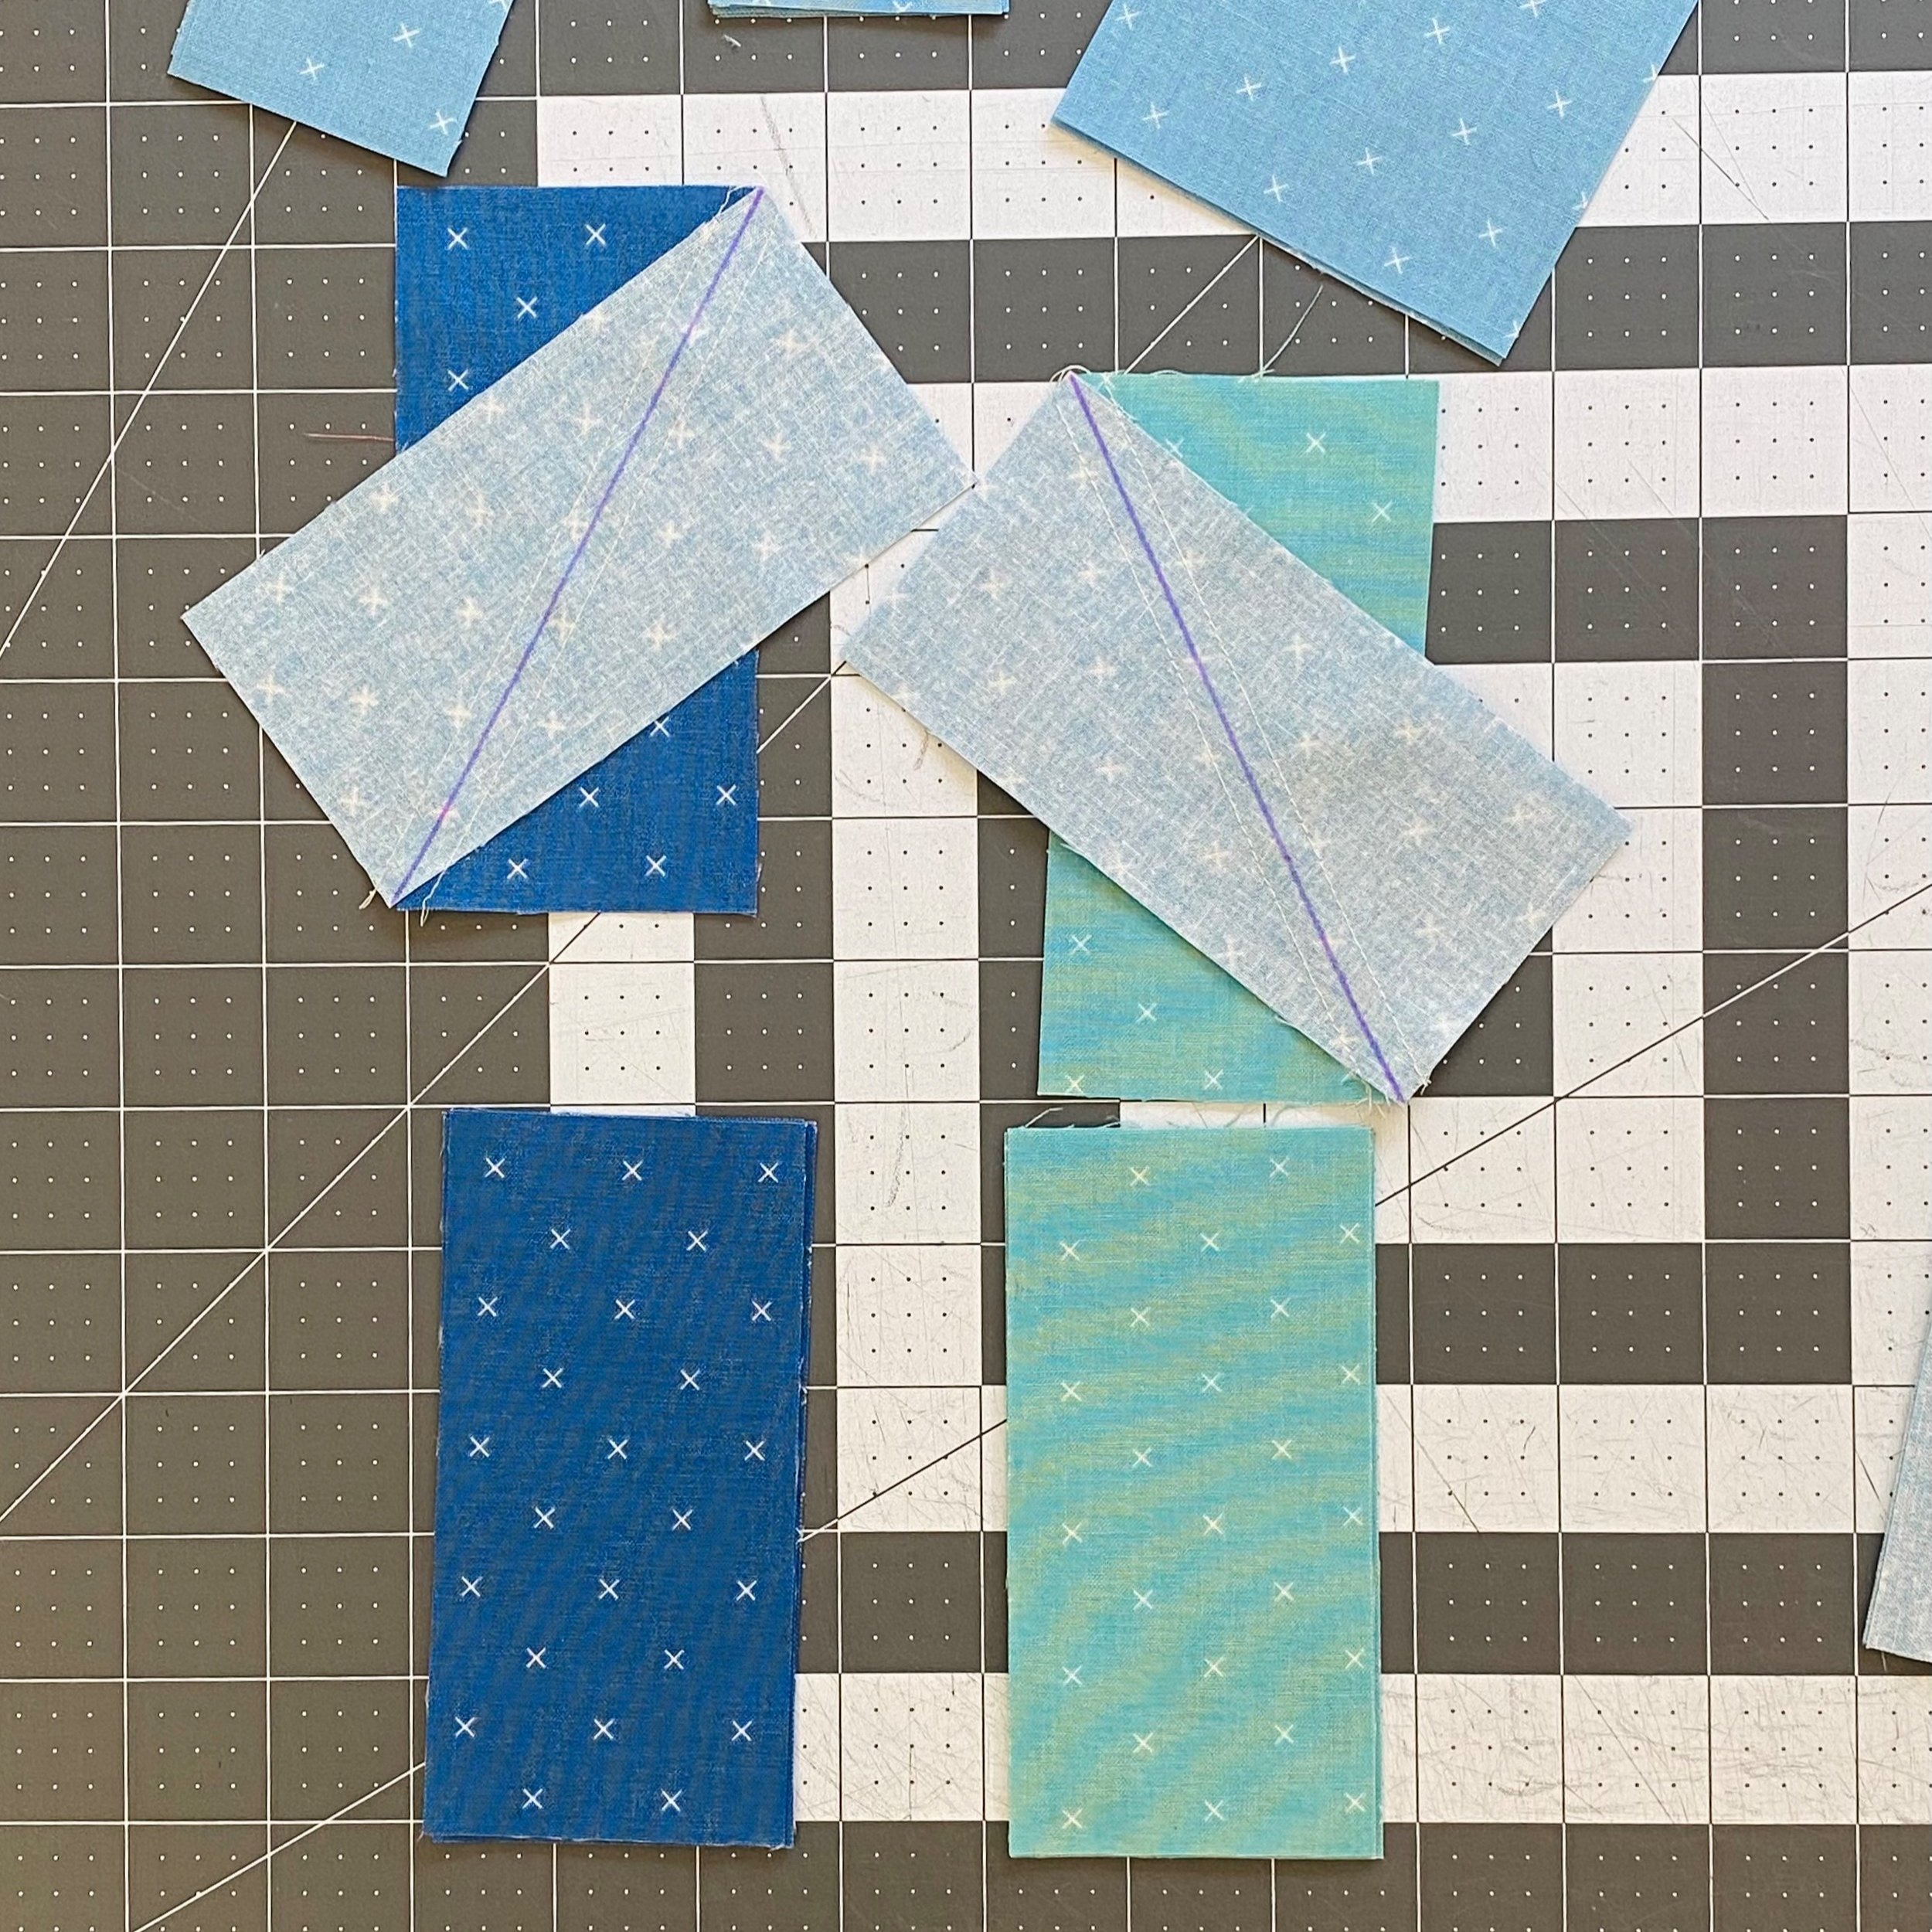
All About HRTs
I know HRTs confuse some folks, so we’ll break down the construction a bit. First thing first. Don’t bother thinking about HSTs. They are different, the proportions are different, the construction is different and the trimming is different. Put them out of your mind completely. If you try and compare making HRTS to HSTs, you’ll only be disappointed.
There are left and right leaning HRTs. One cannot be exchanged for the other. The Startle block pattern uses both, and constructs them with the 2-at-a-time HRT method. To help keep straight in your mind which HRT you are making, remember that whatever direction you draw your line, your final HRT with run in the opposite direction. Make sure you draw half the lines in one direction, and half in the opposite direction. I like to put half aside so I don’t get my HRTS confused.
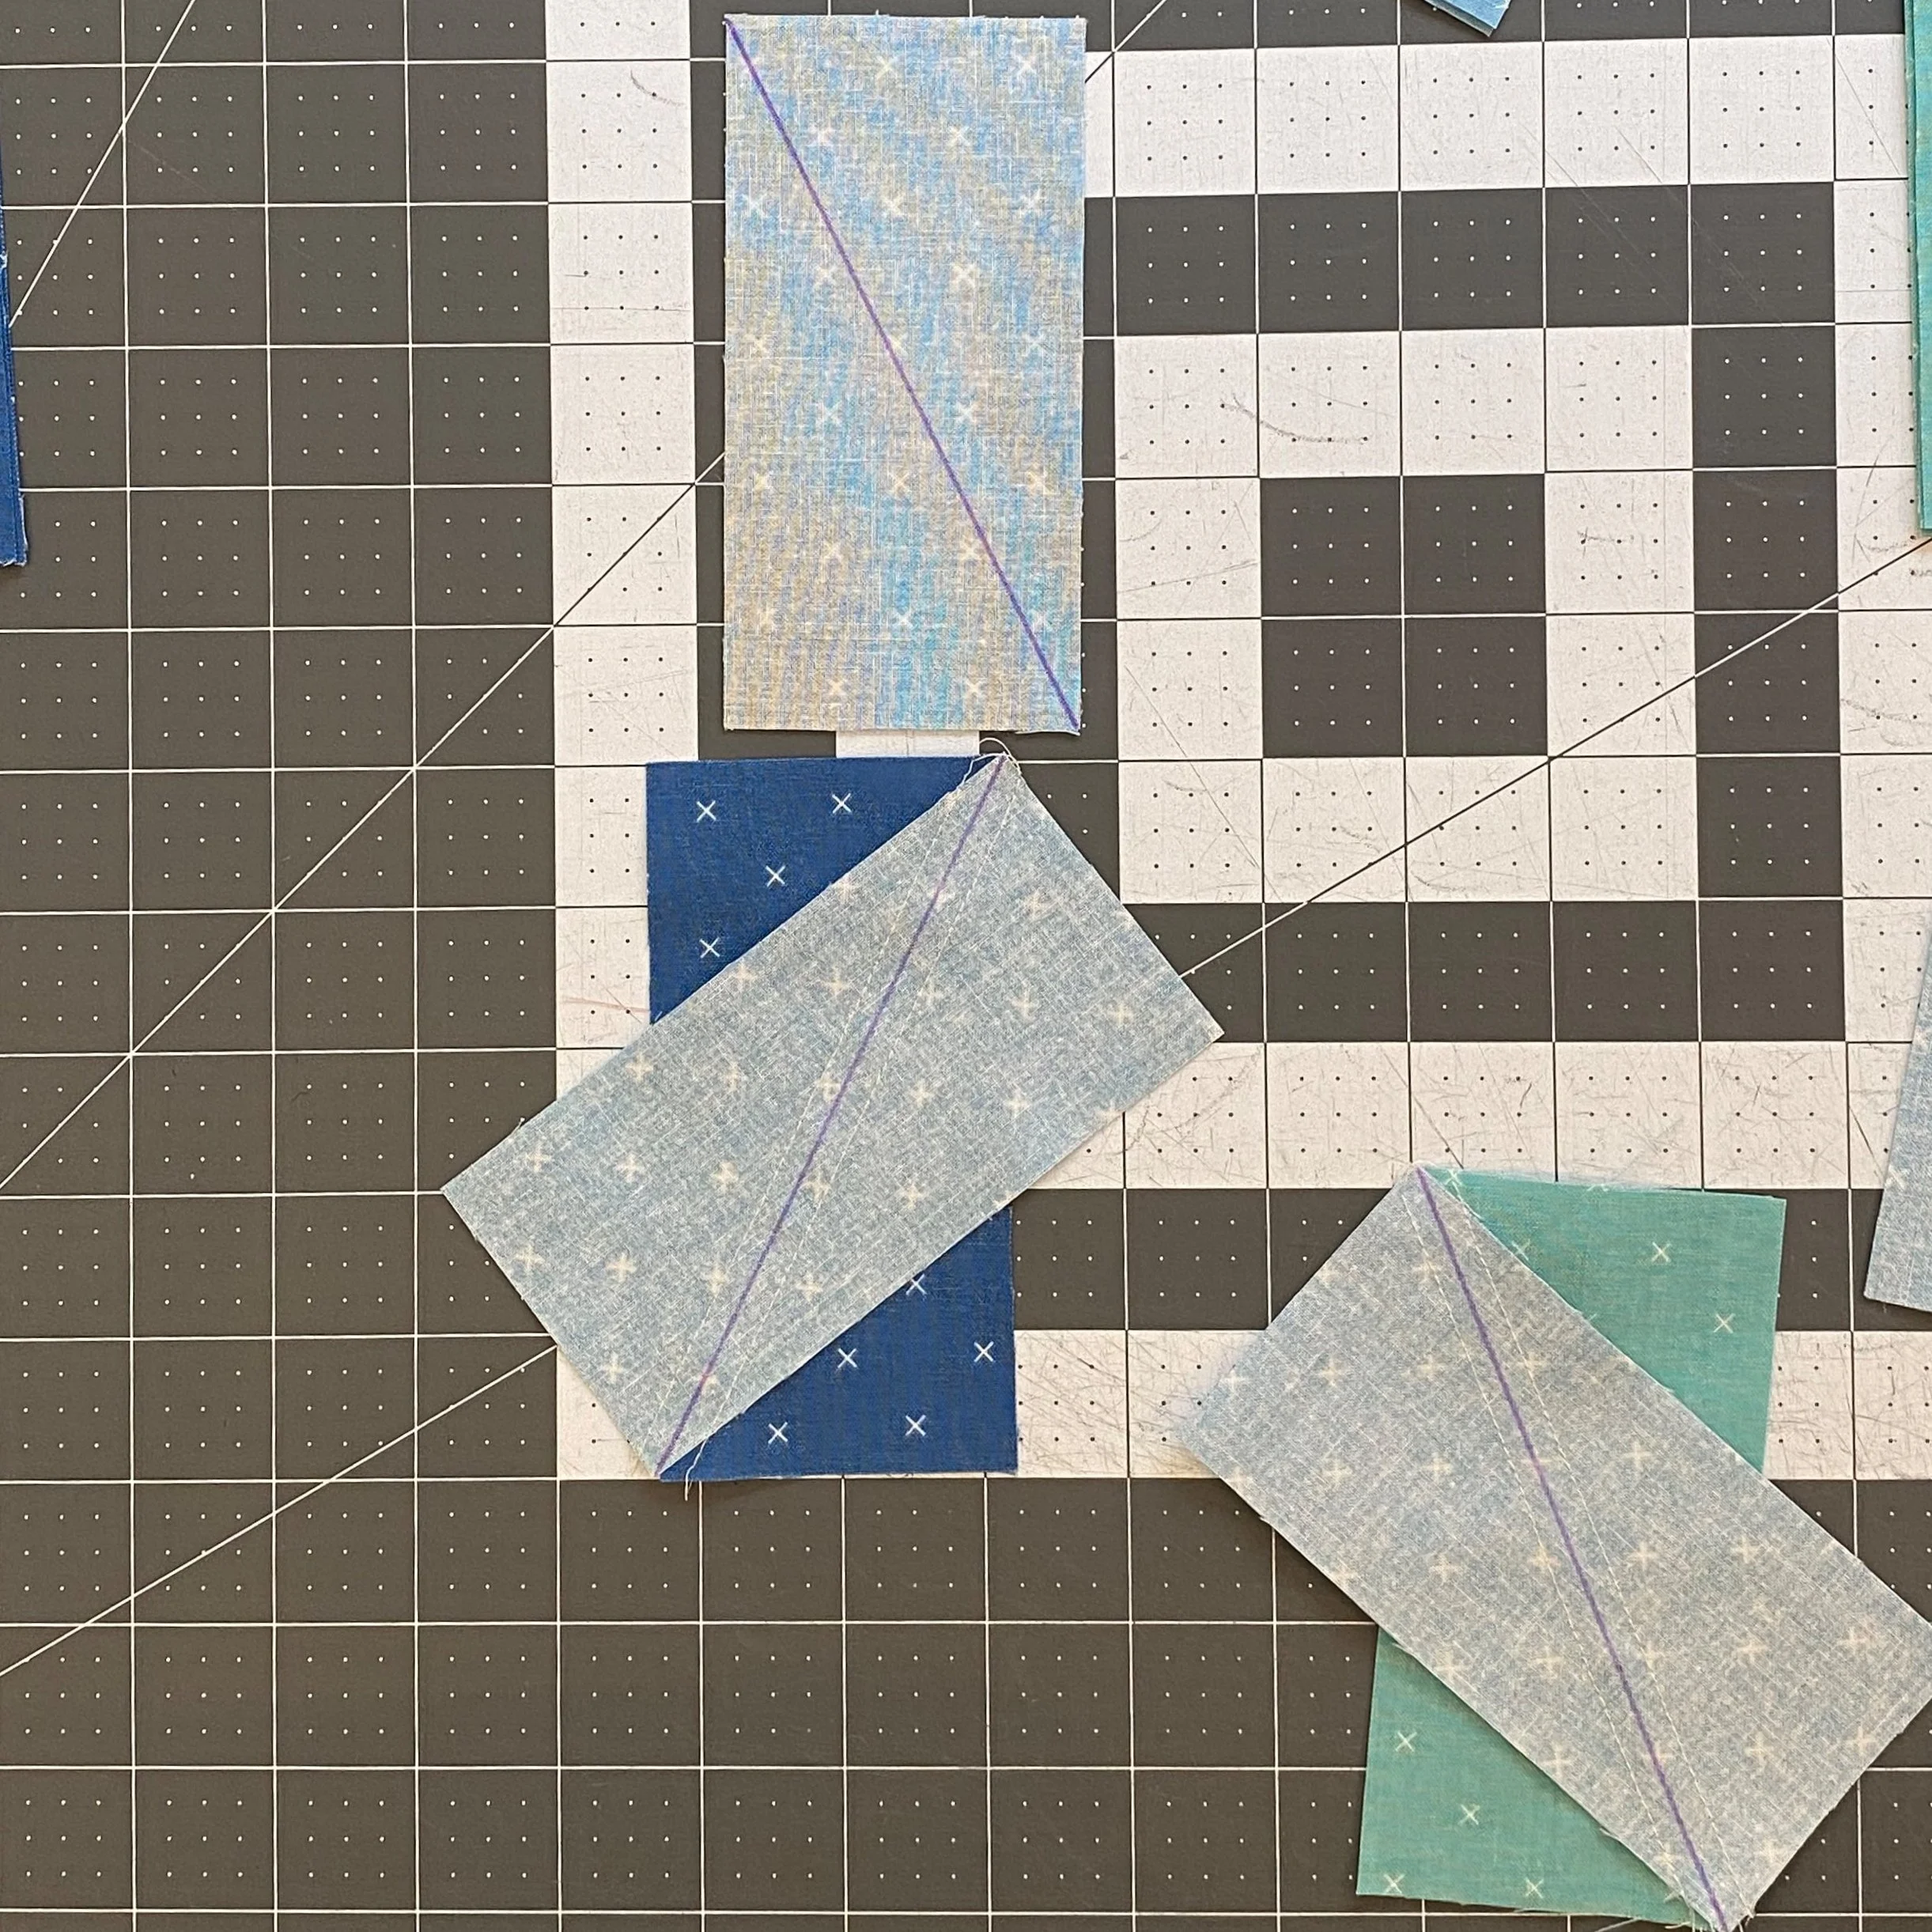
Right Leaning HRTs
We start by drawing a diagonal line on the wrong side of a Fabric C rectangle. From here, we align the Fabric C rectangle with a Fabric A rectangle. Don’t align like you would if you were just piecing two rectangles together. You want the drawn line to run diagonally on the Fabric A rectangle.
Once everything is aligned, I recommend using at least one pin. You will be sewing on a bias angle and you’ll want to prevent too much shifting. I use just one pin somewhere in the middle of the drawn line. I recommend using a very scant seam allowance to sew ¼" away on both sides of the line. The more scant the seam, the more trimming room you will have later.
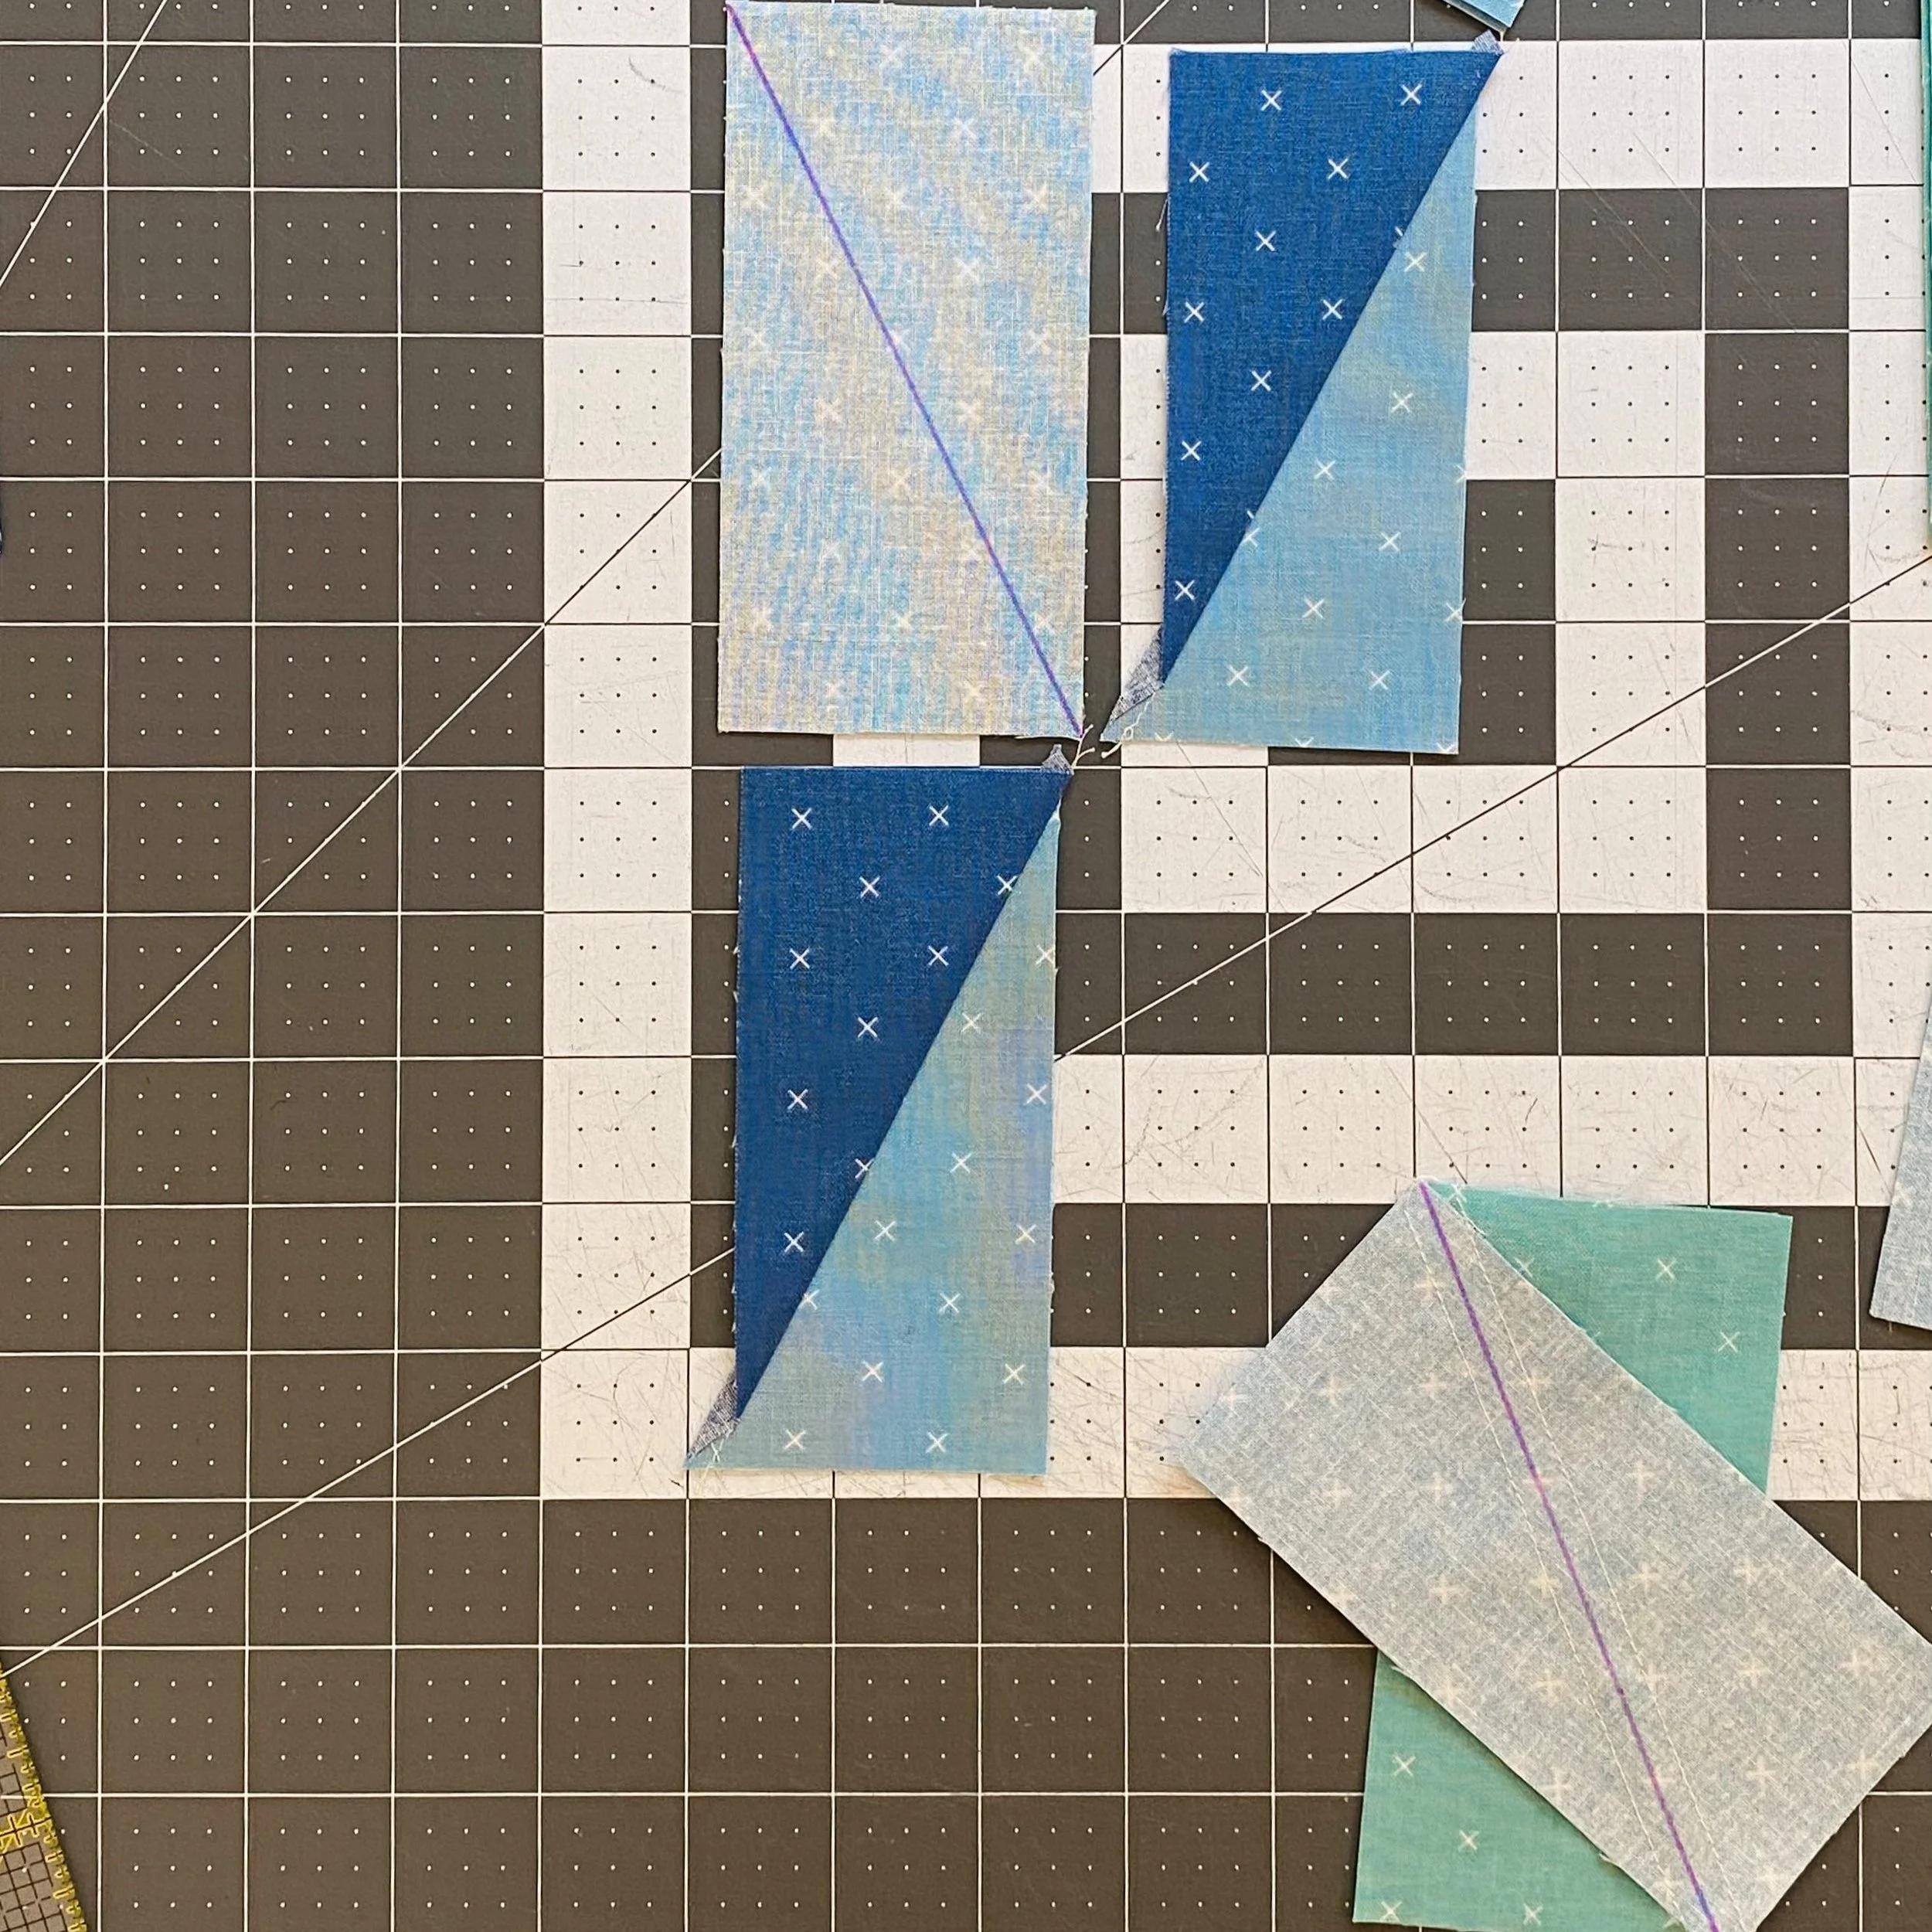
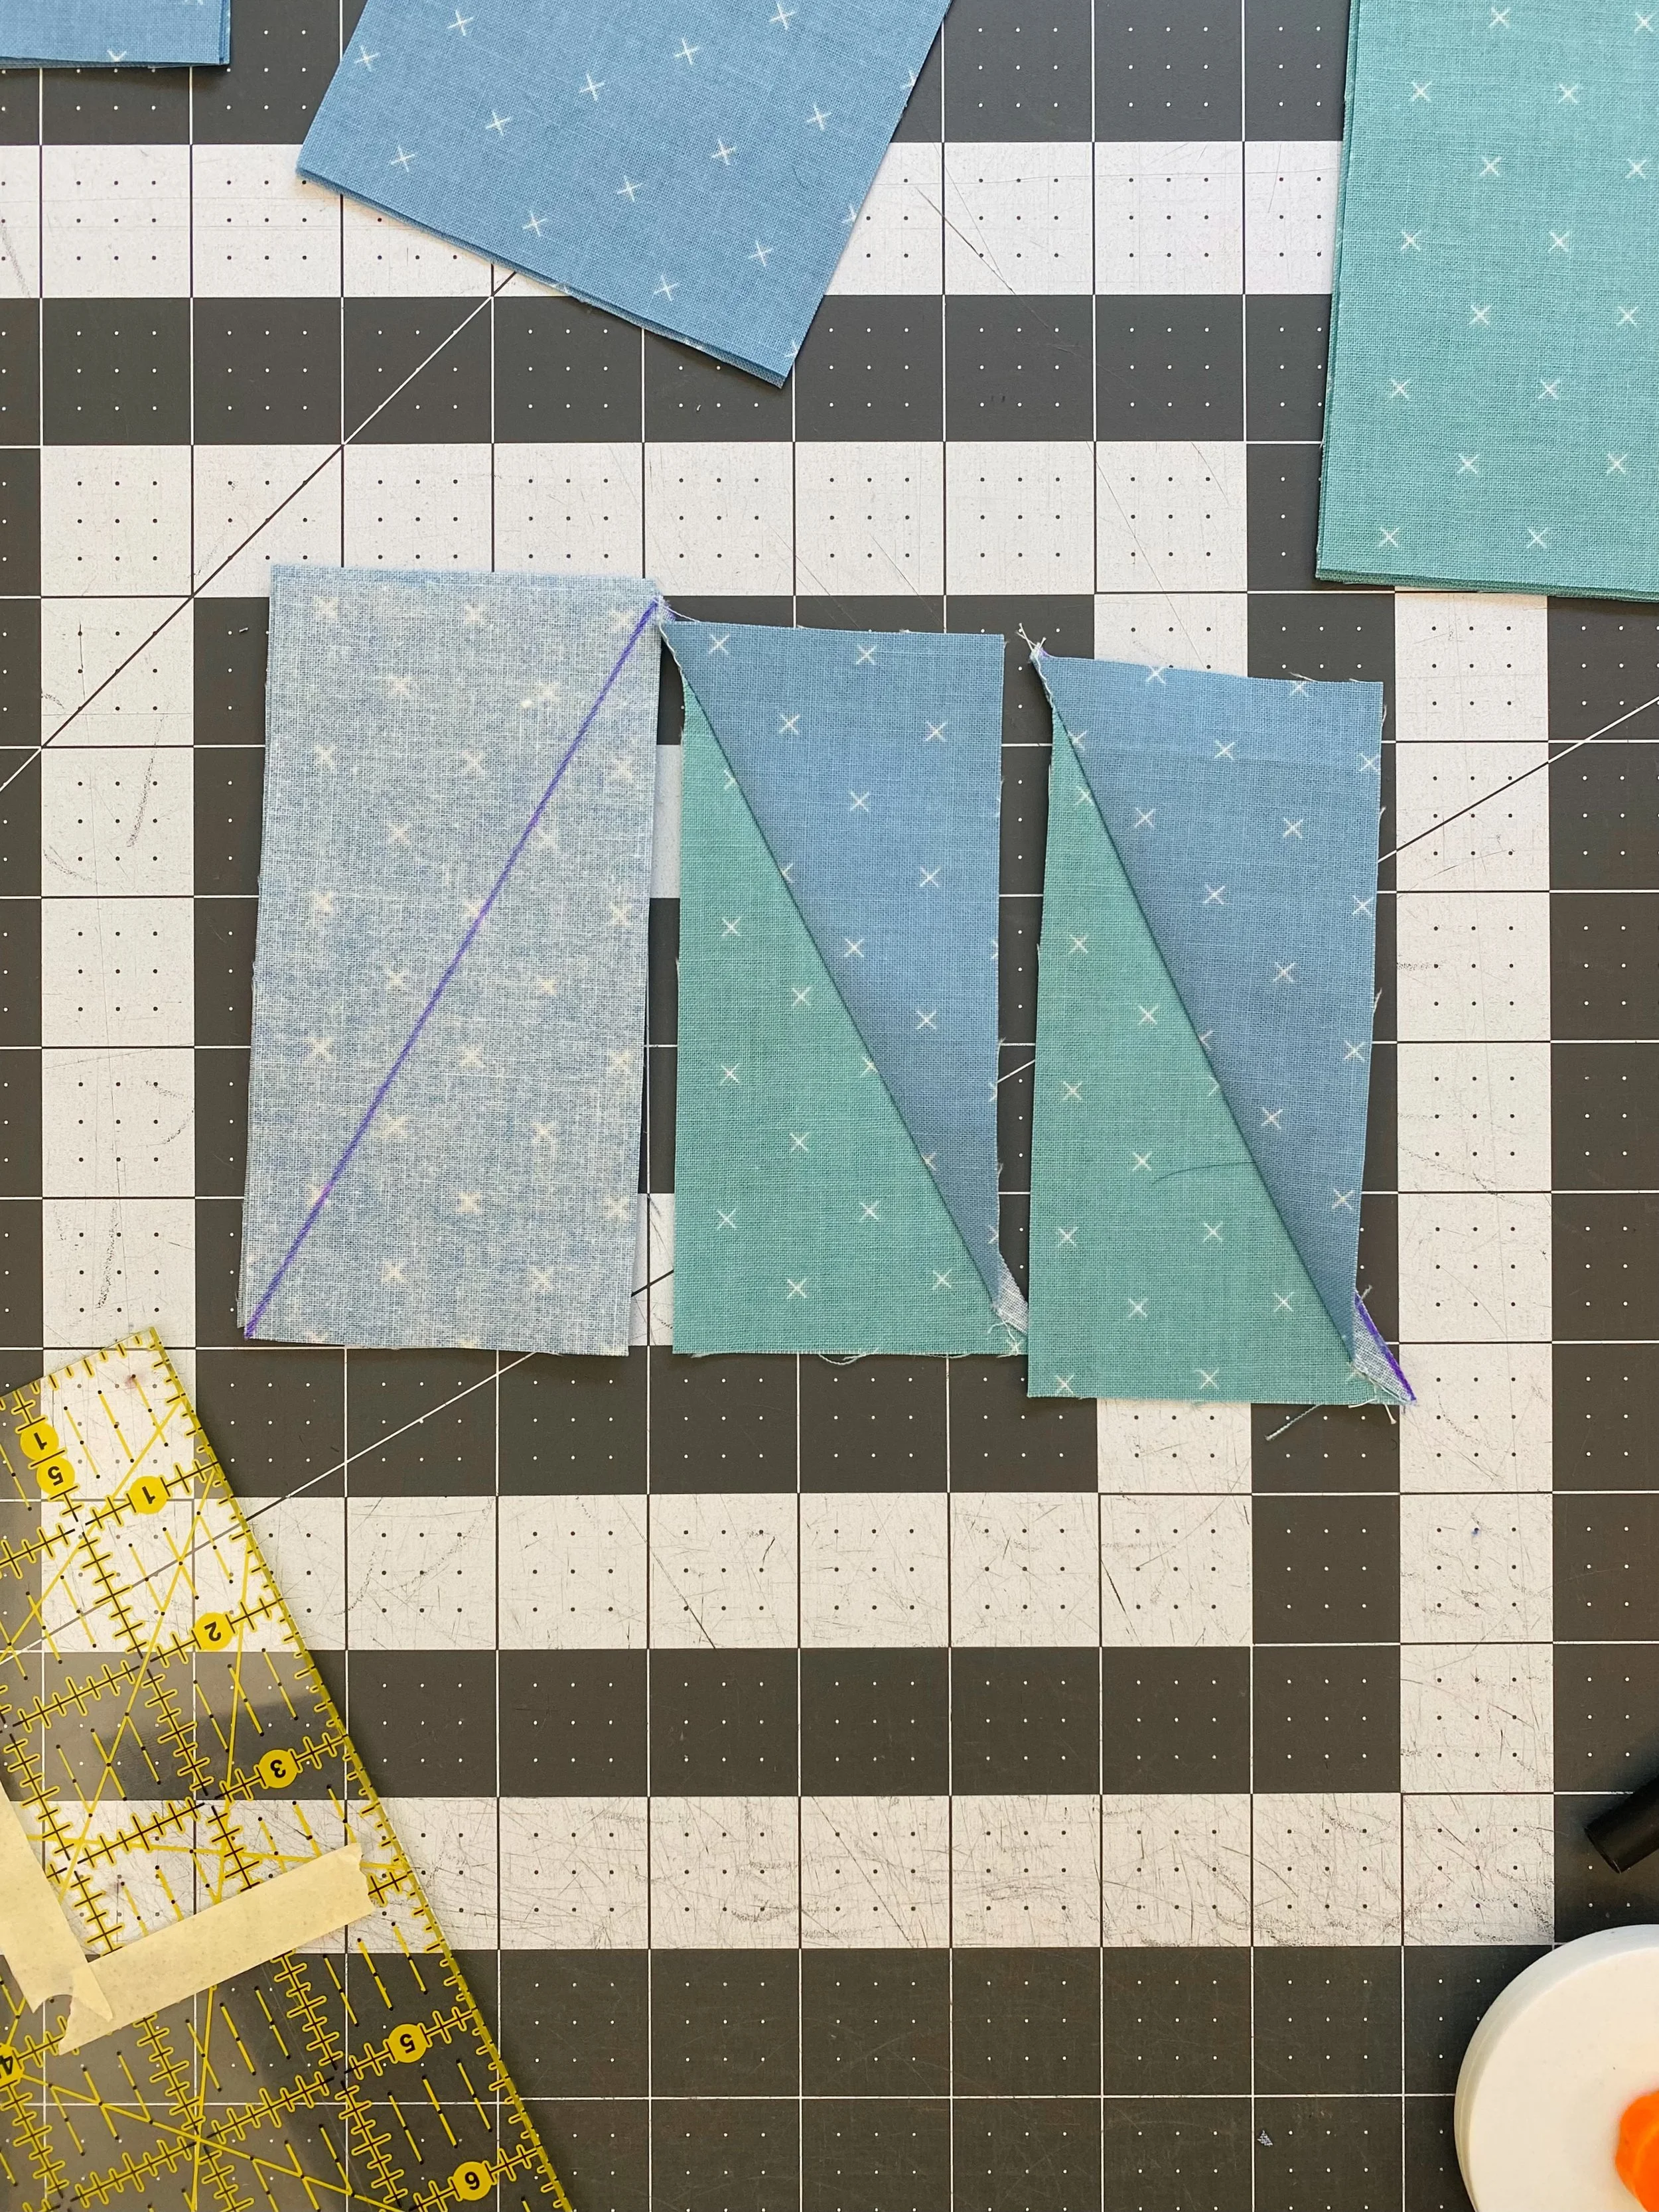
After you’ve sewn down both sides of the line, cut along the drawn line and press. The HRTs can be pressed open; the pattern pressing directions indicate to press to the side, but only so the HRT seams nest in final construction. You can see in this picture what I mean when I say the initial drawn line runs opposite to the final direction of your HRT.
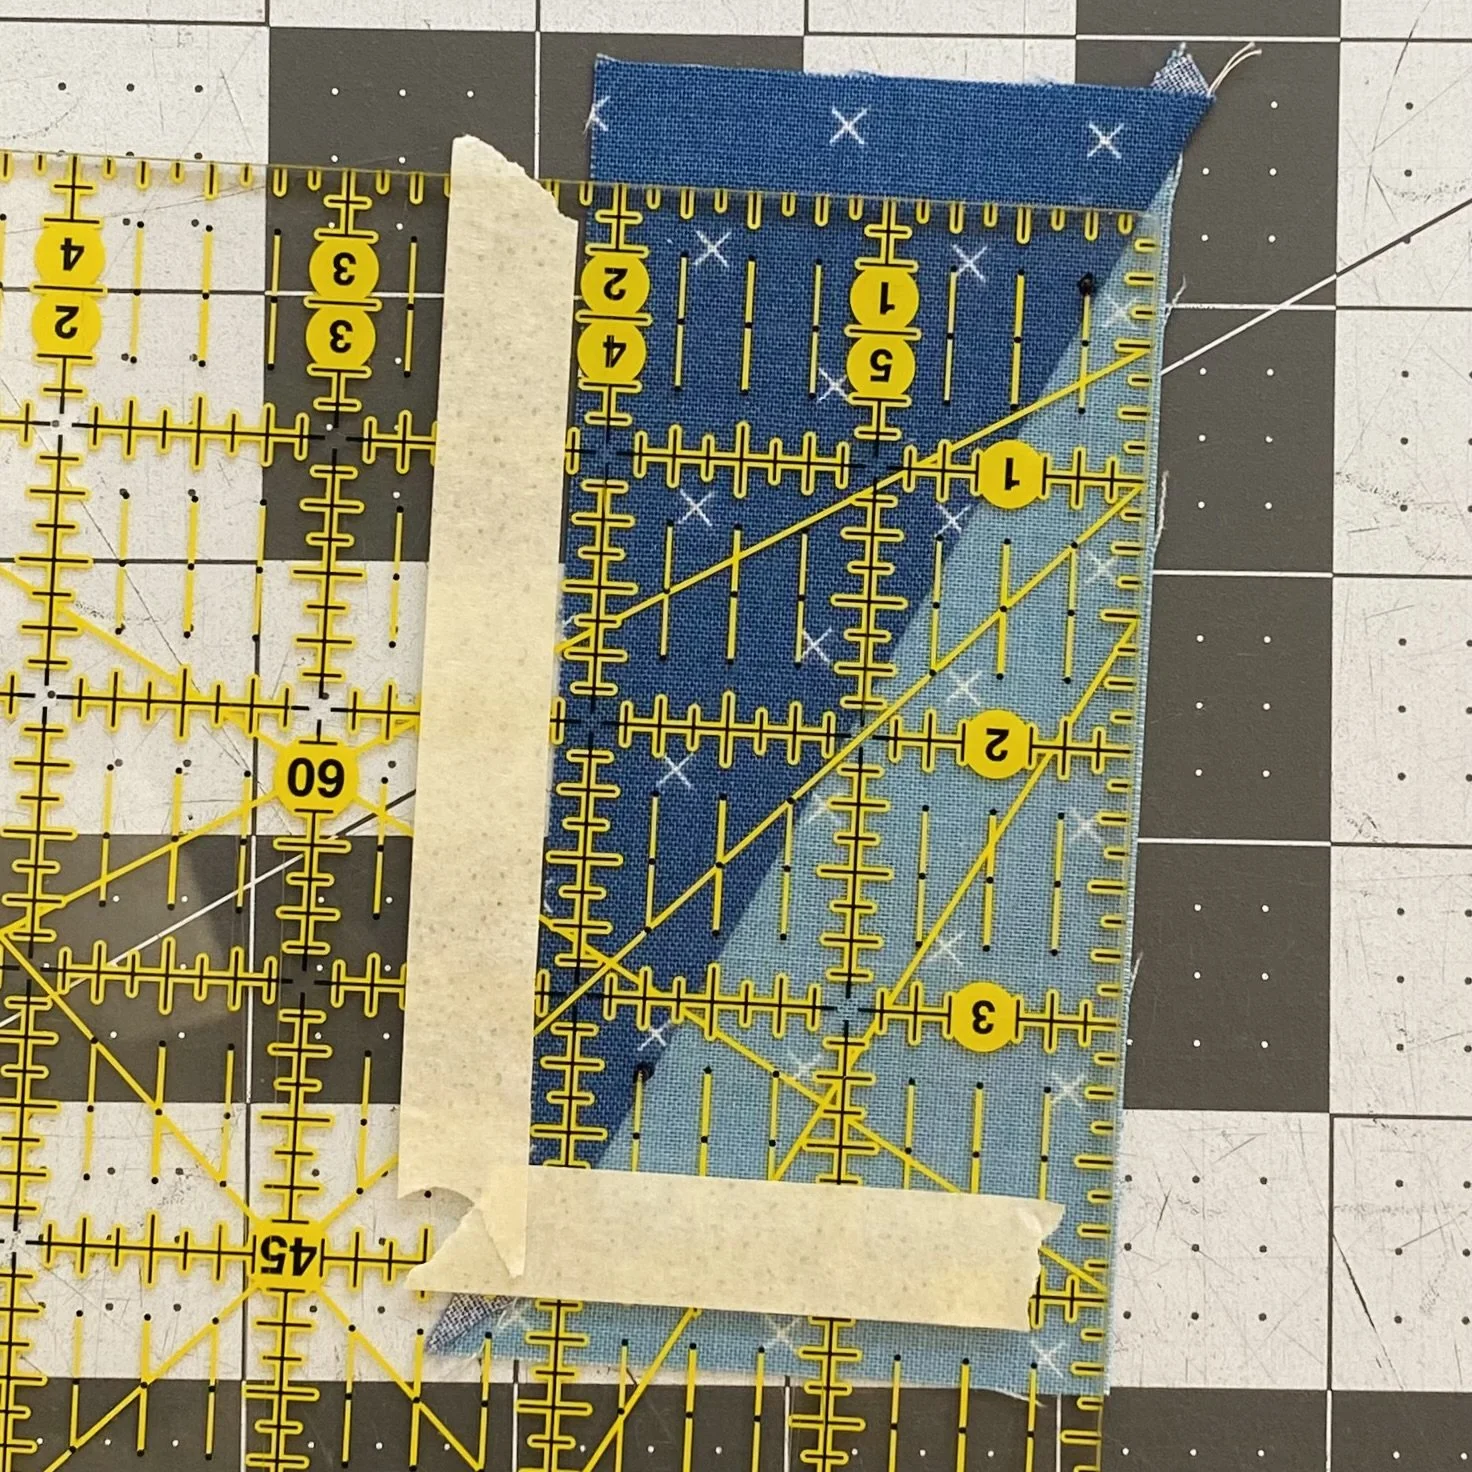
Next up is trimming. Before talking about the ruler, I invite you to look closely at this picture. See how little room for trimming there is along the long vertical sides of the HRT? It’s worth repeating that the more scant your seam allowance is, the more trimming room you will have.
The pattern tells you where to mark your points. I use the nearest marker I can find, but a sharpie would 1) work, 2) be very visible and 3) come off with a little rubbing alcohol. I like to add tape marks to the ruler at 2" and 3 ½" lines. I actually put the tape about ⅛" away, so I can clearly see the lines I’m interested in.
Align the block for trimming by making sure the diagonal line falls on the marked points.
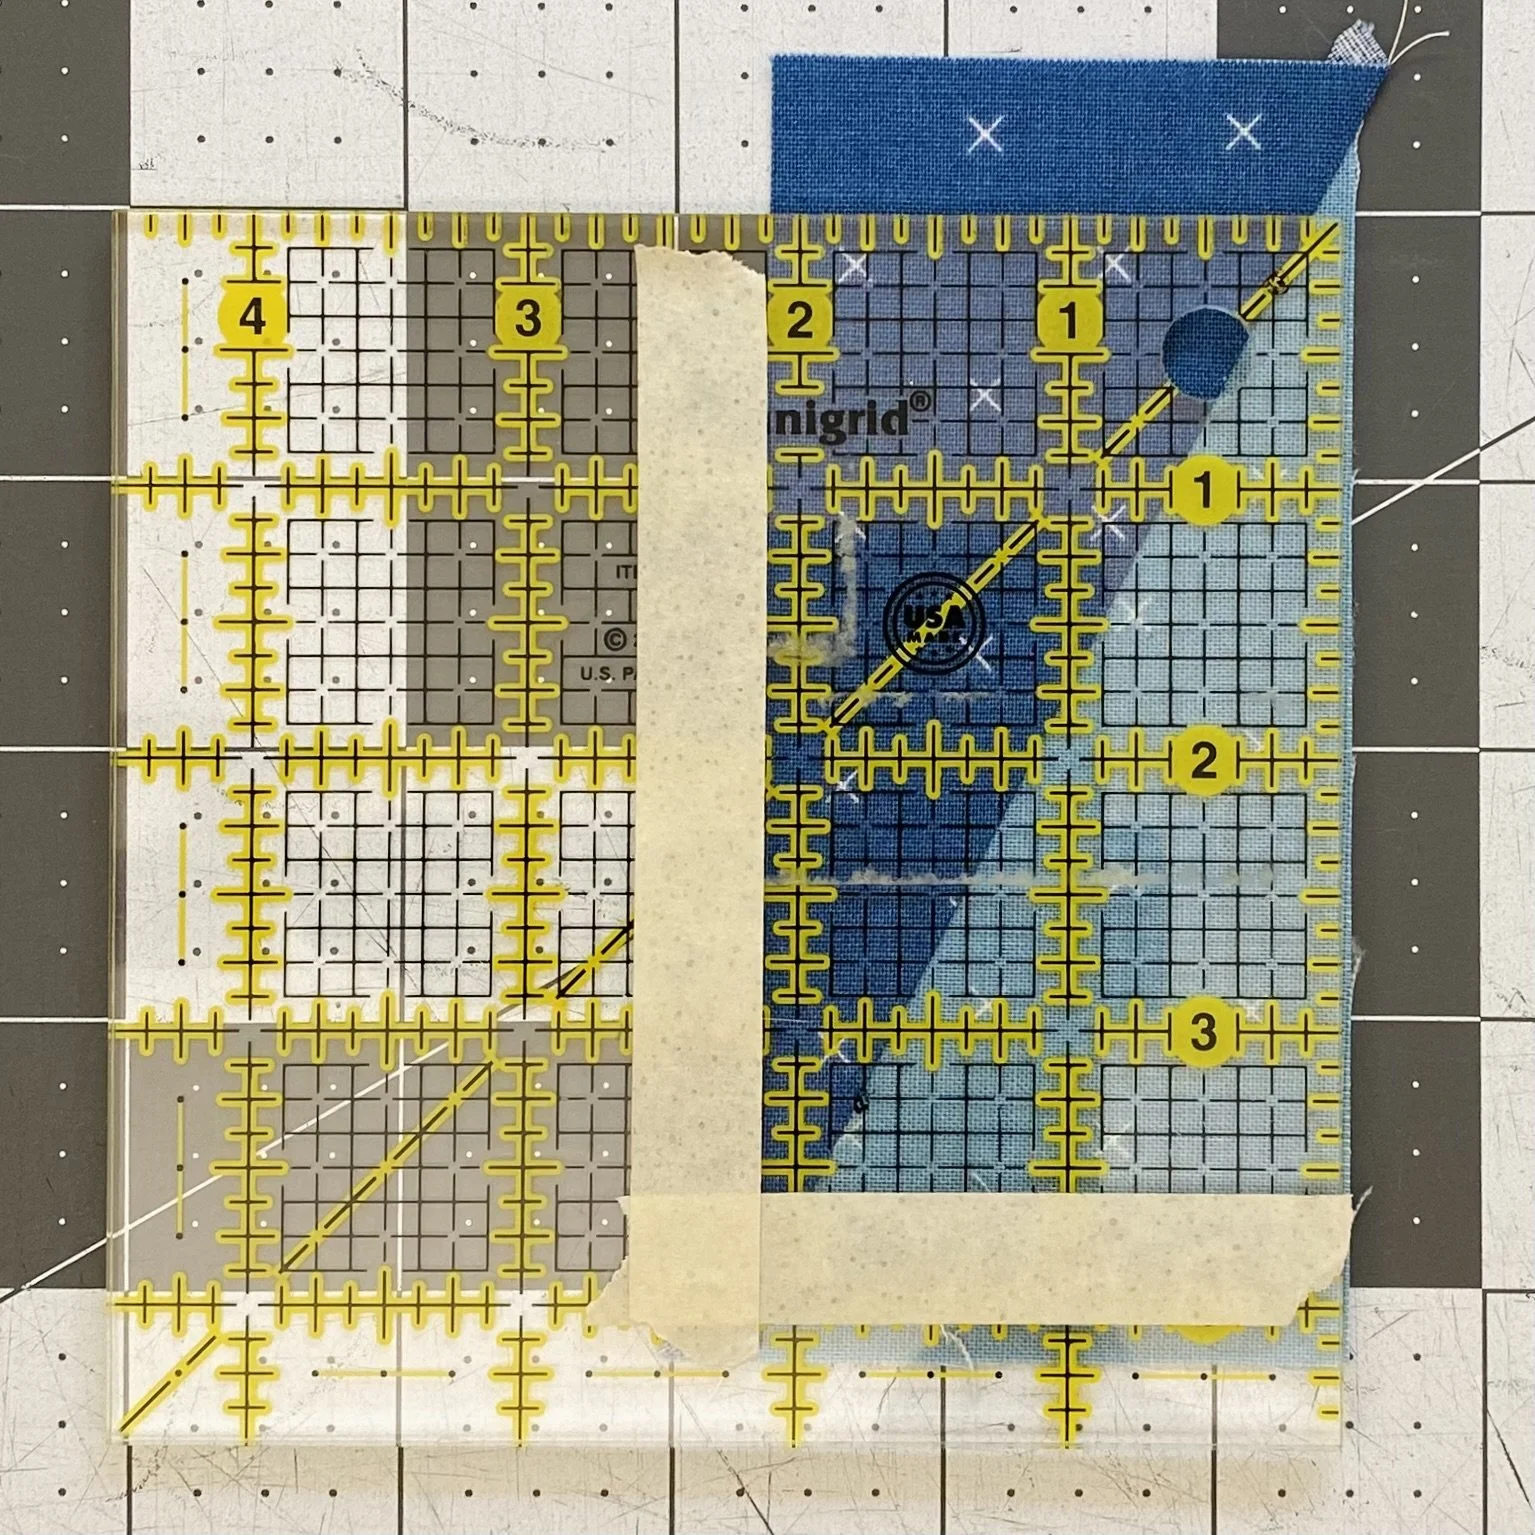
Generally, I’m not too picky about which rulers I use. But for HRTs I don’t like to use rulers with ⅛" lines, like this ruler. I think the lines make it difficult to see the block. I prefer to use blocks like the previous picture, with just ¼" lines.
Left Leaning HRTs
To make the left leaning HRTs, the process is identical. Make sure you remember to switch the direction of the drawn line and change the marked points on your ruler.
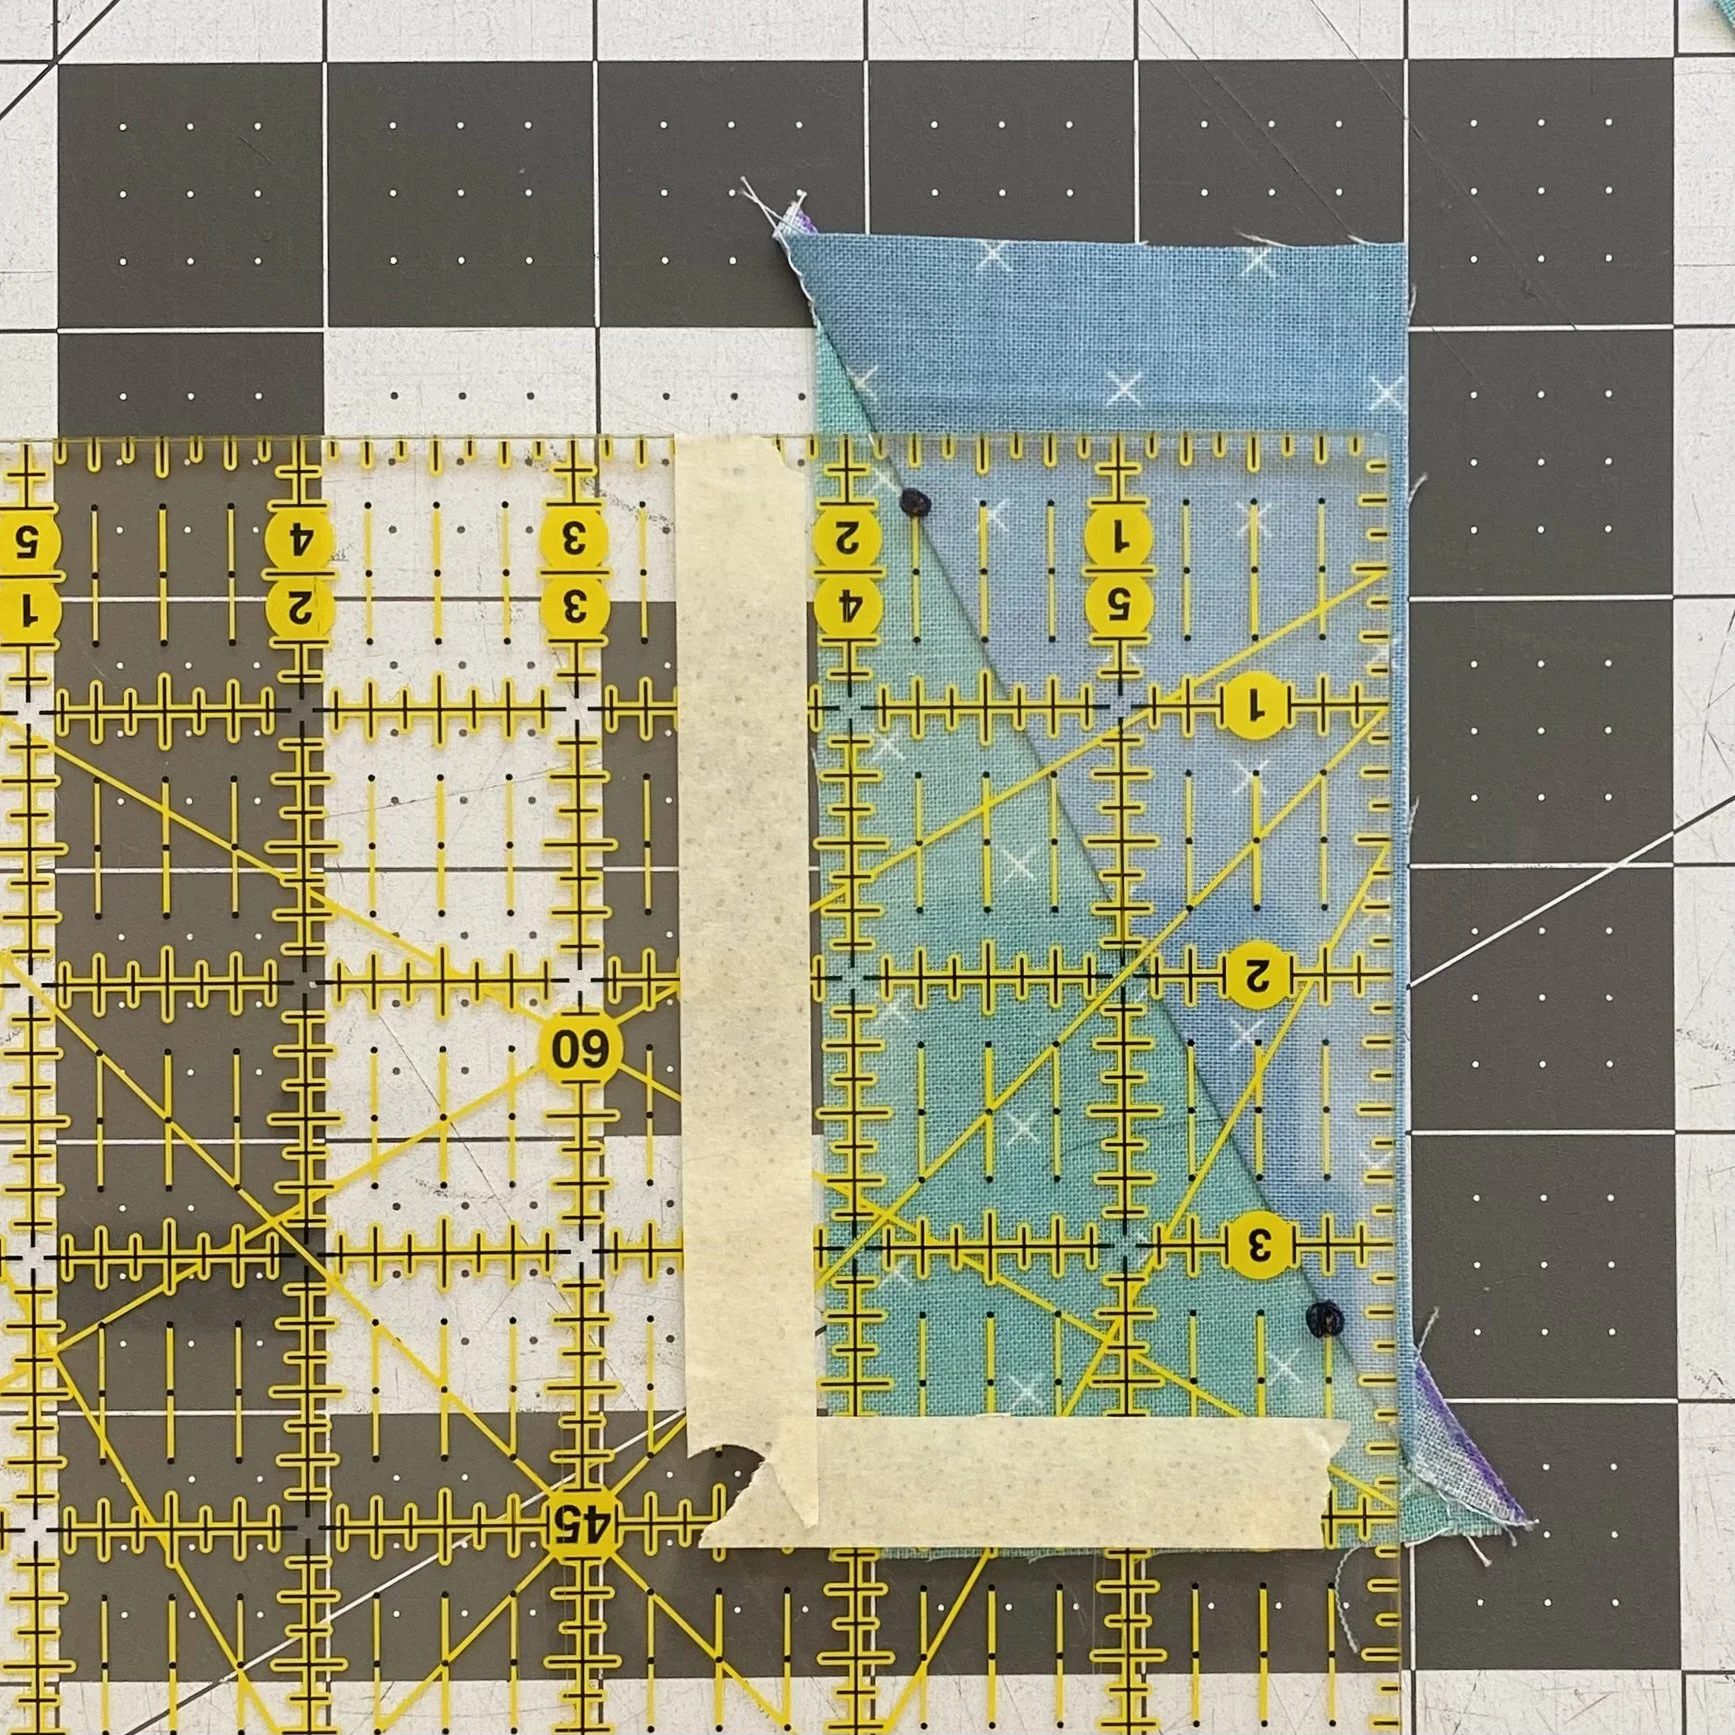
Like last month’s block, the final assembly step of Startle is another exercise in paying attention to the orientation of the blocks. I just work my way down the block, one row at a time. And honestly, you can press to your preference - there is no big secret to these pressing instructions. Just remember to use a scant ¼" seam allowance.
Please keep sharing your blocks with me! Every time I see a new block pop up, I get the biggest smile on my face. I’ve been pretty busy and stressed at my day job these past few months - seeing your work turns even the hardest day into a good day! Make sure to tag me in your Instagram posts and use #learningcurvesBOM and #startlequiltblock so I can keep up with your projects.
Happy quilting!