
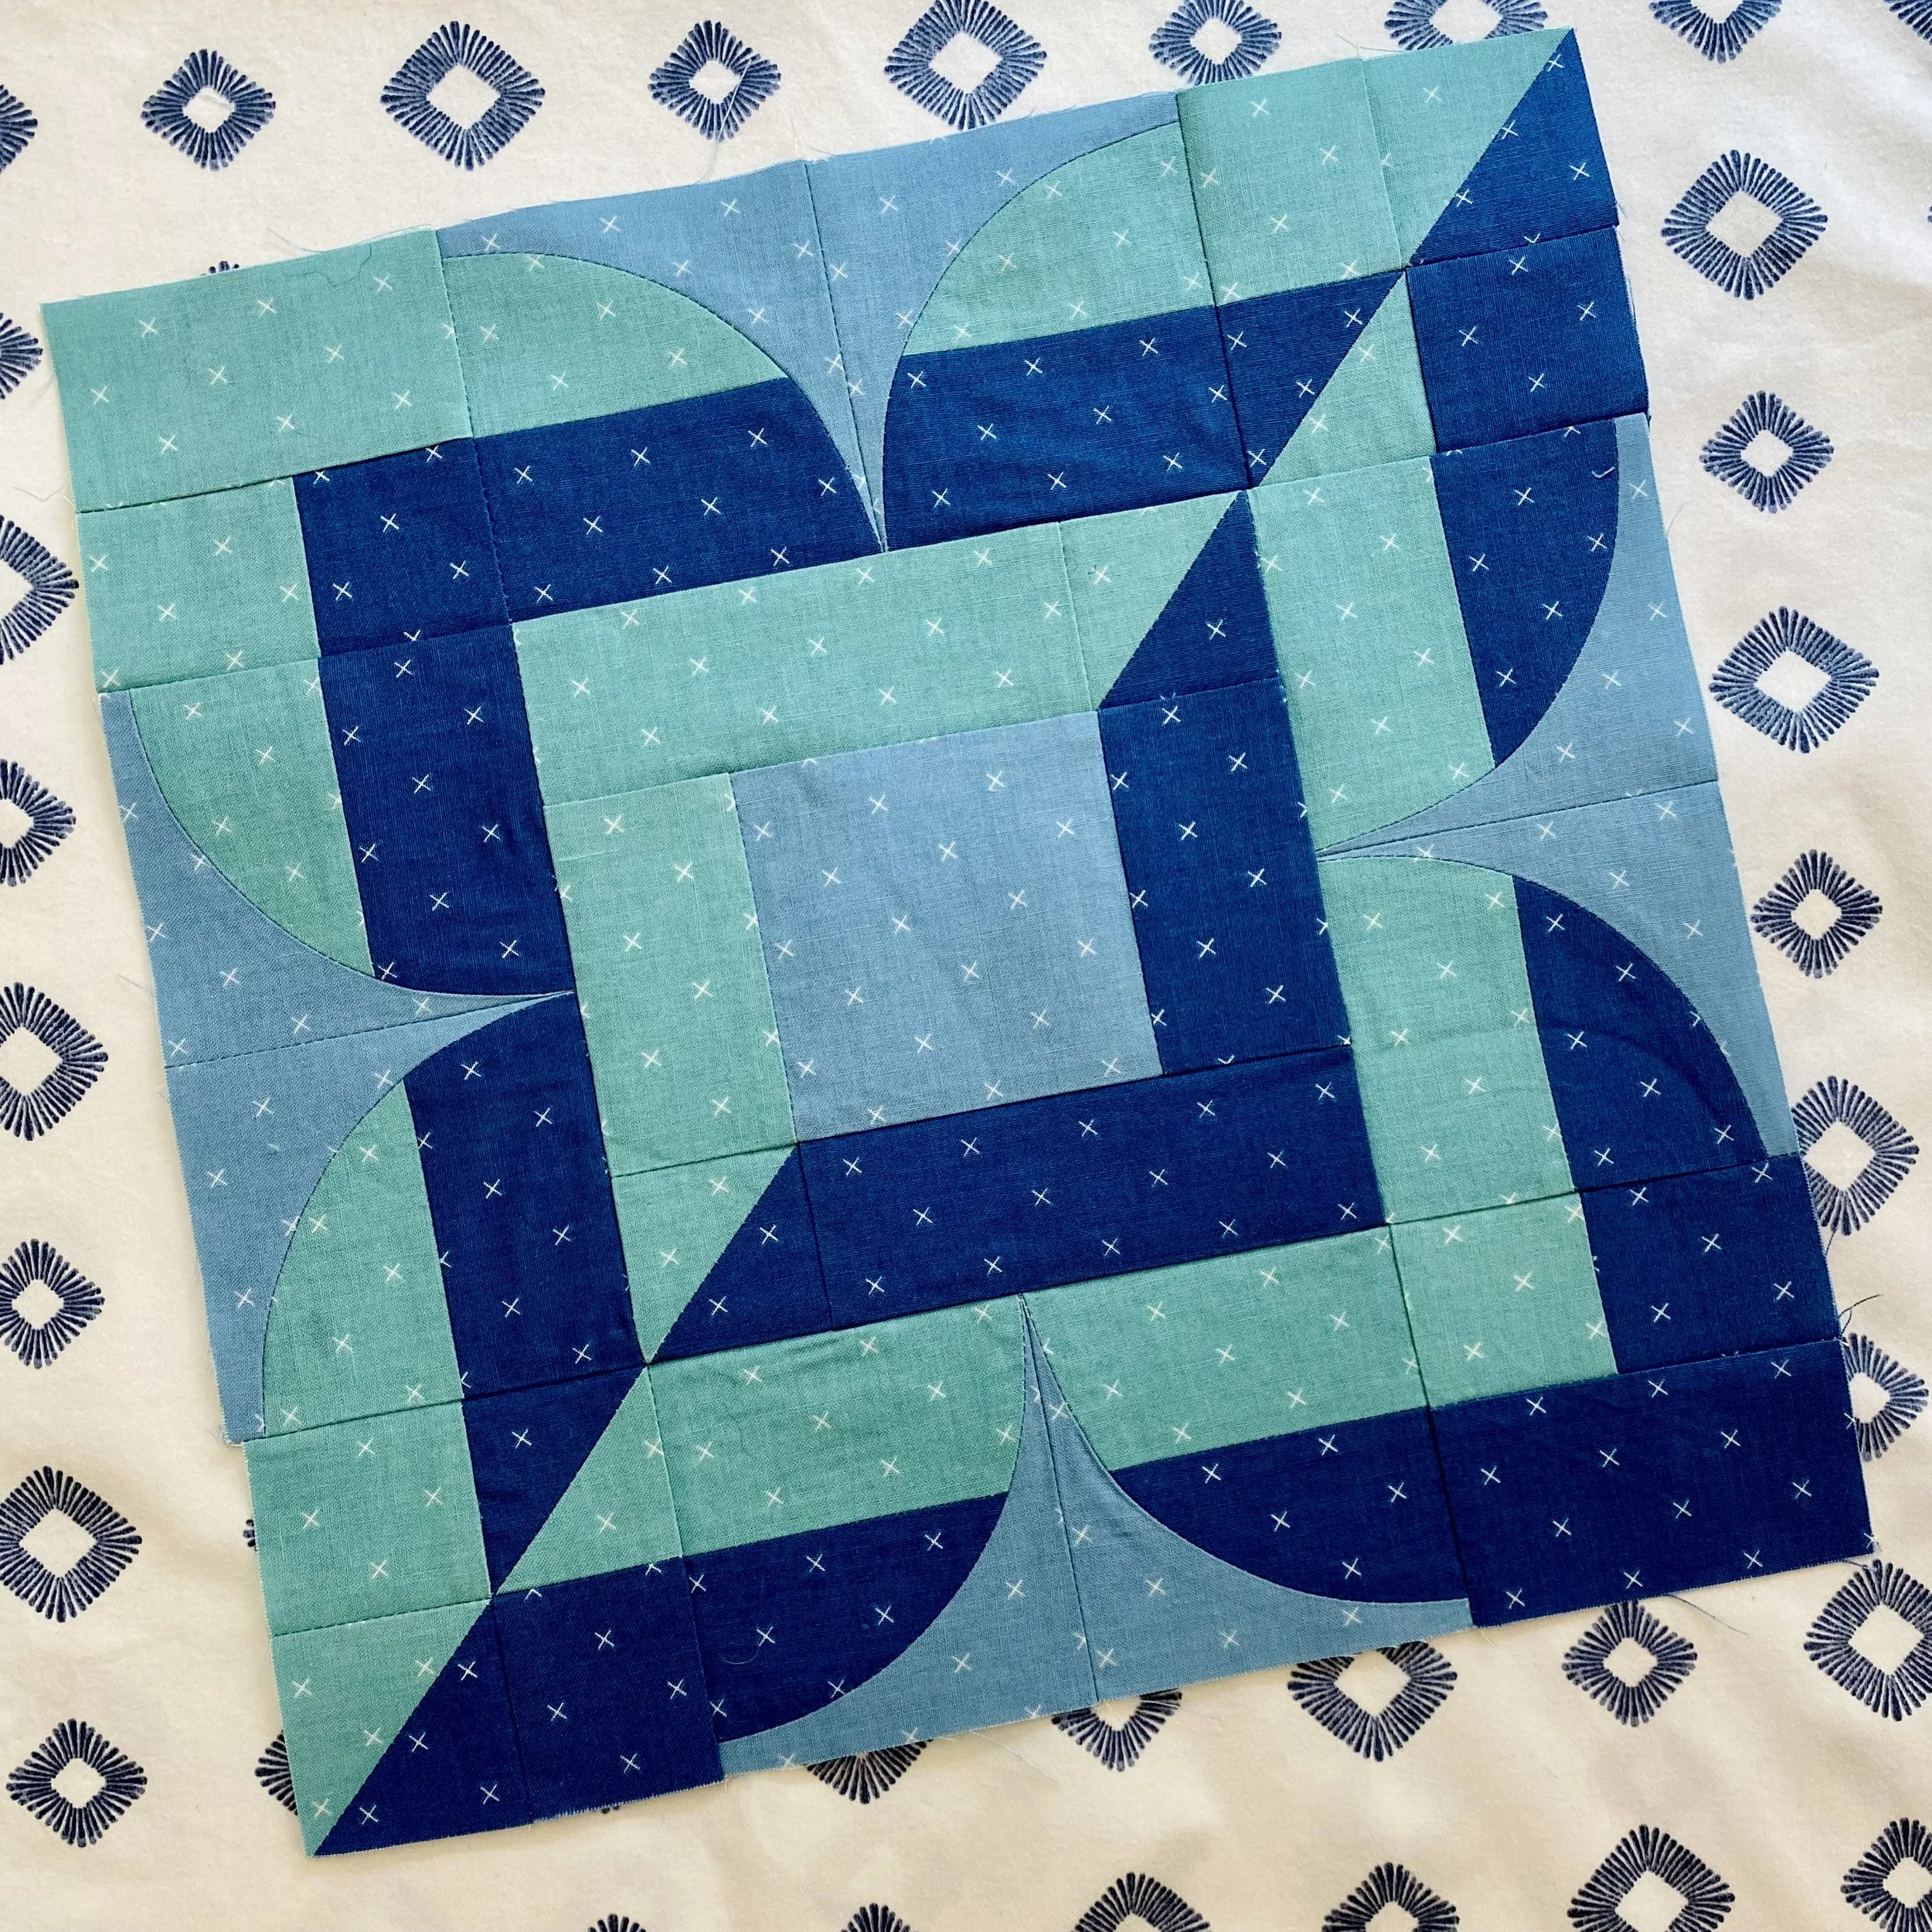
February’s block is…Formal Gardens. I designed this block as a play on the traditional log cabin block. It’s not assembled like a log cabin, but the fabric placement is reminiscent of one. The alternating fabric, plus the addition of curves makes me dream of formal French gardens, with perfectly manicured greenery and flowers.
This month, we’re sticking with the quarter circle, but the diameter of the circle is smaller. The February bonus sheet walks you through practicing these smaller curves. If you take your time, and spend a minute trying out the test curves, you’ll have no problem stitching up the Formal Gardens quilt block.
The fabrics I’m using are Bee Cross Stitch, designed by Lori Holt for Riley Blake Designs.
Fabric A: Denim
Fabric B: Cottage
Fabric C: Soldier
Fabrics were provided by Riley Blake Designs.
This is the second time this BOM that you’ve seen the instruction to shorten your stitch length. When there are pieced units that get trimmed with a curved template, the shorter stitch length helps ensure that the seams don’t pop open while manipulating the curves. For the Roxy Wave in January, we pressed these pieces-that-eventually-become-curves to the side. That was so the nine patch unit seams would nest. Trying to nest the seams in the Formal Gardens block would be a bit more complicated, so we’re pressing these pieces-that-eventually-become-curves open. This will also reduce bulk in the seam allowance.
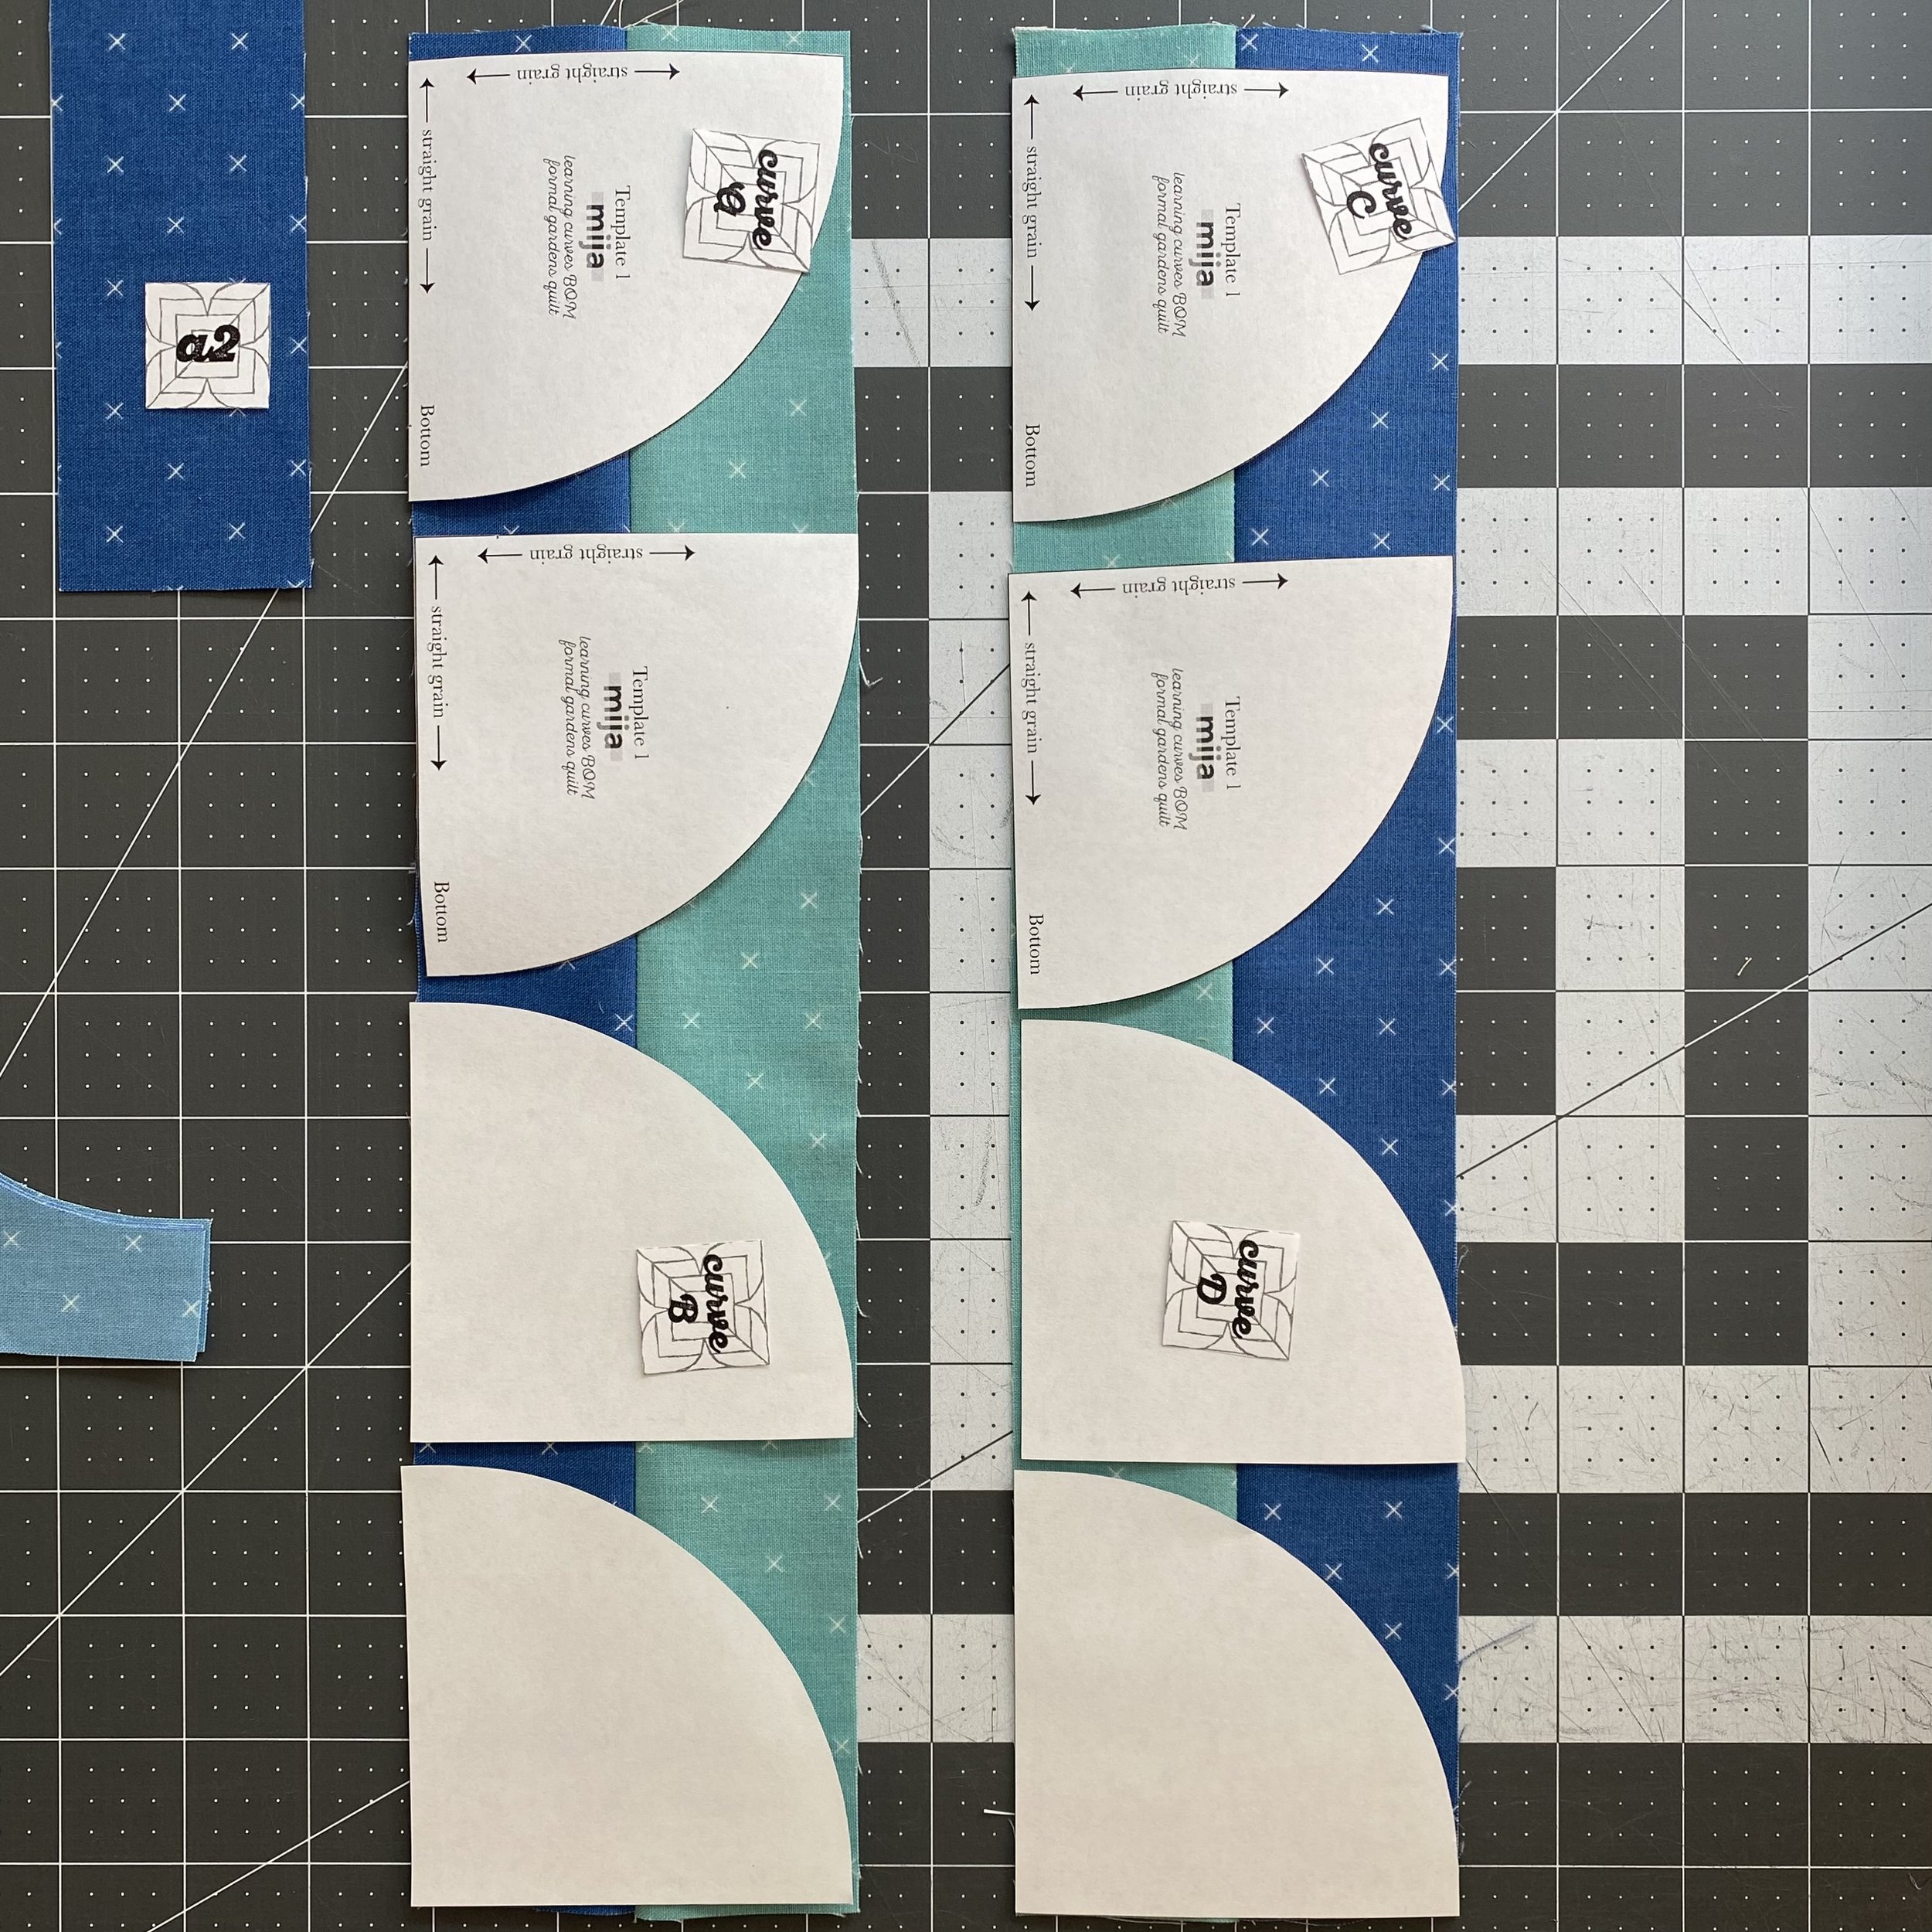
I think cutting the convex pieces (Template 1) from the strip sets is the most complicated part of this pattern. The orientation of the strip set matters and the orientation of the template matters. In this picture, I replicated the pattern illustration with 8 template pieces, just to make sure you can picture how these turn out. Just take your time and reference the diagrams to make sure you’re cutting correctly.
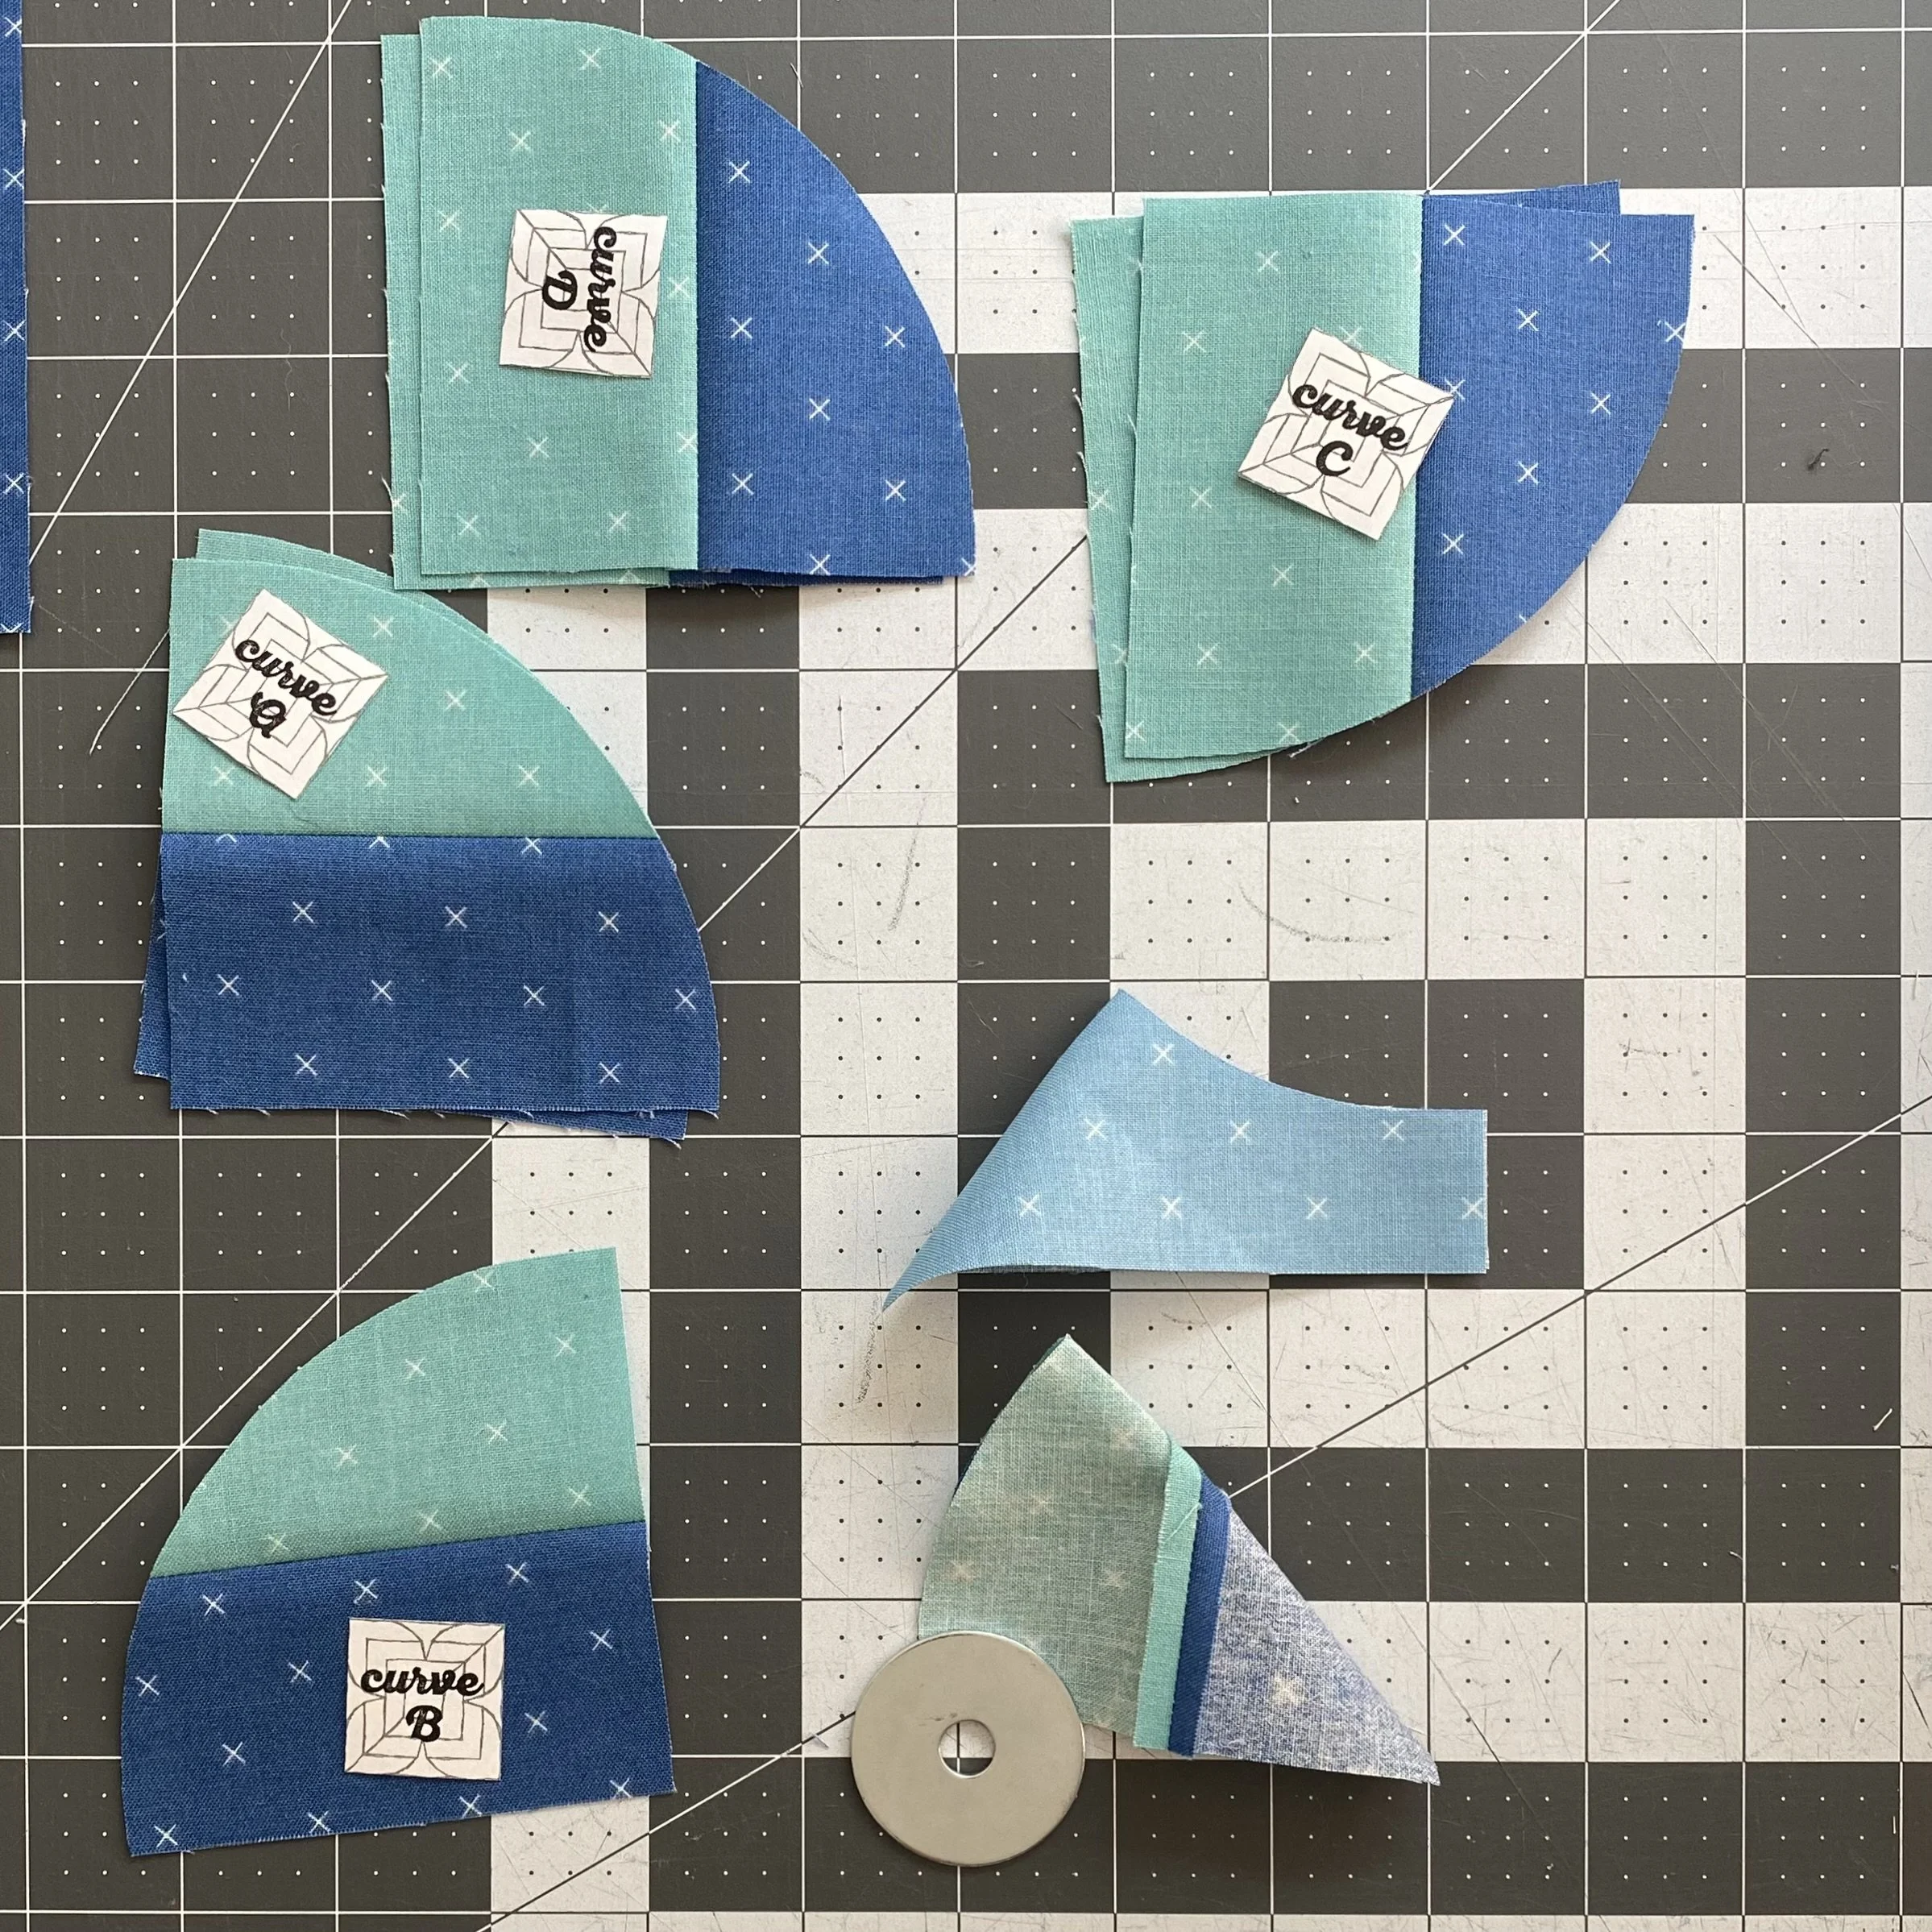
This month’s templates do not have registration marks. To find the center, you will fold the curve units in half and lightly crease them. I like to fold the convex units in half RST and the concave units in half wrong sides together. This way, when I pin them RST, the crease of the concave unit nestles nicely into the crease of the convex unit.
If you want, you can crease these with a hot iron. I like to crease it by pressing it with my lips (whatever works, right!?). I don’t suggest using your fingernails, as this pressure could warp the exposed bias edge.
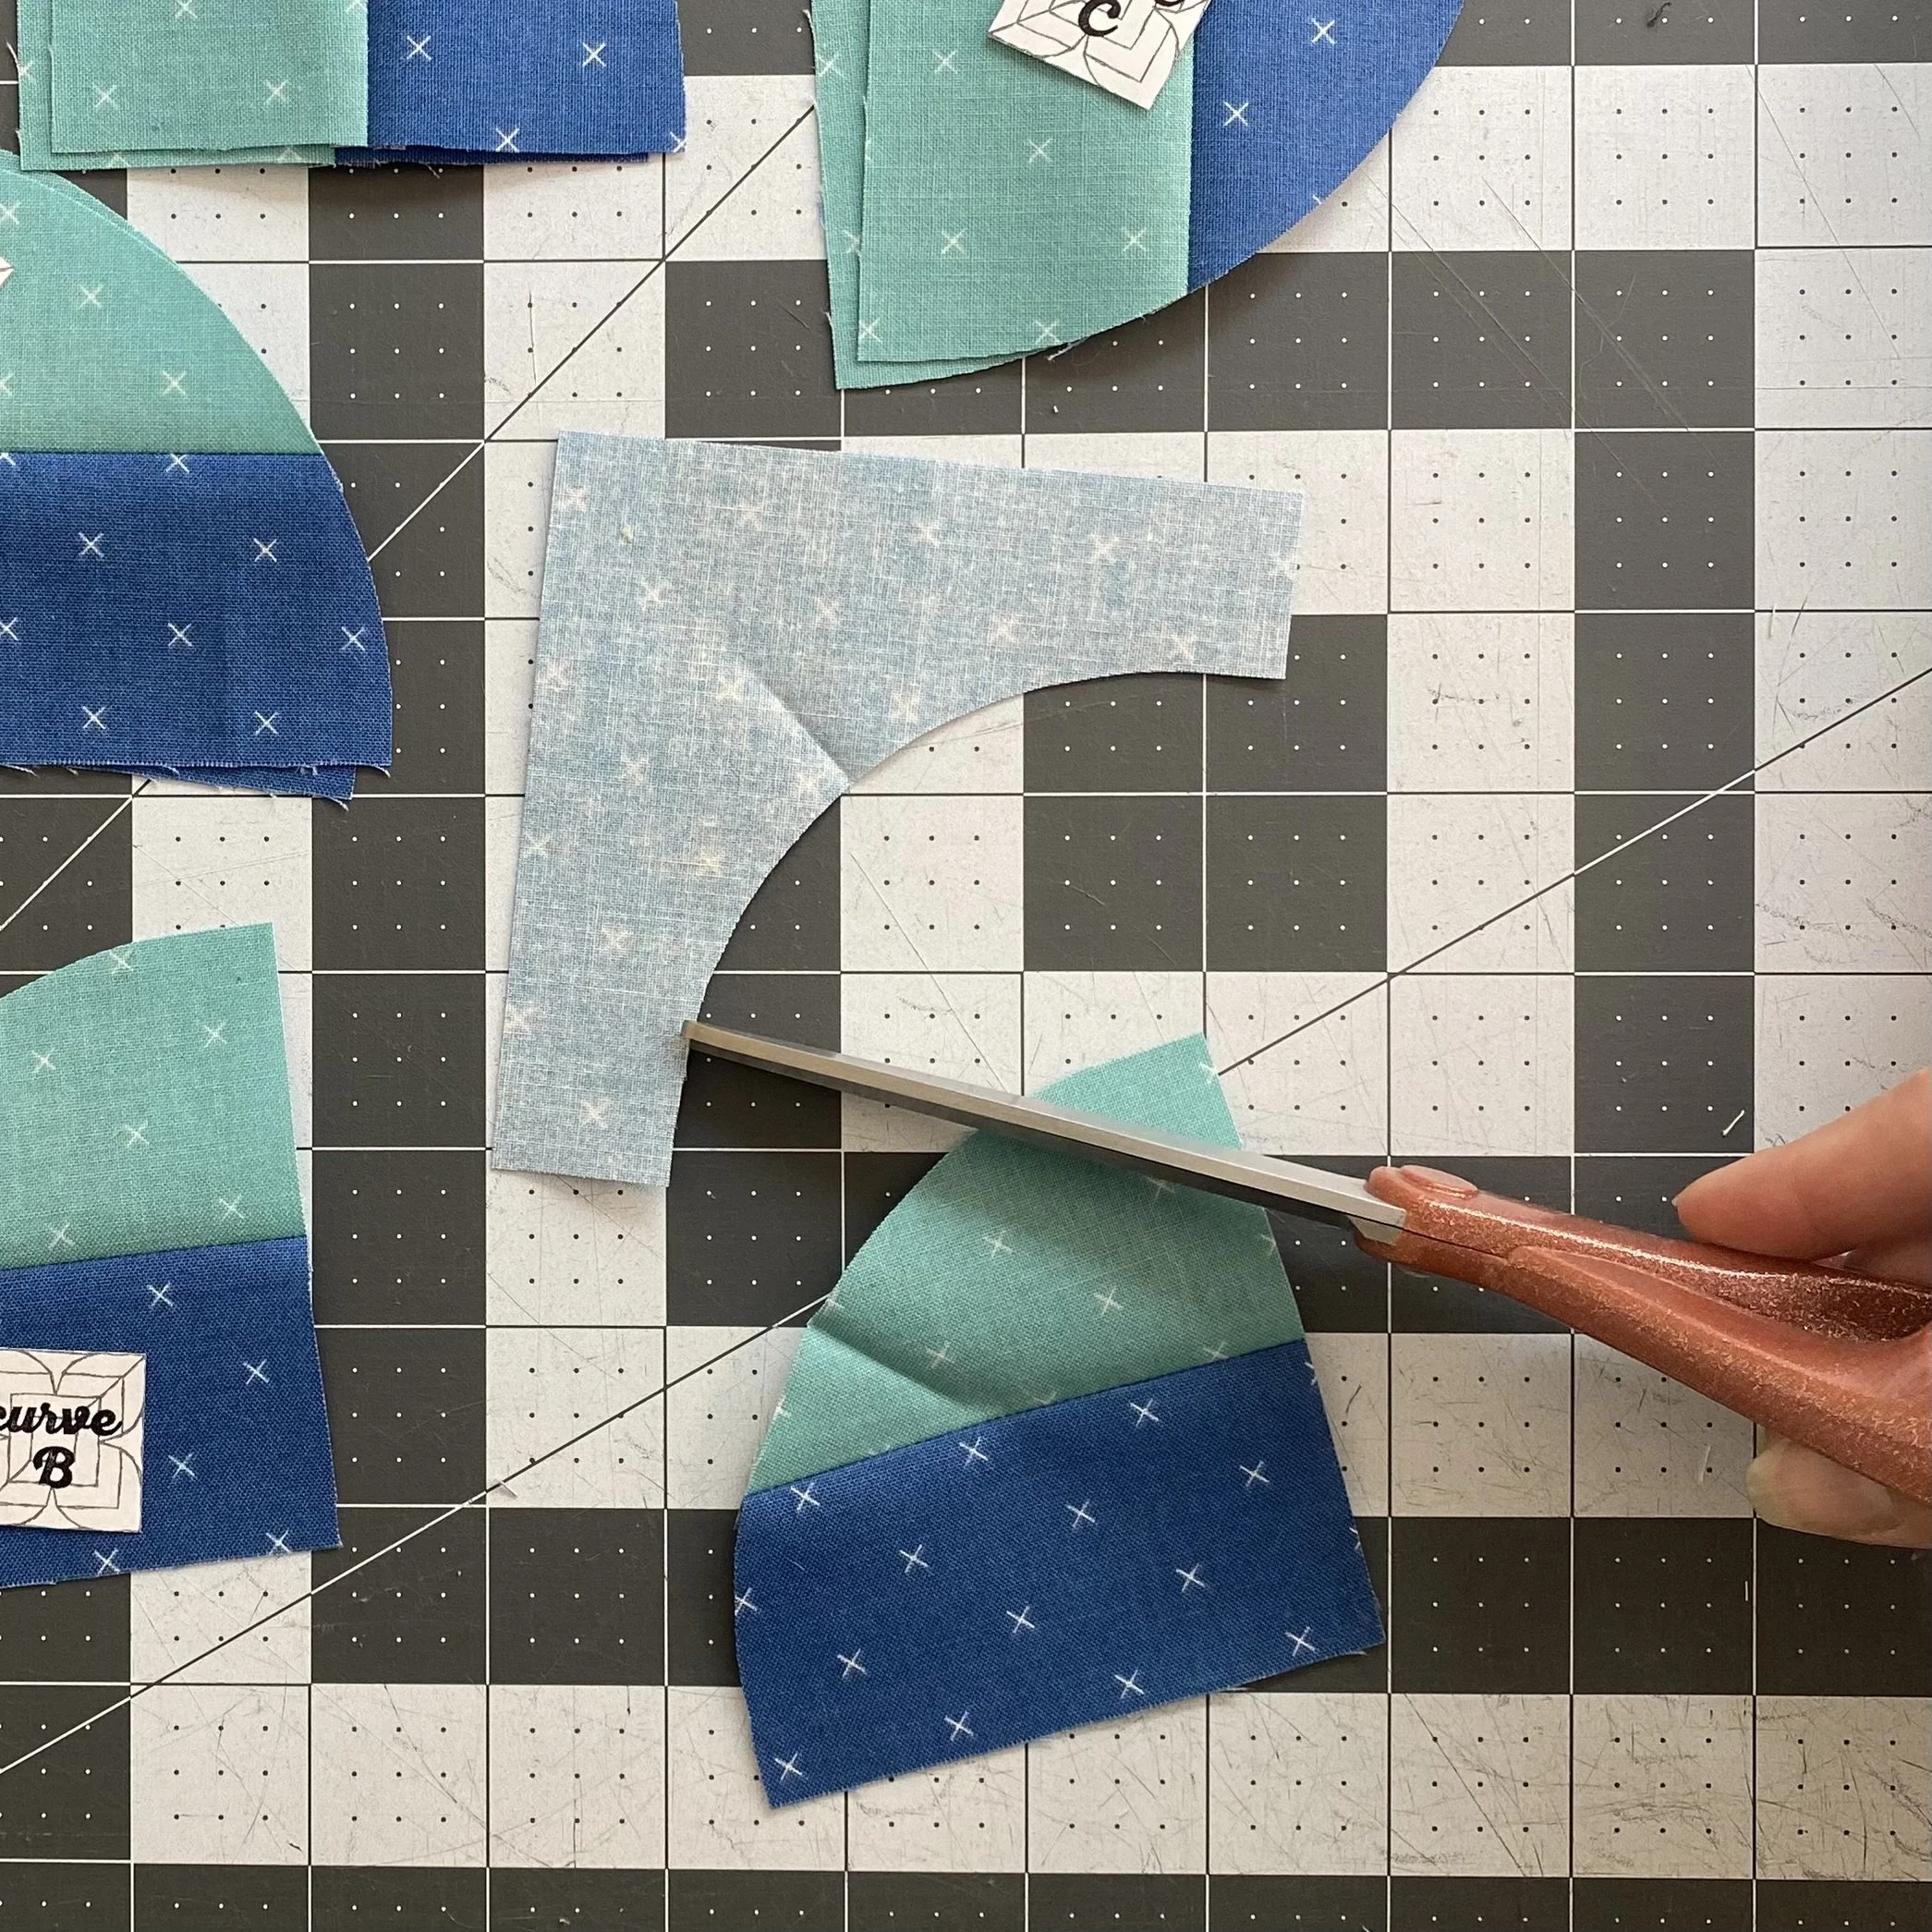
I noted this above, but it’s worth reiterating. Formal Garden’s curves are quite smaller than the Roxy Wave curves. As the size of the curve decreases, the difficulty increases. Don’t stress about the increased difficulty - this whole BOM is about practicing new skills.
If you haven’t tried a practice curve as highlighted in the bonus sheet yet, I suggest pausing now to try.
If you find you’re having a hard time, try making small snips around the concave curve. The cuts need to stay inside the seam allowance, and can be as small as ⅛", spaced as close as ¼" apart. The more snips you make in the curve, the easier it will be to encourage the curve into the right place.
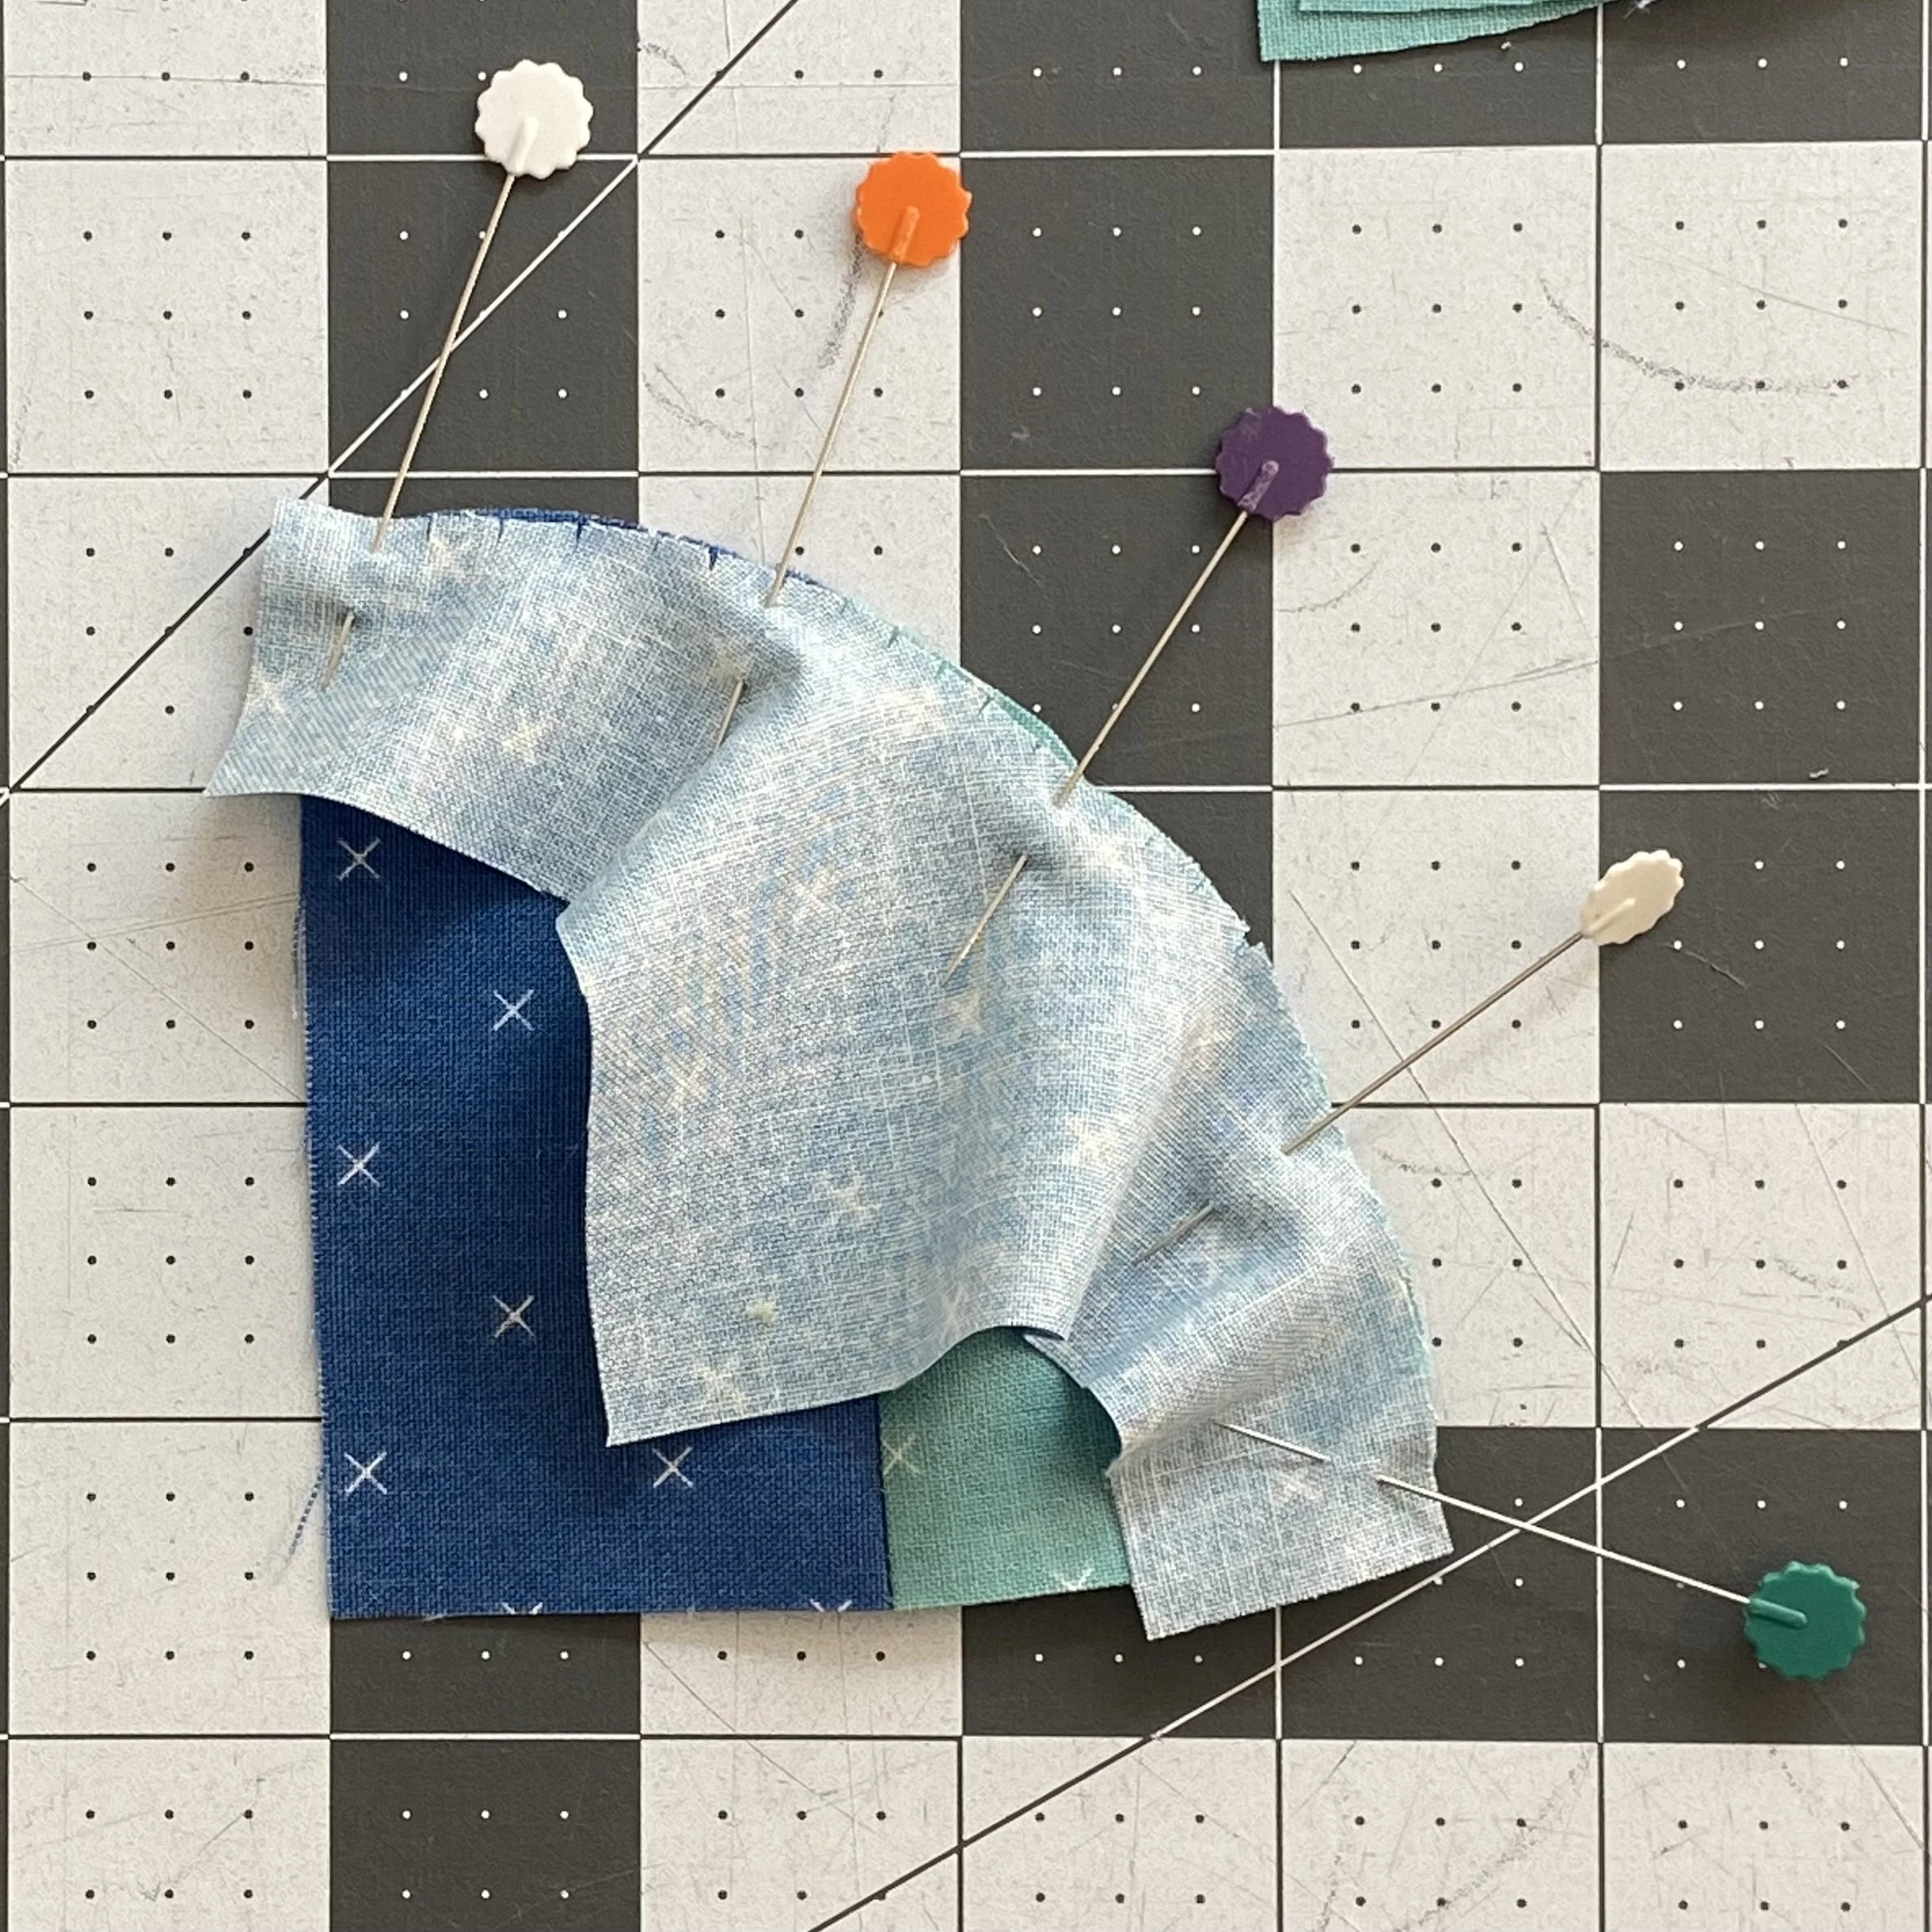
This is what a pinned and snipped curve will look like. Ultimately, I used three pins, not five.
At this point, we find ourselves facing another difference between the Roxy Wave templates and the Formal Garden templates. In January, the concave and convex units met exactly at the ends. This month, the concave template is designed to extend ⅛" beyond the convex unit. If you’re a stickler, you could mark in ⅛" from the ends and pin the mark at the end of the convex unit. But the point of this type of template is that everything should workout just fine if you eyeball it. (And if you don’t like this approach, you could trim ⅛" off the ends of the concave template and the ends will meet exactly.)
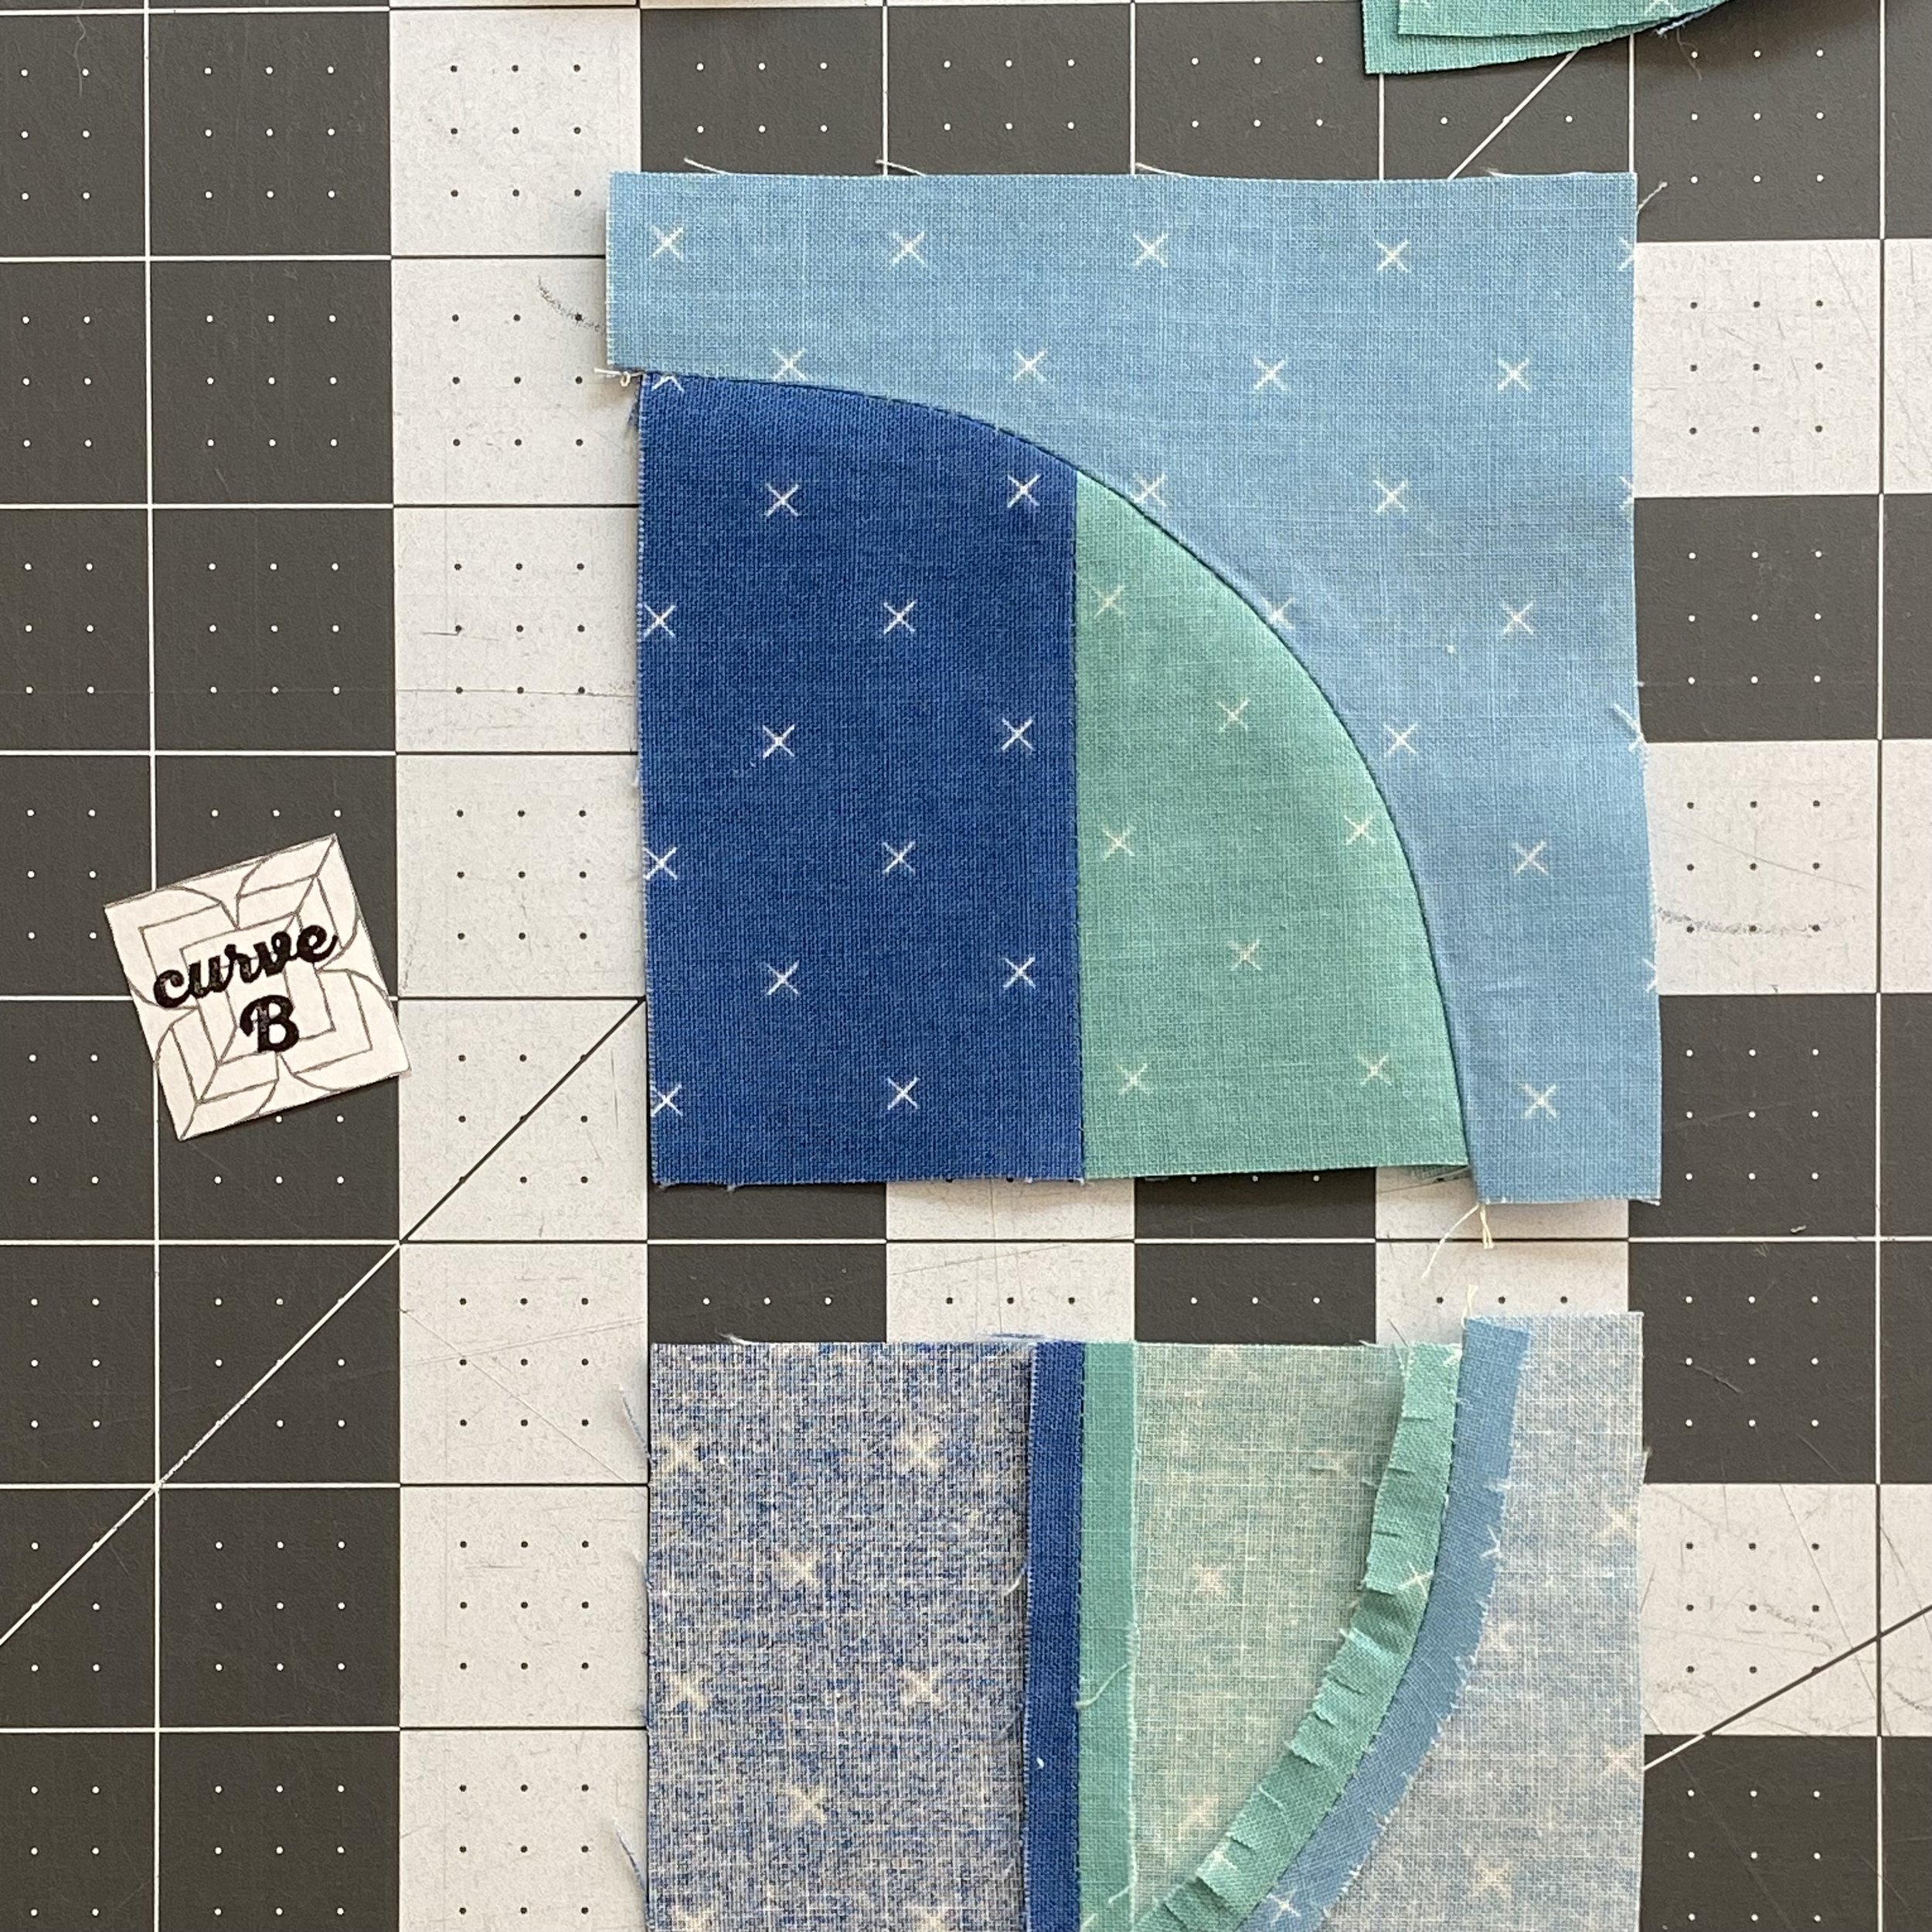
This may be controversial, but I suggest pressing these quarter circle unit seams open. This reduces bulk in some key areas of the block. Alternately, you could press as follows for nesting seams:
curve A, in
curve B, out
curve C, in
curve D, out
You can just see here, but wherever there was bulk or a wrinkle in the seam allowance of the convex piece, I clipped the seam allowance to help it lay flat. I will continue to suggest leaving these under a heavy object for at least 20 minutes before trimming to size.

Remember to align the ¼" seam allowance mark with the seam of the curve when you trim the quarter circle units. Only trim from the concave unit. Don’t forget to trim the ⅛" bit that extends beyond the convex unit.
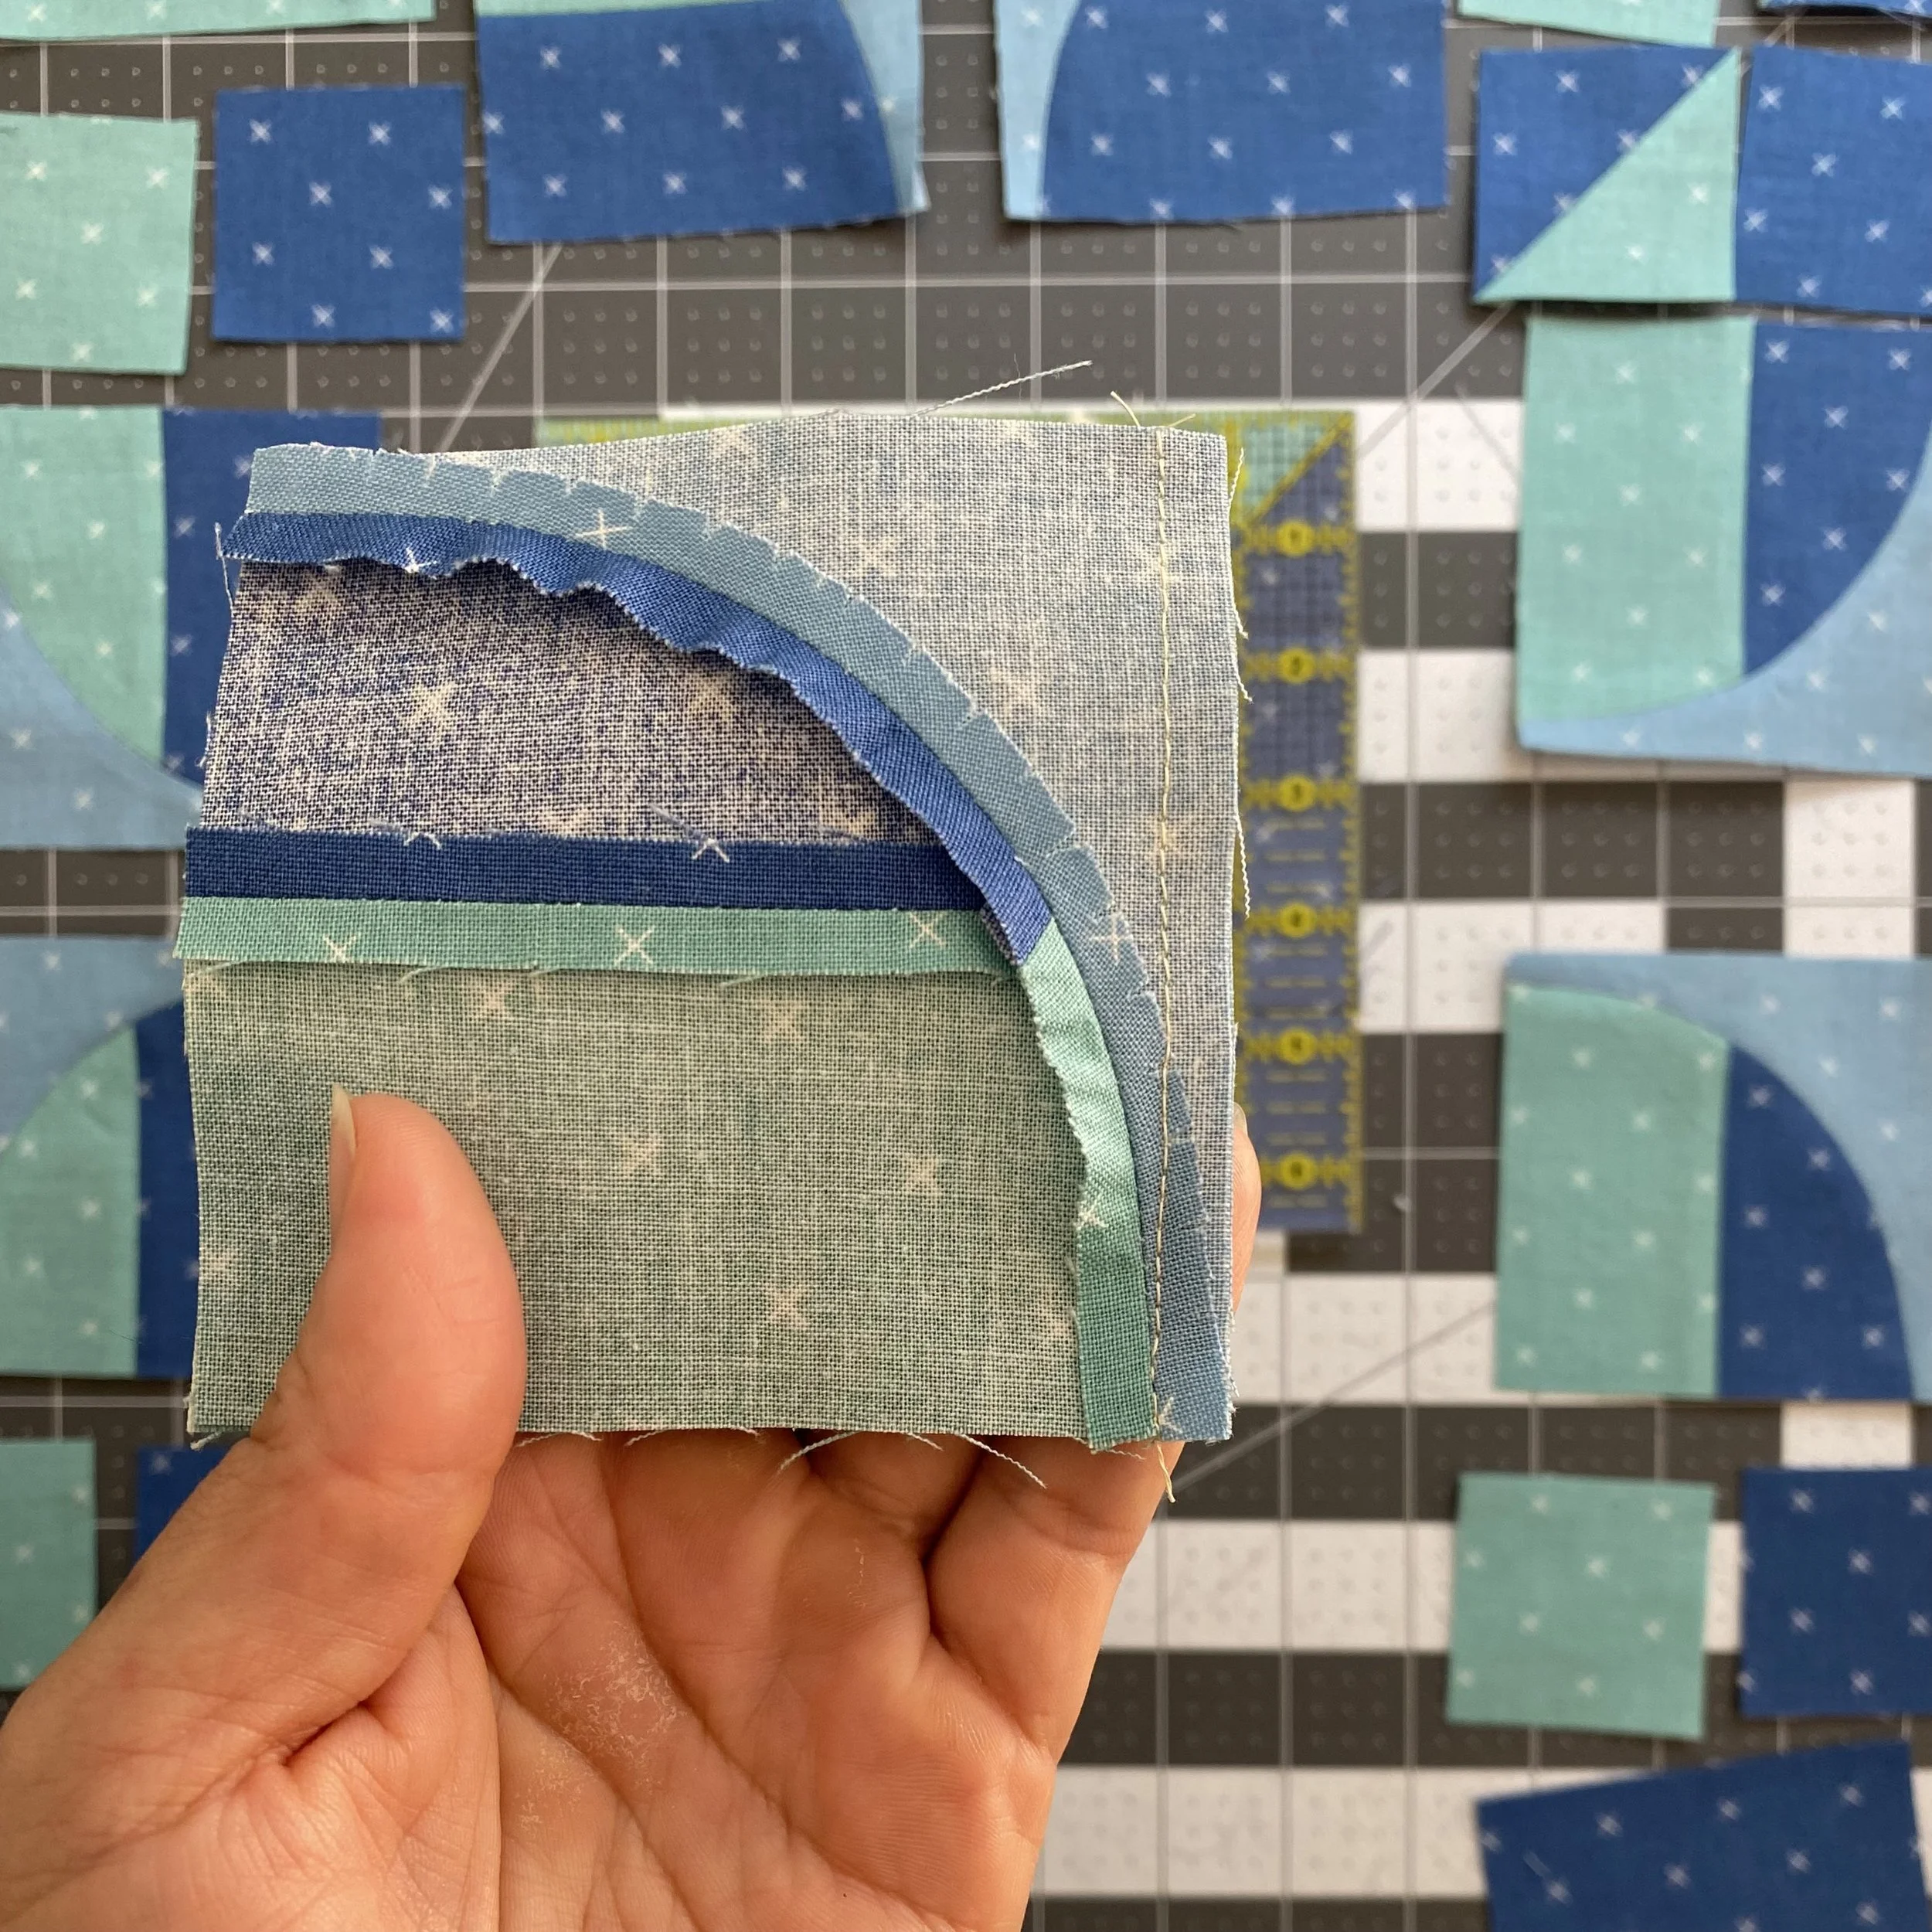
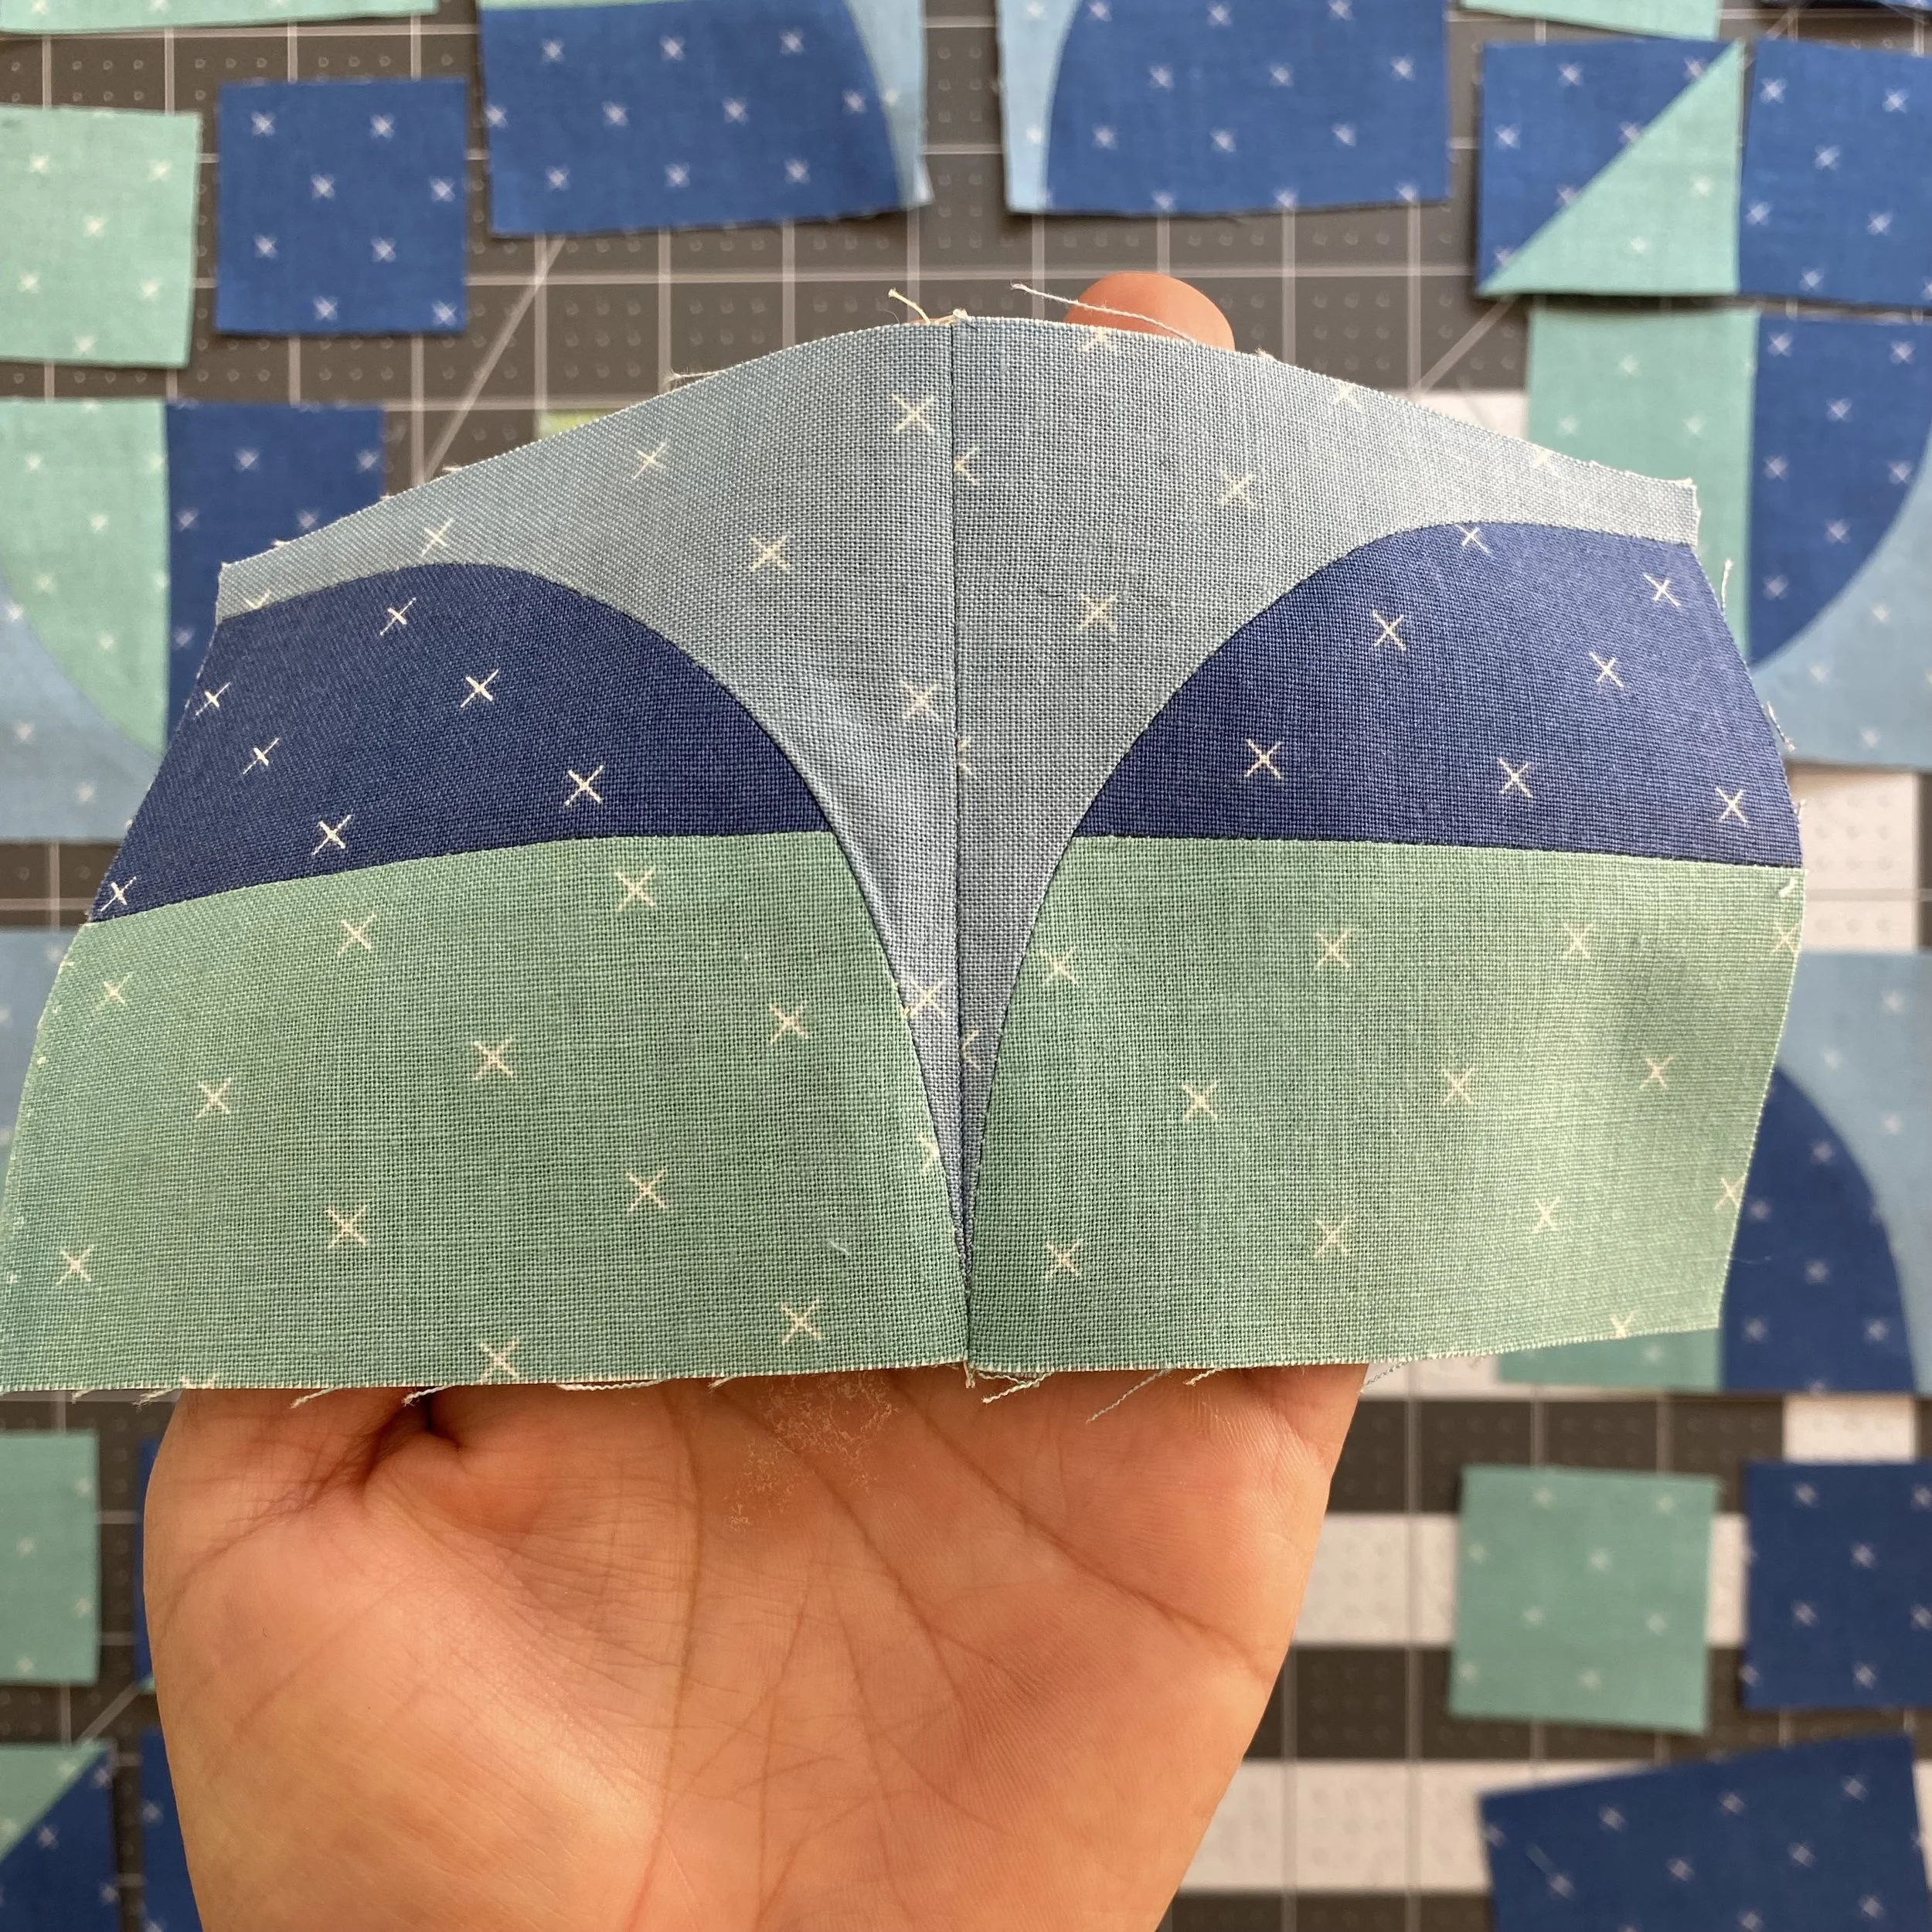
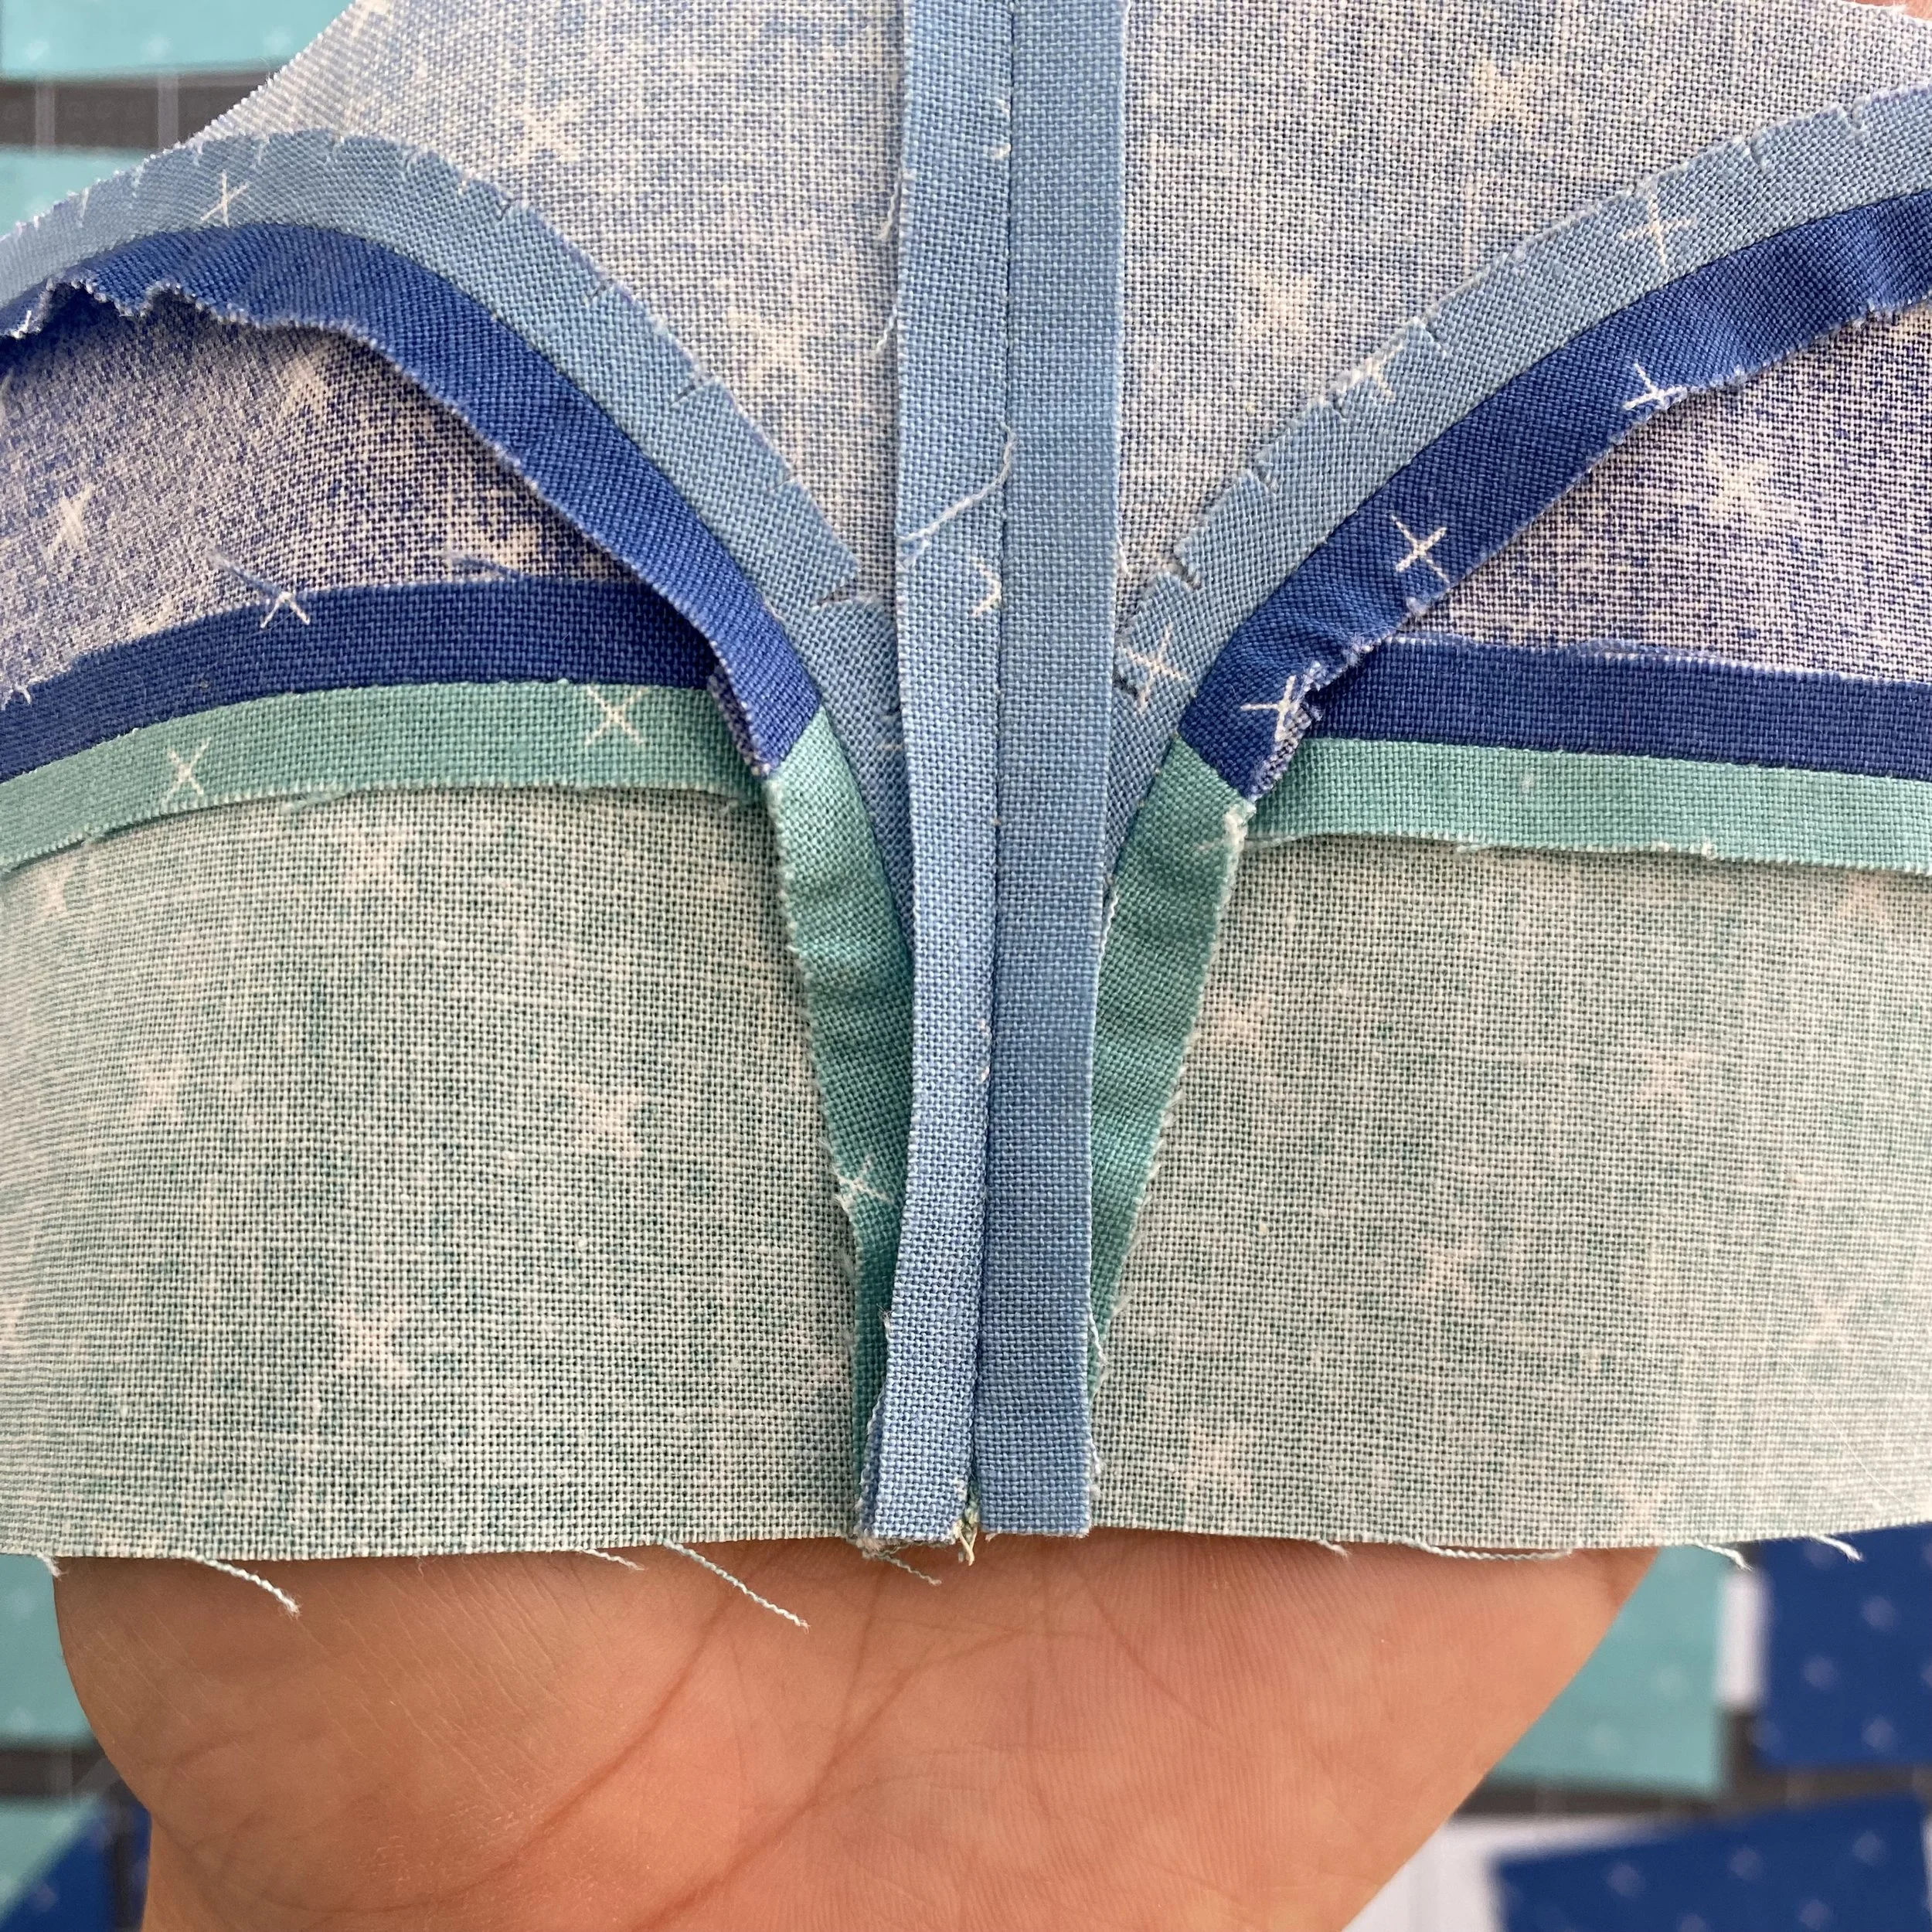
From here, it’s just a matter of making a few HSTs and sewing the units together in the order indicated in the pattern. I suggest paying particular attention to sewing the quarter circles and the orientation of the HSTs. For the quarter circles, you want the stitching line to intersect the seam at ¼" exactly. Check out the photos below for what a pretty successful stitching line looks like.
Keep the feedback and Instagram pictures coming! I love seeing your blocks. Share your progress and finished blocks using #learningcurvesBOM, #formalgardensquiltblock and #mijapatterns. Did you check out everyone’s #roxywavequiltblock?
Happy quilting!