
How I Made the Lucy Duffle Bag
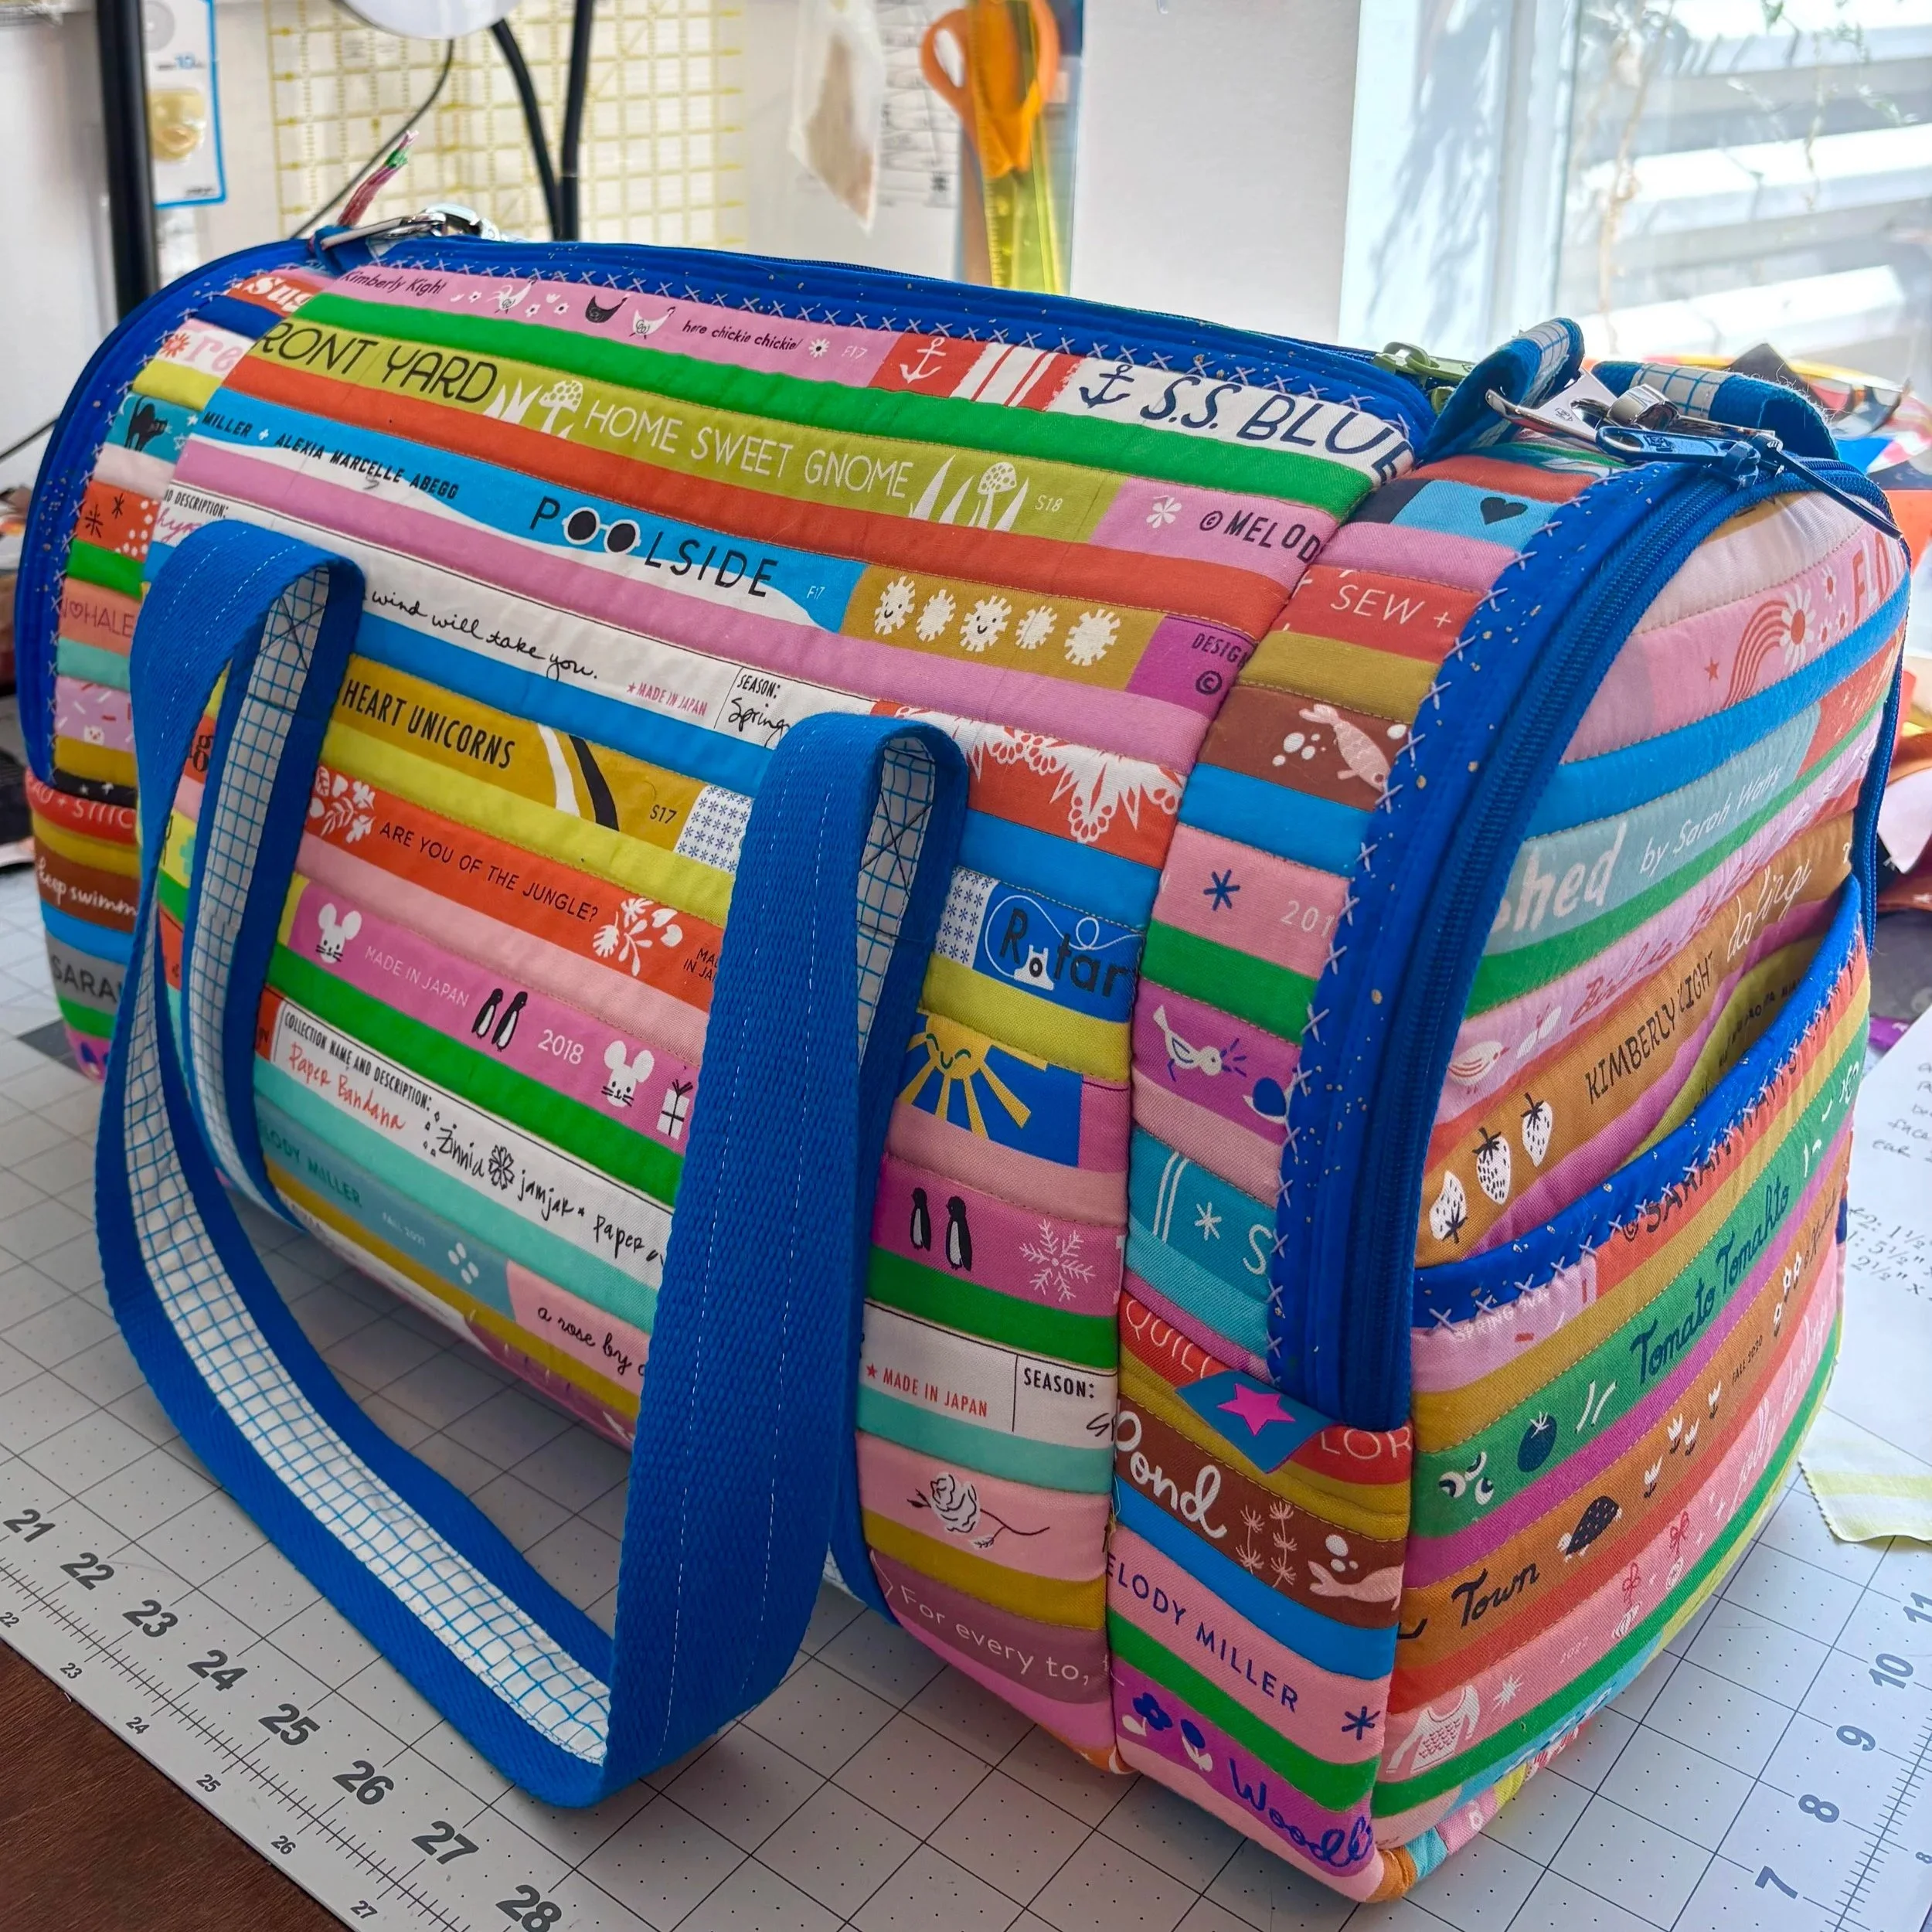
I no longer quilt, I only make bags now! I’m mostly kidding, but also still completely obsessed with making bags from this fabric. Did you see my packing cube made with the same Selvedge Magic fabric? Once I made that packing cube, I knew I needed a duffle to go with it. After a bit of searching around, I chose the Lucy Duffle from Knot and Thread. If you’d like to make a bag like this, I’ve gathered all my thoughts on how I accounted for a one-way directional print, and how I altered the side pockets to be more to my liking.
First off, this pattern is incredibly well written and the bag is soundly designed. If you’ve never sewn a bag before, I might recommend you work through Knot and Thread’s Patchwork Duffle before tackling this duffle. But If you have some experience with bag making and zippers, you could confidently work your way through this pattern.
Second, I can’t give you fabric requirements for this project. With all the alterations I made, I successfully used the 1¼ yards of lining. But I had multiple yards of Selvedge Magic and ByAnnie’s Soft and Stable. So I wasn’t worried about running out of fabric when I made my changes. Plus, this is more of a “here’s how I logic-ed my way through this” and less of a tutorial to make exactly what I made.
Third, this isn’t my pattern, so I can’t give you measurements. That does make it difficult to share exactly what I did, but I’ll walk you through all the considerations I had to make along the way. You can apply these lessons to your project using a one-way directional print.
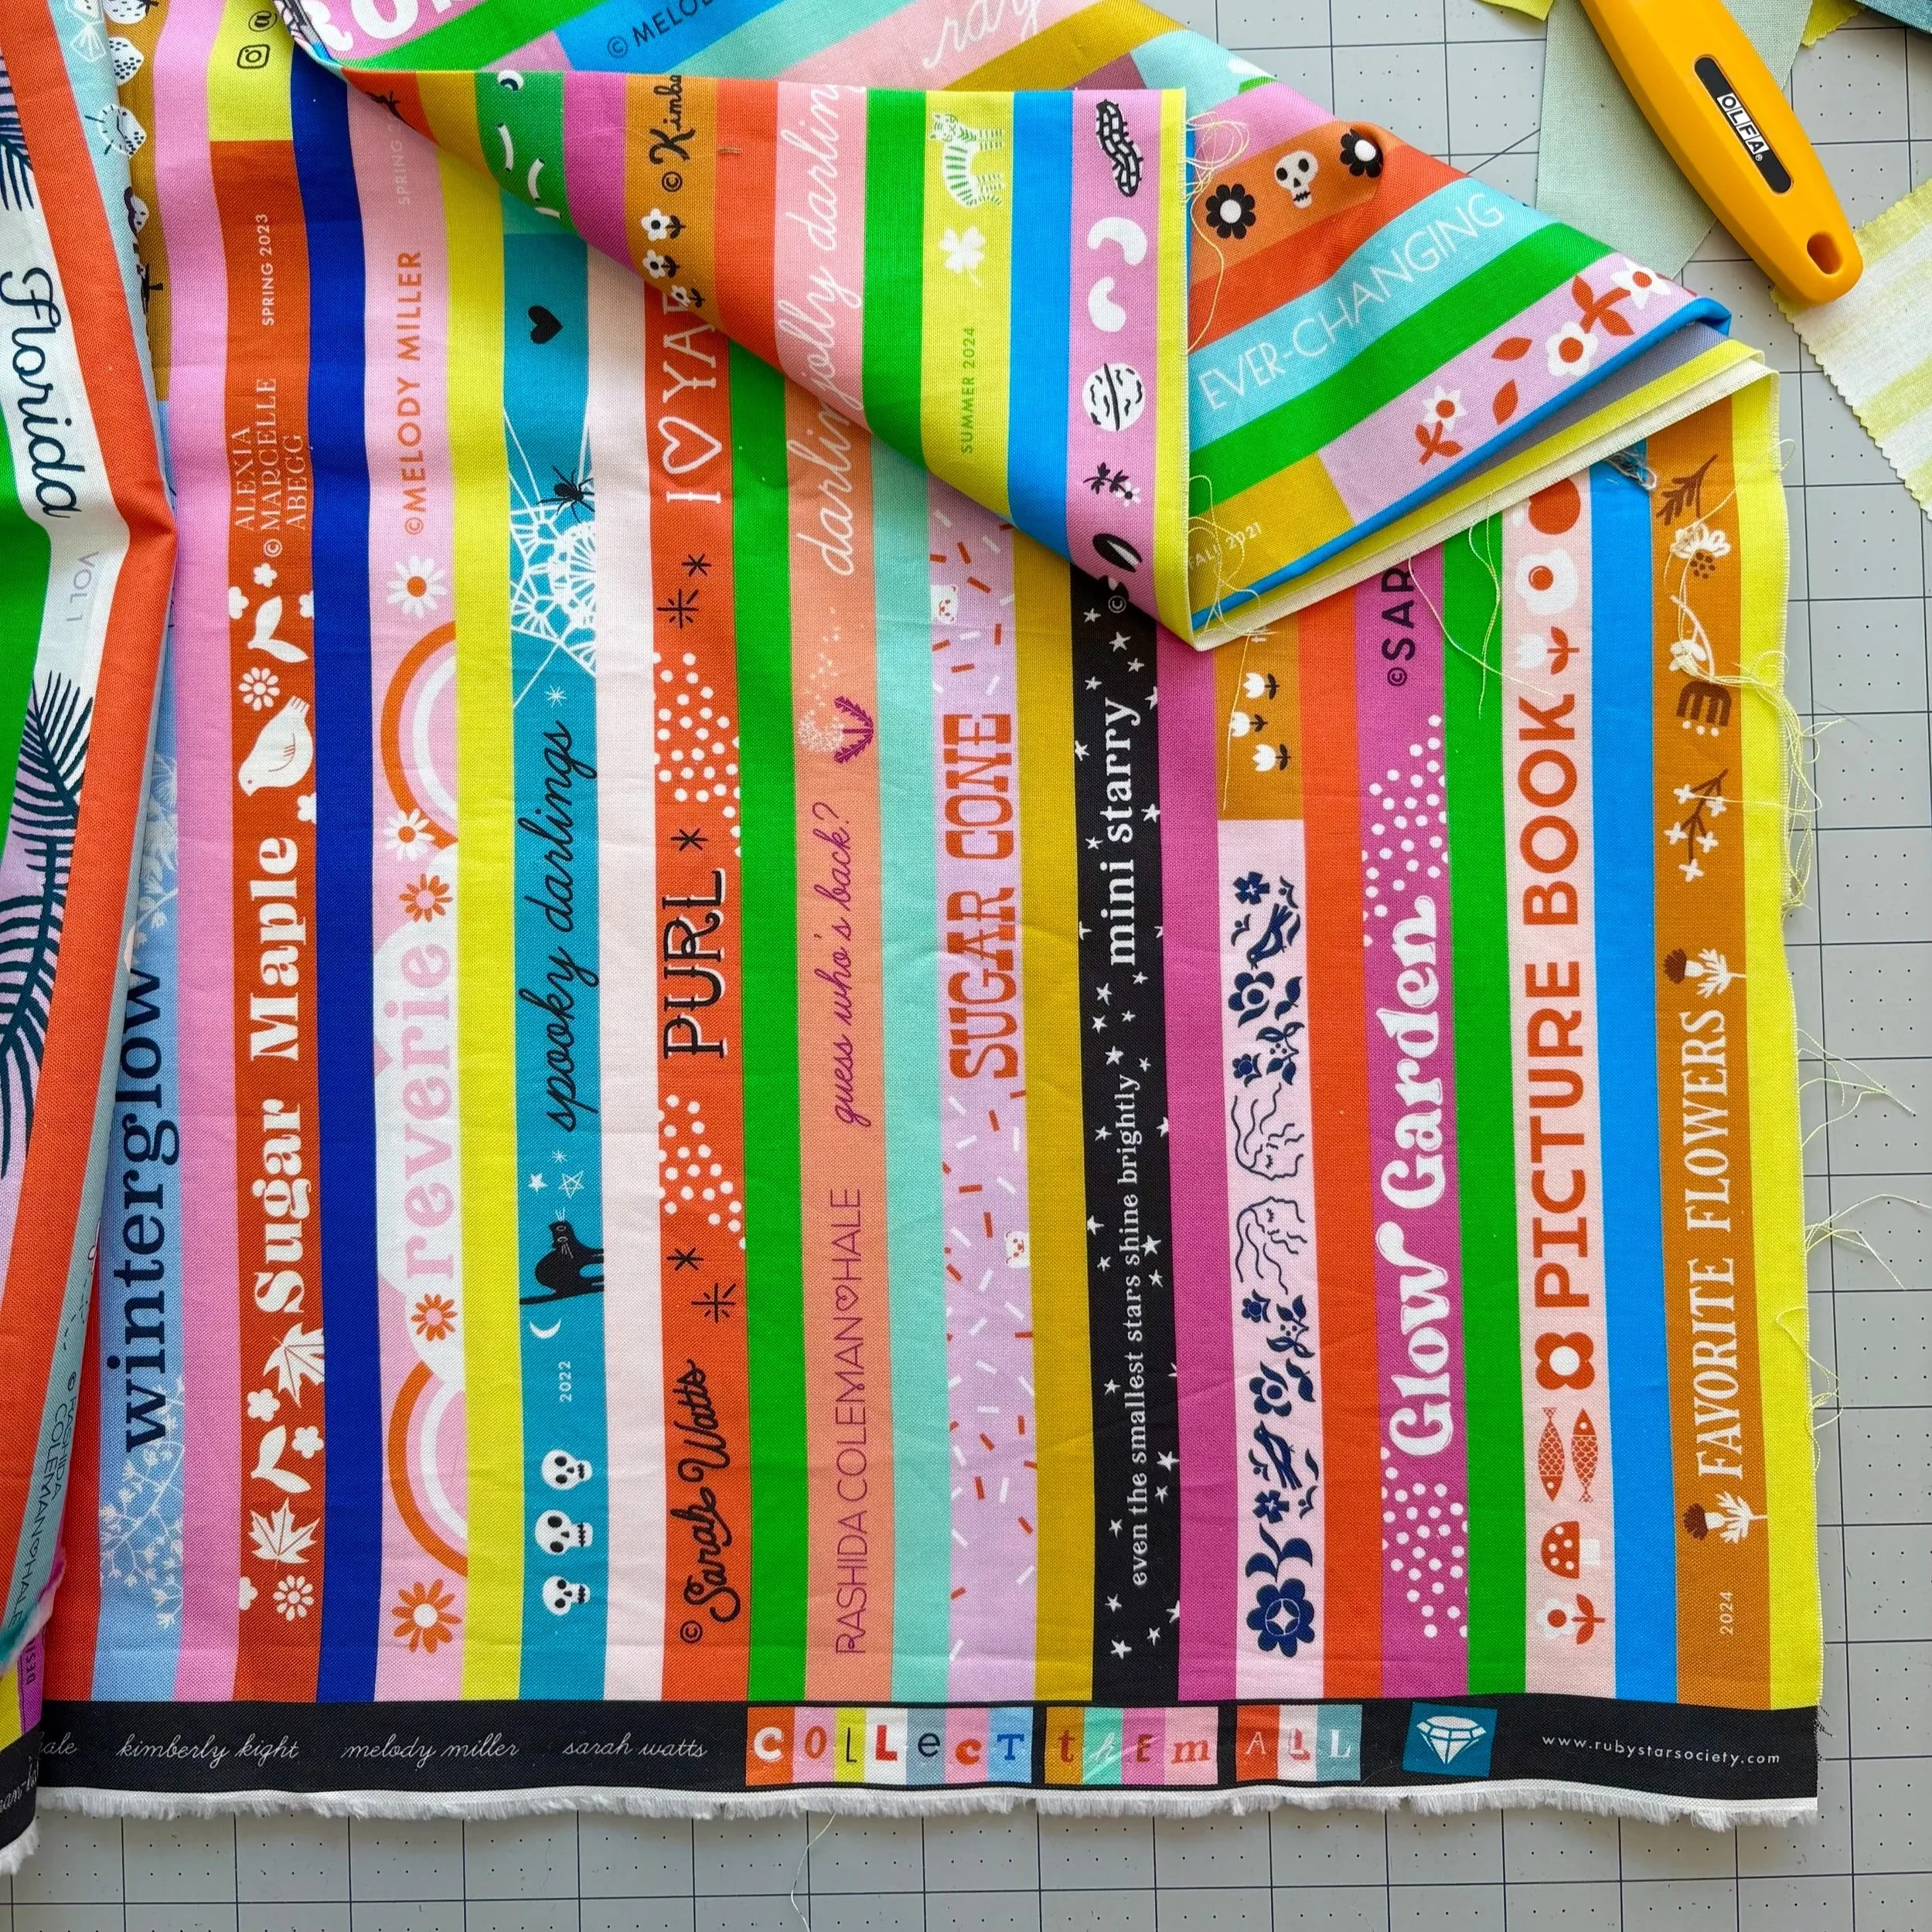
One-Way Directional Fabric
Need help identifying one-way directional fabrics? Read this blog post on directional fabrics.
The pattern includes instructions for using a two-way directional print that runs from selvedge to selvedge. I used a one-way directional print, which meant that if I wanted the Selvedge Magic words to be right side up on all sides of the bag, I needed to make some modifications.
1) The dimensions of all the pieces need to be switched. The pattern notes all measurements are listed height X length, where height is the measurement that runs WOF in the diagrams. To account for my one-way directional print, I needed to cut them length x height.
A QUICK SIDE NOTE: height X length is confusing to me. My brain prefers width X height. But, to be consistent with the Lucy Duffle pattern instructions, I’ve stuck with height X length in this blog post.
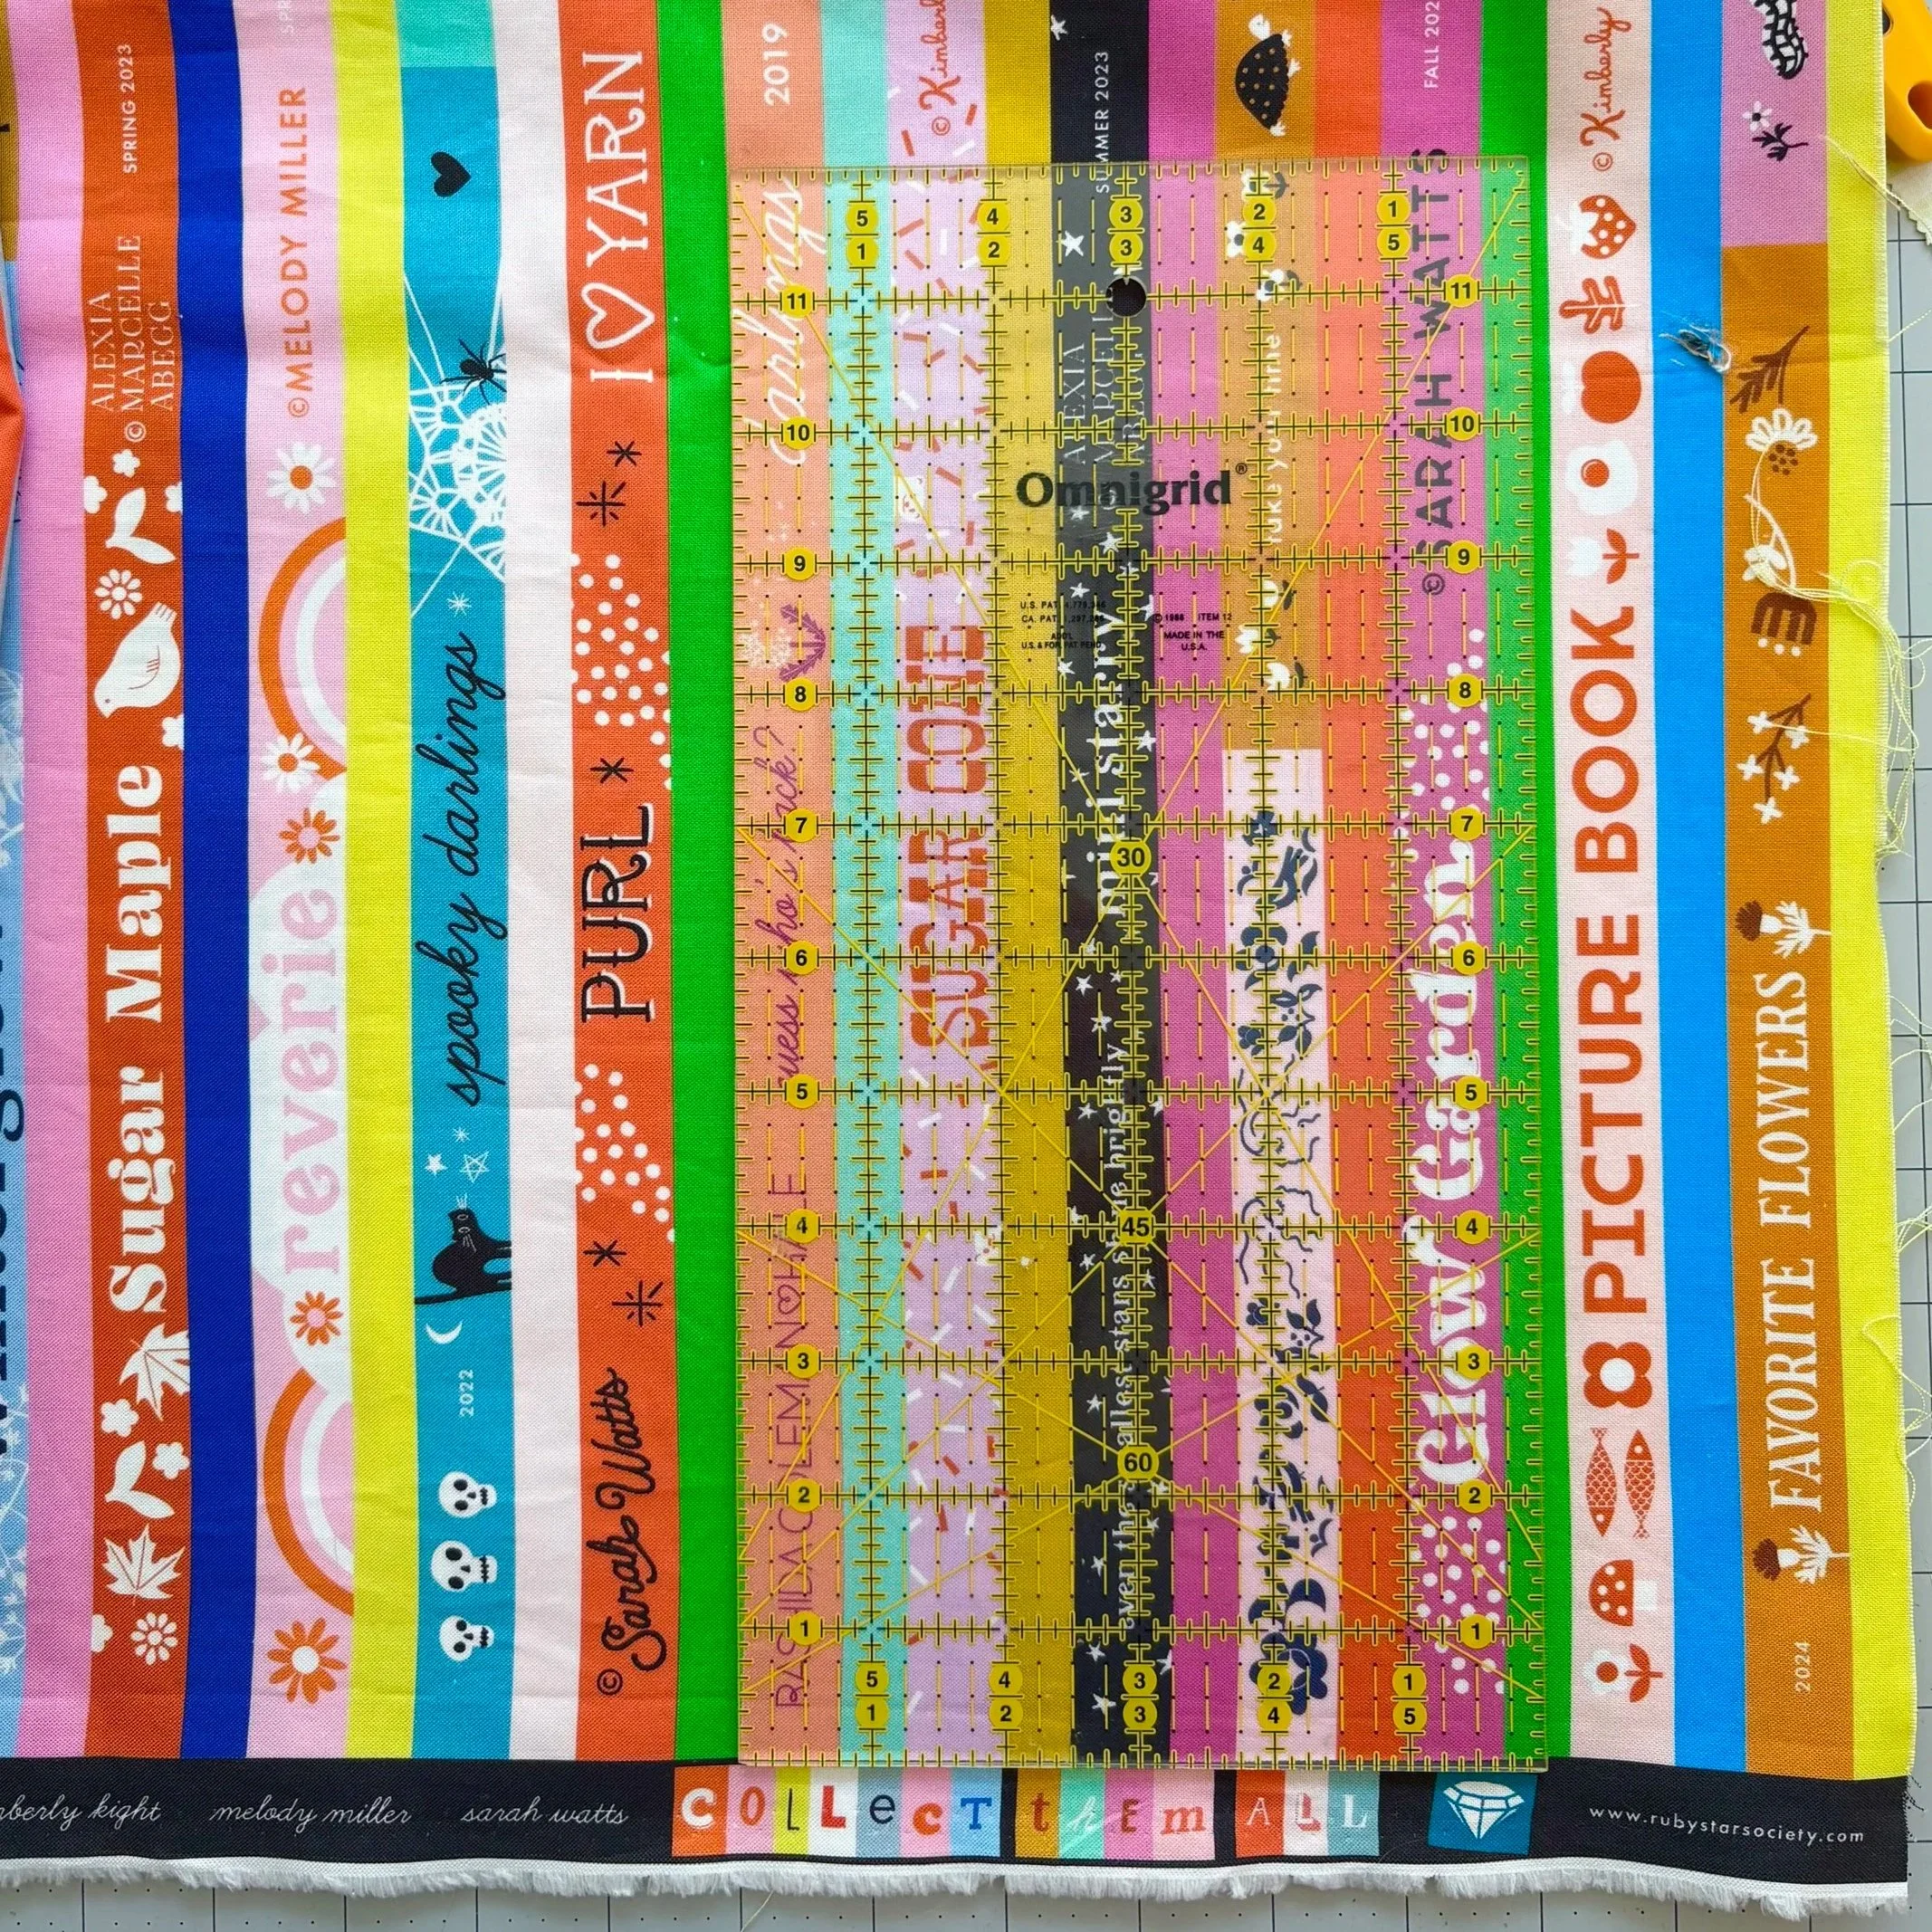
If I had cut the units from Selvedge Magic height x length, the words would run up the height (like a title on a book spine) instead of across the length (like words on a page). For example, if a unit is listed as 10" x 7" (10 inches tall and 7 inches wide), I cut it 7" x 10". This ensured that the words would run along the 7" inch wide dimension. Refer to the image with the rule to help picture these dimensions and what the resulting unit would look like if cut from the fabric.
Another way to think about this is that all pieces need to be turned 90 degrees before cutting them. I want to be consistent in my language here, so I’m sticking with the “switch the height and length dimensions” approach.
2) Any unit that crosses the middle of the bag needs to be pieced in the middle so that the words change orientation on each side of the bag. These following exterior bag pieces need to be pieced in the middle:
bag body
side gusset strips
side zipper strips
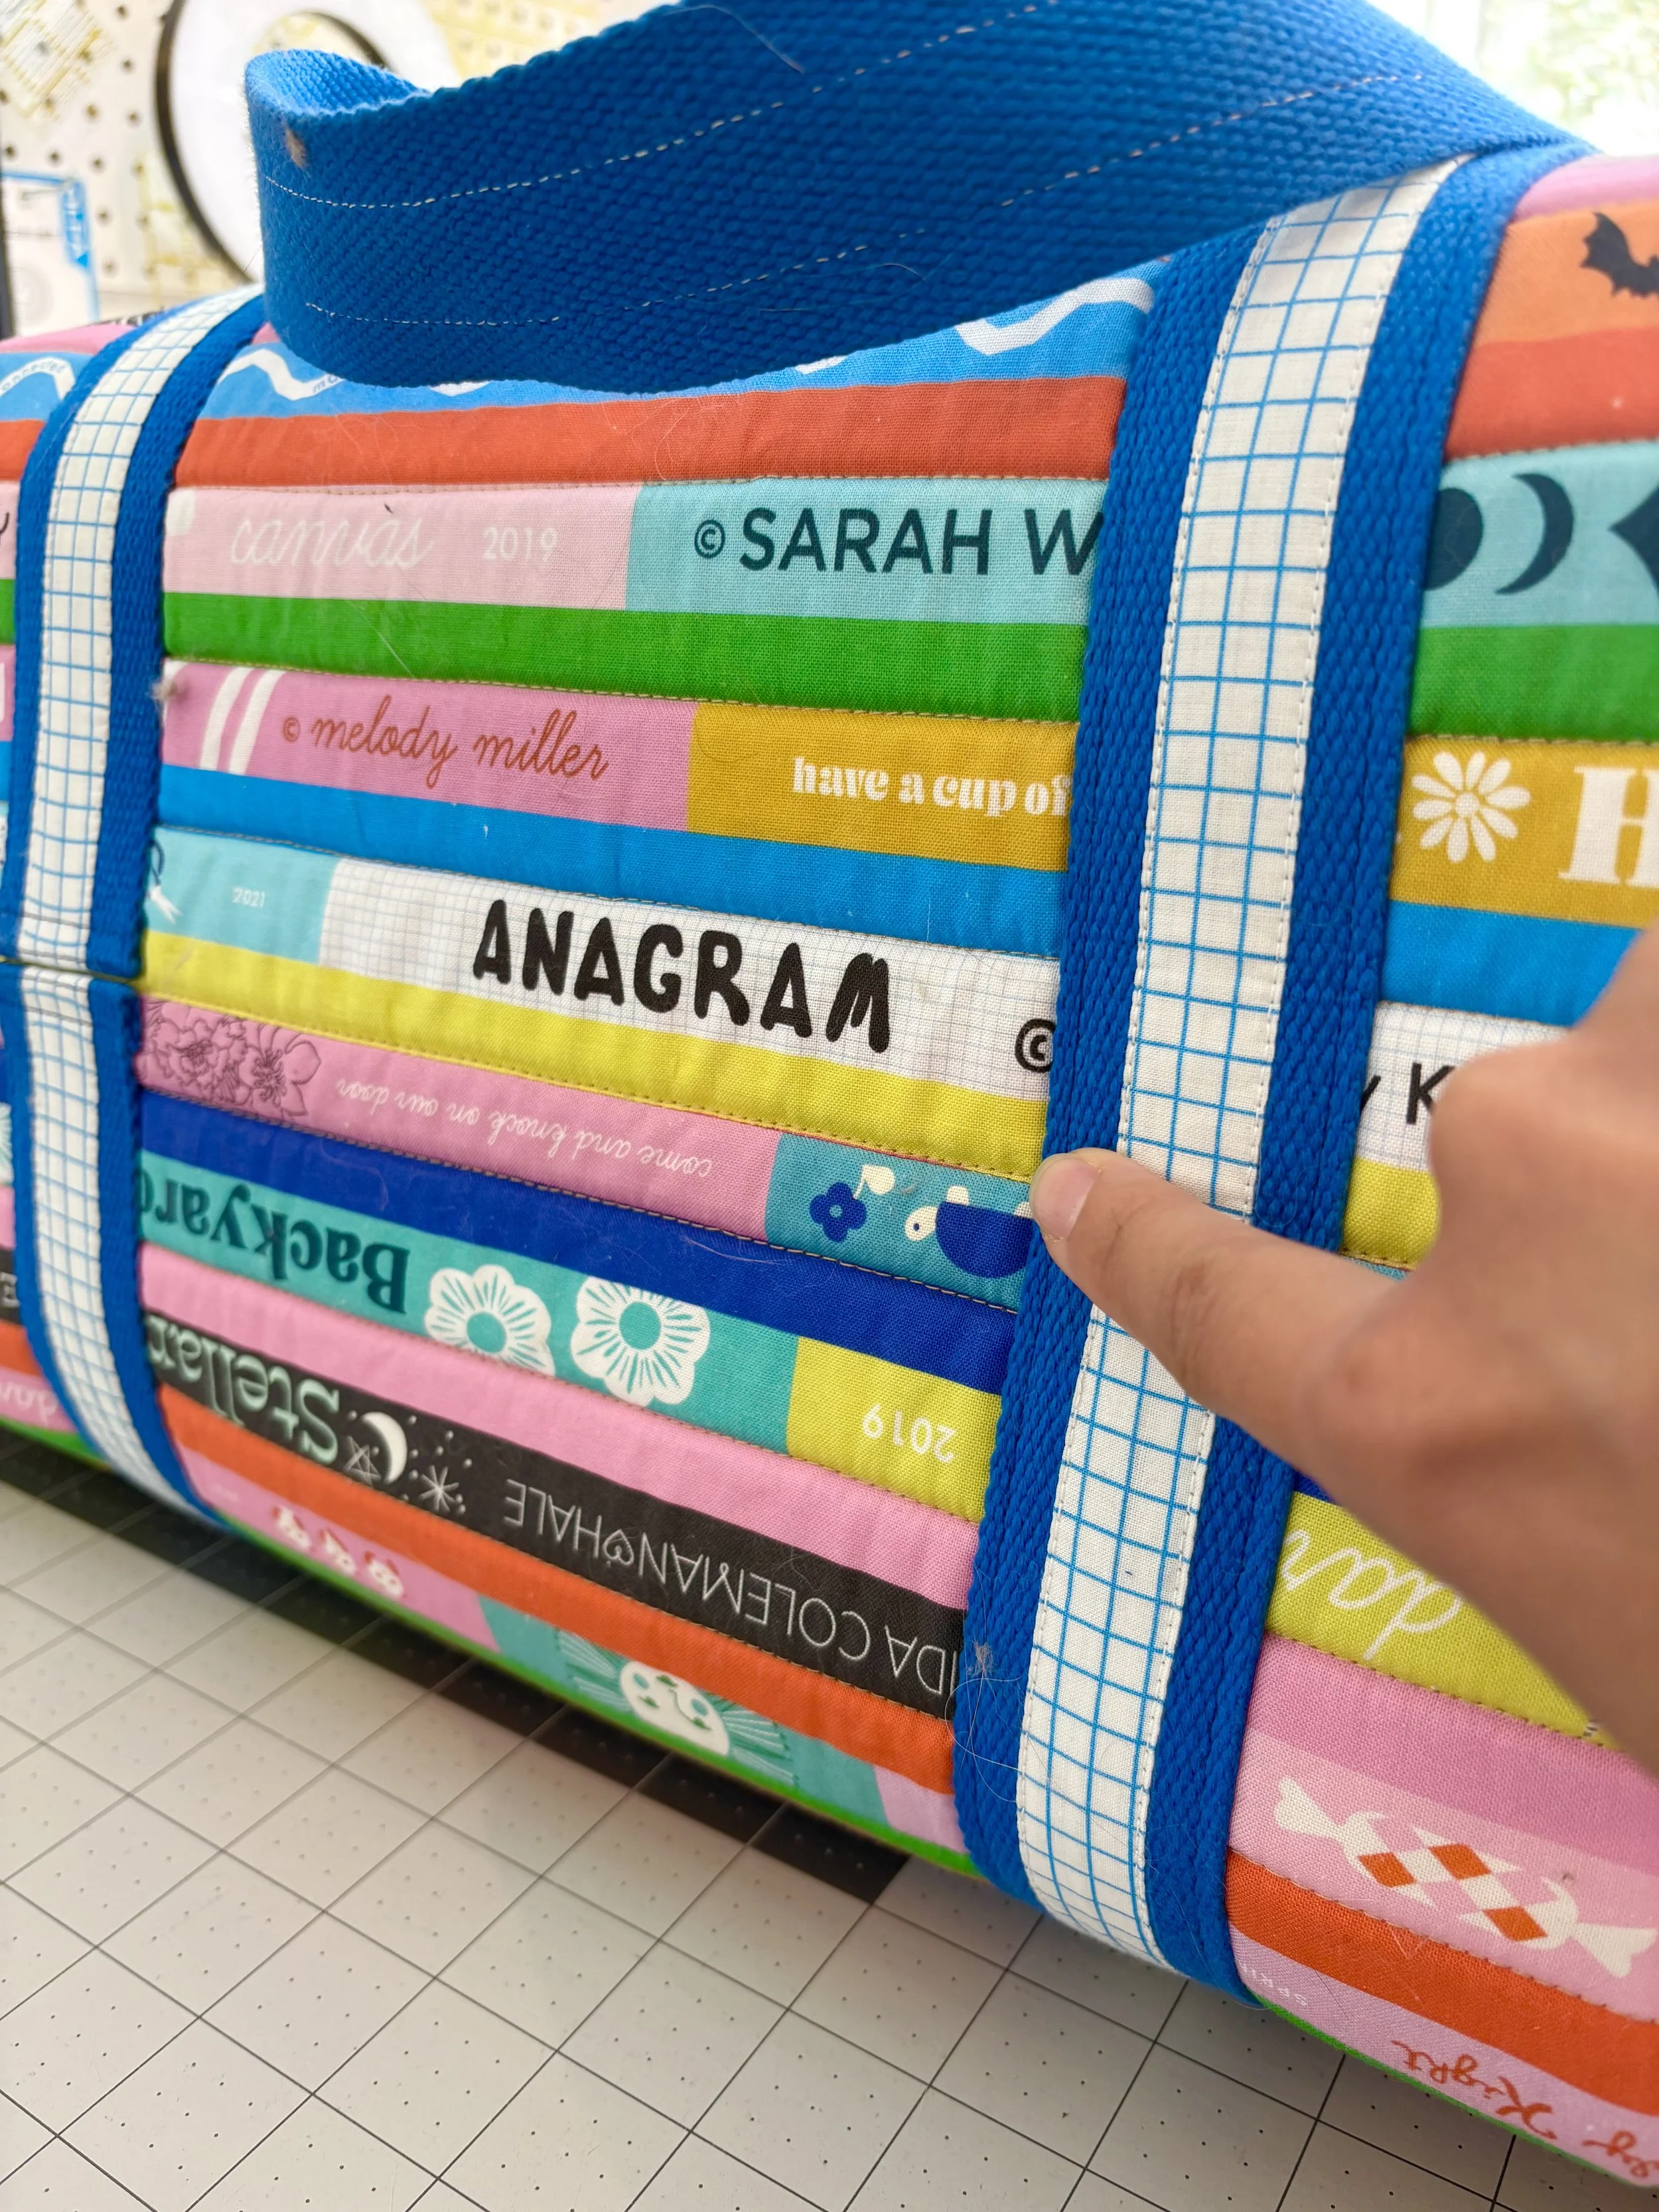
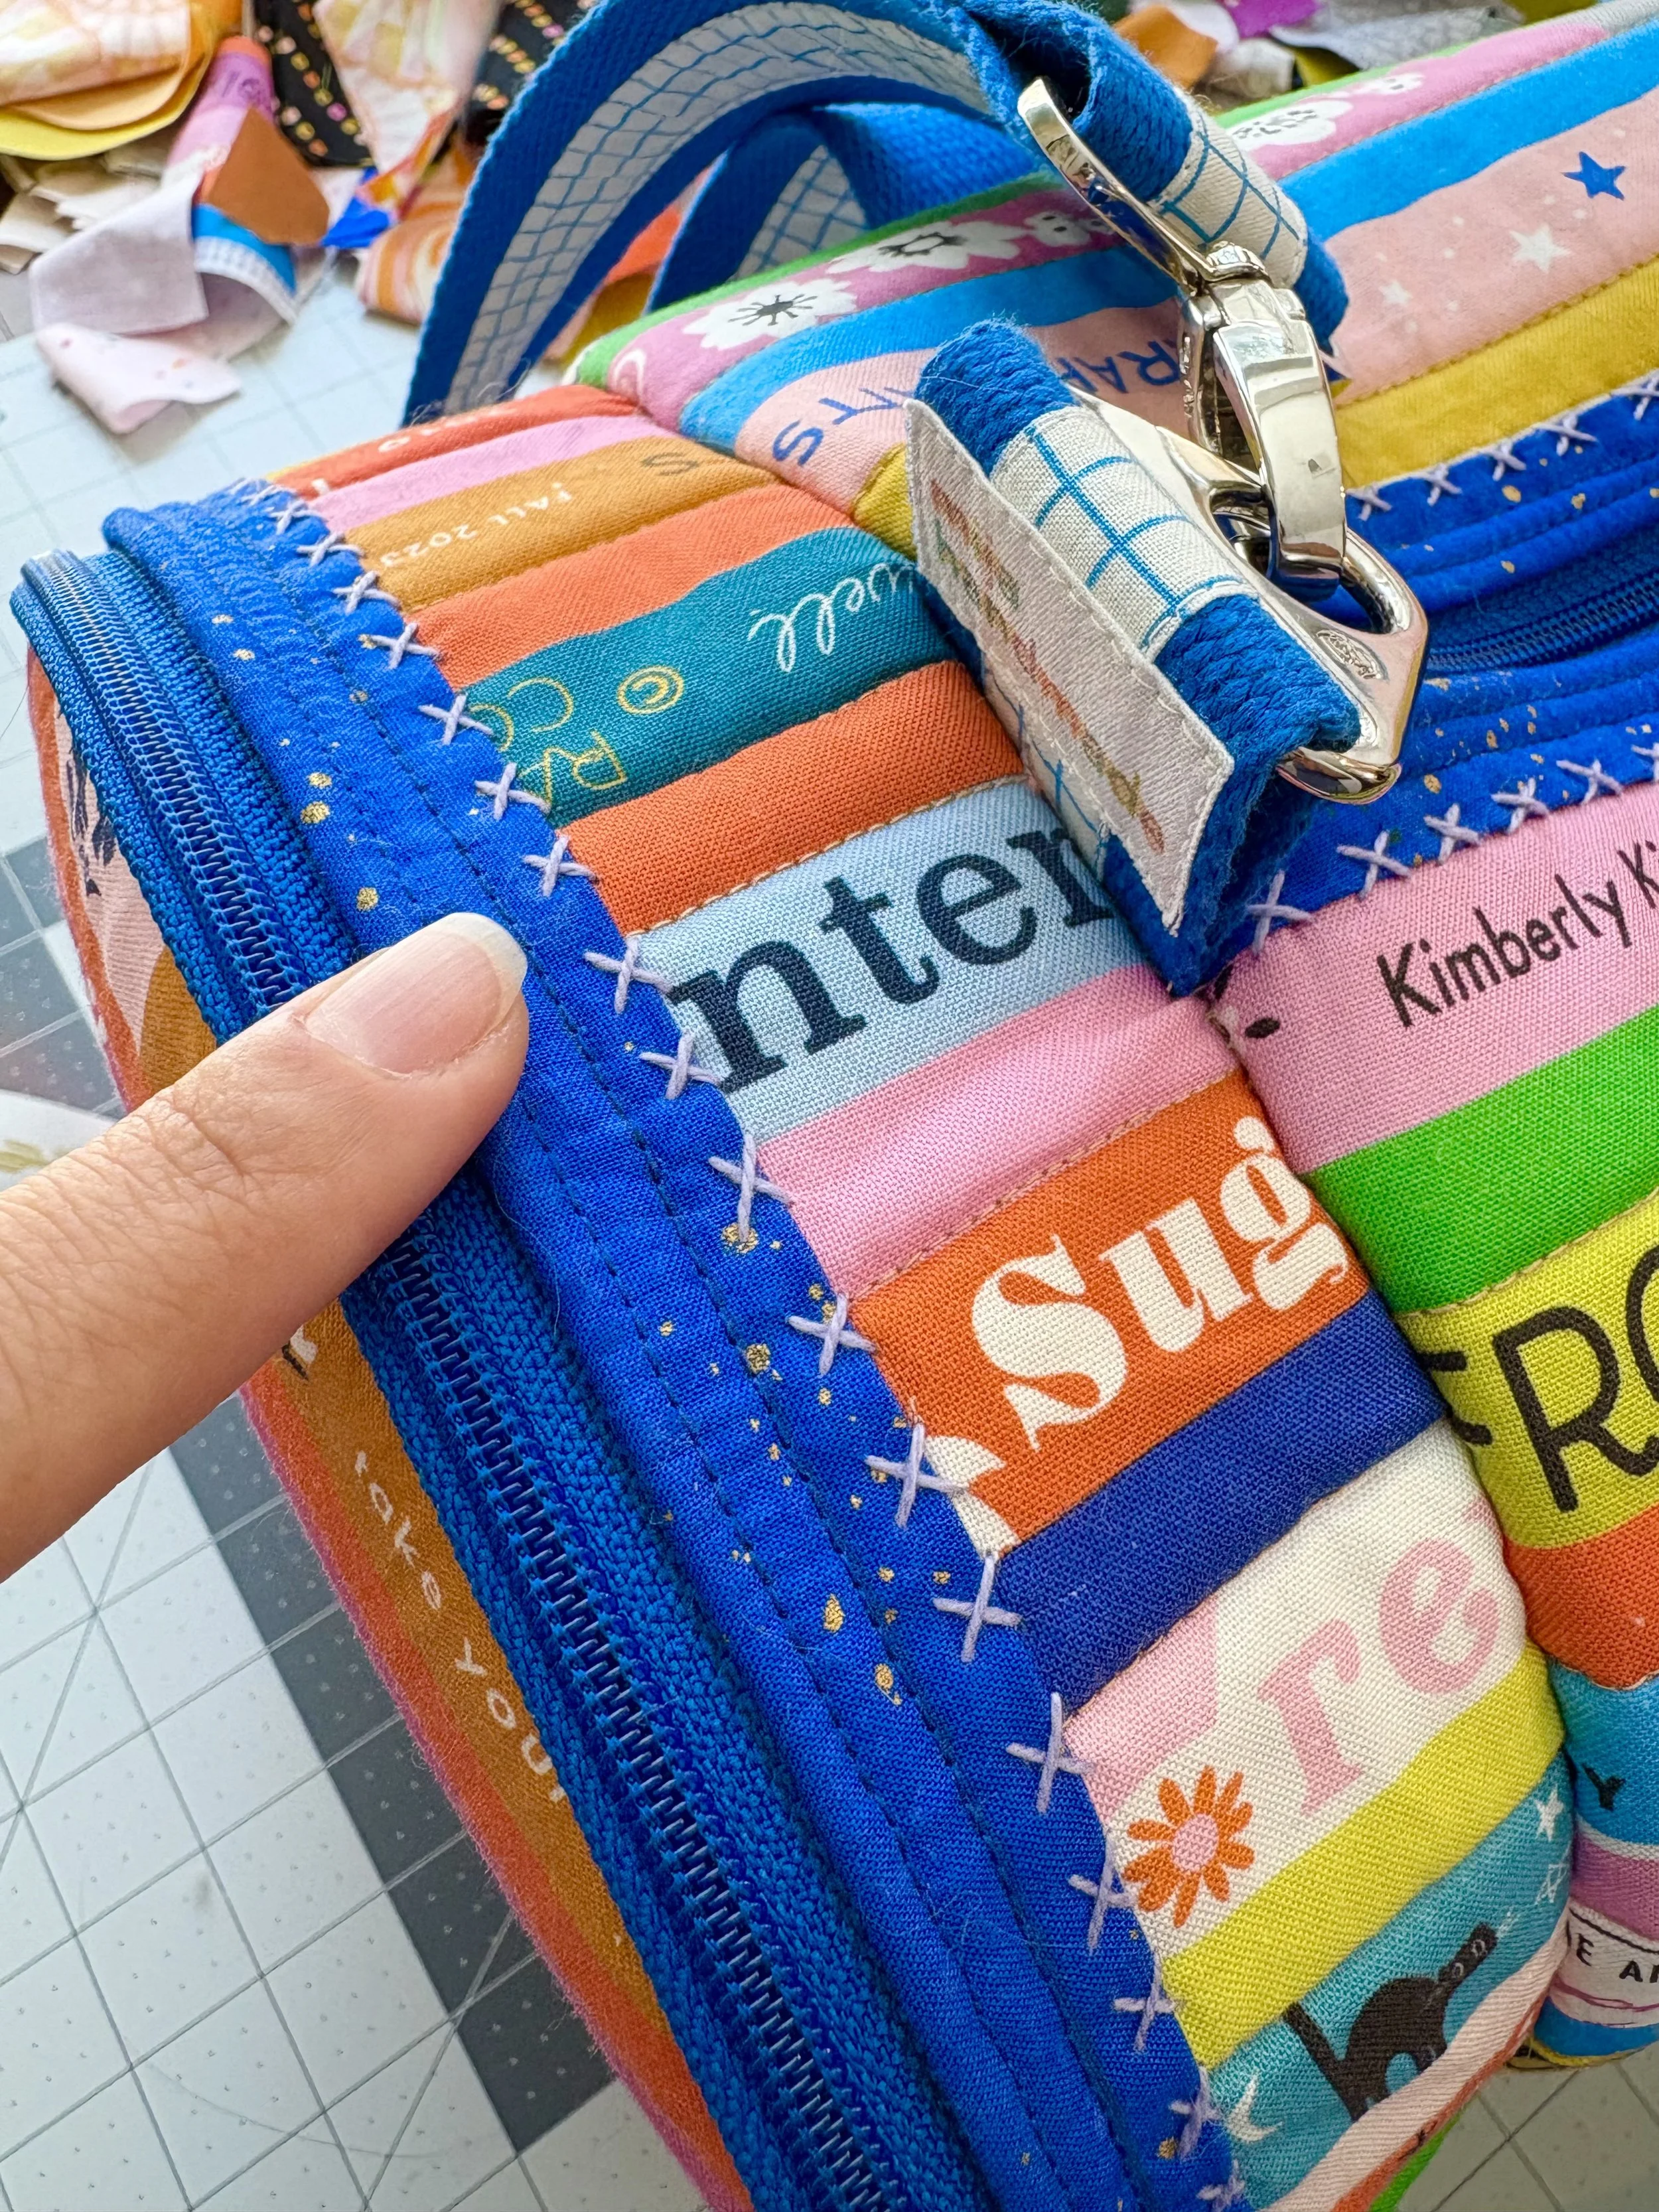
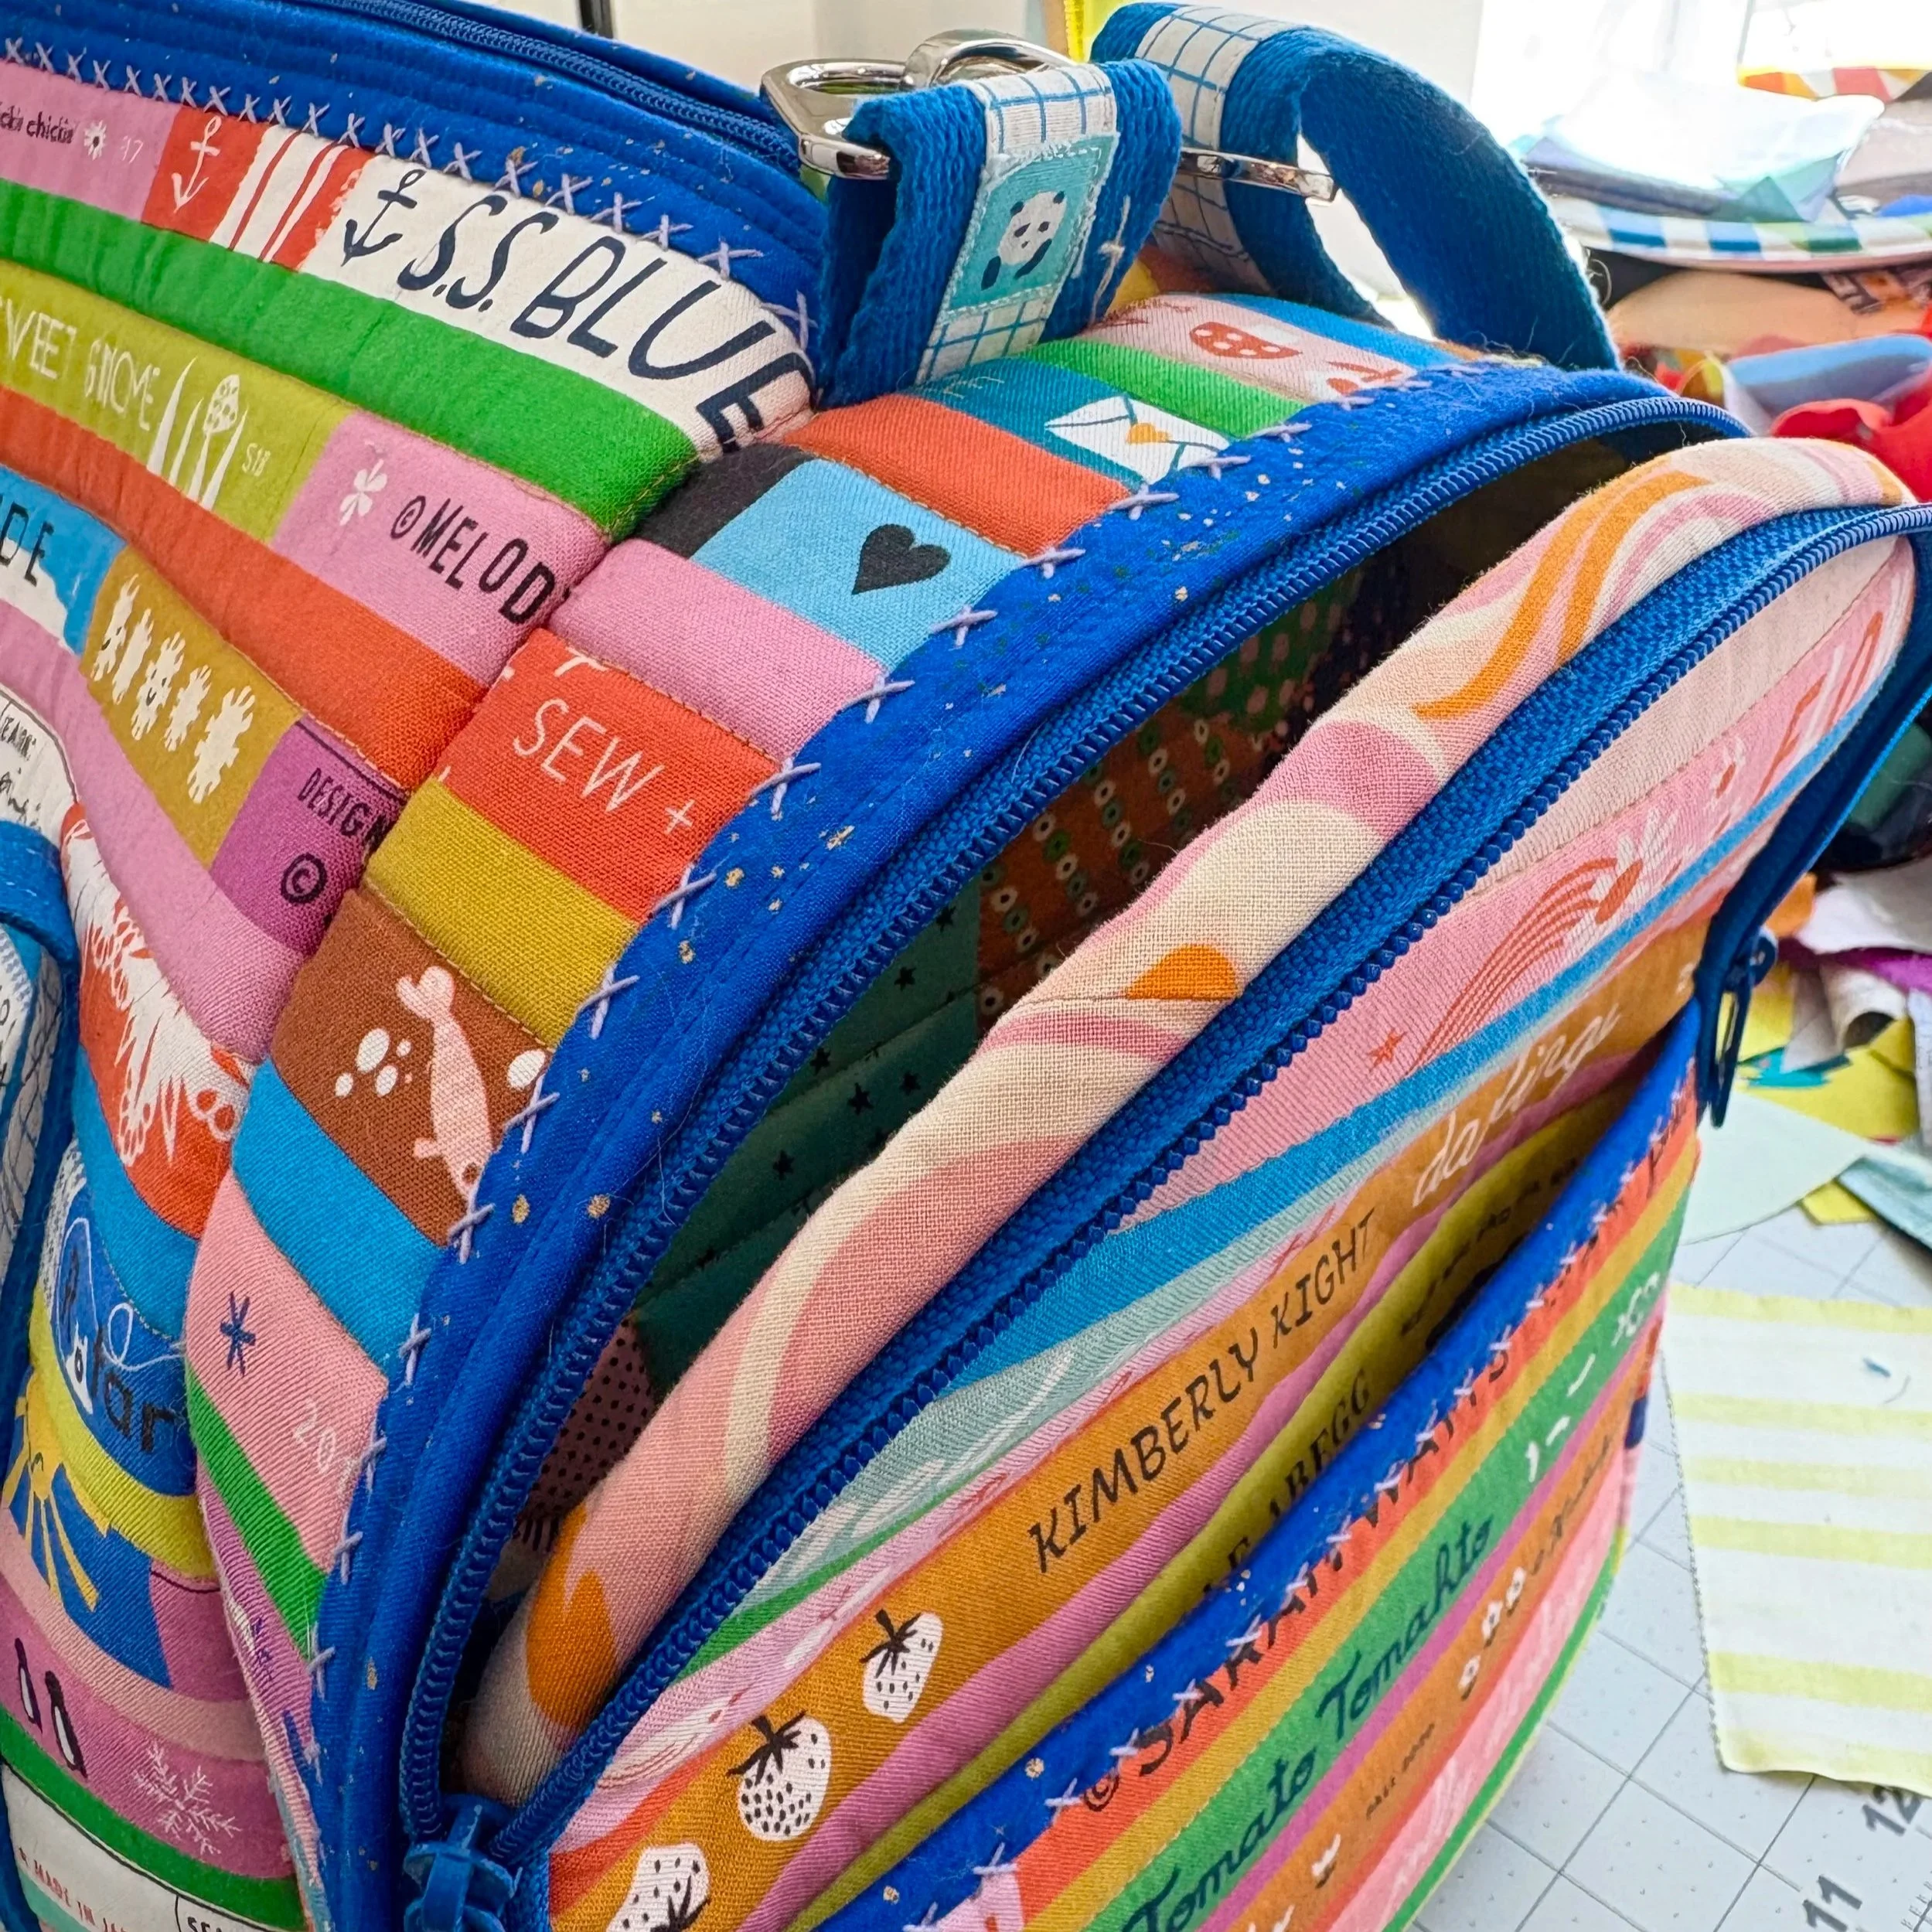
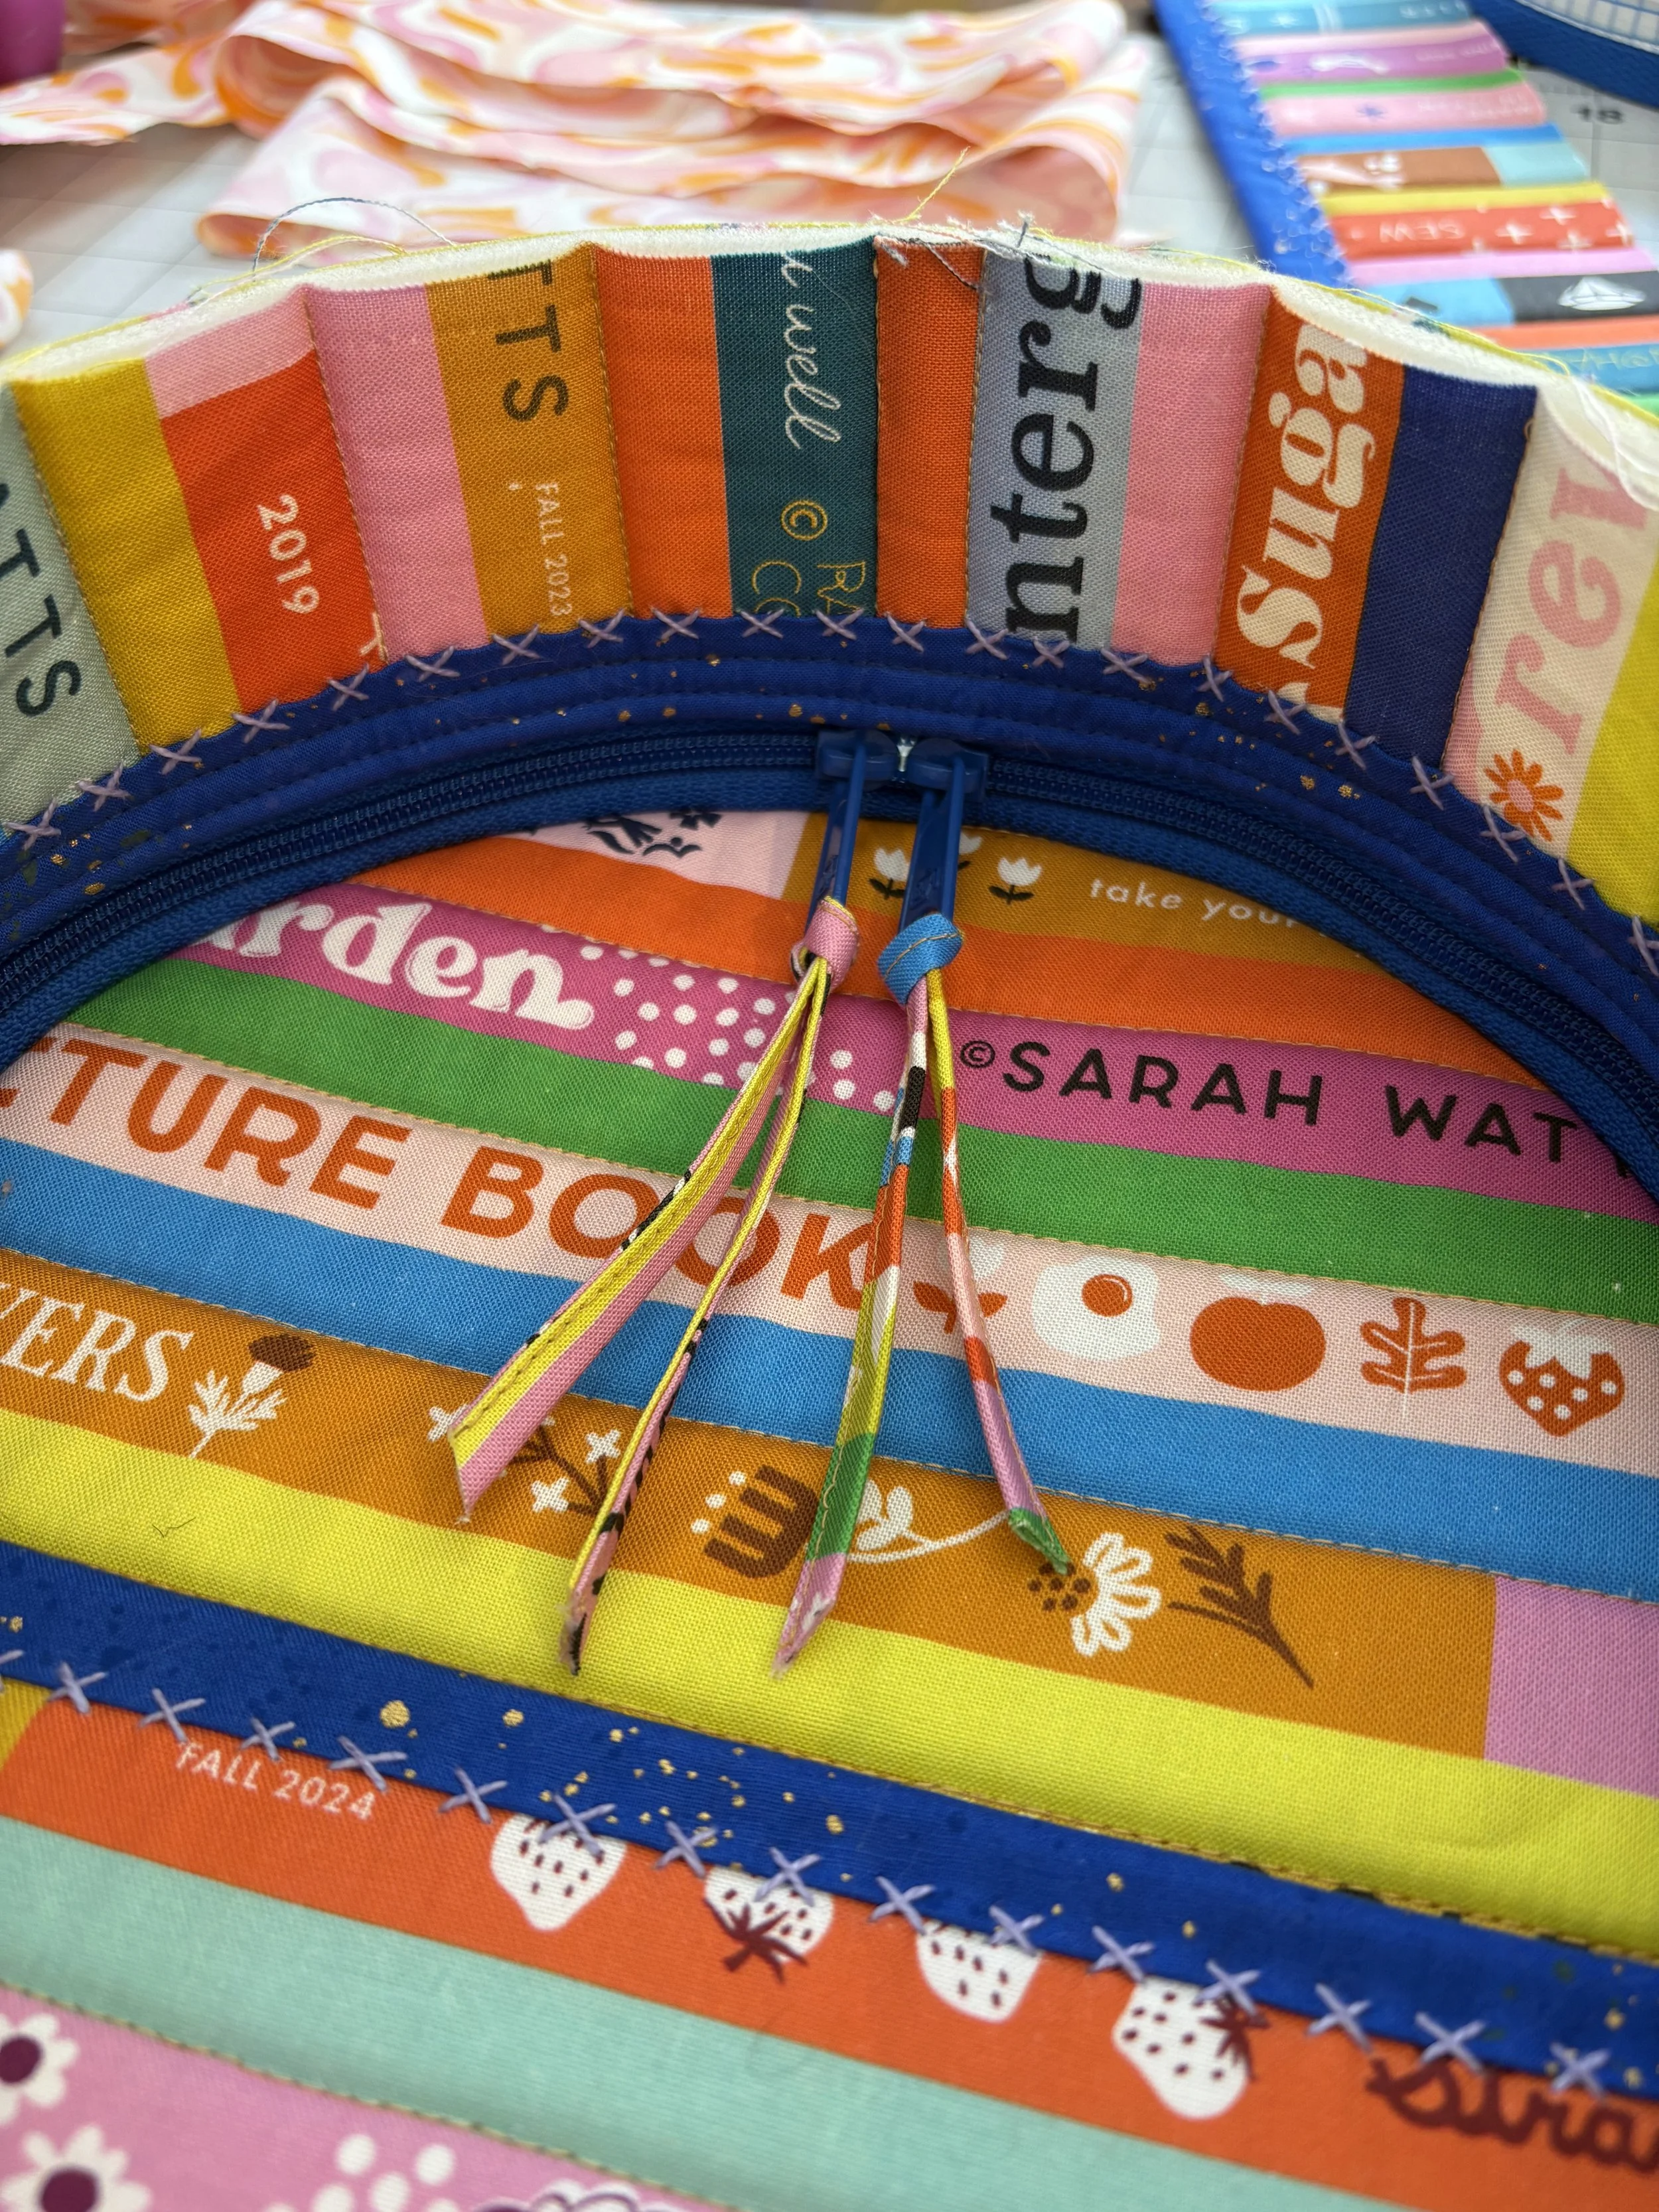
Take a look at these pictures of the bottom of the bag body, the bottom of the side gusset strip and the top of the side zipper strip. Notice how the text changes direction on either side of the place where I am pointing.

3) Because so many exterior fabric units needed to be pieced to account for the directionality, I determined that I wouldn’t be able to just quilt a large piece of fabric, then subcut the bag body units like the pattern encourages. The nice thing about quilting a large piece of fabric is that you can easily account for shrinkage by just quilting a piece larger than you need. Since I would be quilting each bag unit individually, I’d need to account for shrinkage in each.
4) Considering the above three points, I moved on to calculating the size of the exterior units I need to cut and piece. Let’s work through an example, using a made up measurement.
SWITCH MEASUREMENTS: If the pattern says the exterior bag body measurement is 20" x 10", first I have to switch the height and length. I need a unit that is 10" x 20".
CUT UNIT IN HALF: To make sure the words are legible on both sides of the bag, the 10" x 20" needs to be pieced in the middle of the new length dimension (this seam will go at the center bottom of the bag). Remembering to add a ¼" seam allowance, I need two exterior bag body units that measure 10" x 10¼".
ACCOUNT FOR SHRINKAGE: The amount of extra fabric you add can vary depending on how densely you plan to quilt your pieces. From a lesson I learned while making my previous packing cube, I knew I was mostly concerned about shrinking in the length dimension. So I added ½" to the length of both pieces (which would give me a total of one extra inch in length after everything is pieced). I also added ½" to the height dimension (which would give me an extra ½" in height after everything is pieced) . That means I need two exterior bag body units that measure 10½" x 10¾". And then I just rounded up to the nearest inch to be extra safe. My final requirements for the two exterior bag body pieces would be 11" x 11.

5) Next in this example, I pieced the two 11" squares so that the print runs away from the center seam. Another way to describe this is if you held the resulting unit like a long scroll of parchment, it would be legible at the top and the text would be upside down once you reached the center seam.
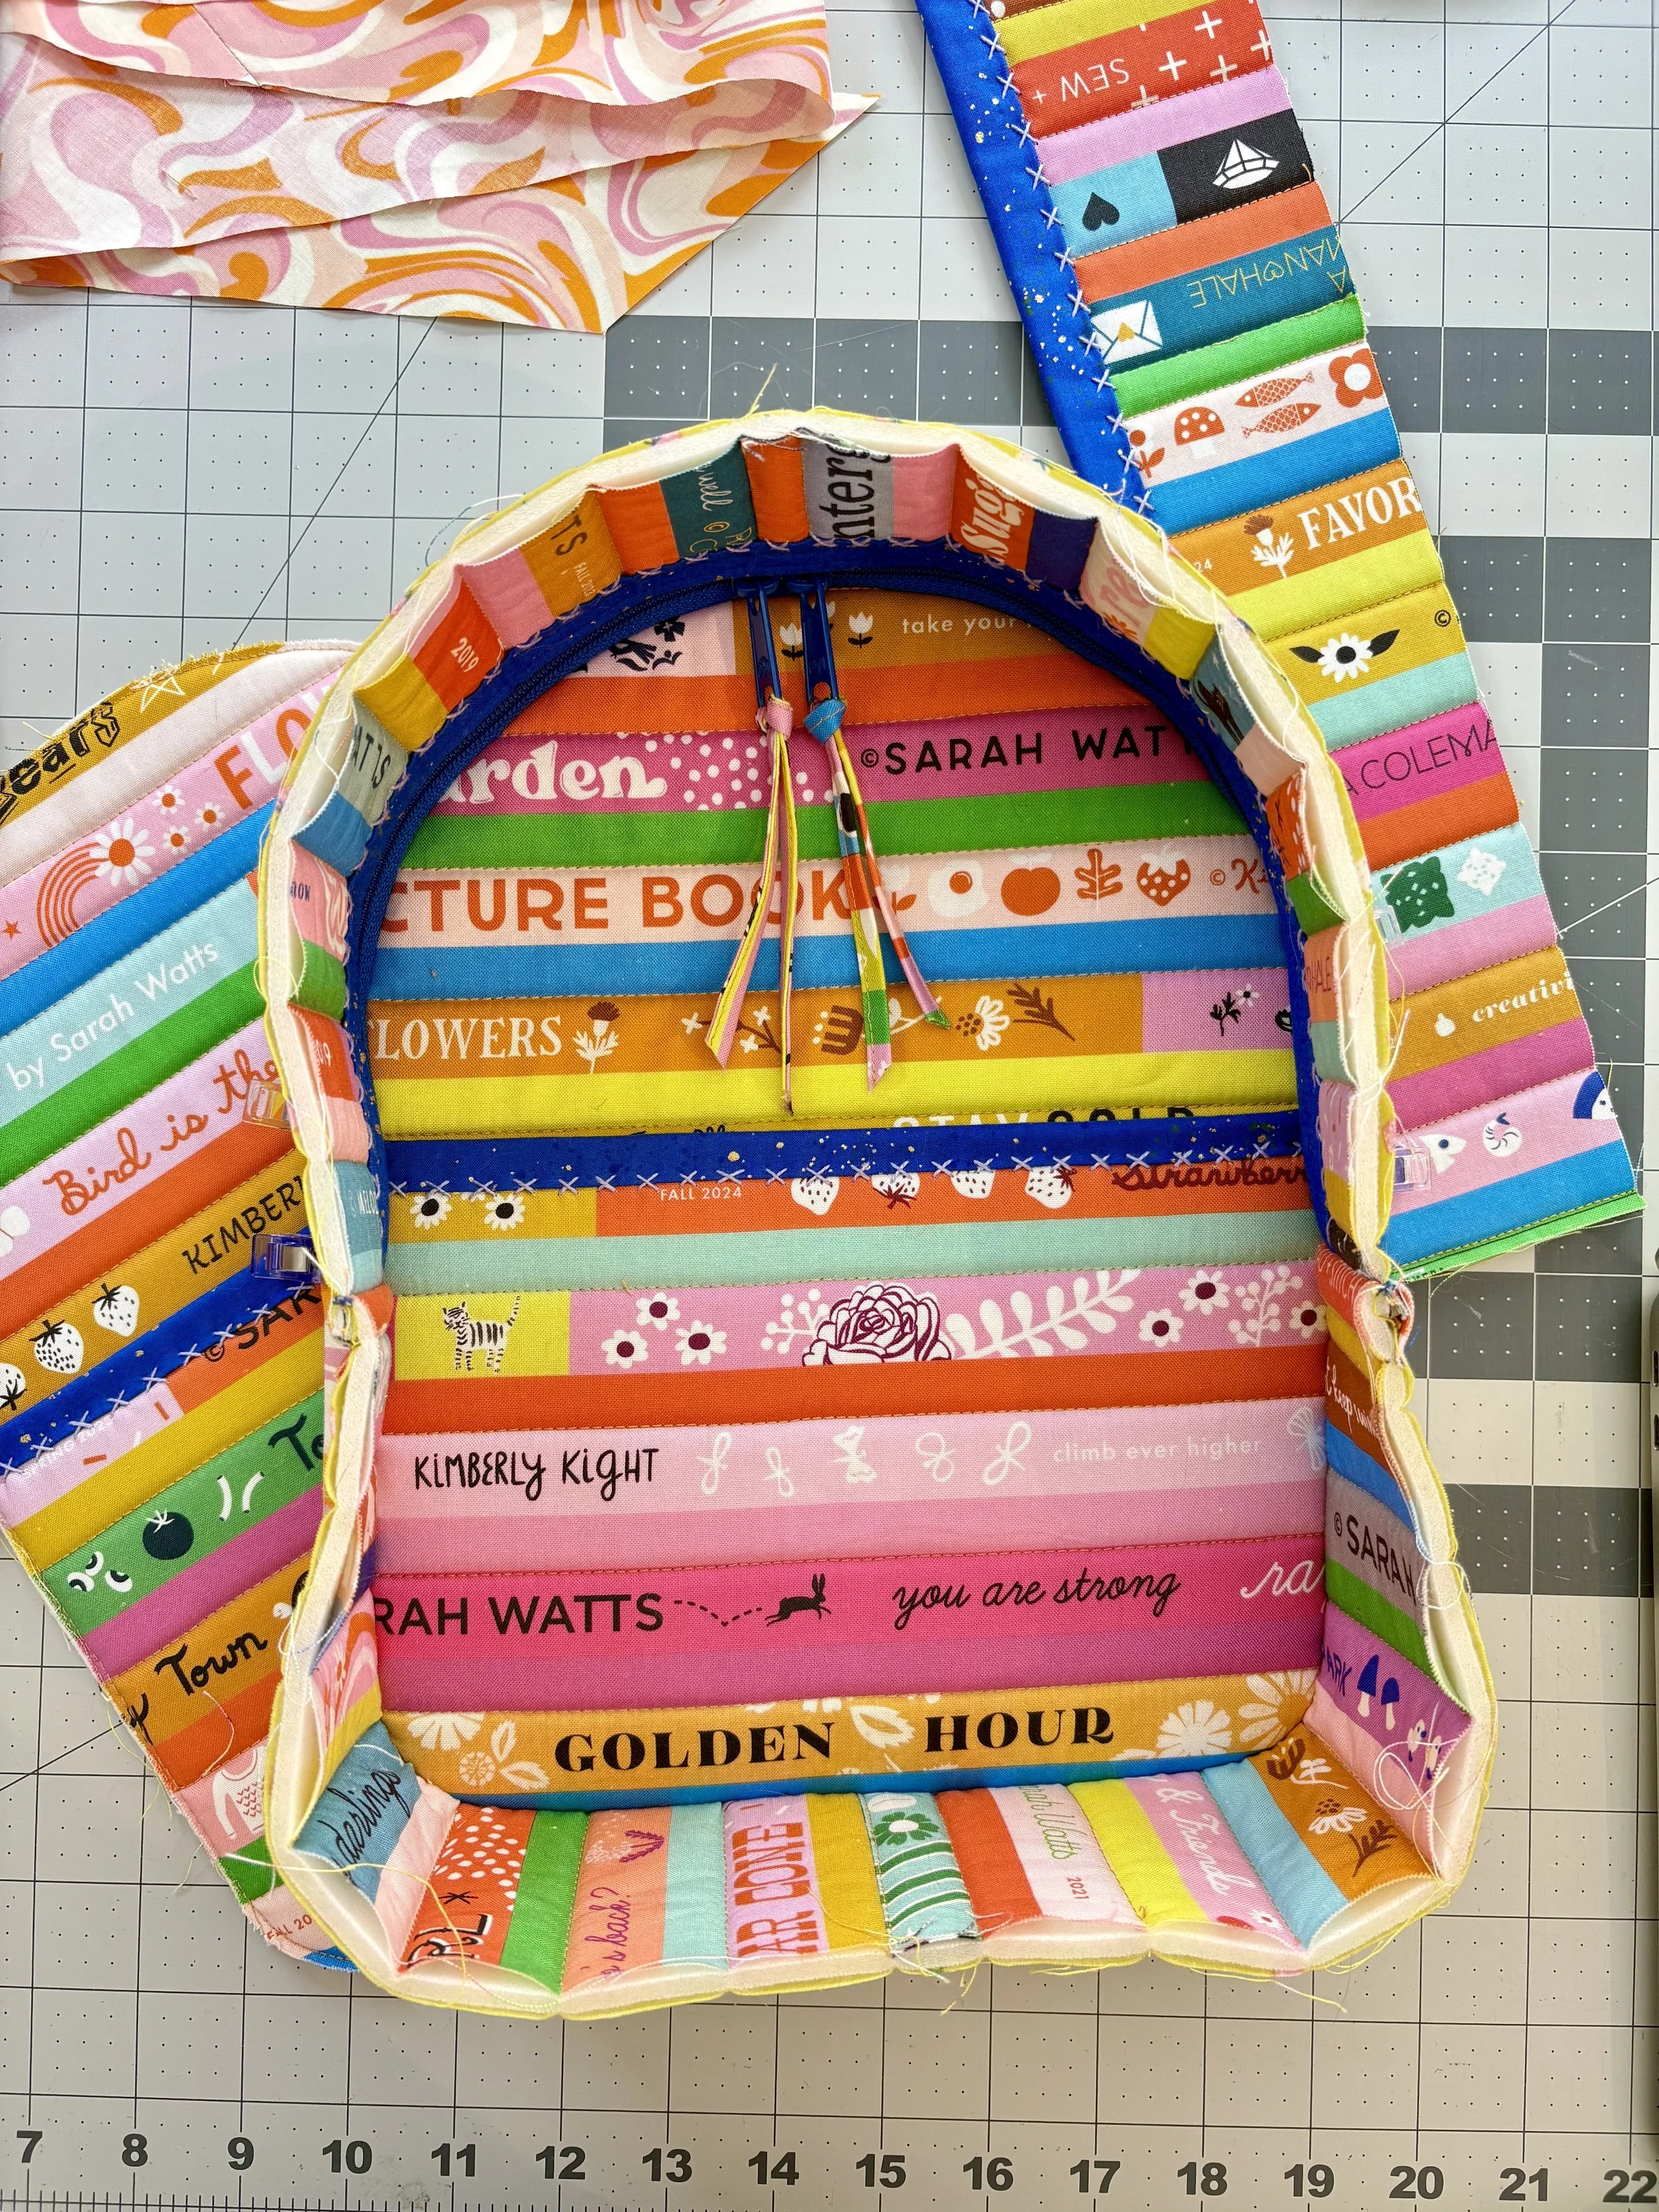
Take a look at this picture of me ironing the bag body unit. You can read the words at the top of the photo, but the words at the bottom of the photo are upside down.
6) I laid this fabric unit on top of the Soft and Stable and lining fabric to cut out matching pieces to quilt. I quilted the sandwich and cut out my final exterior bag unit that measures 10" x 20".
7) Repeat these calculations with the side zipper and side gusset strips. The side gusset strips get pieced like the bag body, like a scroll of parchment that is legible from the top. The side zipper strips get pieced in the opposite orientation. The text should run towards the center seam (this seam will sit at the TOP of the bag). If you held it like a long scroll from the top, the text is upside down.
Side Zipper Strip Alterations
I wanted the side zippers to sit at the edge of the side pockets, not in the middle of the pocket opening. This alteration was pretty straightforward, but again, I recommend that you have some bag making experience before trying to alter patterns.
Instead of using four Side Zipper Strips, I used two Side Zipper Strips cut the same as the pattern-written height dimension of the Side Gusset Strip. I kept the pattern-written length dimension. I’ll provide another example using made up measurements.
If the pattern says to cut:
Four side zipper strips: 2" x 10"
Two side gusset strips: 4" x 11"
I needed these units instead:
Two side zipper strips: 4" x 10"
Two side gusset strips: 4" x 11"
Then I followed all the steps outlined above to account for one-way directional fabric and shrinkage to determine what size exterior units to cut. During Zipper Strip assembly, I attached the zipper to the bound side of the Zipper Strips, then re-trimmed my assembled Zipper Strip unit to make sure it still equaled the 4" dimension of the Gusset Strip. I followed all the steps to attach the Exterior End Panel to the zipper side of the Zipper Strip.
Phew! That was a lot. If you’re confused… well… me too! Like I mentioned above, height X length just doesn’t vibe with my brain. That’s not a jab at the pattern - it’s more important that the pattern is consistent in how it presents measurements, which this pattern is! It’s the pattern writer’s job to share information in a consistent way, and my job to interpret that information.
Pile onto that, that every measurement for the exterior fabric needs to be switched, then cut in half, then expanded… I spent a lot of time quadruple checking my math and logic while making this bag. Even while writing up this blog post, I scratched my head and double guessed myself. My parting advice is this: get some bag making experience under your belt, and double check everything.