
Pack It In 2.0 Pattern Review and Tips
For a while now, I’ve had an idea for a duffle bag pattern that I want to write. The biggest problem? I haven’t made too many bags or followed any bag patterns. I’ve stumbled my way through a few bags that I’ve made from scratch (see this selvedge fringe bag that I absolutely love) but that experience doesn’t lend itself well to drafting a writing a high quality pattern.
I decided to fix this by getting my hands on a few bag patterns and digging in deep, starting with ByAnnie’s Pack It In 2.0 bag. And the first thing I learned? I’m terrible at following patterns! But that’s a personal trait that I will have to work on. Overall, I had so much fun making this packing cube - I believe myself to be slightly addicted to bag making now.
ByAnnie patterns are really well written, and the add on videos can be very helpful. If you need a summer project or are like me and want to improve your bag making skills, keep reading for my tips and insights into the pattern, and a list of the materials I used. I outline my thoughts on each step of the pattern and share some things I did to make my life easier (and some things I did to make my life harder).
Part I. Cutting
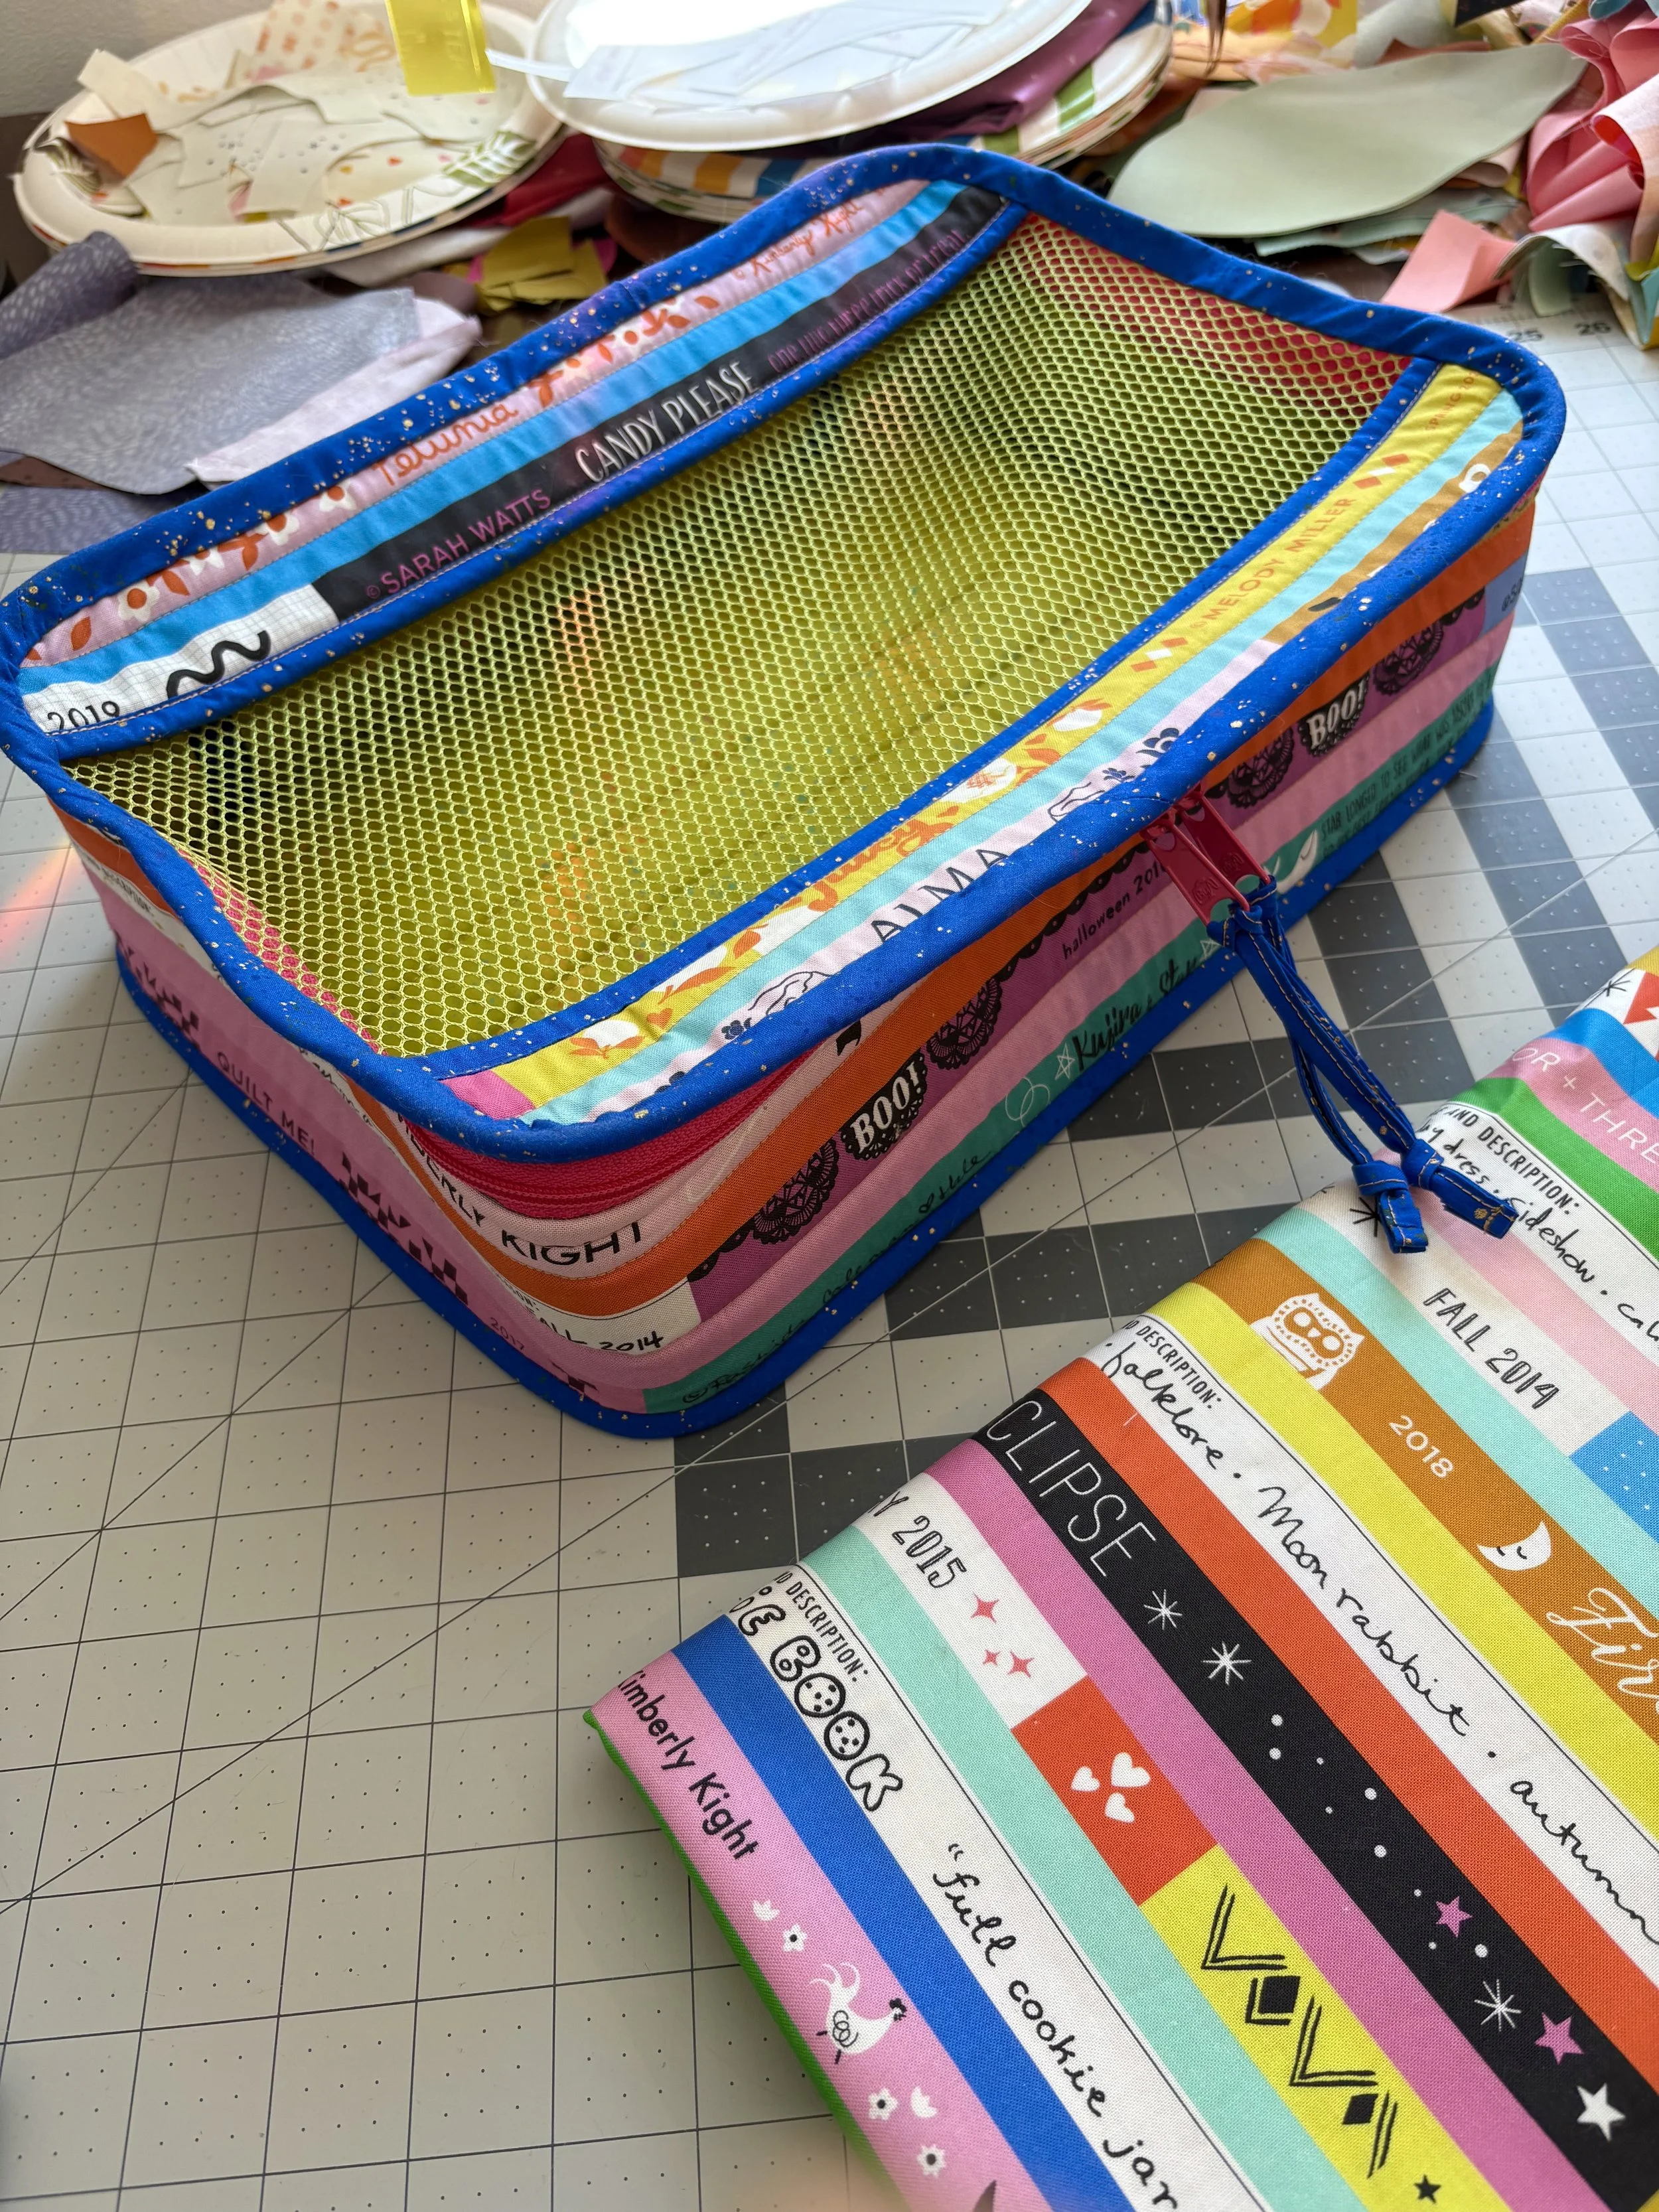
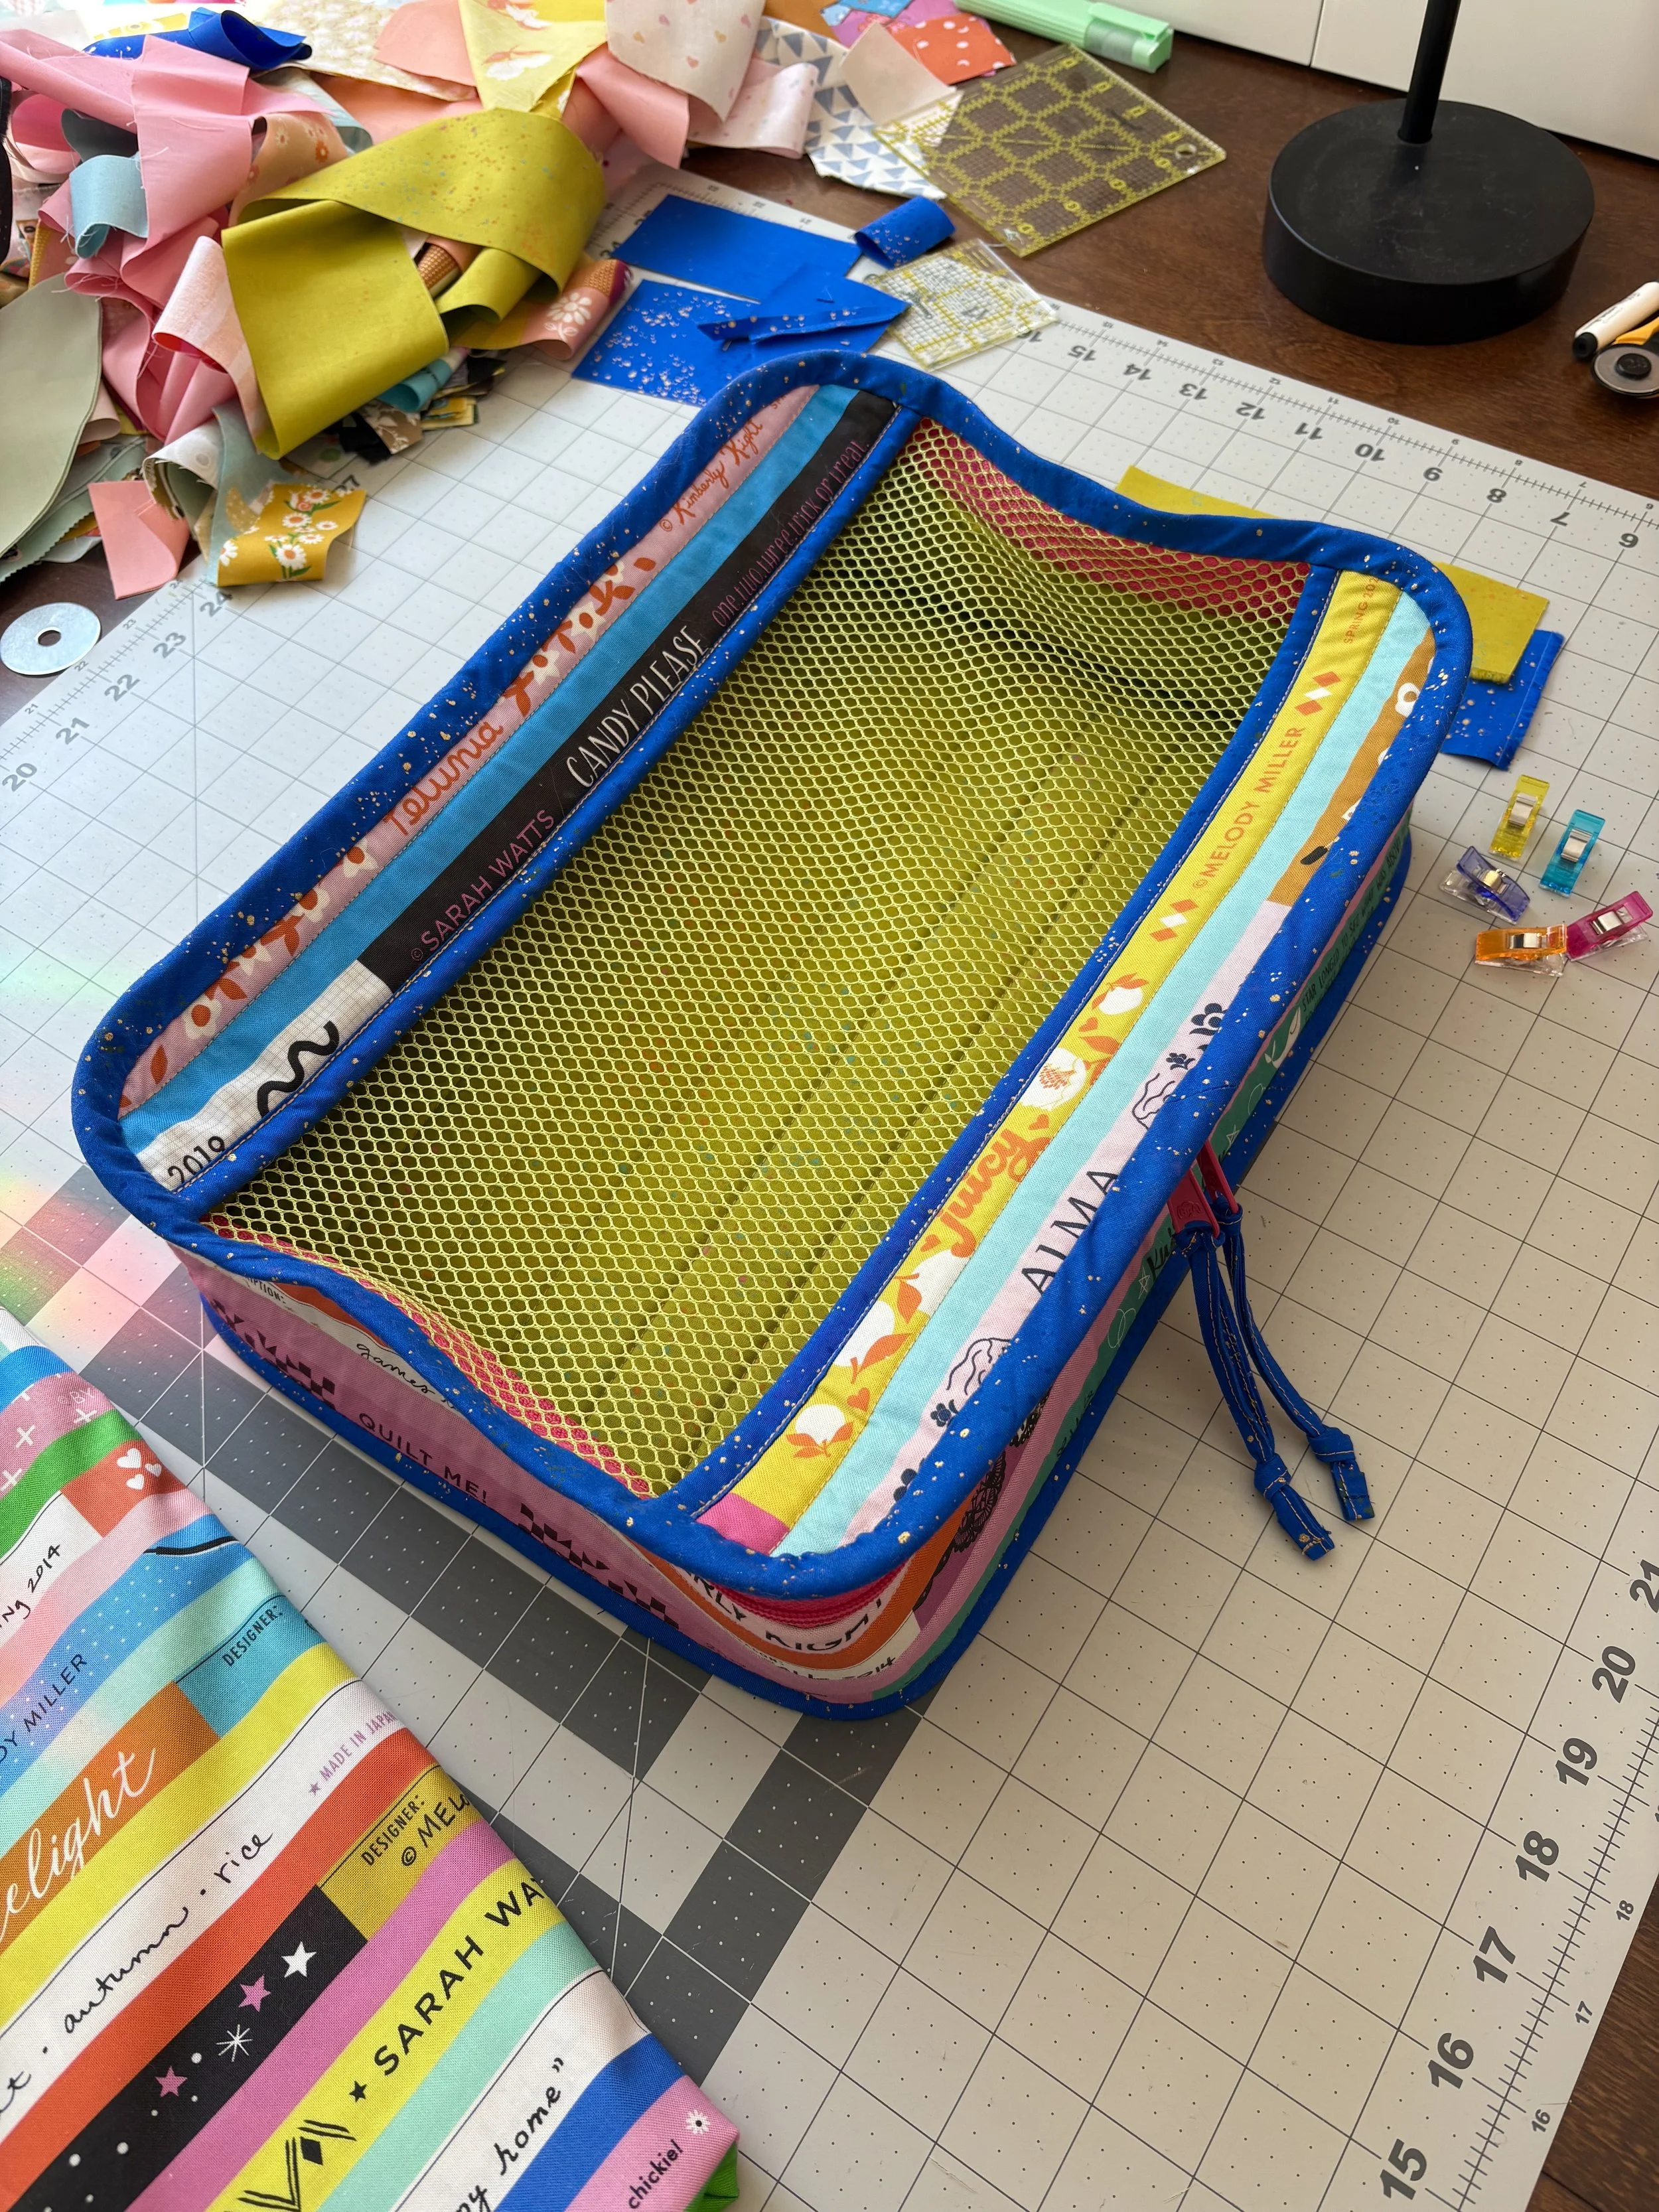
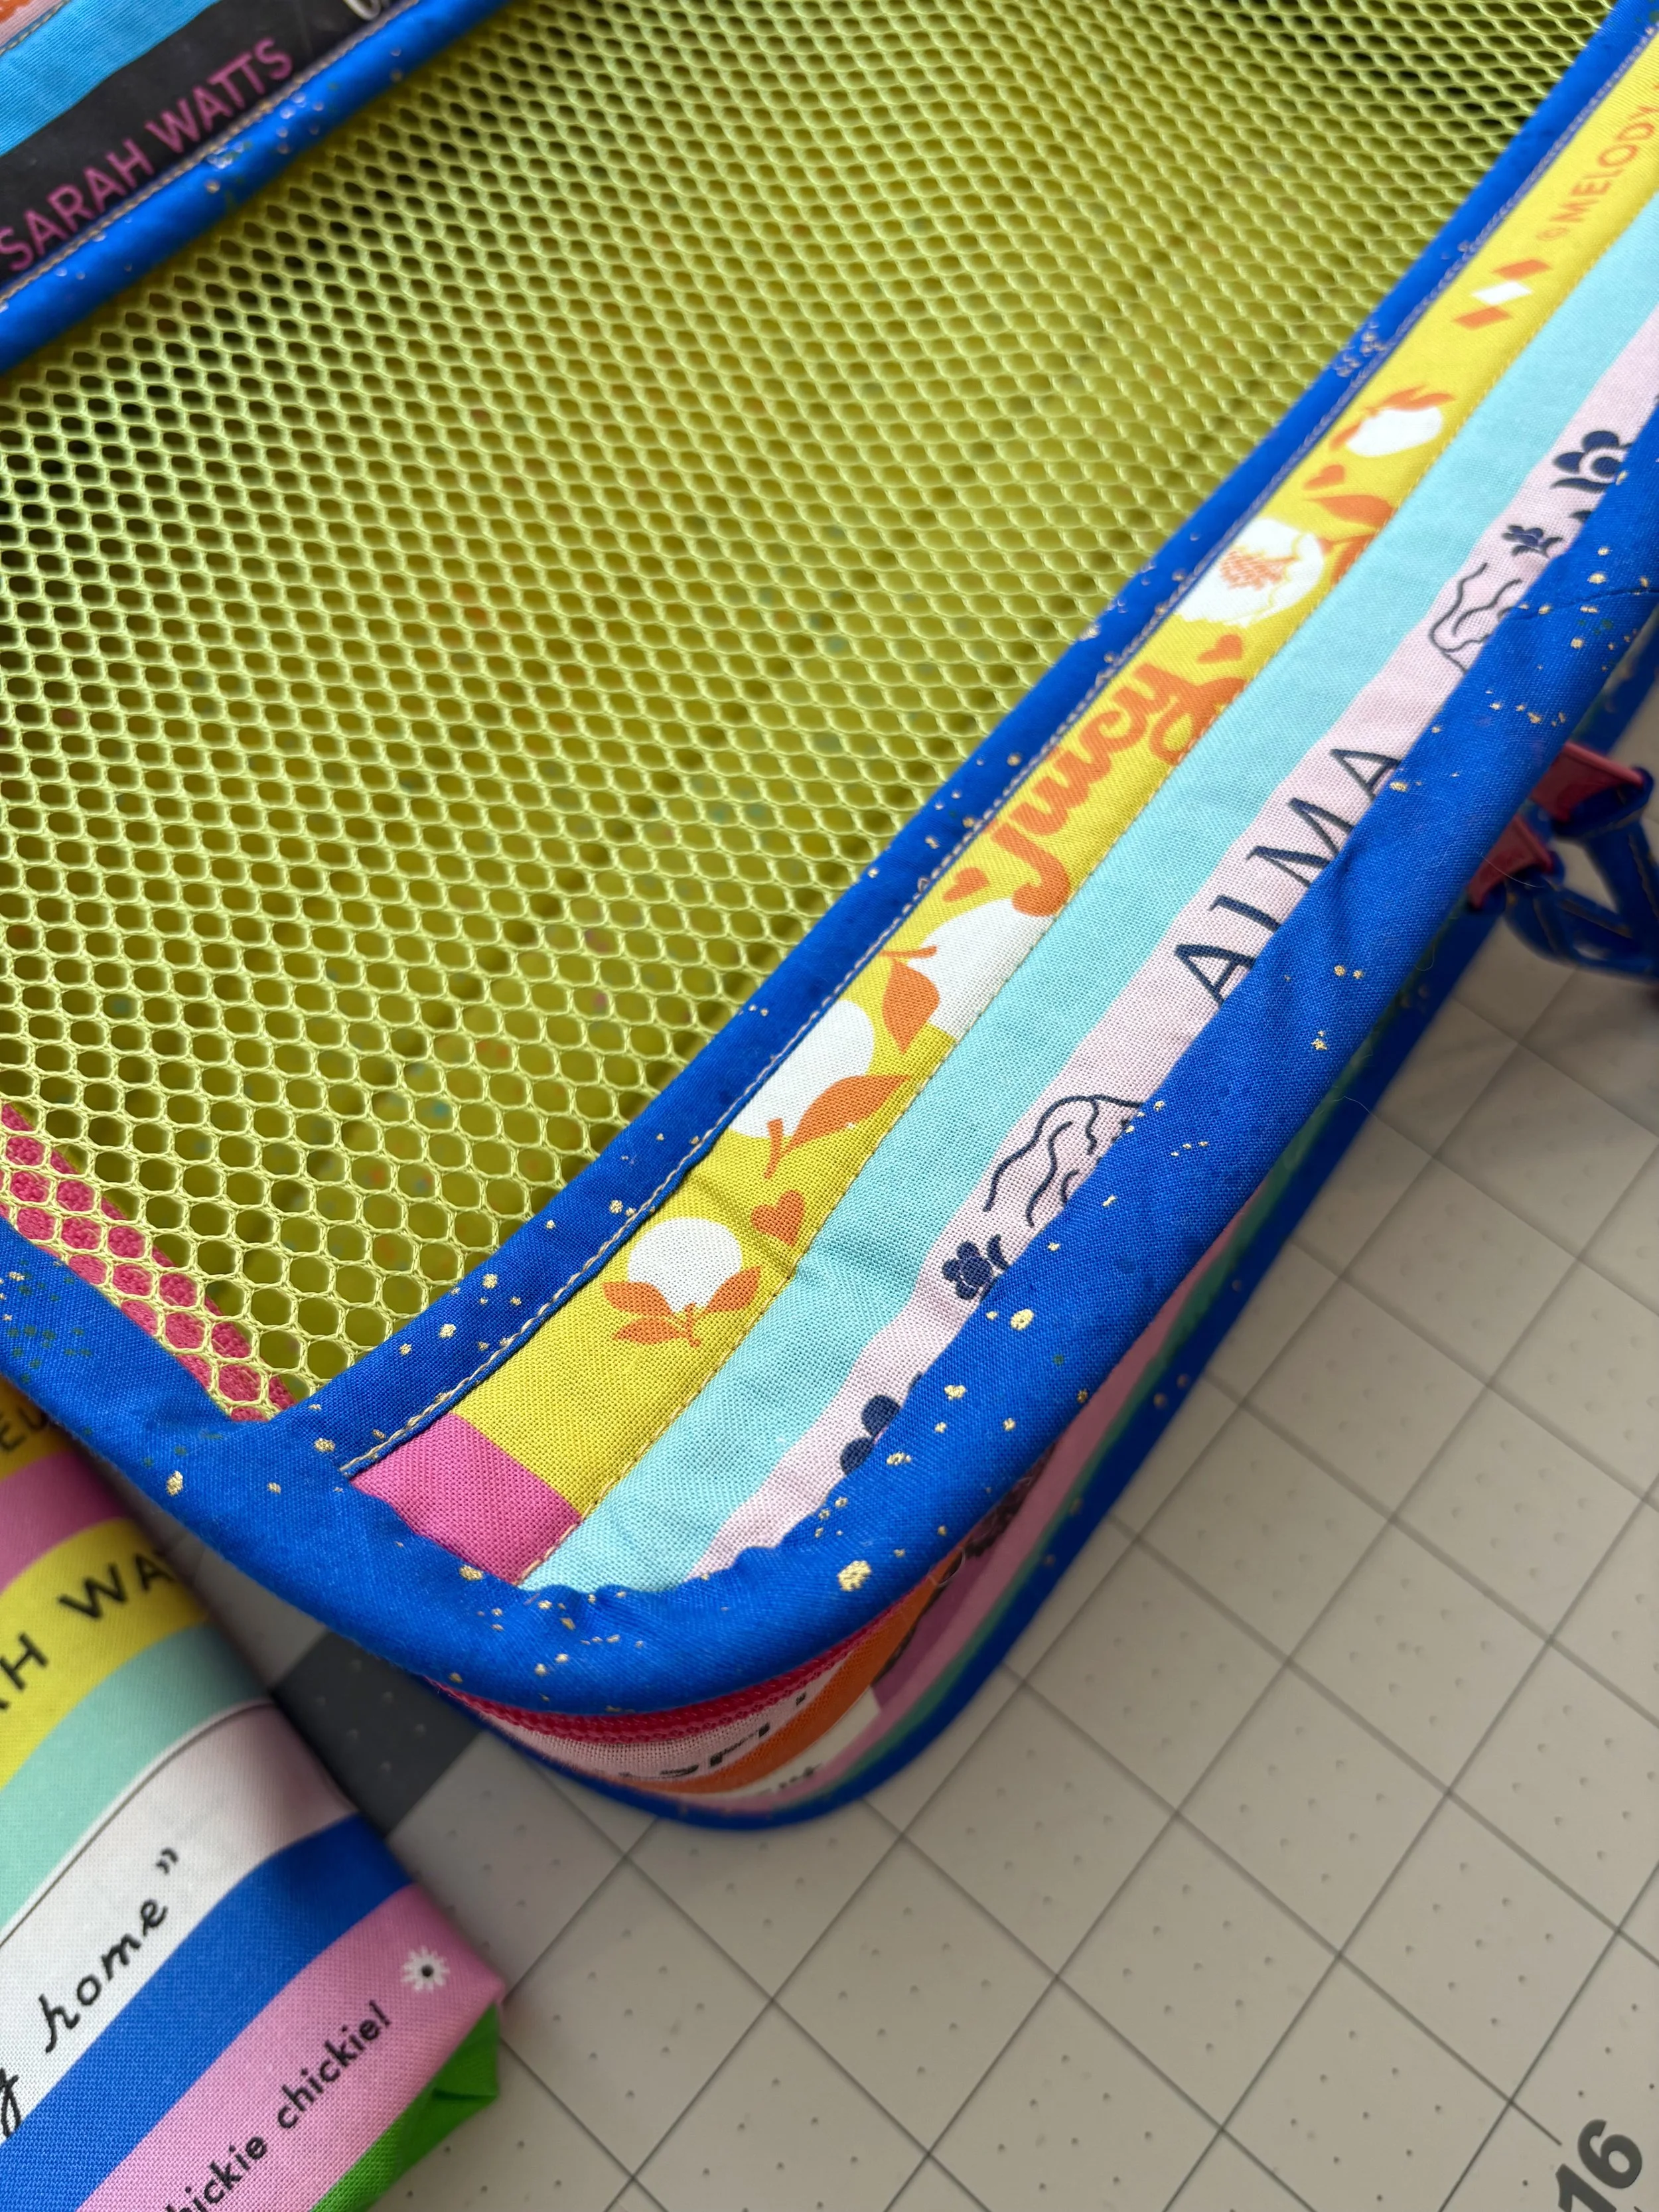
The cutting instructions are laid out very thoughtfully. Because there are multiple size options, I highlighted the information for the size I wanted to make. The pattern and cutting instructions account for directional fabric, so don’t be scared to use them! I used Ruby Star Society’s Selvedge Magic and it’s the most perfect fabric for this project.
Part II. Quilting
Here’s where I learned I’m terrible at following patterns. I started out making the large size packing cube, but I had so much shrinkage after quilting my pieces, that I was scared I wouldn’t have enough material to continue with the big size. So I pivoted and downsized all the quilted pieces for the medium size cube. If I had just been calm and read the whole pattern, I would have realized that there is a comfortable amount of overage, my shrinkage was nothing to worry about, and I could have moved forward with the large size.
Part III. Preparing Components
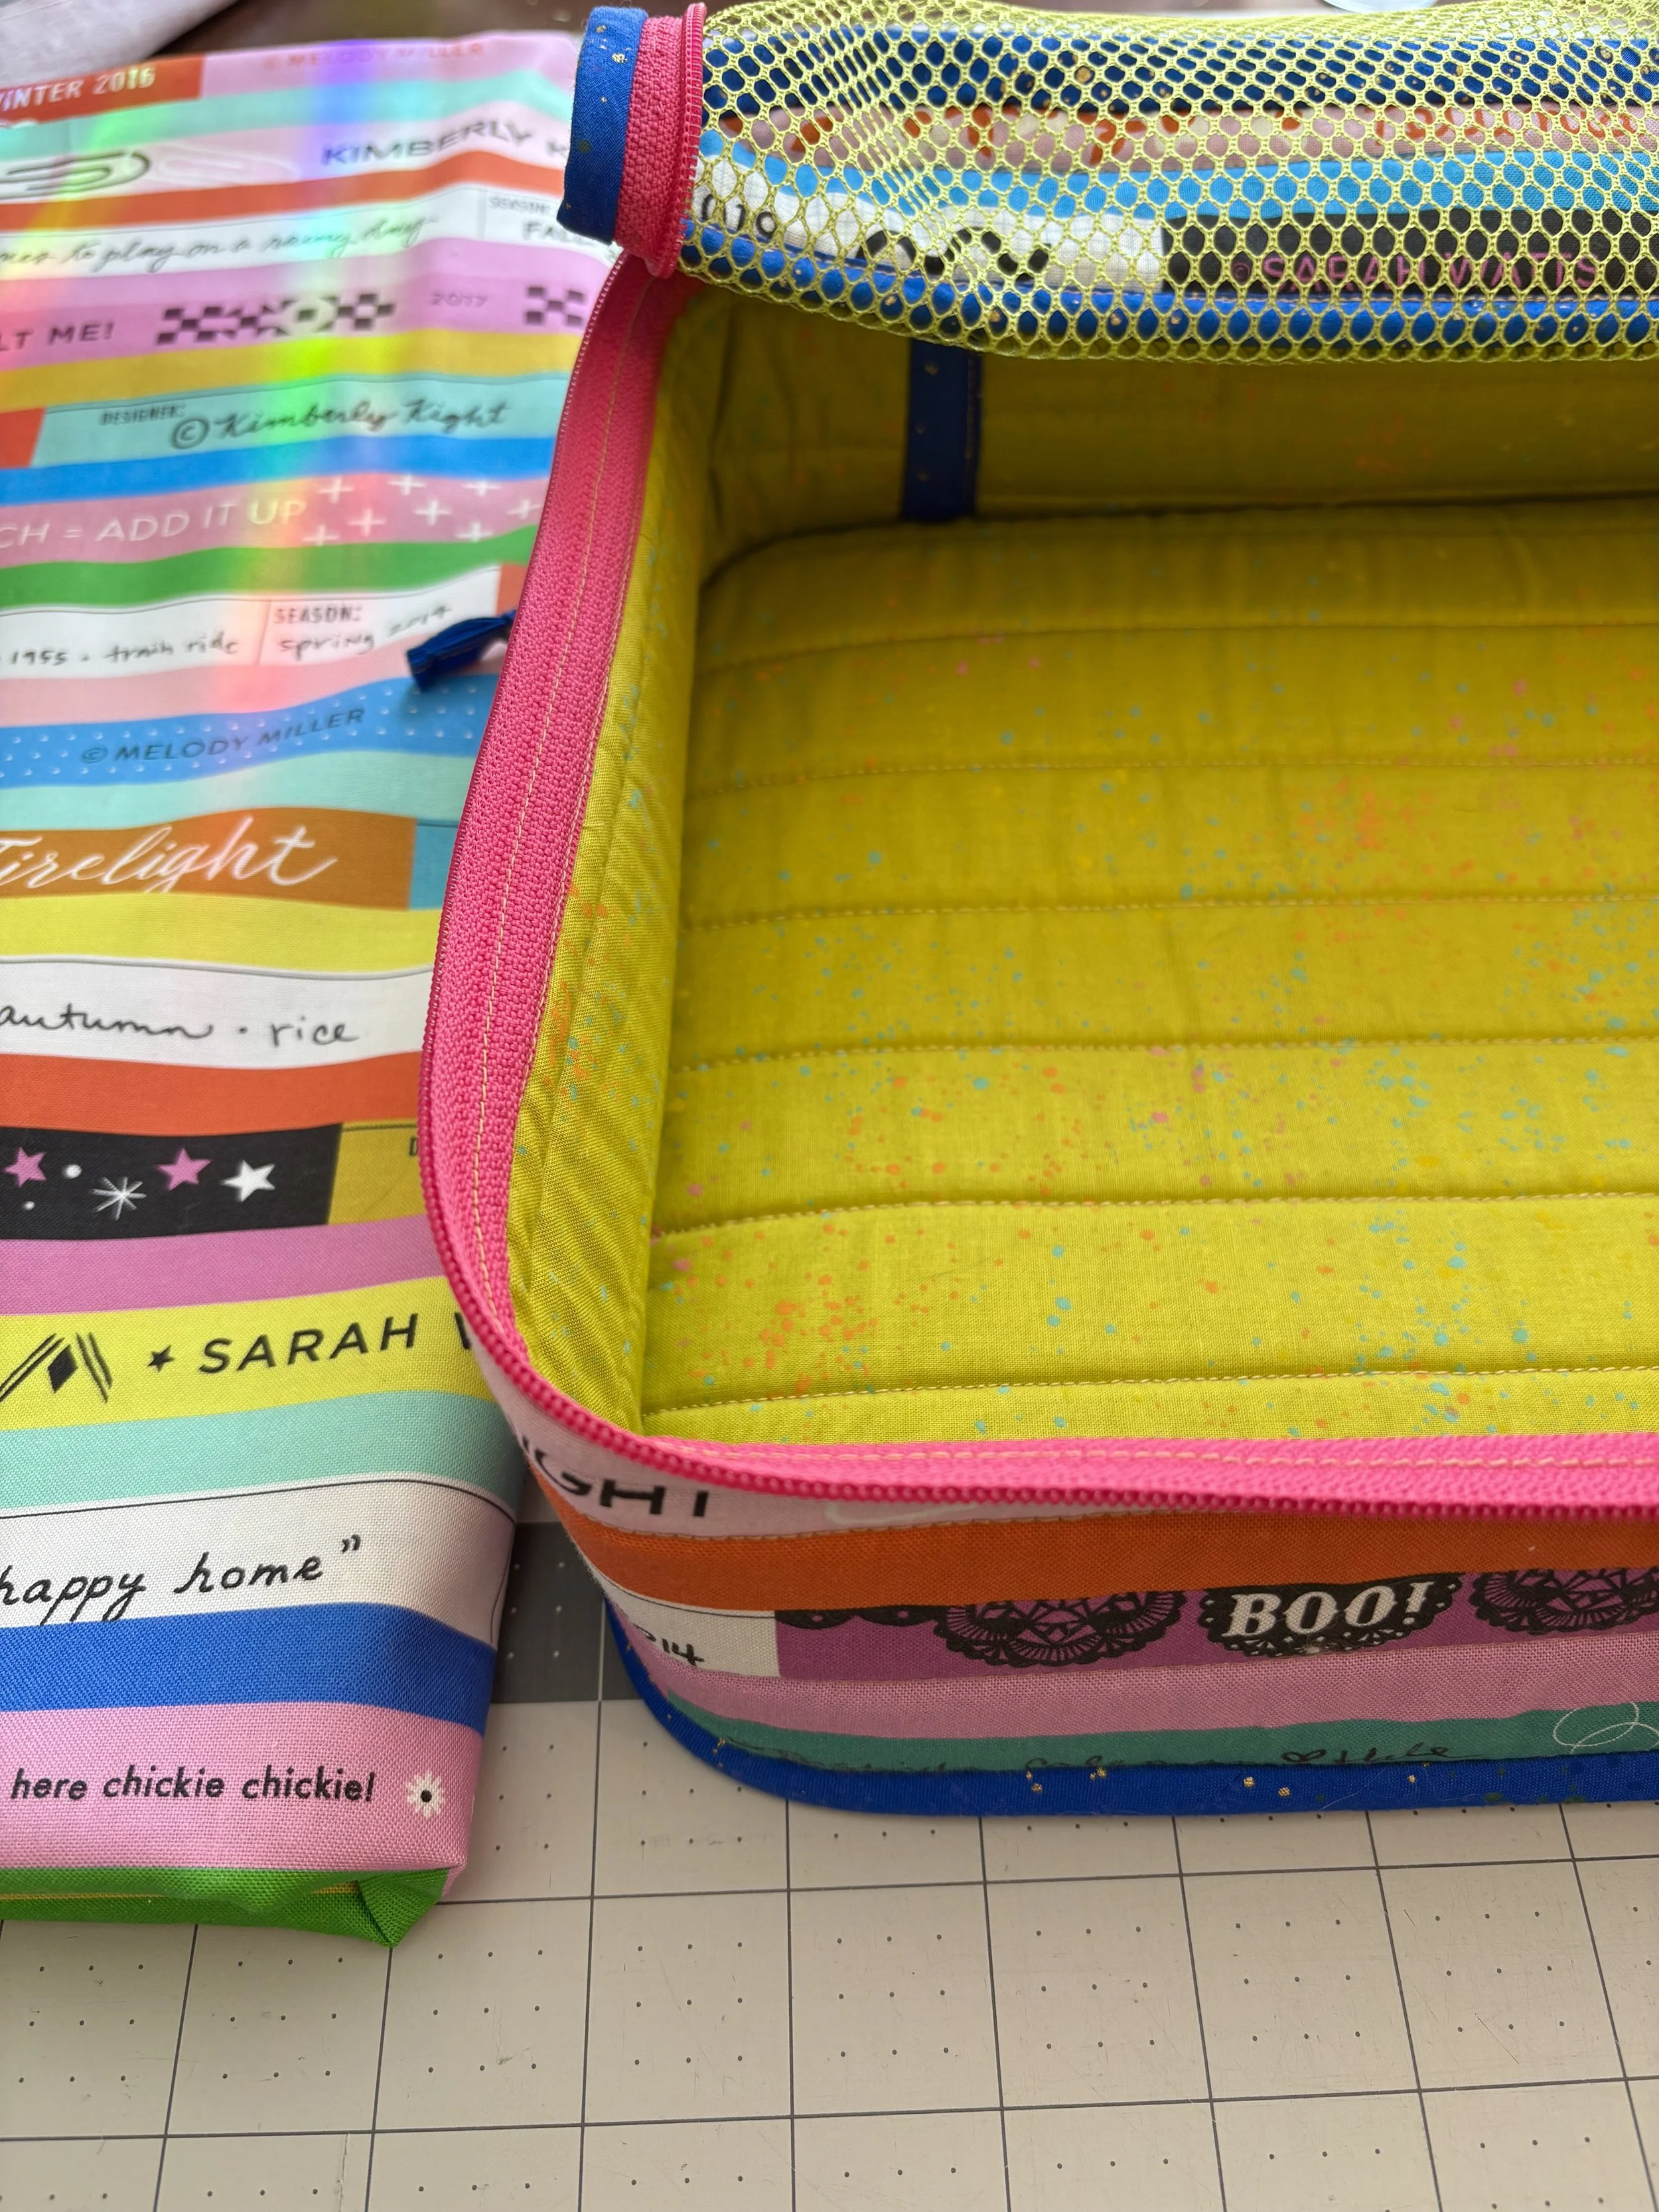
If you are making the small or medium packing cube, you can get away with a pre-zippered 40" zipper tape. I had zipper tape by the yard, so I had to be brave and thread my own zipper pulls for the first time. I spent many minutes getting so so so frustrated. Then I watch the ByAnnie video on threading zippers. I don’t know that I did anything different after watching Annie, but the zipper pull went right on afterwards, so she must have some sort of magic.
Part IV. Lid and Base
These components are very straightforward. This was my first time working with mesh, so there was a small learning curve here. If I were to make this pattern again, I would make the mesh unit smaller in the width dimension, and add units like the lid top and lid bottom to the sides of the mesh. Because the mesh goes all the way to the edges of the cube, the sides sag inwards a bit. I would like a touch more rigidness to the project.
Part V. Zipper Loop
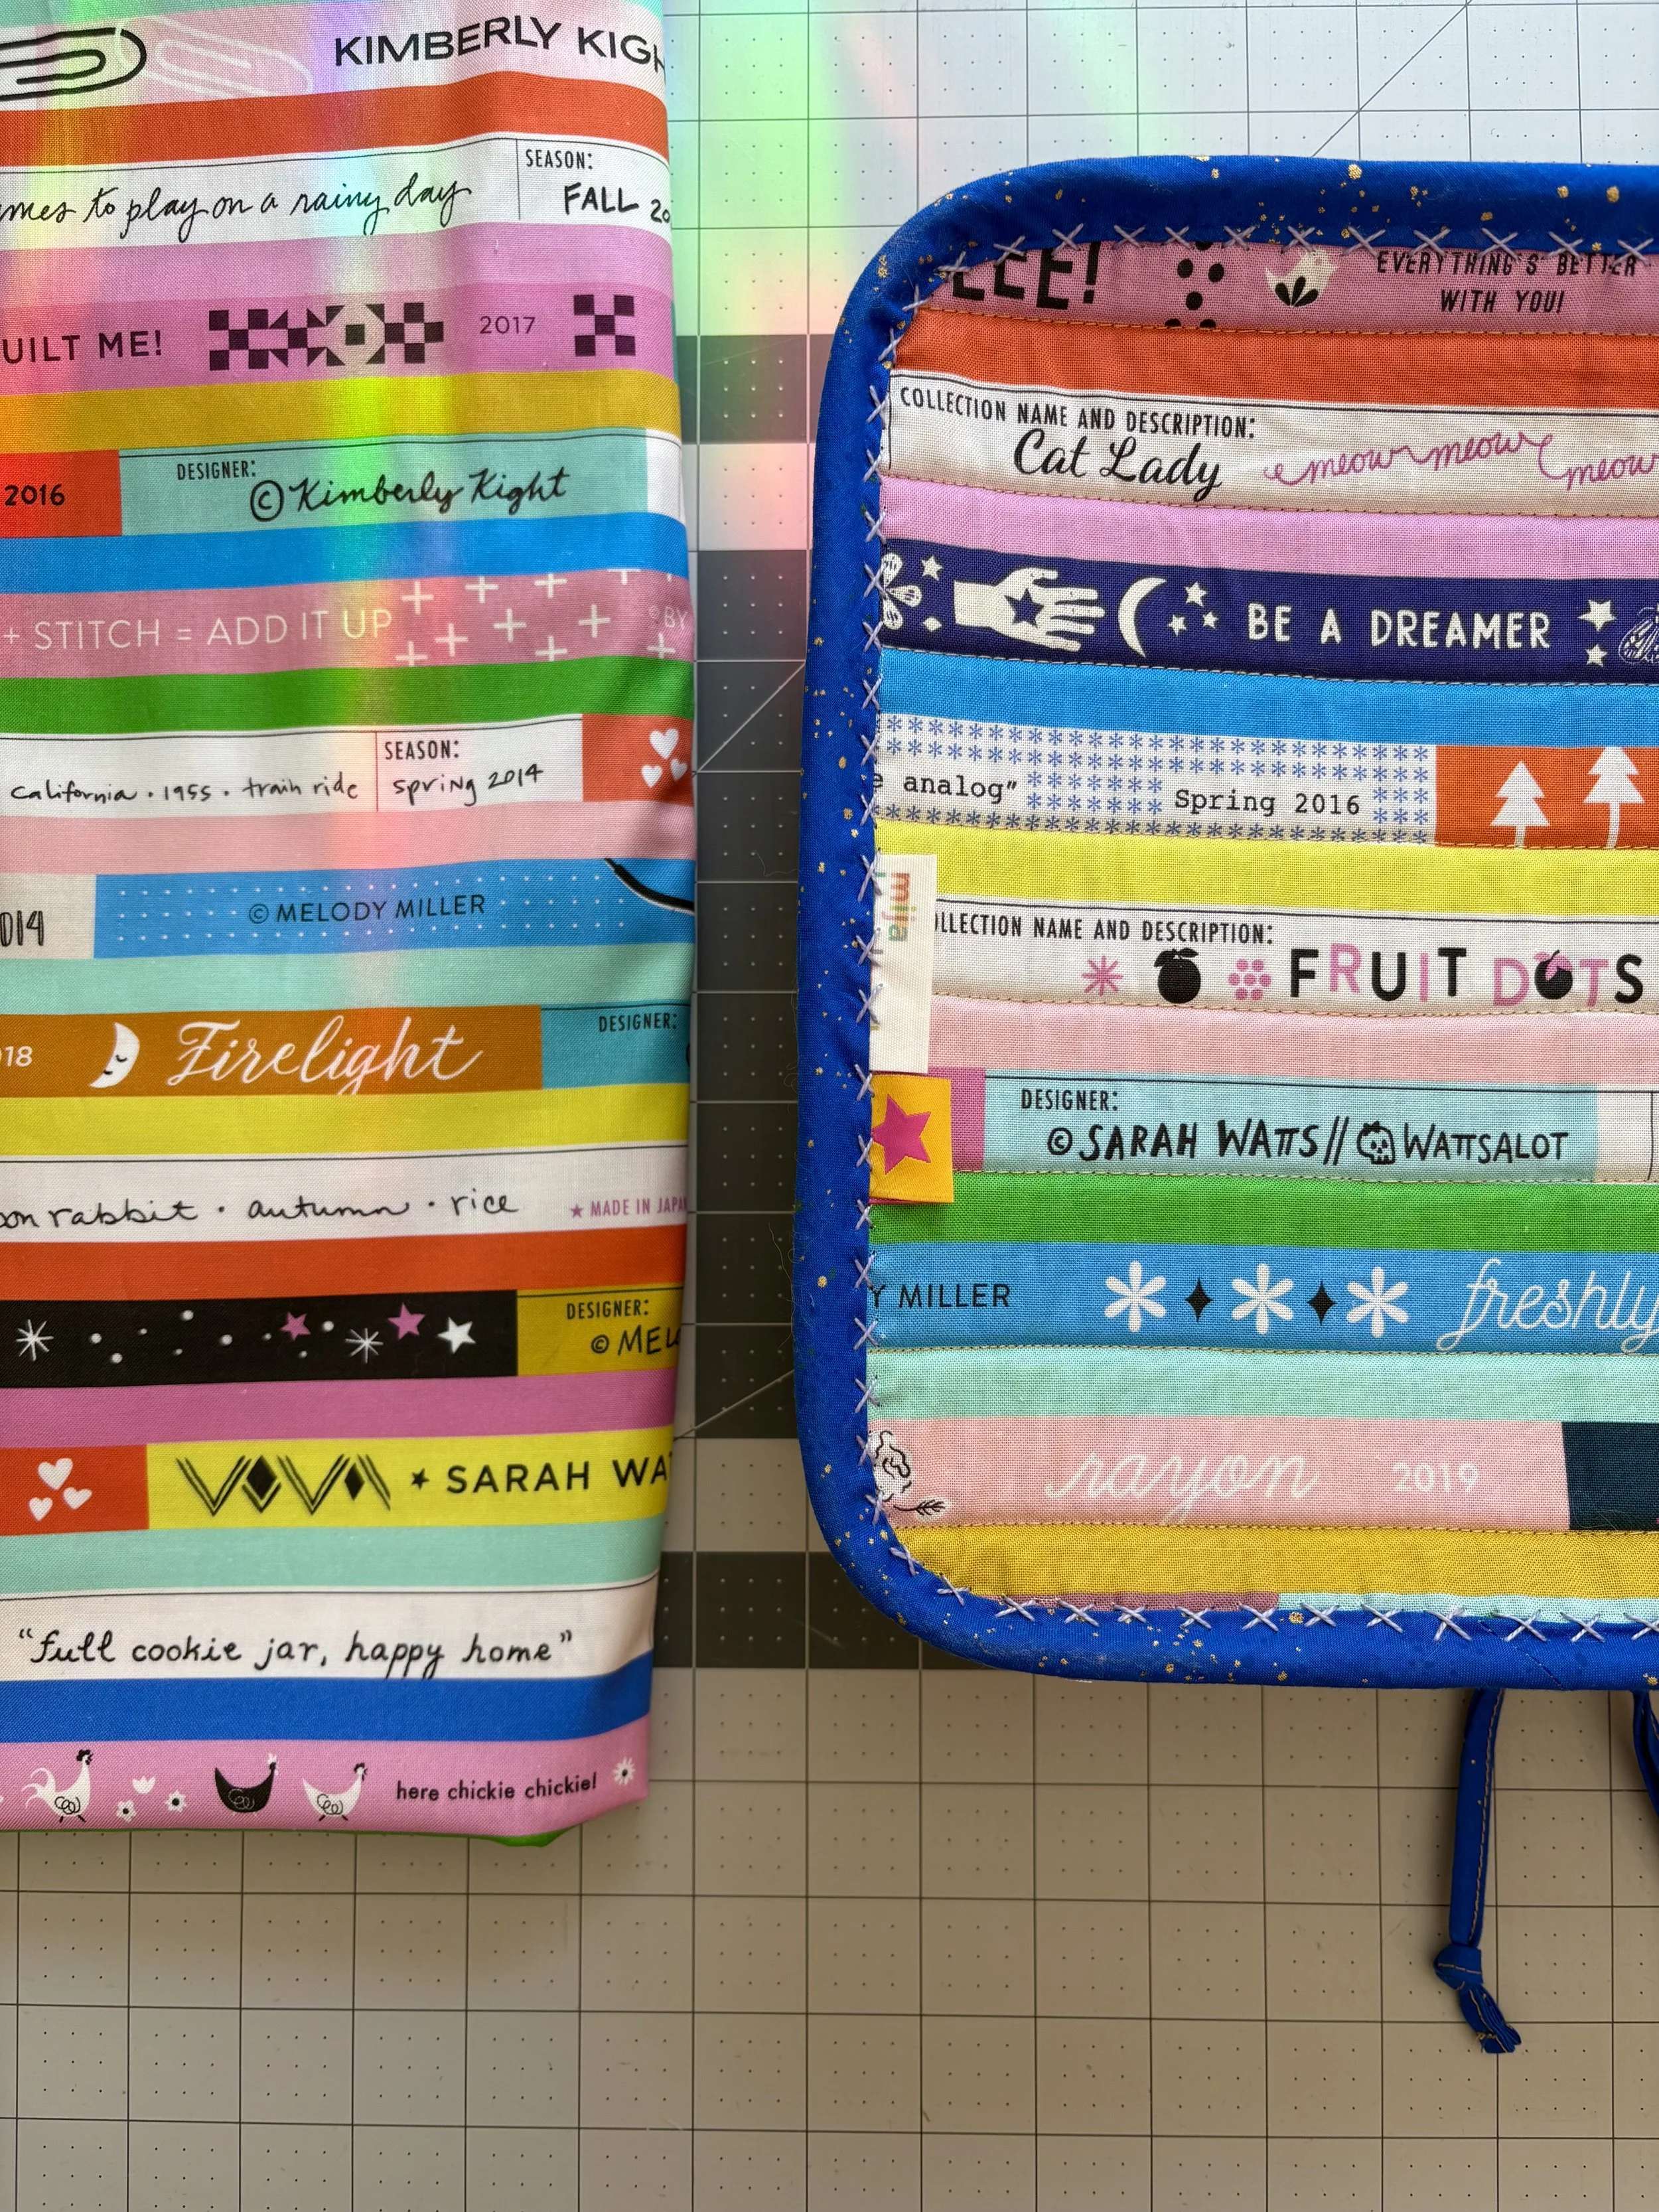
If you are going to add a sew-in label to your project, I would recommend adding it to the back strip, where the handle is sewn to the main fabric. I didn’t think about adding a label until I was finishing the very last step, so mine is hidden on the bottom of the bag.
Part VI. Assembly
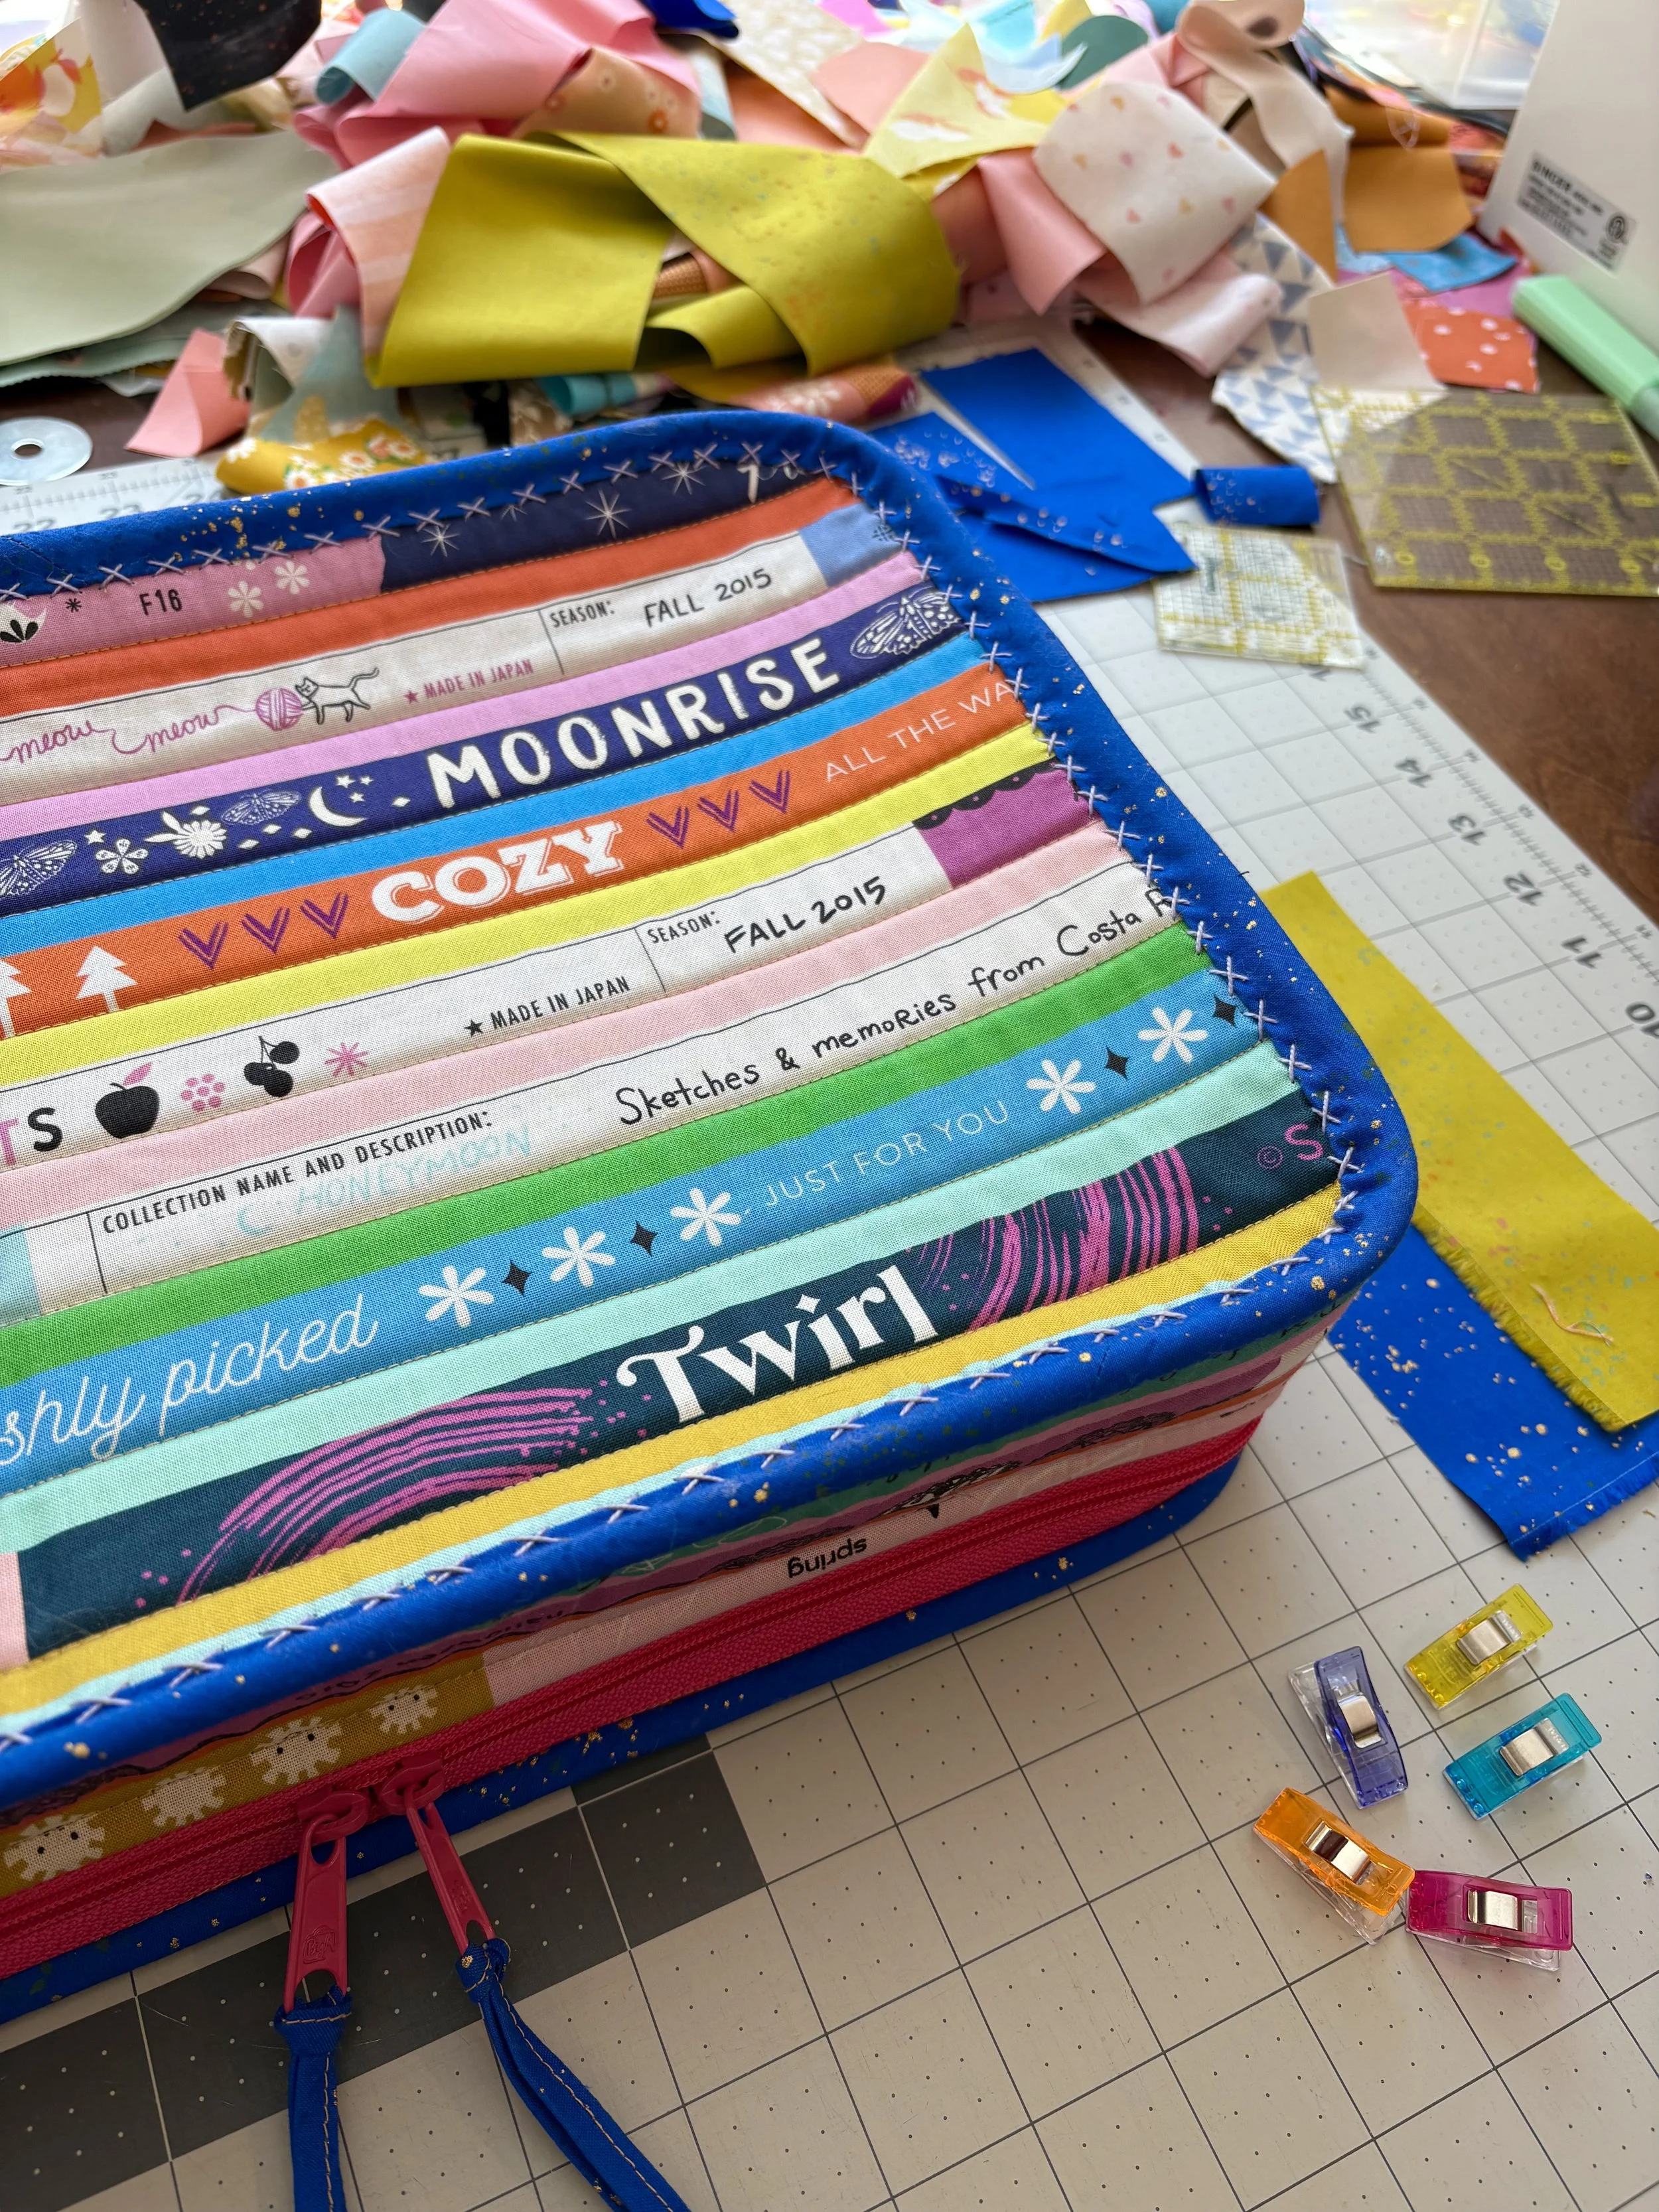
Binding…woof. I was more scared of the binding than I was of threading my own zippers. I really dislike finishing binding by machine. I opted to finish the top binding by hand using an invisible ladder stitch. I used a thread color that matched the zipper, as the ladder stitch wouldn’t be invisible on the zipper tape.
I was tired of hand sewing by the time I got to the bottom binding, so I tried to be brave again and finish it by machine. I regret this so much. I ripped out the stitching twice because I was so unhappy with it. I can’t be entirely mad though because this frustration led to my favorite discovery, using big stitch binding for the final touches.
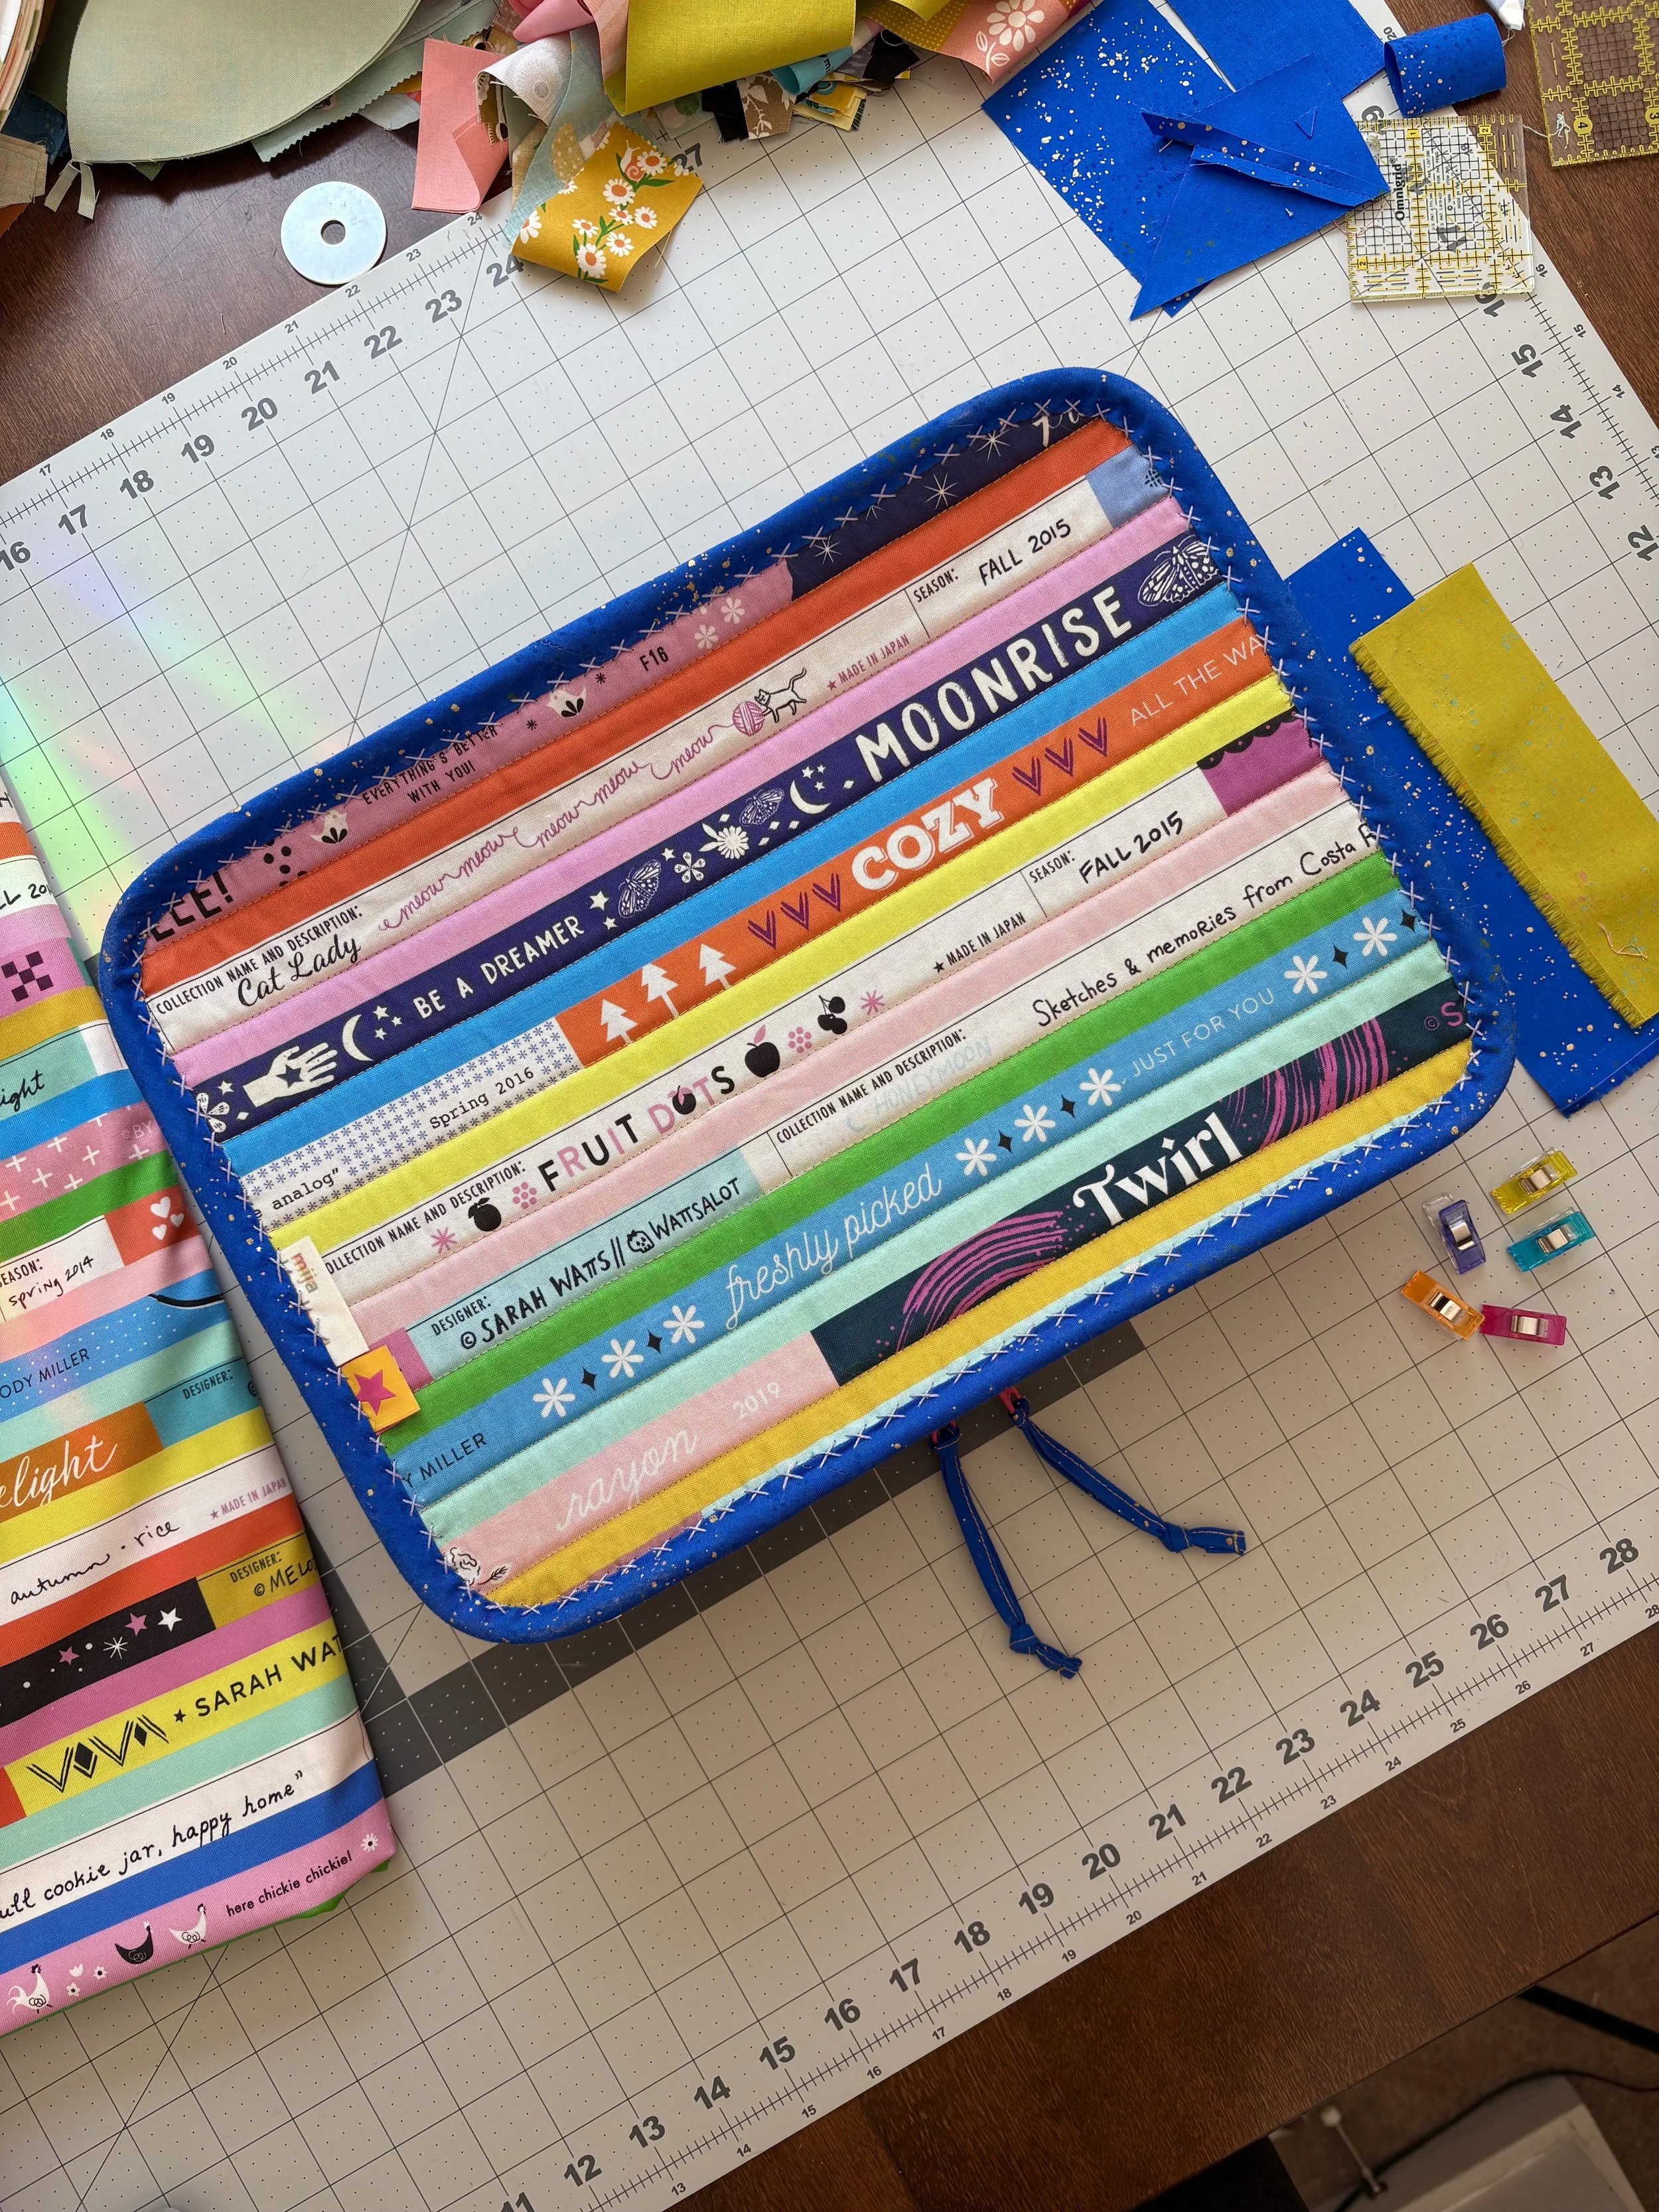
I absolutely love how this turned out! If you want to replicate this look, I would recommend sewing the binding to the bottom of the bag so you can put the big stitches on the zipper loop portion of the packing case. If you want to replicate this bag entirely, here are the materials I used.
Main fabric: Selvedge Magic, Ruby Star Society
Lining fabric: Speckled in Pistachio by Rashida Coleman Hale for Ruby Star Society
Coordinating fabric: Speckled in Blue Ribbon by Rashida Coleman Hale for Ruby Star Society
Black Soft and Stable (I only used black because it was what was in stock at my LQS)
Lightweight Mesh from ByAnnie in Apple Green
Zipper by the yard from ByAnnie in Lipstick
I’m off to make the other two sizes of this pattern! If packing cube patterns still seem a bit daunting, remember that I’ve got a free packing cube pattern (saving money is always nice!) for you to try out. Check out the Spare Block packing cube tutorial - use a leftover block, some quilt batting and extra fabric to try your first packing cube bag.