
Bow Big Stitch Binding Tutorial
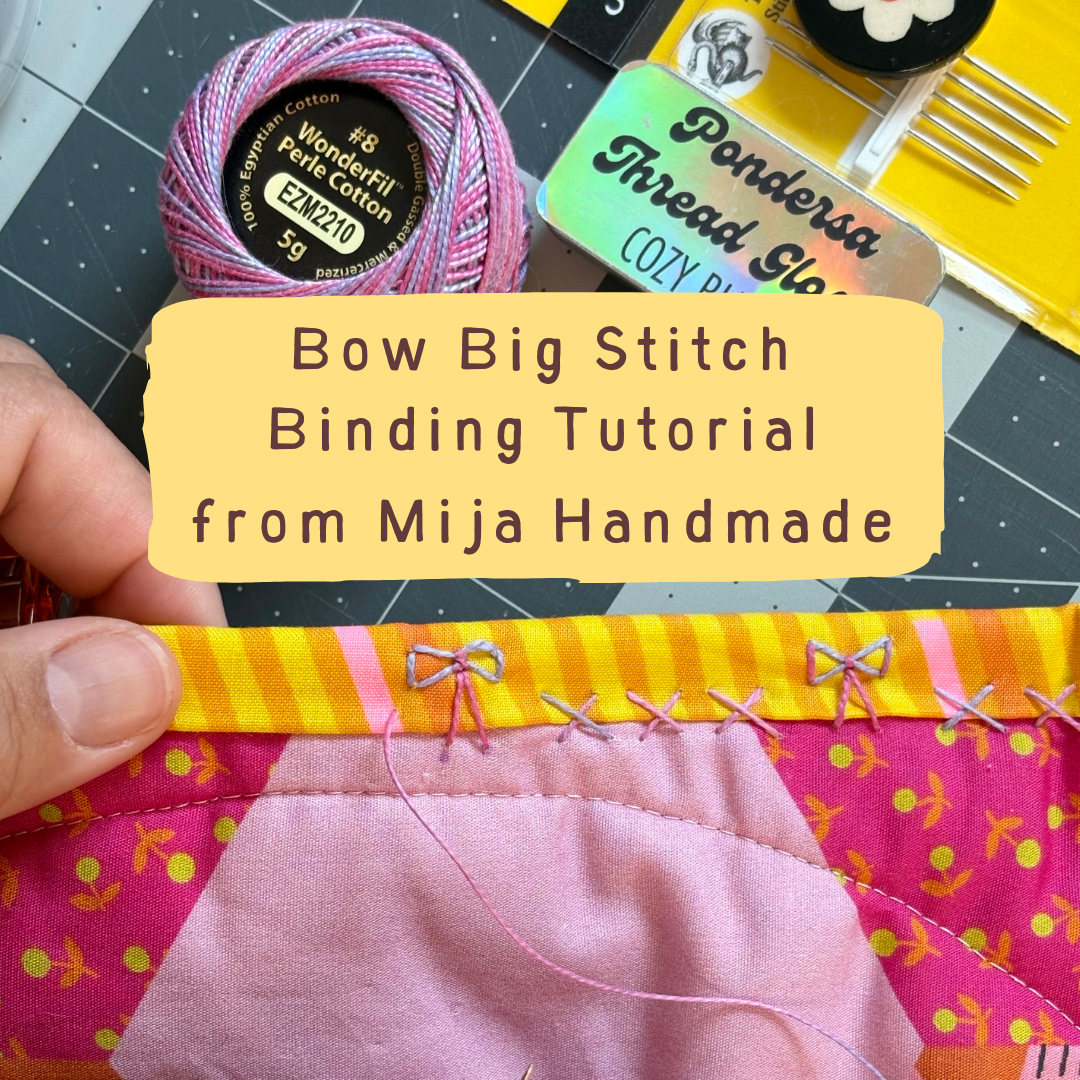
I’m a sucker for hand binding my quilts! I love a criss cross stitch, but lately have been looking for something a little ✨ extra✨.
After looking around for some good inspiration, I spotted this bow embroidery stitch and immediately knew it would be perfect for finishing off any modern quilt pattern!
If you’ve been looking for something new and special for your quilts, I’ve got you covered. I’ve broken down each step of this stitch so you can put a bow on your next quilt project!
Materials
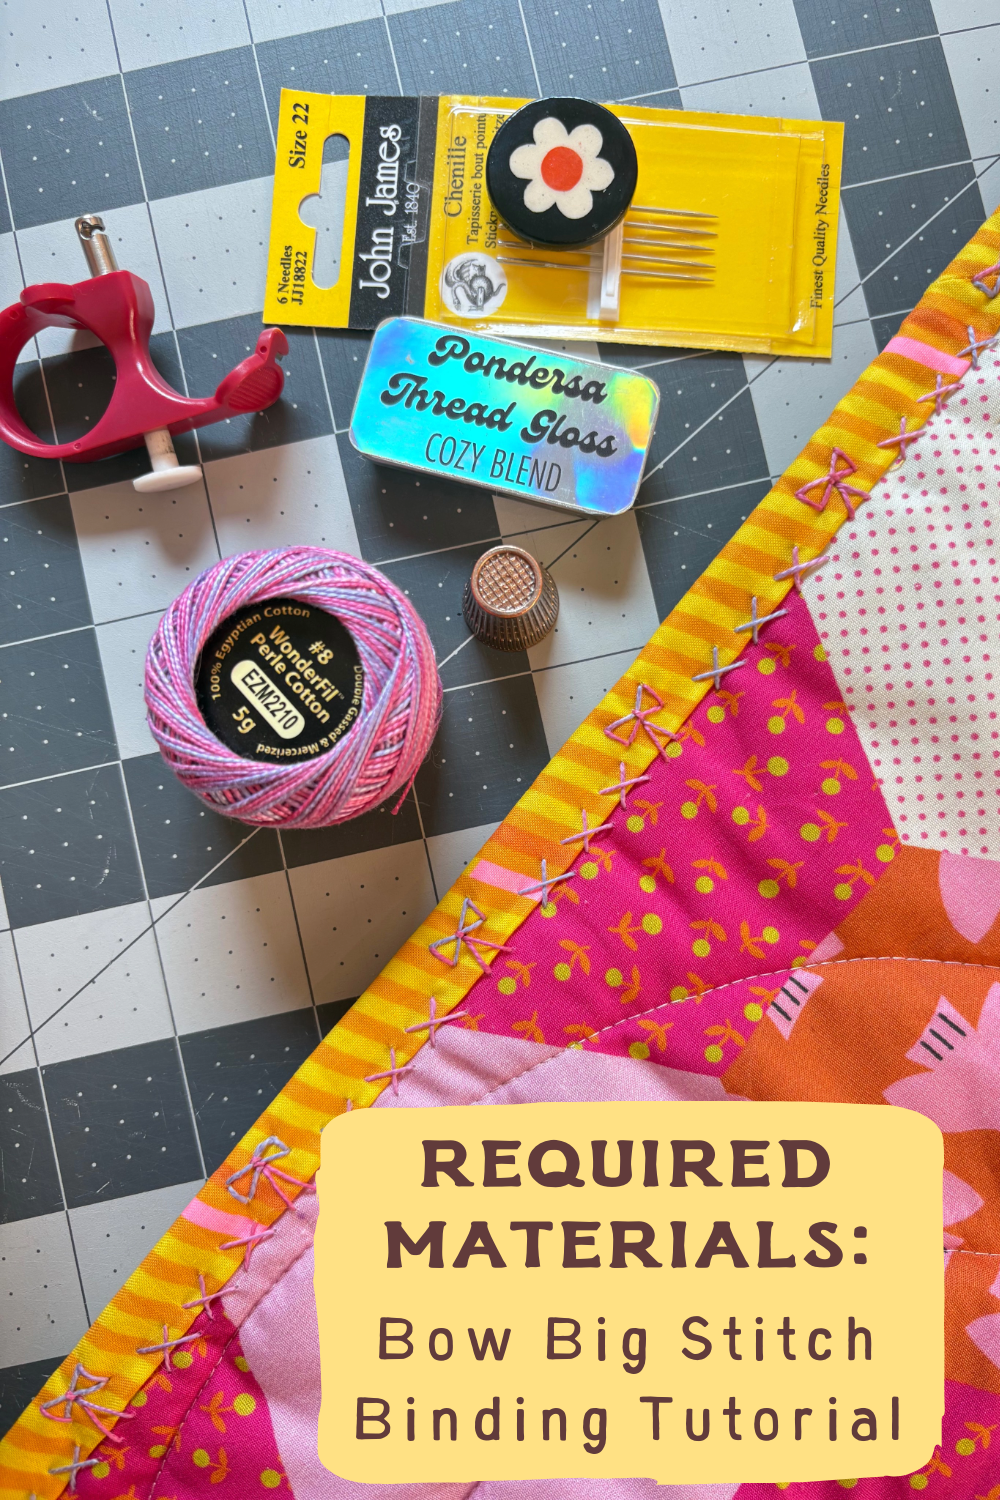
Required
Thread: I like #8 Wonderful Perle Cotton
Needle: I’m currently testing out John James Chenille needles, size 22
Completed project with binding already attached
Optional
Thimble
Thread Gloss: I prefer Ponderosa Thread Gloss
Bohin 3-in-1 needle puller tool
Needle minder
Let’s Get Started
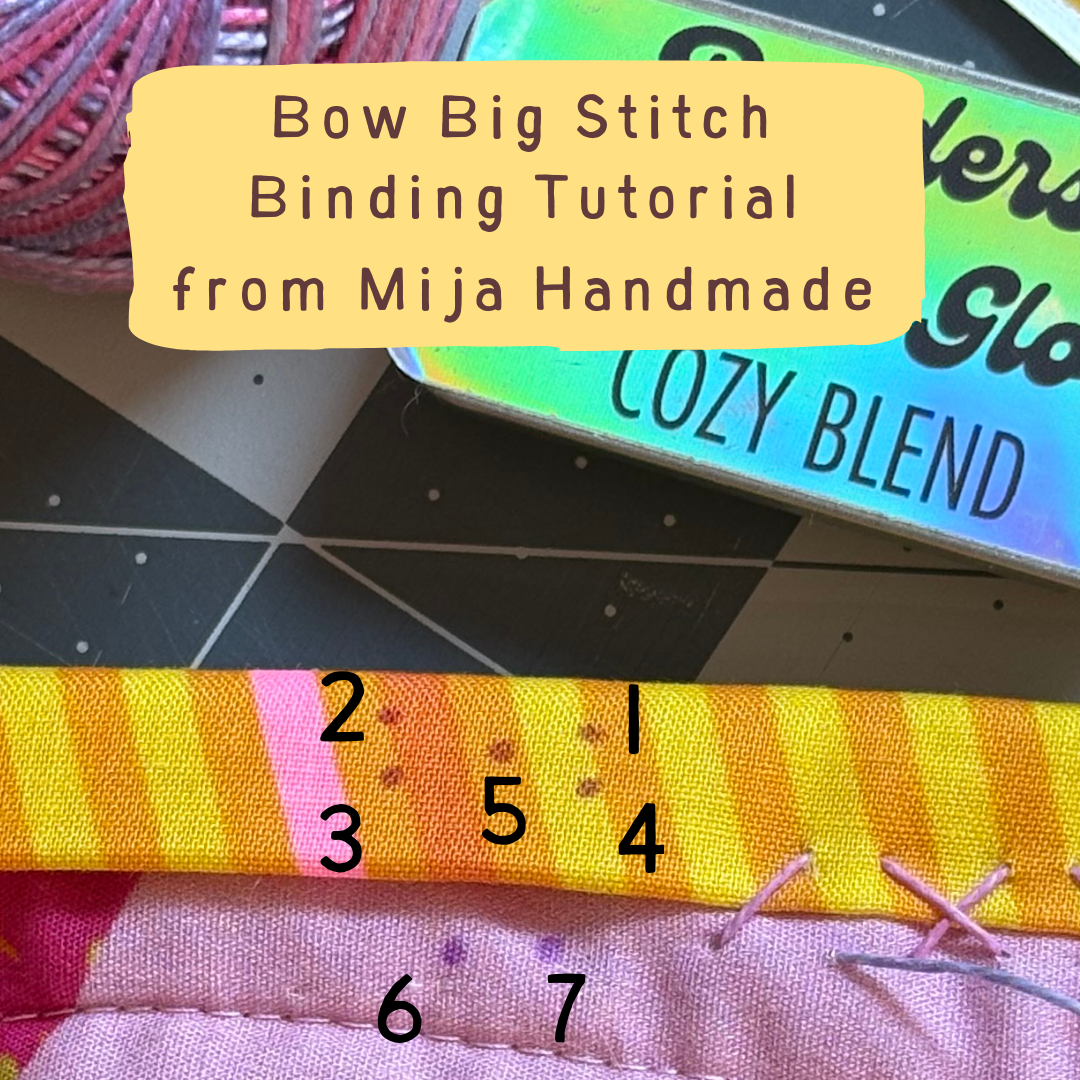
Mark 7 points as shown in the photo. I prefer for my big stitch to enclose the edge of the binding, so I’ve marked points 6 and 7 off the edge of the binding.
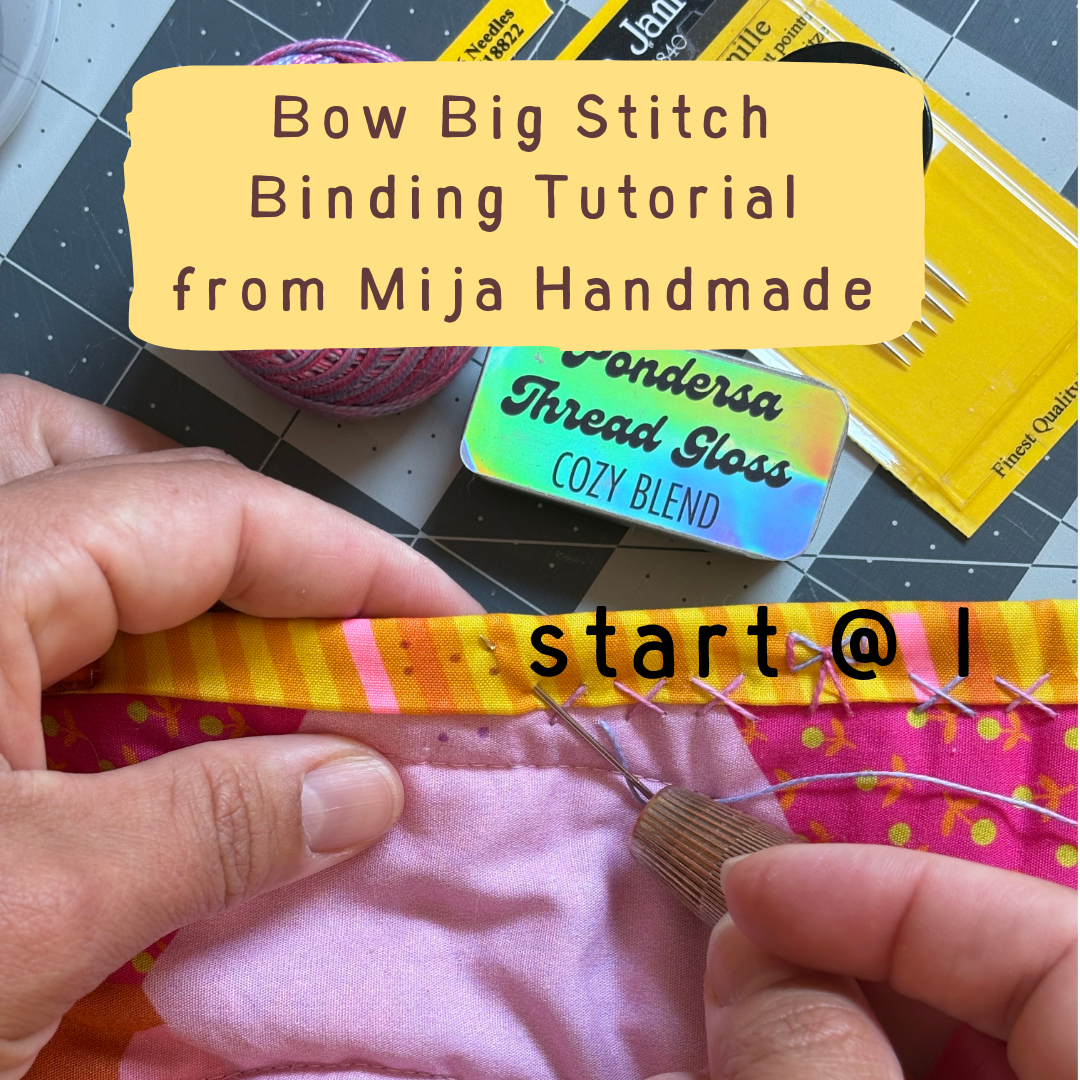
In the subsequent photos, I indicate “In” which means push the needle through the fabric, and “Out” which means the needle exits the fabric. As always, make sure your needle never passes through the front layer to show on the opposite side of the quilt.
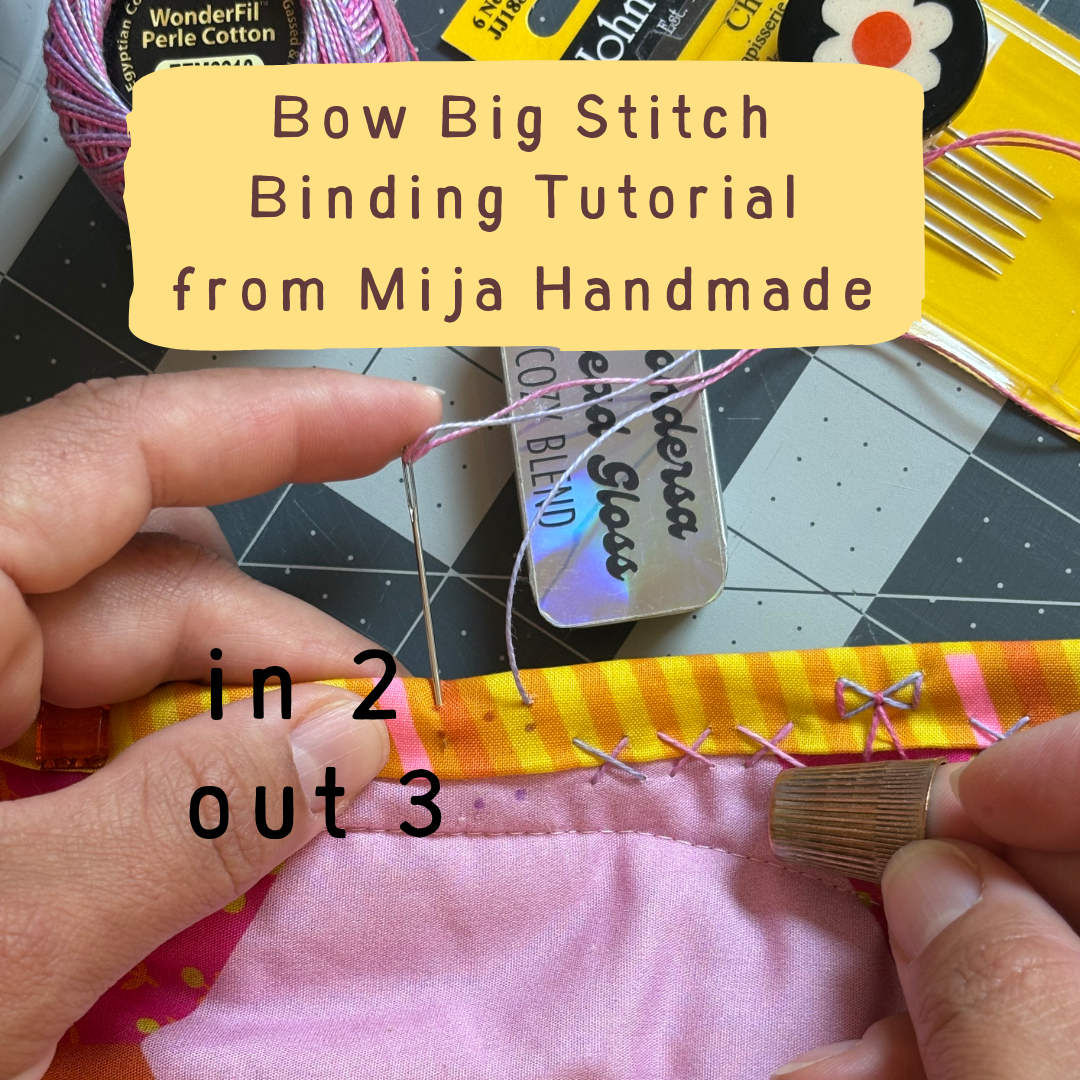
Push the needle through point 2 and exit at point 3. I like to catch only the binding material in this step.
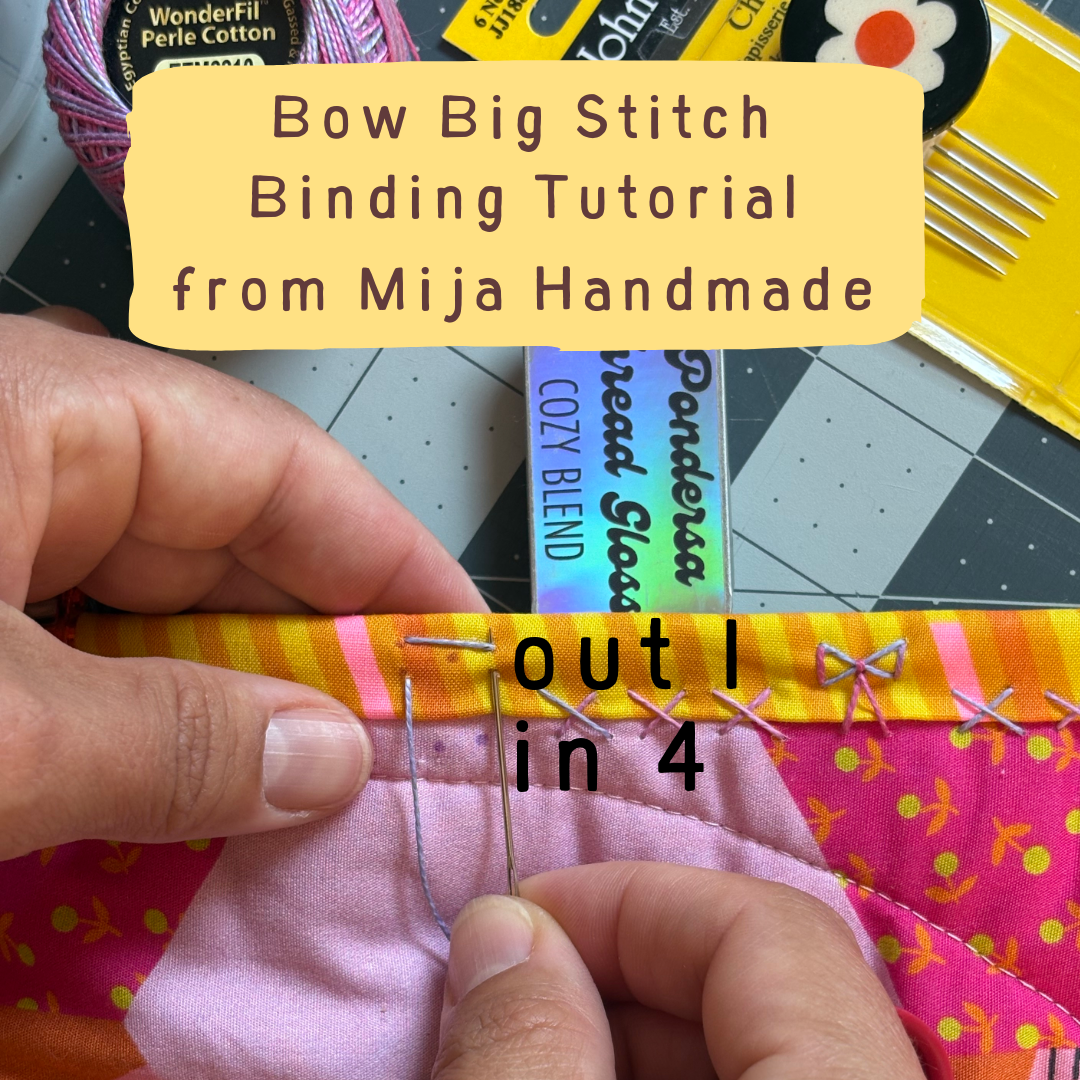
Push the needle through point 4 and exit at point 1, exactly where you took your first stitch. Catch only the binding fabric.
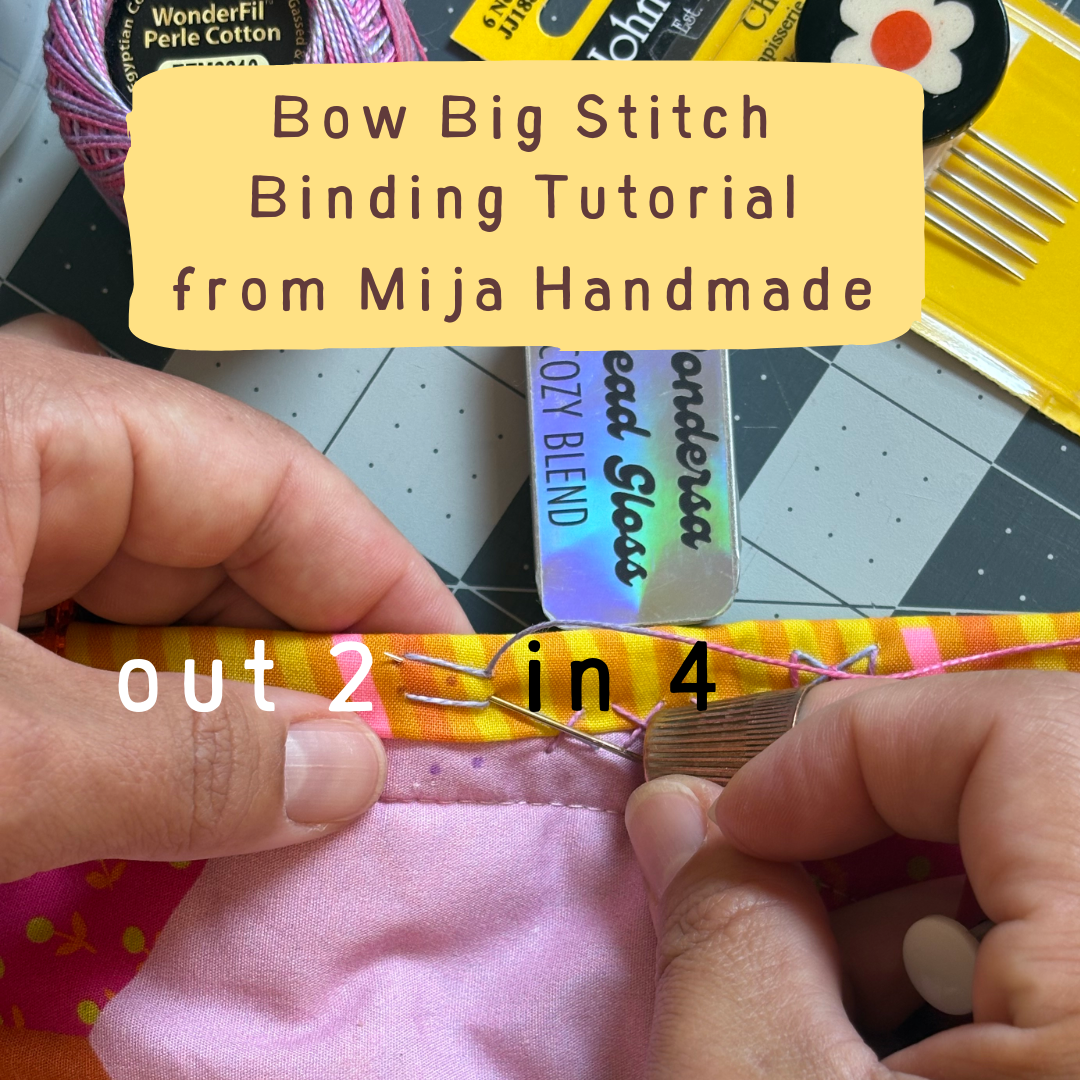
Push the needle through point 4 again and exit at point 2, exactly at the existing stitch. This time, catch the backing fabric and batting.
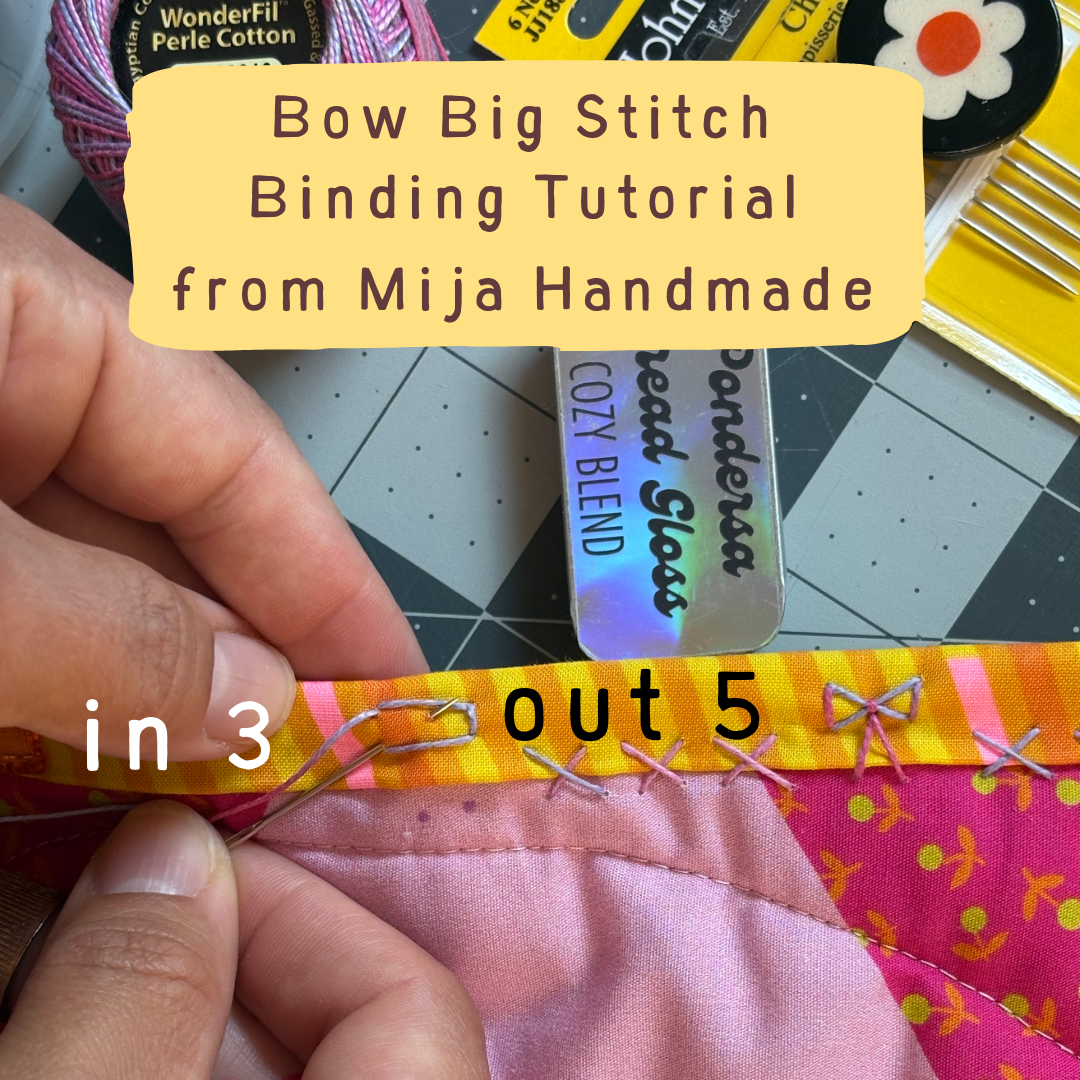
Push the needle back through point 3 and exit at point 5, catching all backing and batting layers.
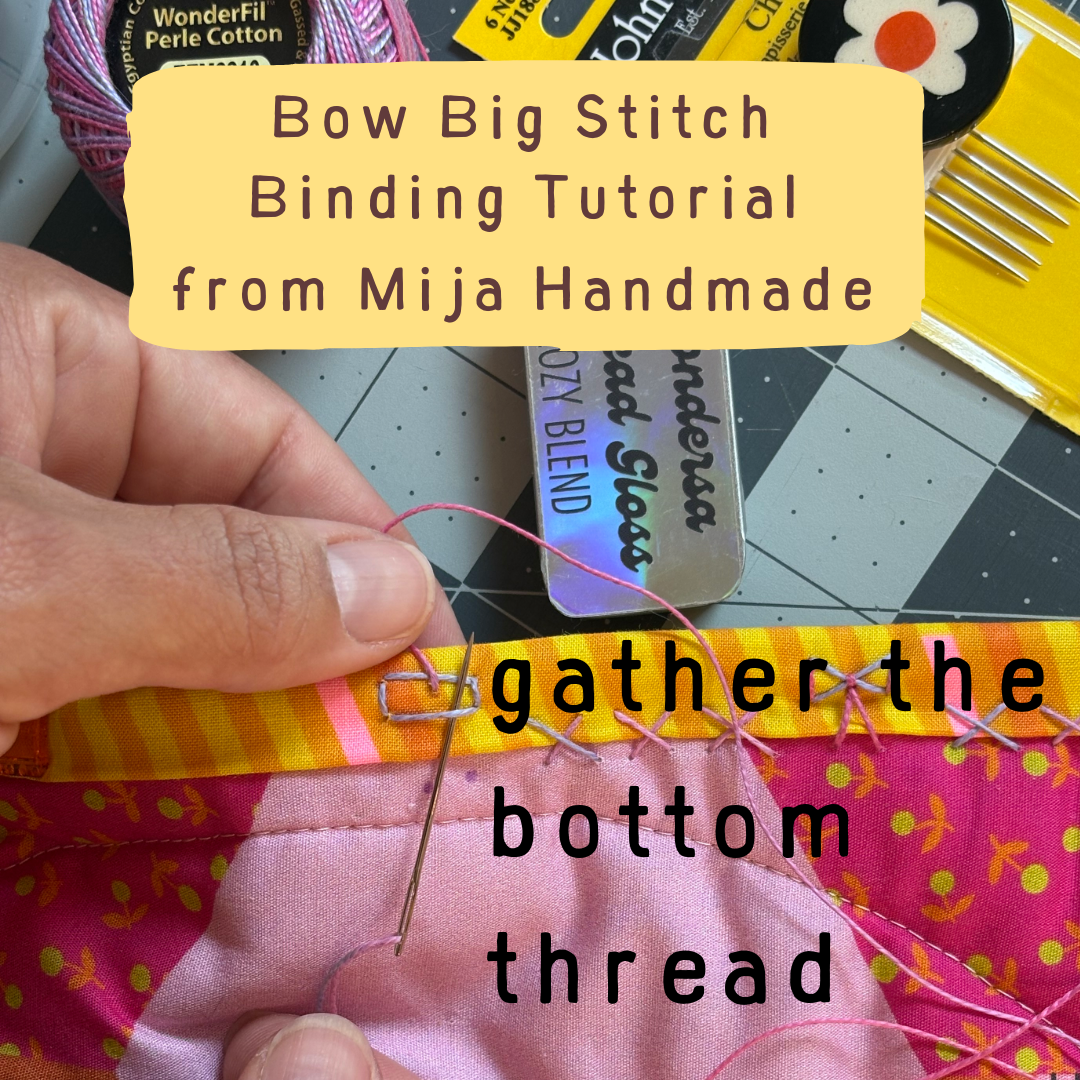
Gather the bottom thread by passing the needle under it.
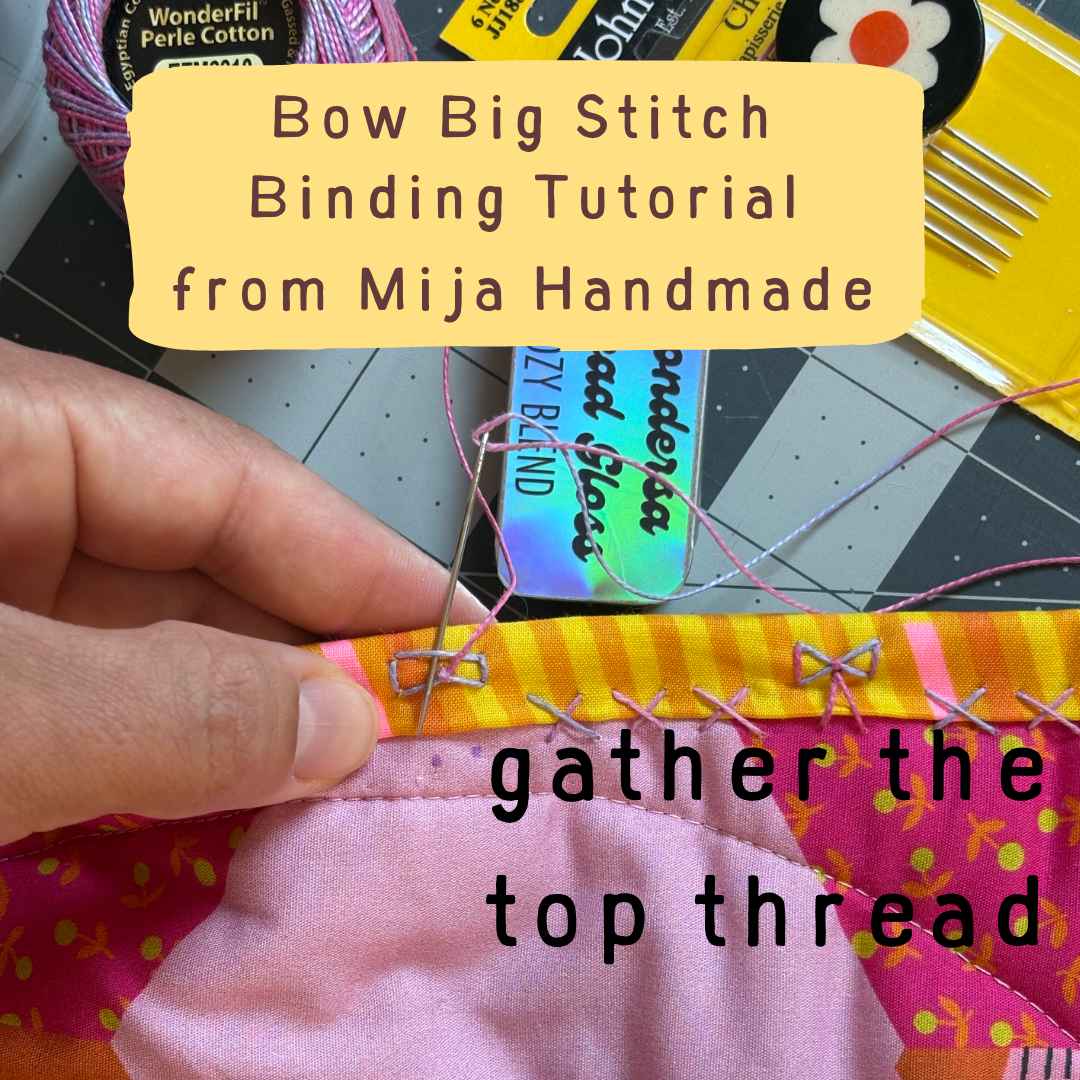
Gather the top thread by passing the needle under it.
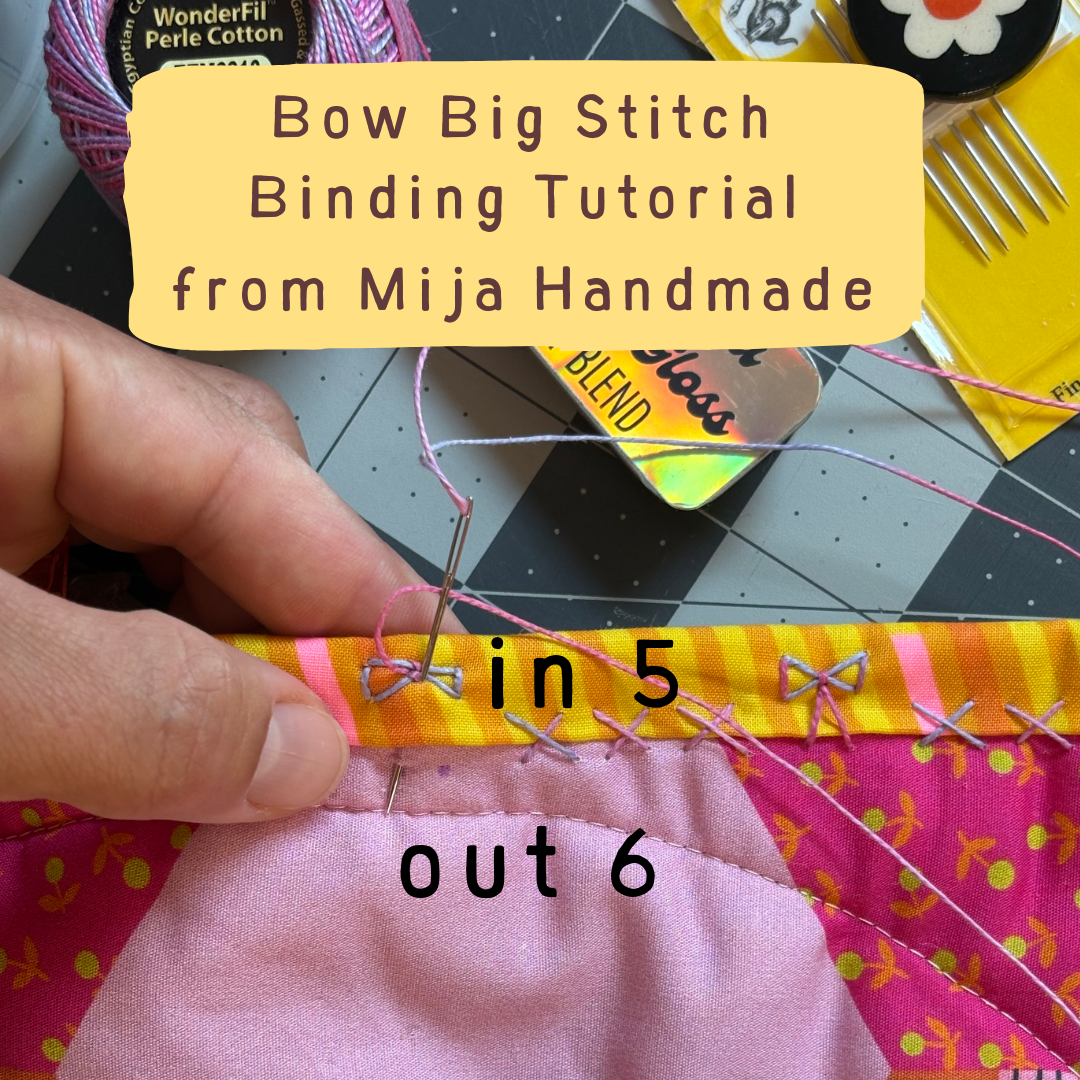
Push the needle back through point 5 and exit at point 6. Pass the needle through all backing and batting layers.
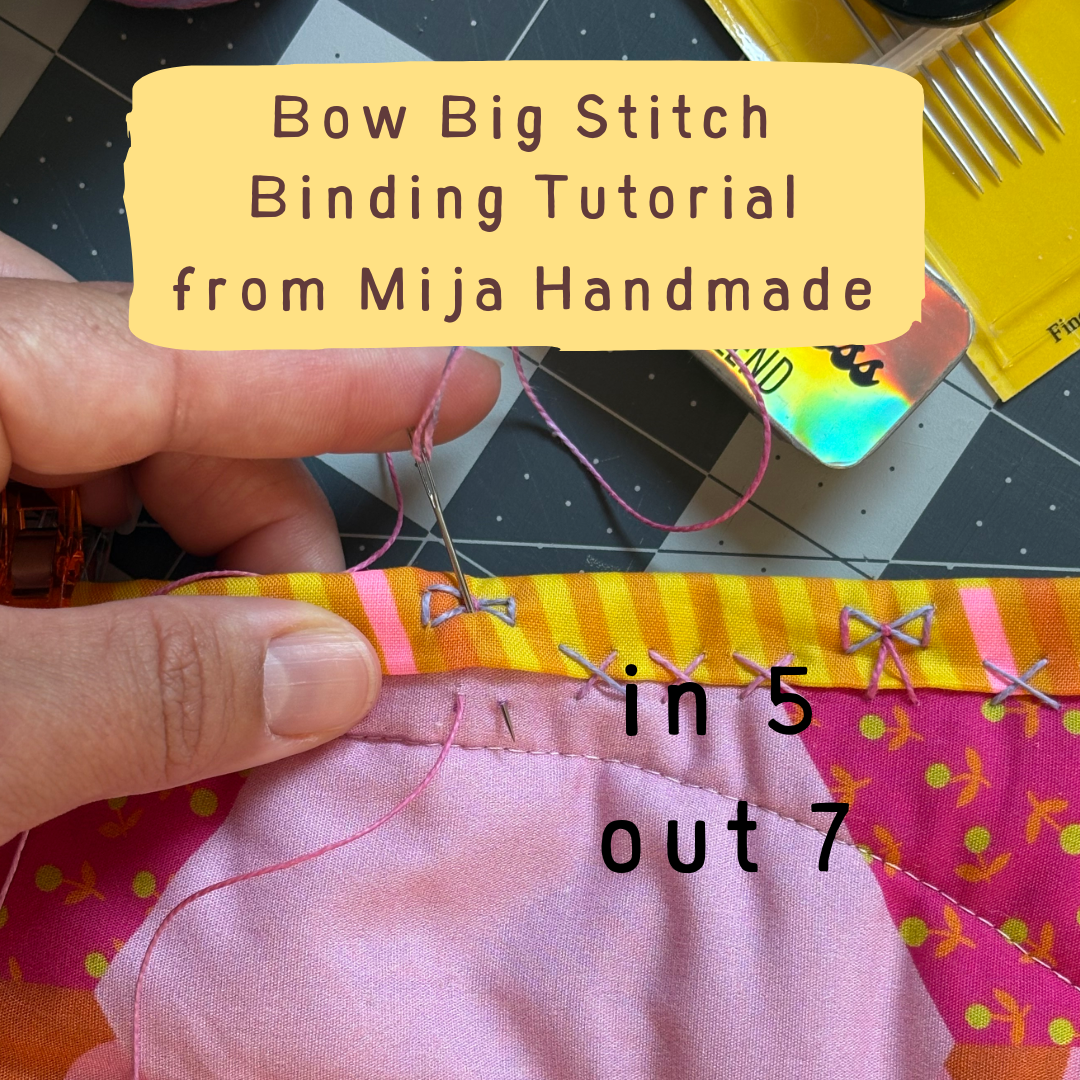
Push the needle back through point 5 and exit at point 7. Pass the needle through all backing and batting layers.
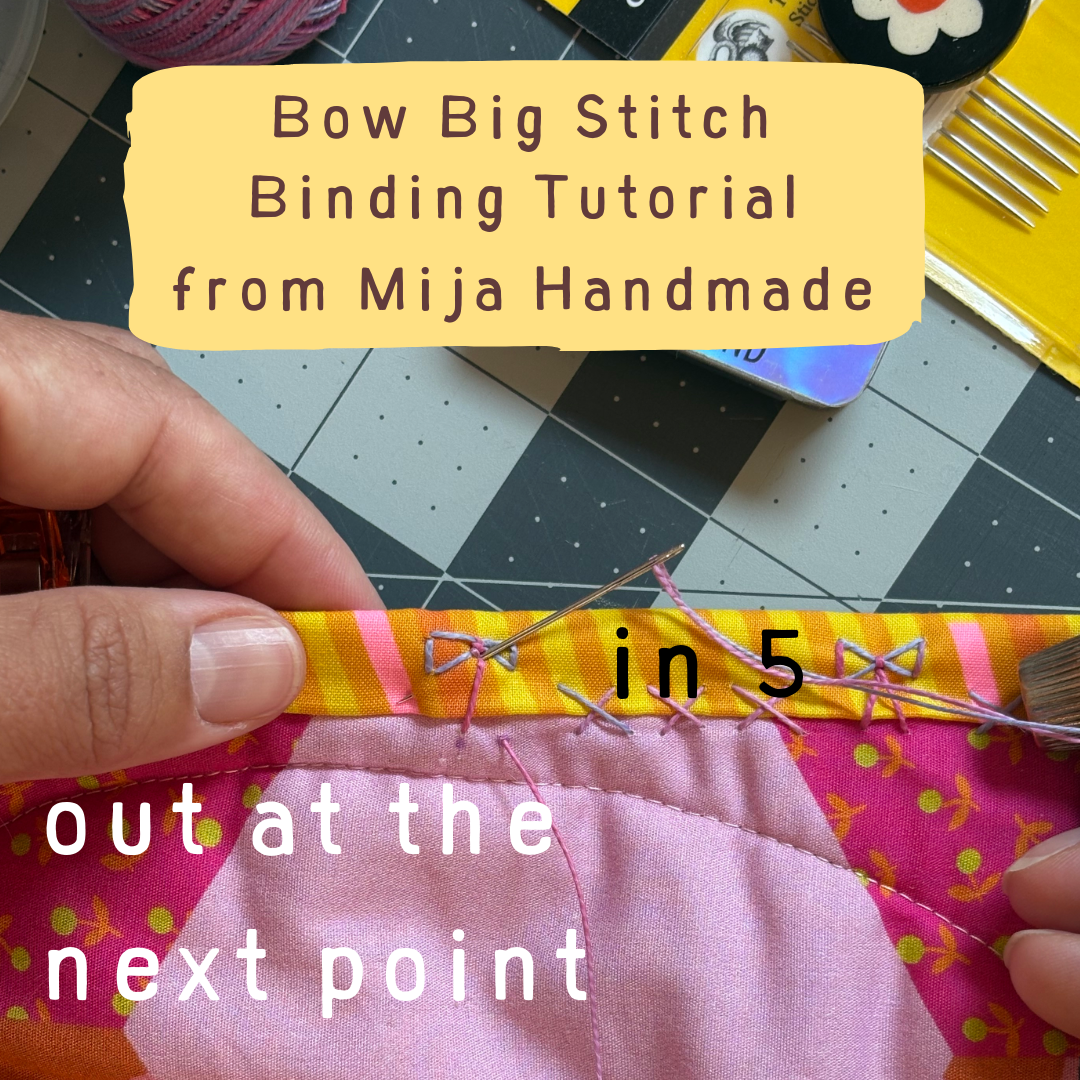
Push the needle back through point 5, then exit at the starting point for your next stitch.
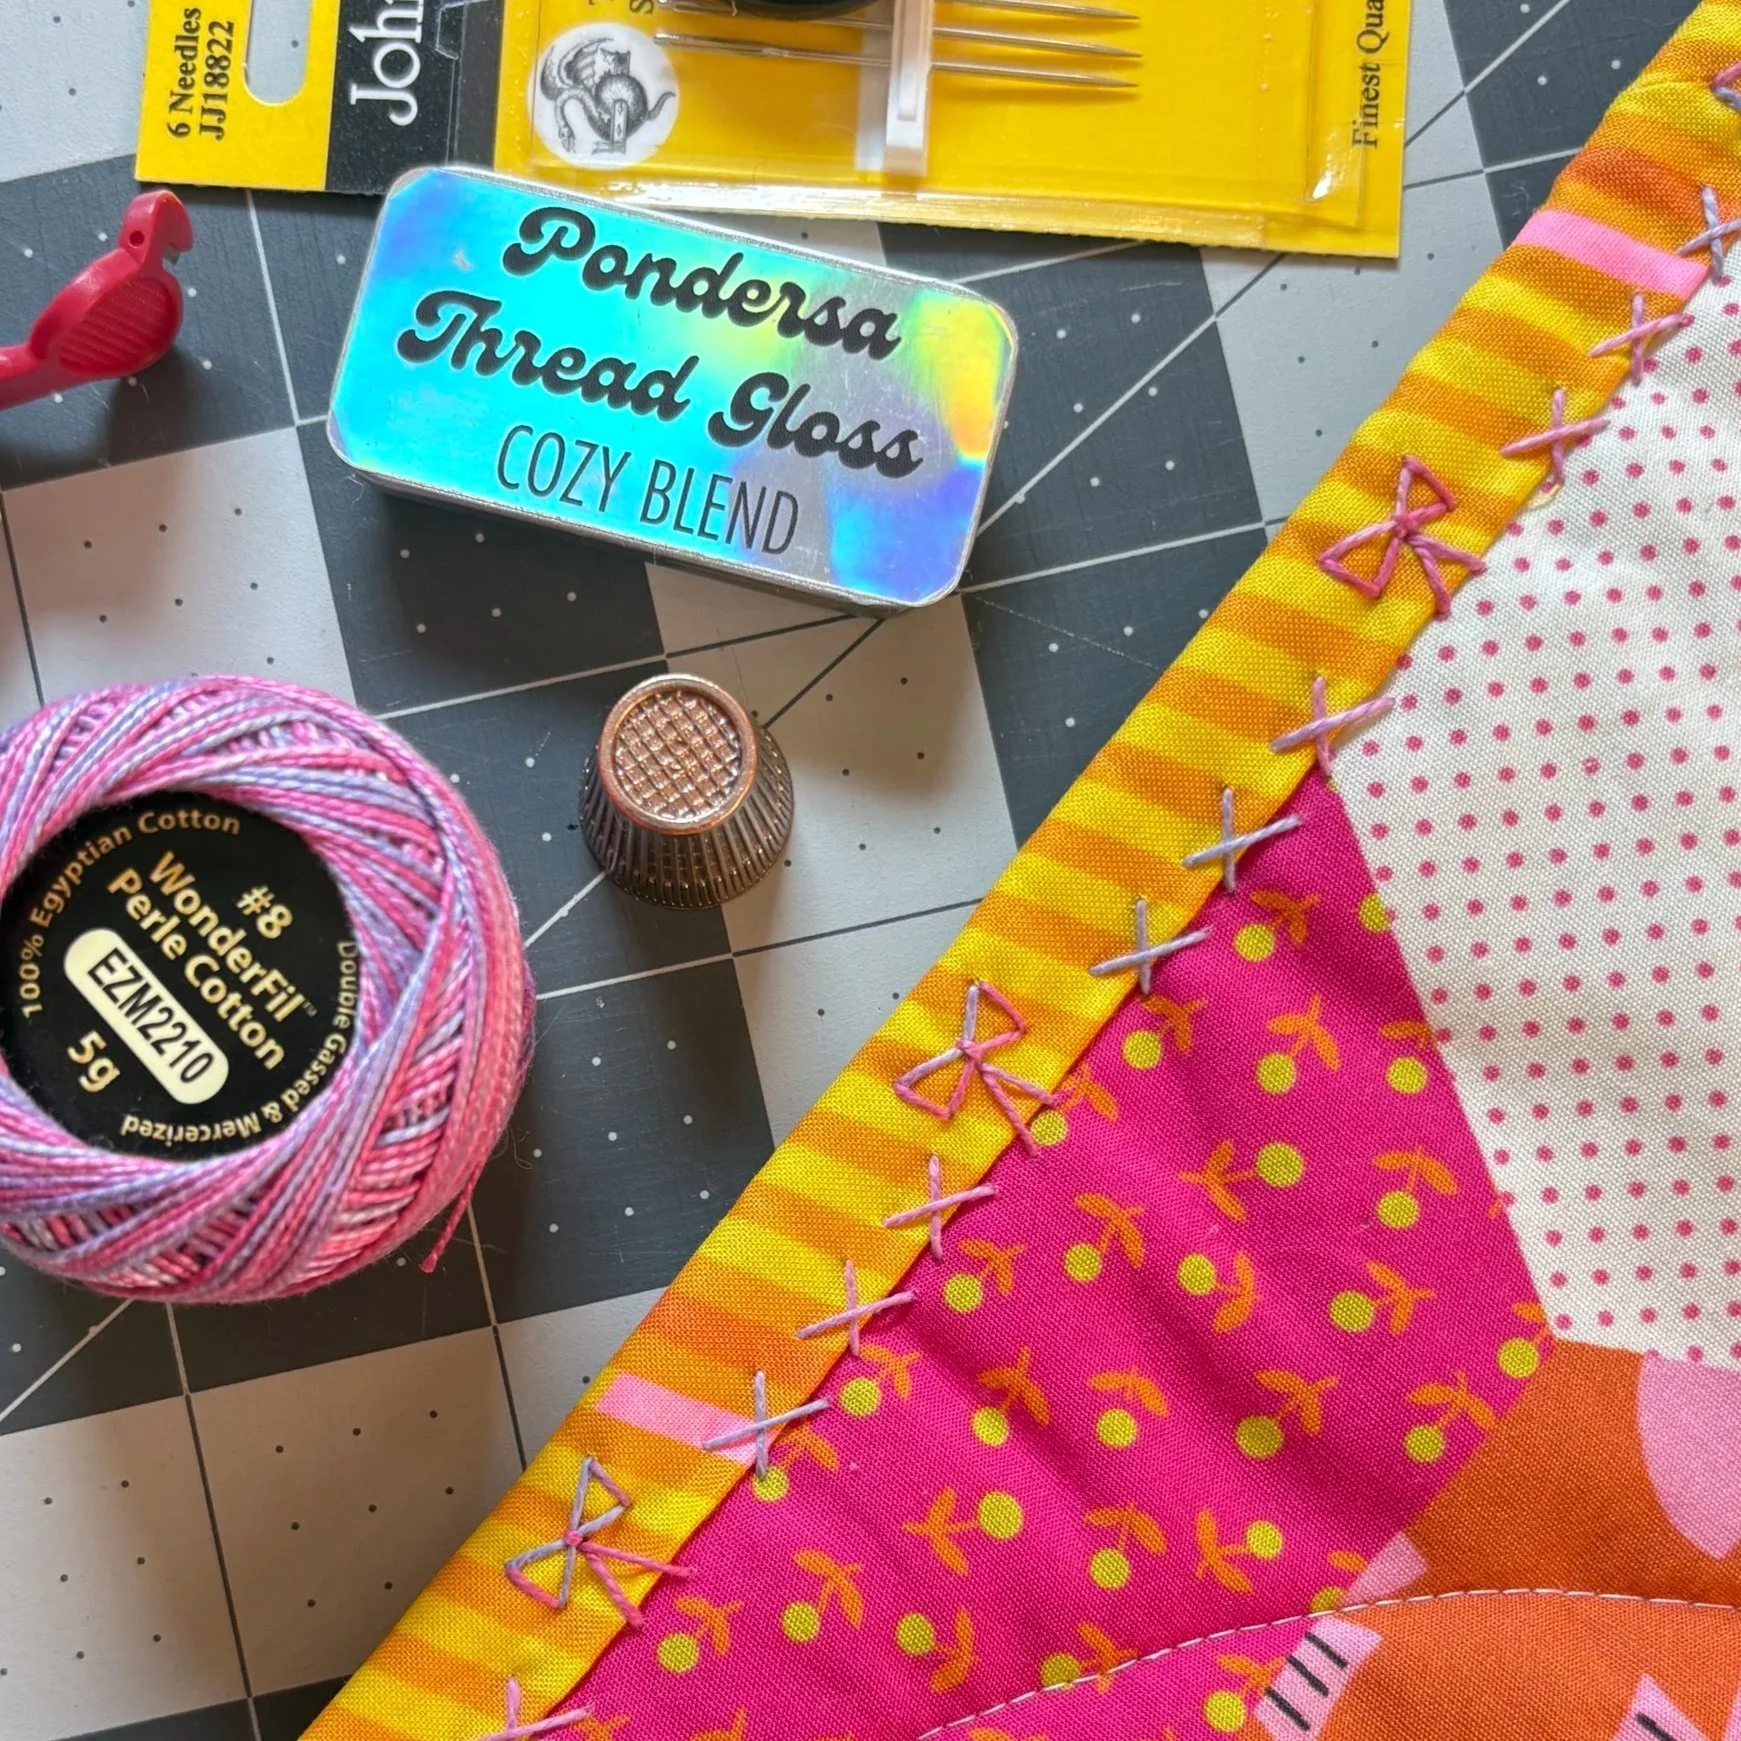
Your bow big stitch is complete! I choose to alternate one bow with three criss cross stitches, just to add some visual texture to this project.
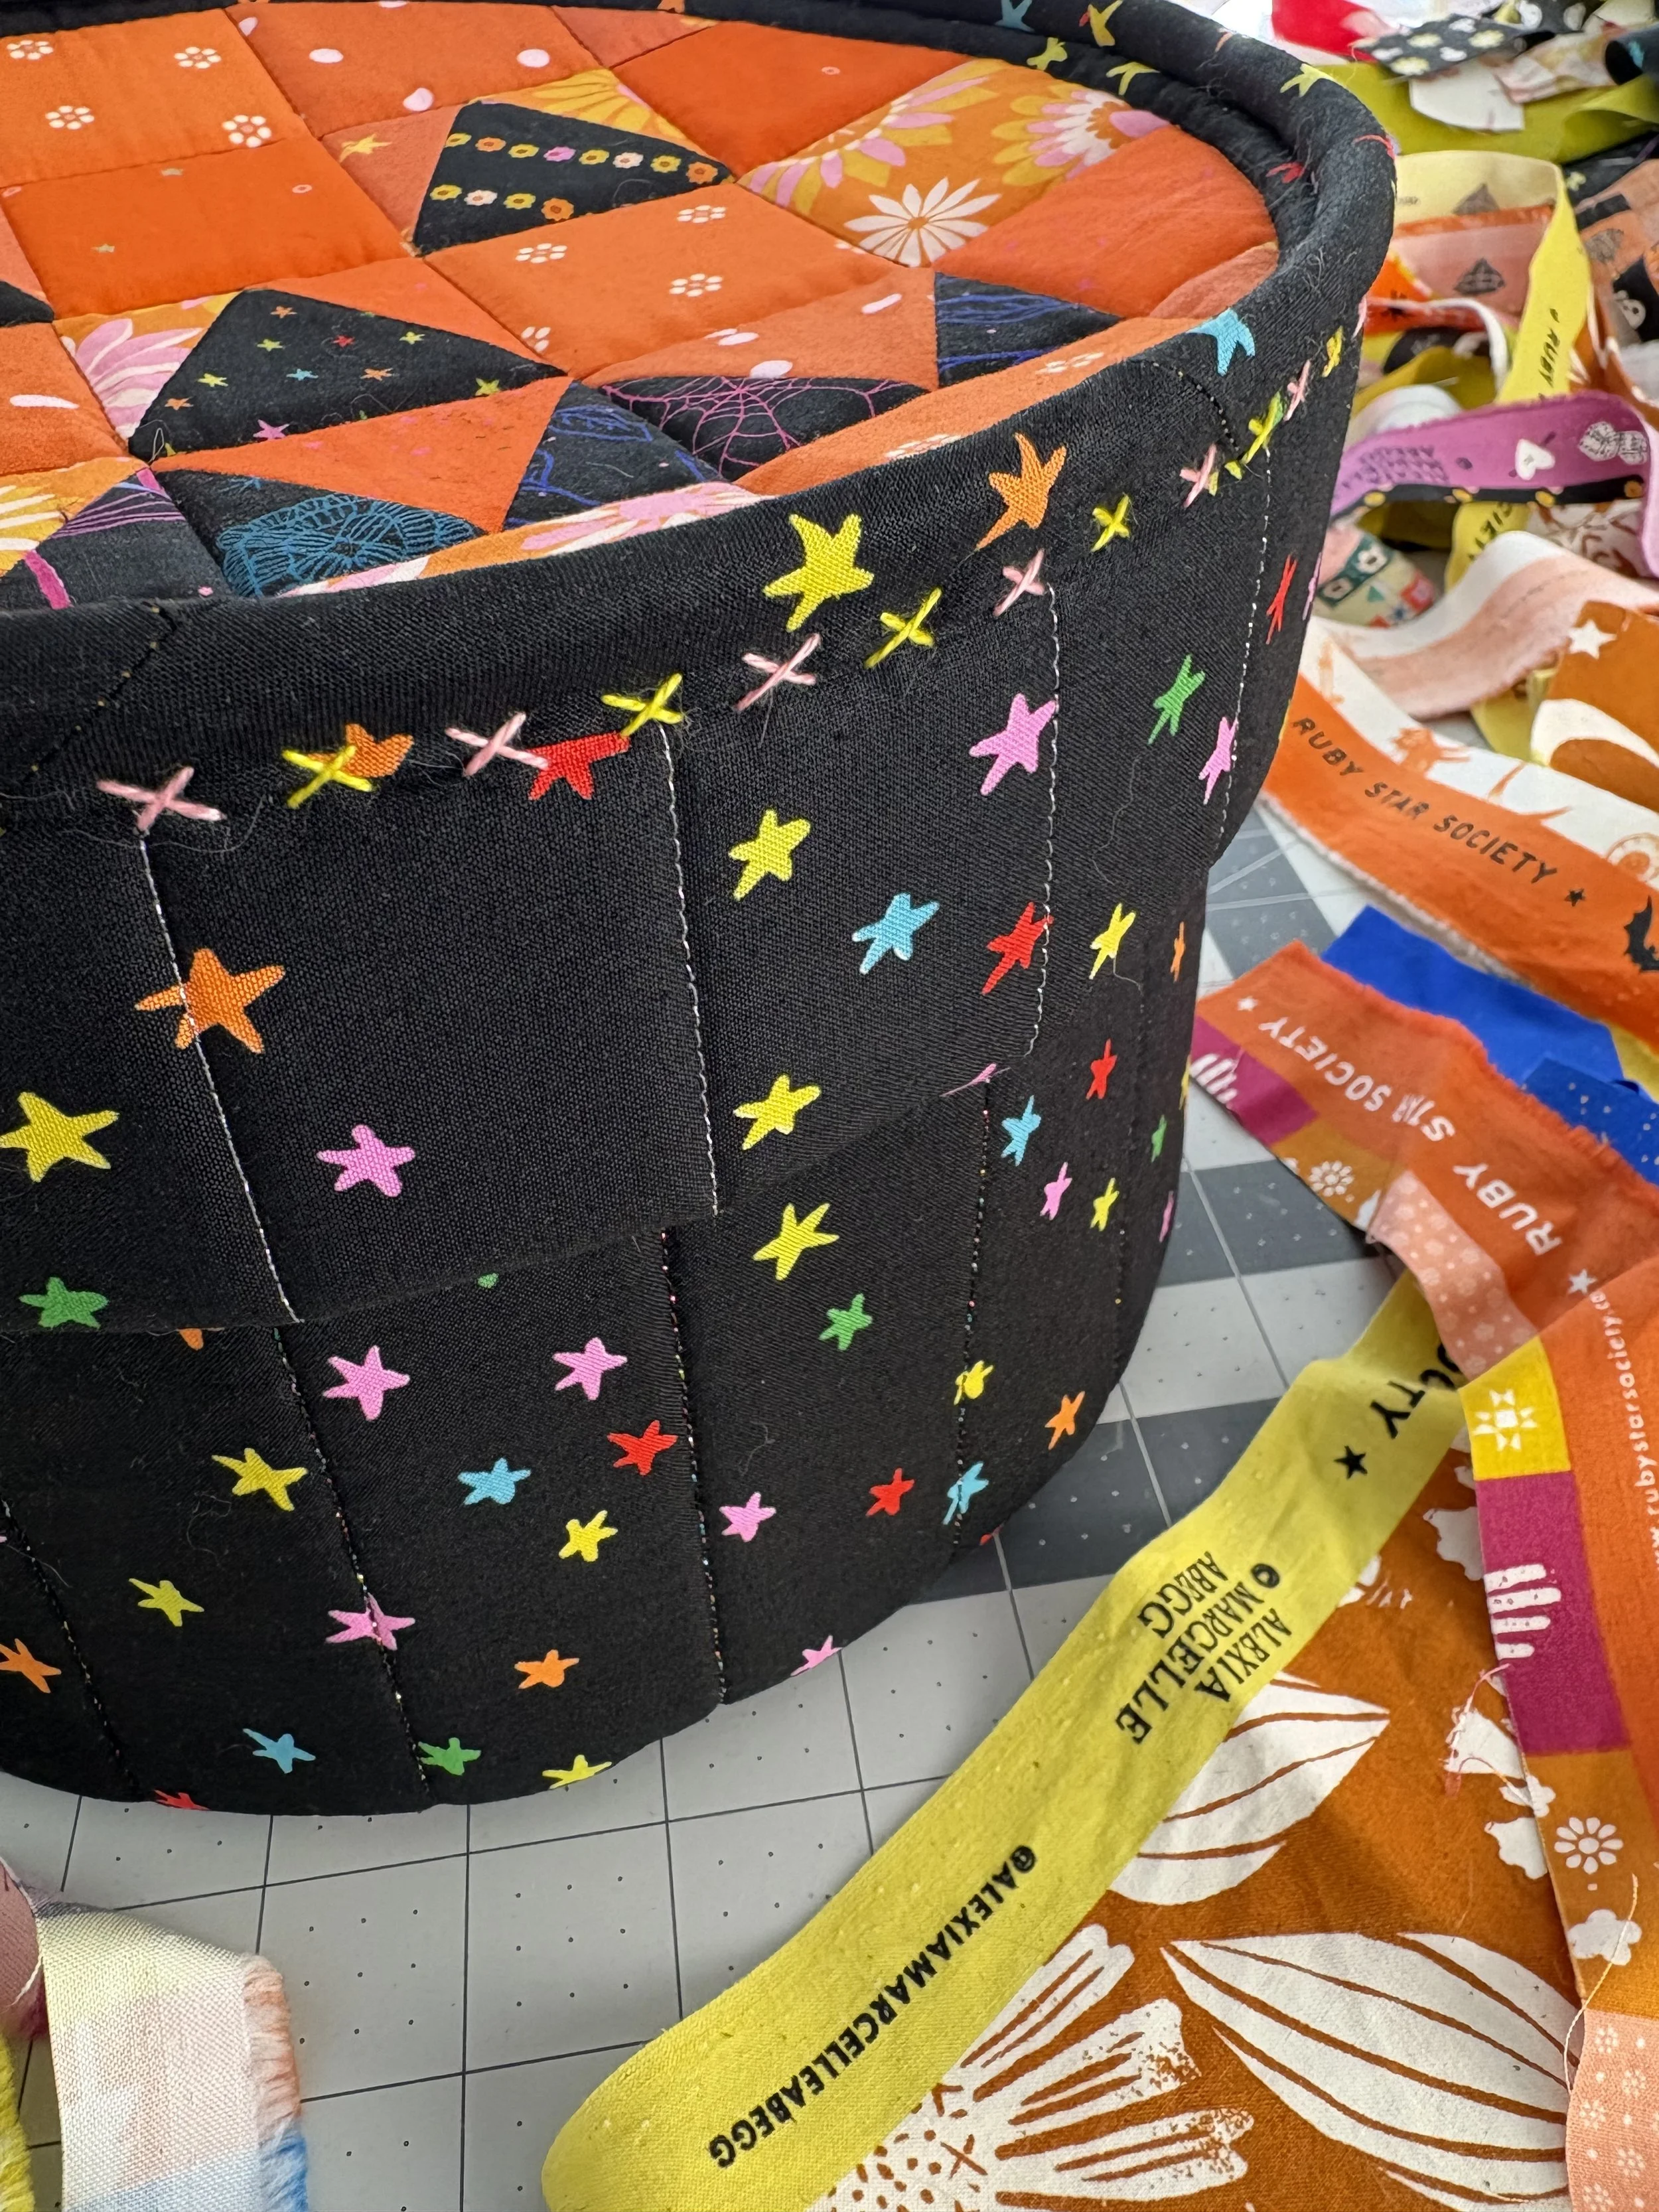
Hand stitches like this can be used in so many different places! I love to use it on home decor projects that require binding, like these quilted Jack O’lantern Baskets, which are perfect for spooky season decorating!