
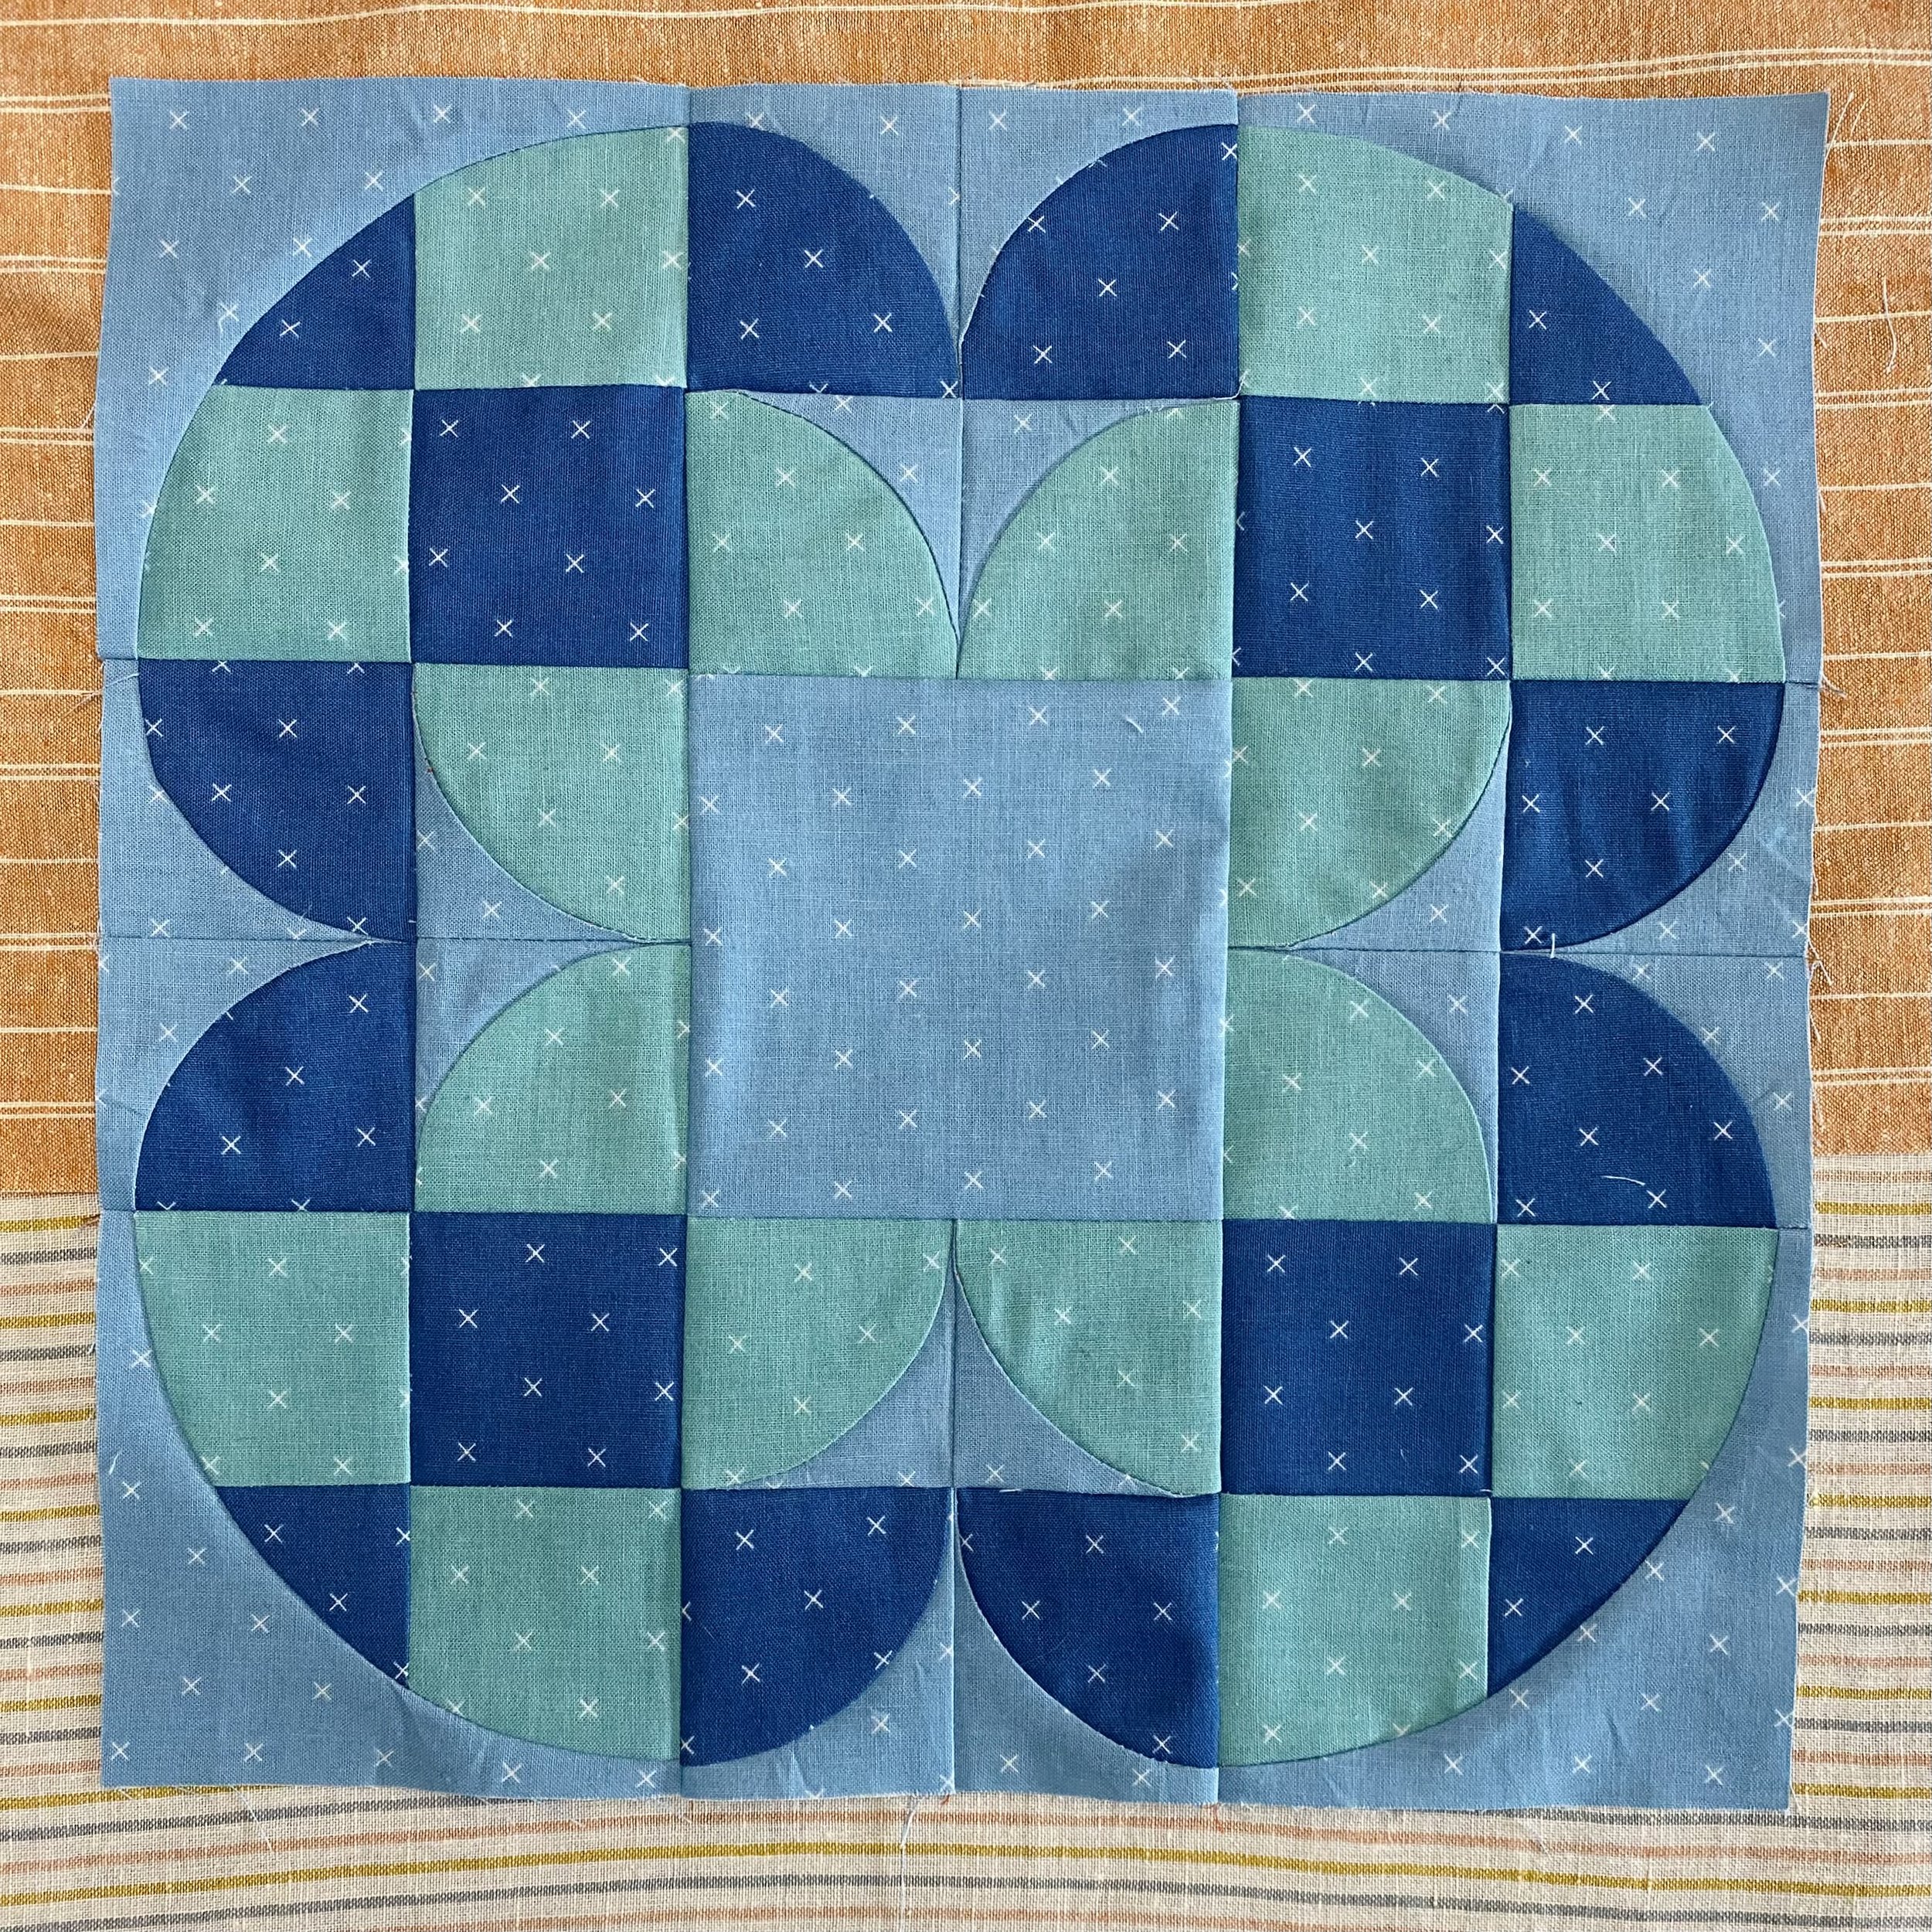
If you haven’t picked up on the trend yet, I designed several of the Learning Curves blocks to celebrate some of our favorite traditional quilt blocks. The Bear Bloom block is my spin on the classic bear paw block. Throw in some quarter circles curves and fun patchwork, and we’ve got a perfectly modern block.
This month, I’m skipping over how I cut out the blocks (I followed the cutting diagram in this month’s bonus sheet to use yardage instead of big scraps). Instead, I want to take a deeper dive into sewing quarter circle curves and share the things I like to pay attention to when I’m sewing.
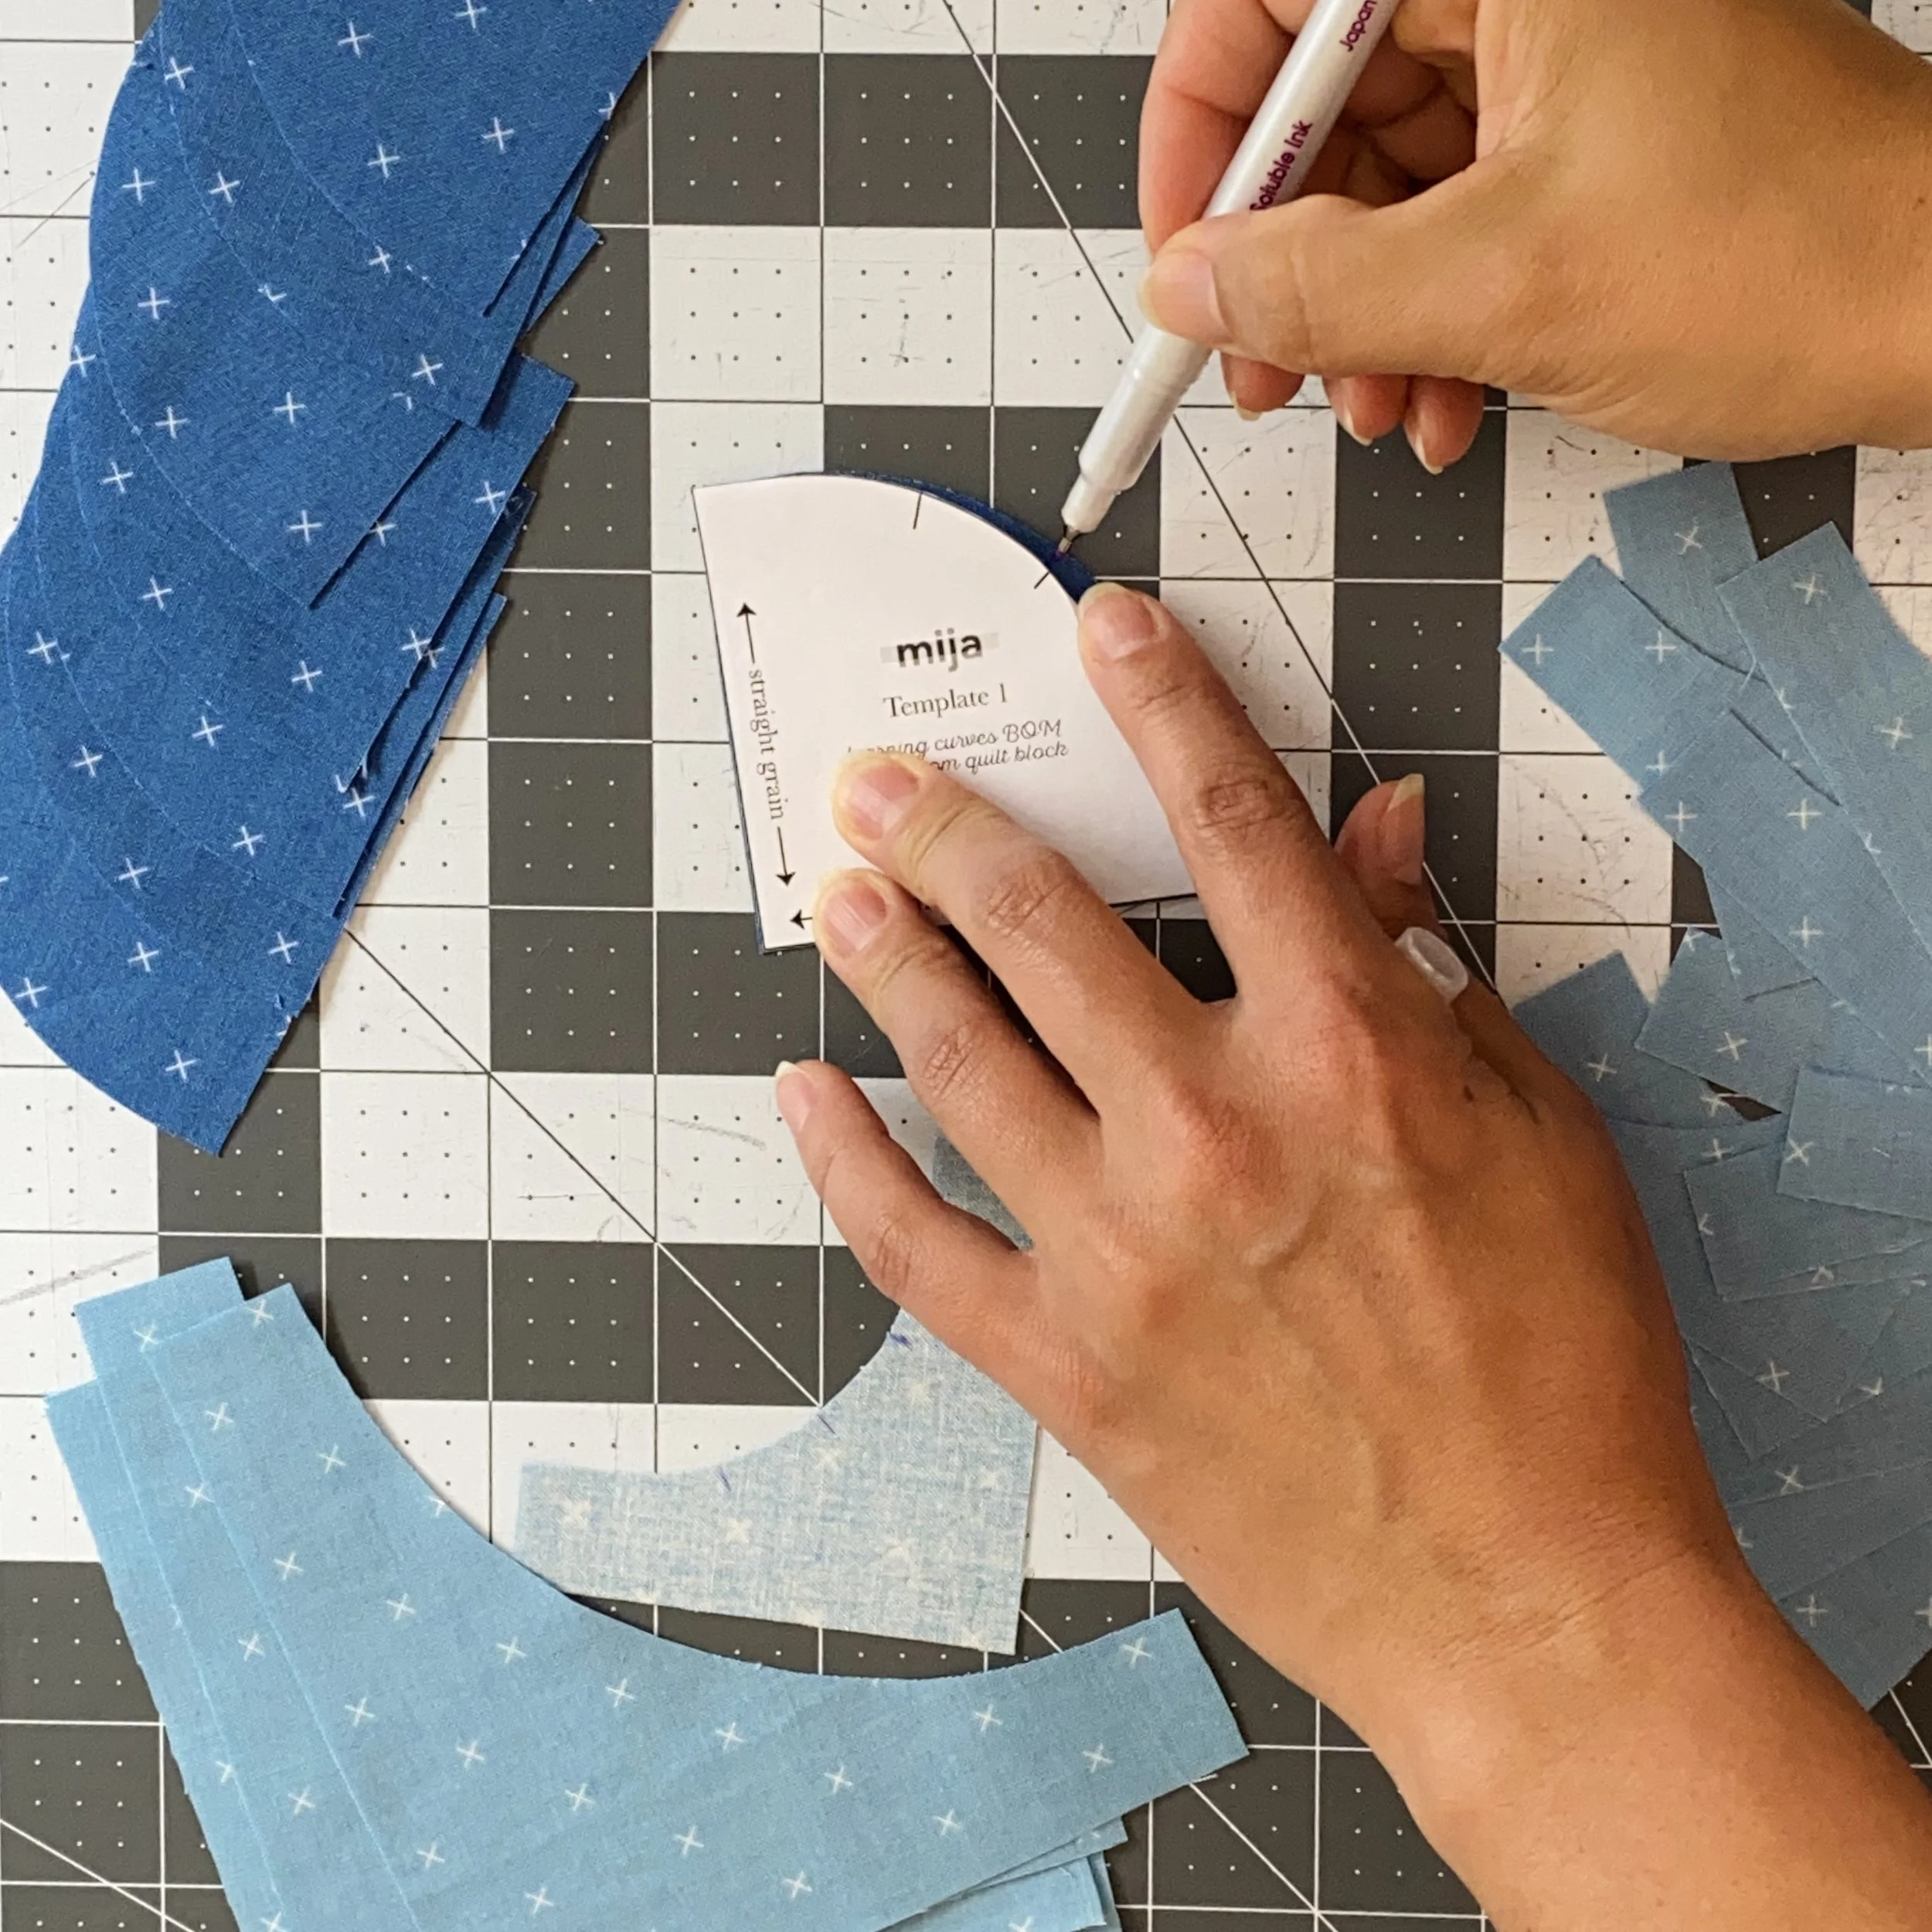
Transferring Registration Marks
Remember that registration marks go on the right side of the convex units and on the wrong side of the concave units. This assumes that you sew with the concave unit on top. If you sew with the convex unit on top, you’ll want to reverse that. I find it easy enough to keep the template on top of the fabric unit and gently peel the edge up, just enough to flick the tip of my pen under the paper.
Some quilters prefer to snip the registration marks with scissors or their rotary blade. I don’t recommend that with this pattern, which I’ll explain below.
A brief note about the templates. I designed these templates to be oversized by ½", which means there is an extra ¼" on all sides. What does this mean for you? It means that the first and last ½" of the curved seam is actually a straight seam. In other words, the first ¼" of the curved seam is extra trimming room and the next ¼" is the seam allowance. The same is true at the end of the curved seam. So, as you pin and sew the ends of the curve seam, remember that you can sew in a straight line for ½" at both ends.
Easing the Curve
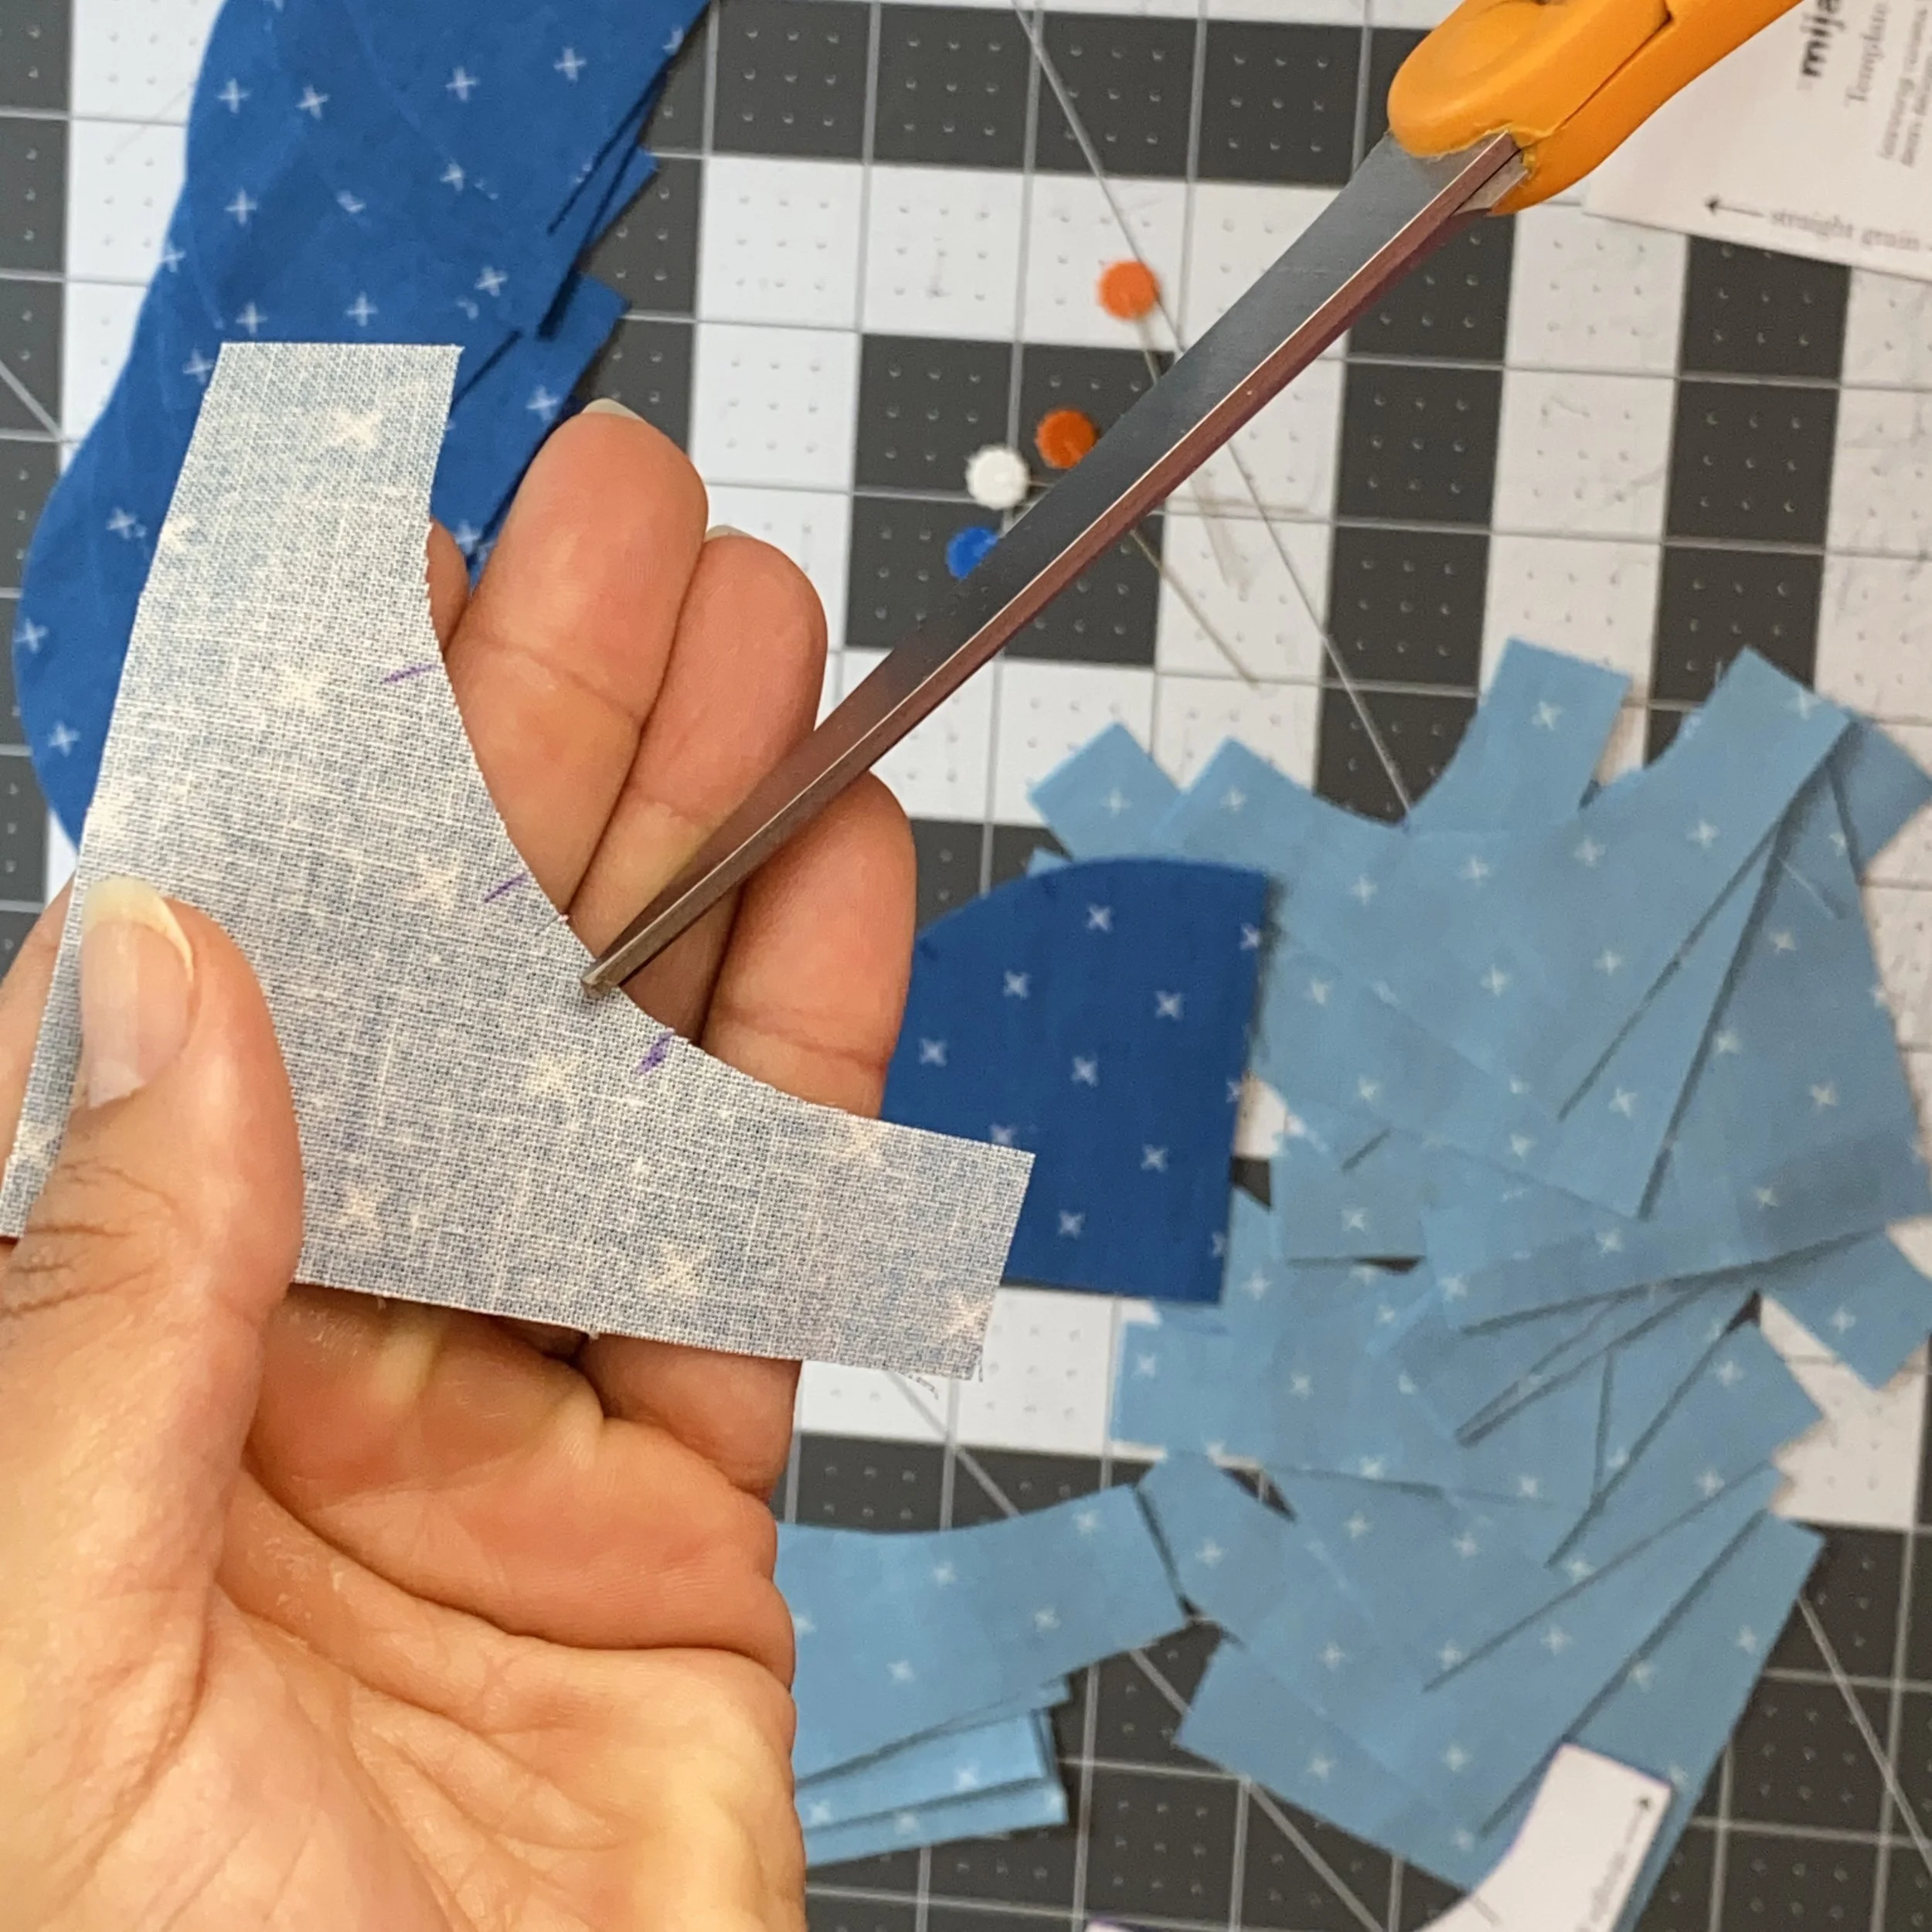
These quarter circle curves are on the smaller side, so I recommend making small snips in the seam allowance of the concave unit. Make sure they are well inside the seam allowance - the snip should be no more than ⅛". I like to make two snips on the outside of the registration marks, and two snips between each mark. You do not need to carry the snips to the edge of the unit as the first and last ½" are straight seams.
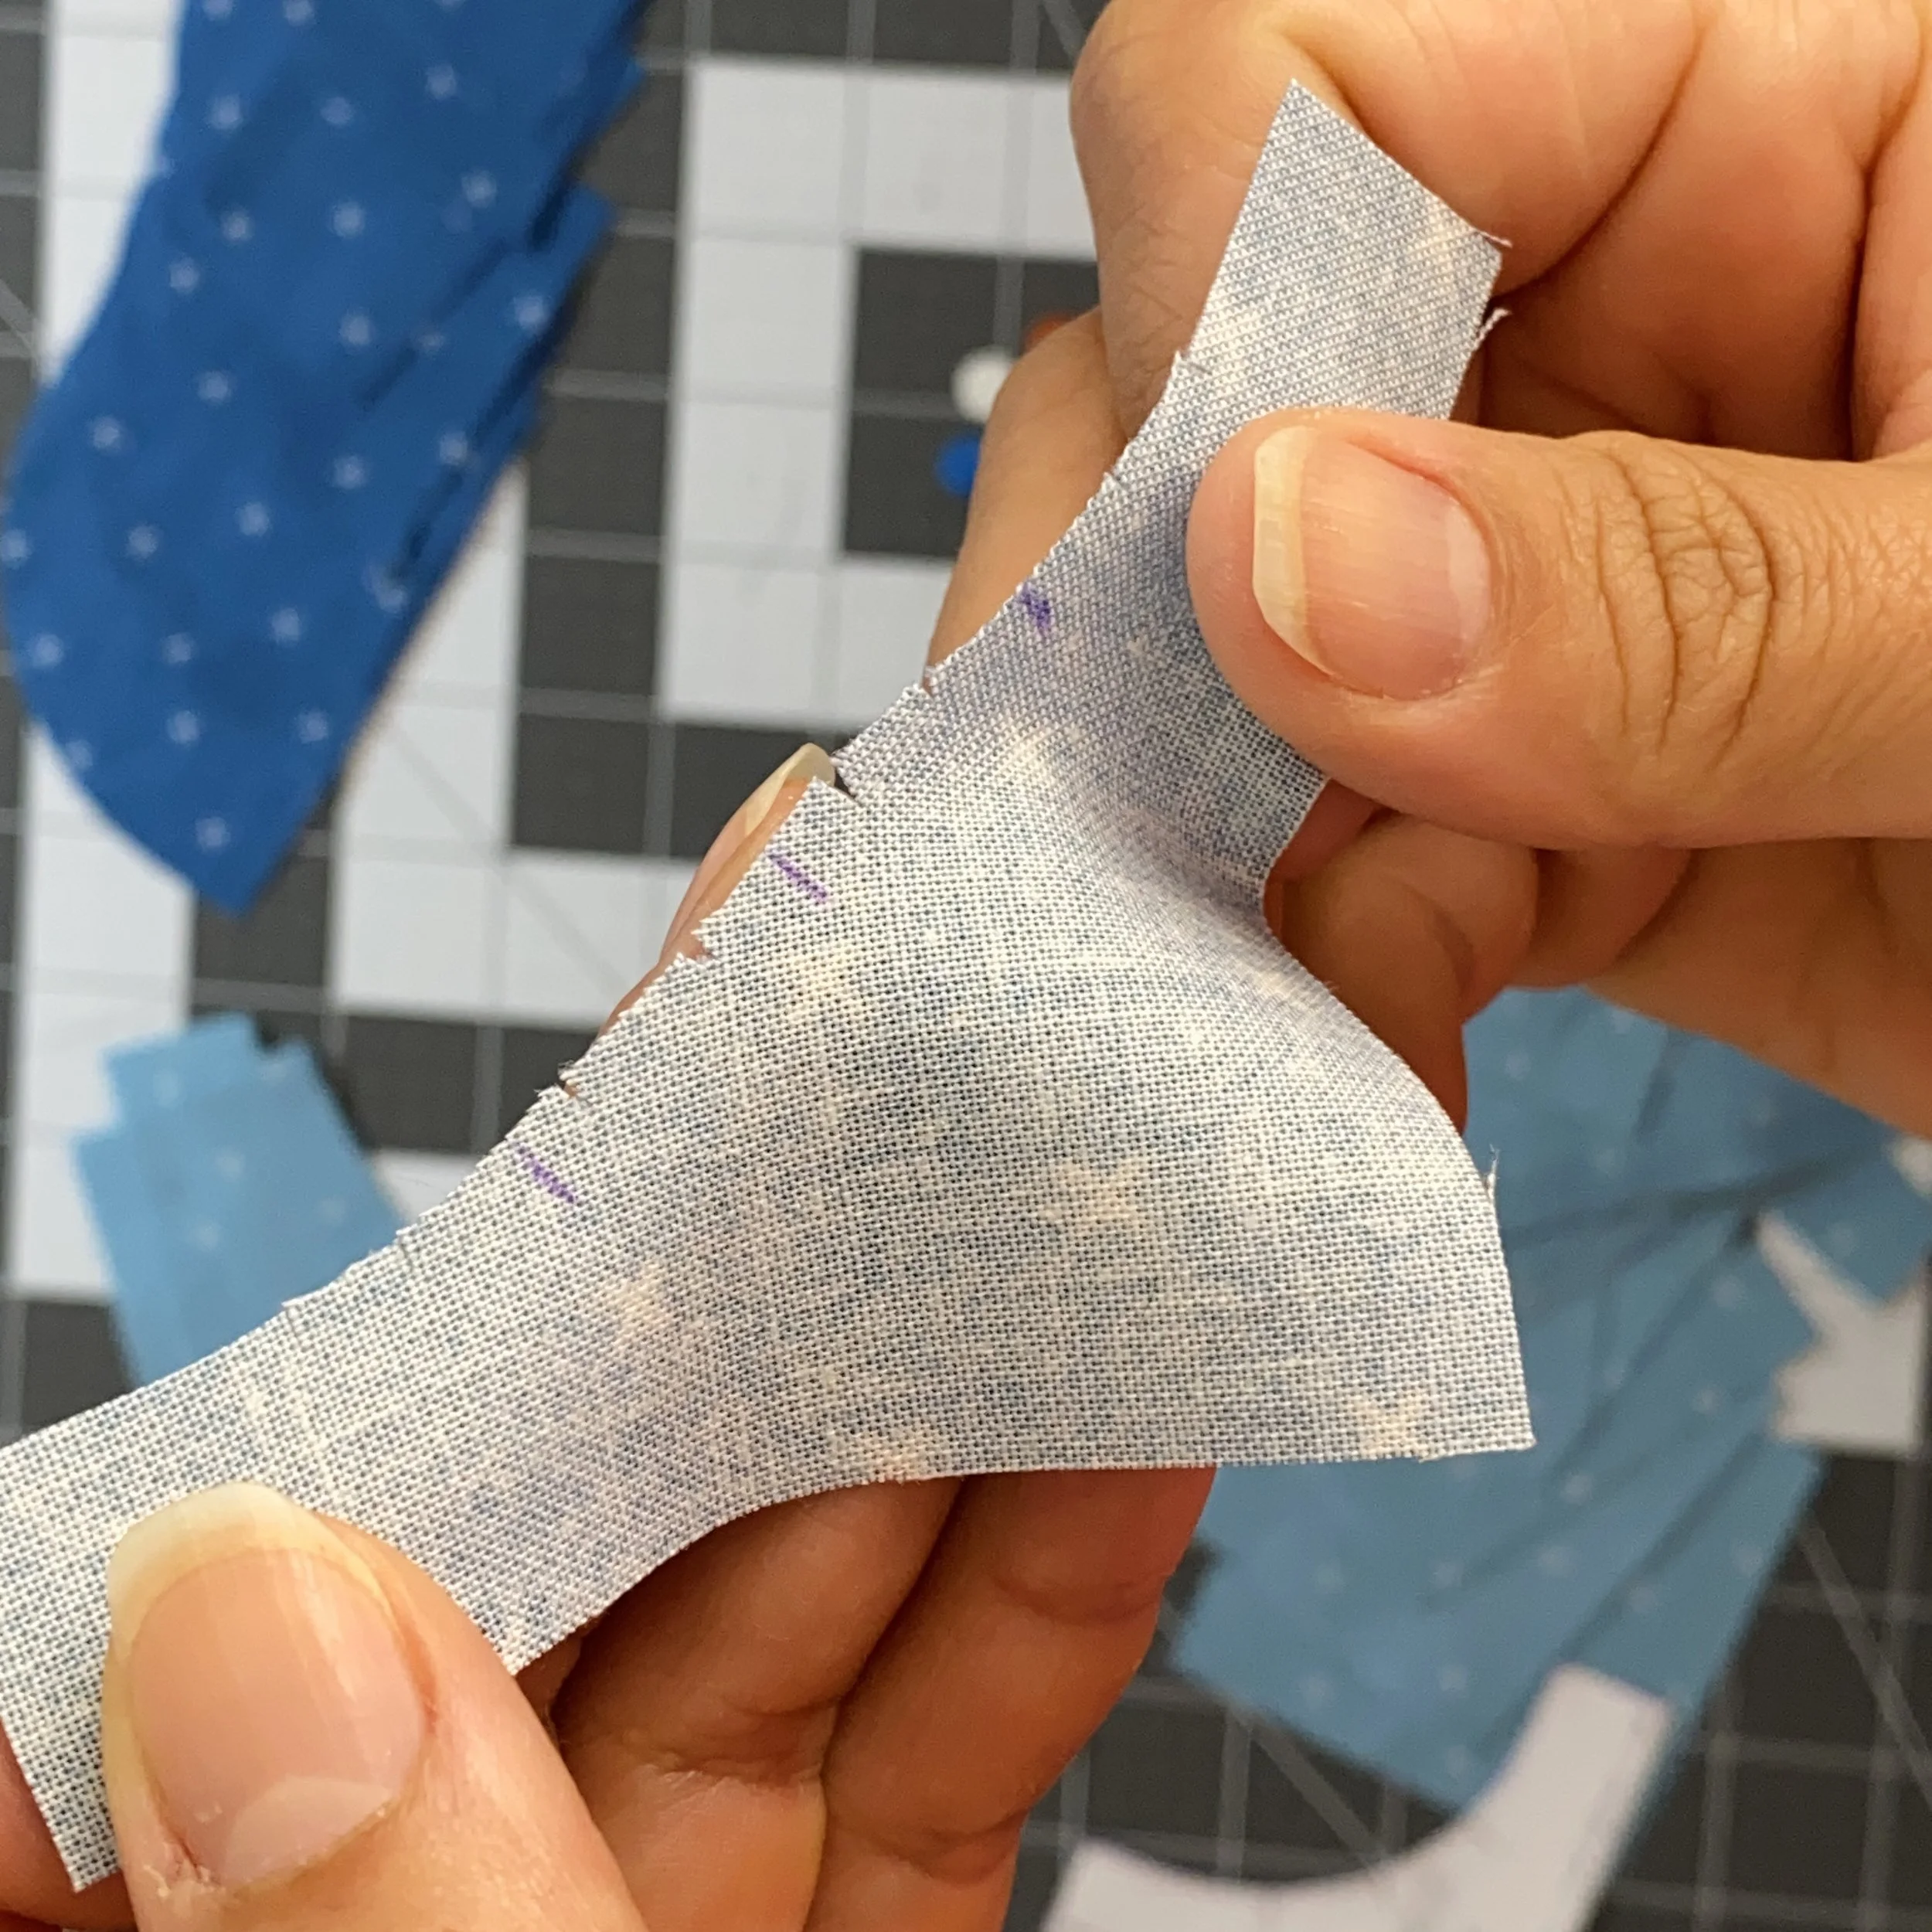
To call back to why I don’t like snipping the registration marks on this pattern, it would be difficult to differentiate between a registration snip and a snip meant to ease the curve.
Once I’ve made all these snips, you can see that I can almost pull the concave curve into a straight line. This will help ease the concave curve to meet the convex curve exactly.

Pinning the Curve Seam
I like to start by pinning the middle and ends first. To match and pin the registration marks, you may feel like you are stretching the concave piece. This could be due to the accuracy of your cutting and registration marks. Even though the units are small, it’s hard to mess these up too much.
Top Four Things To Pay Attention To
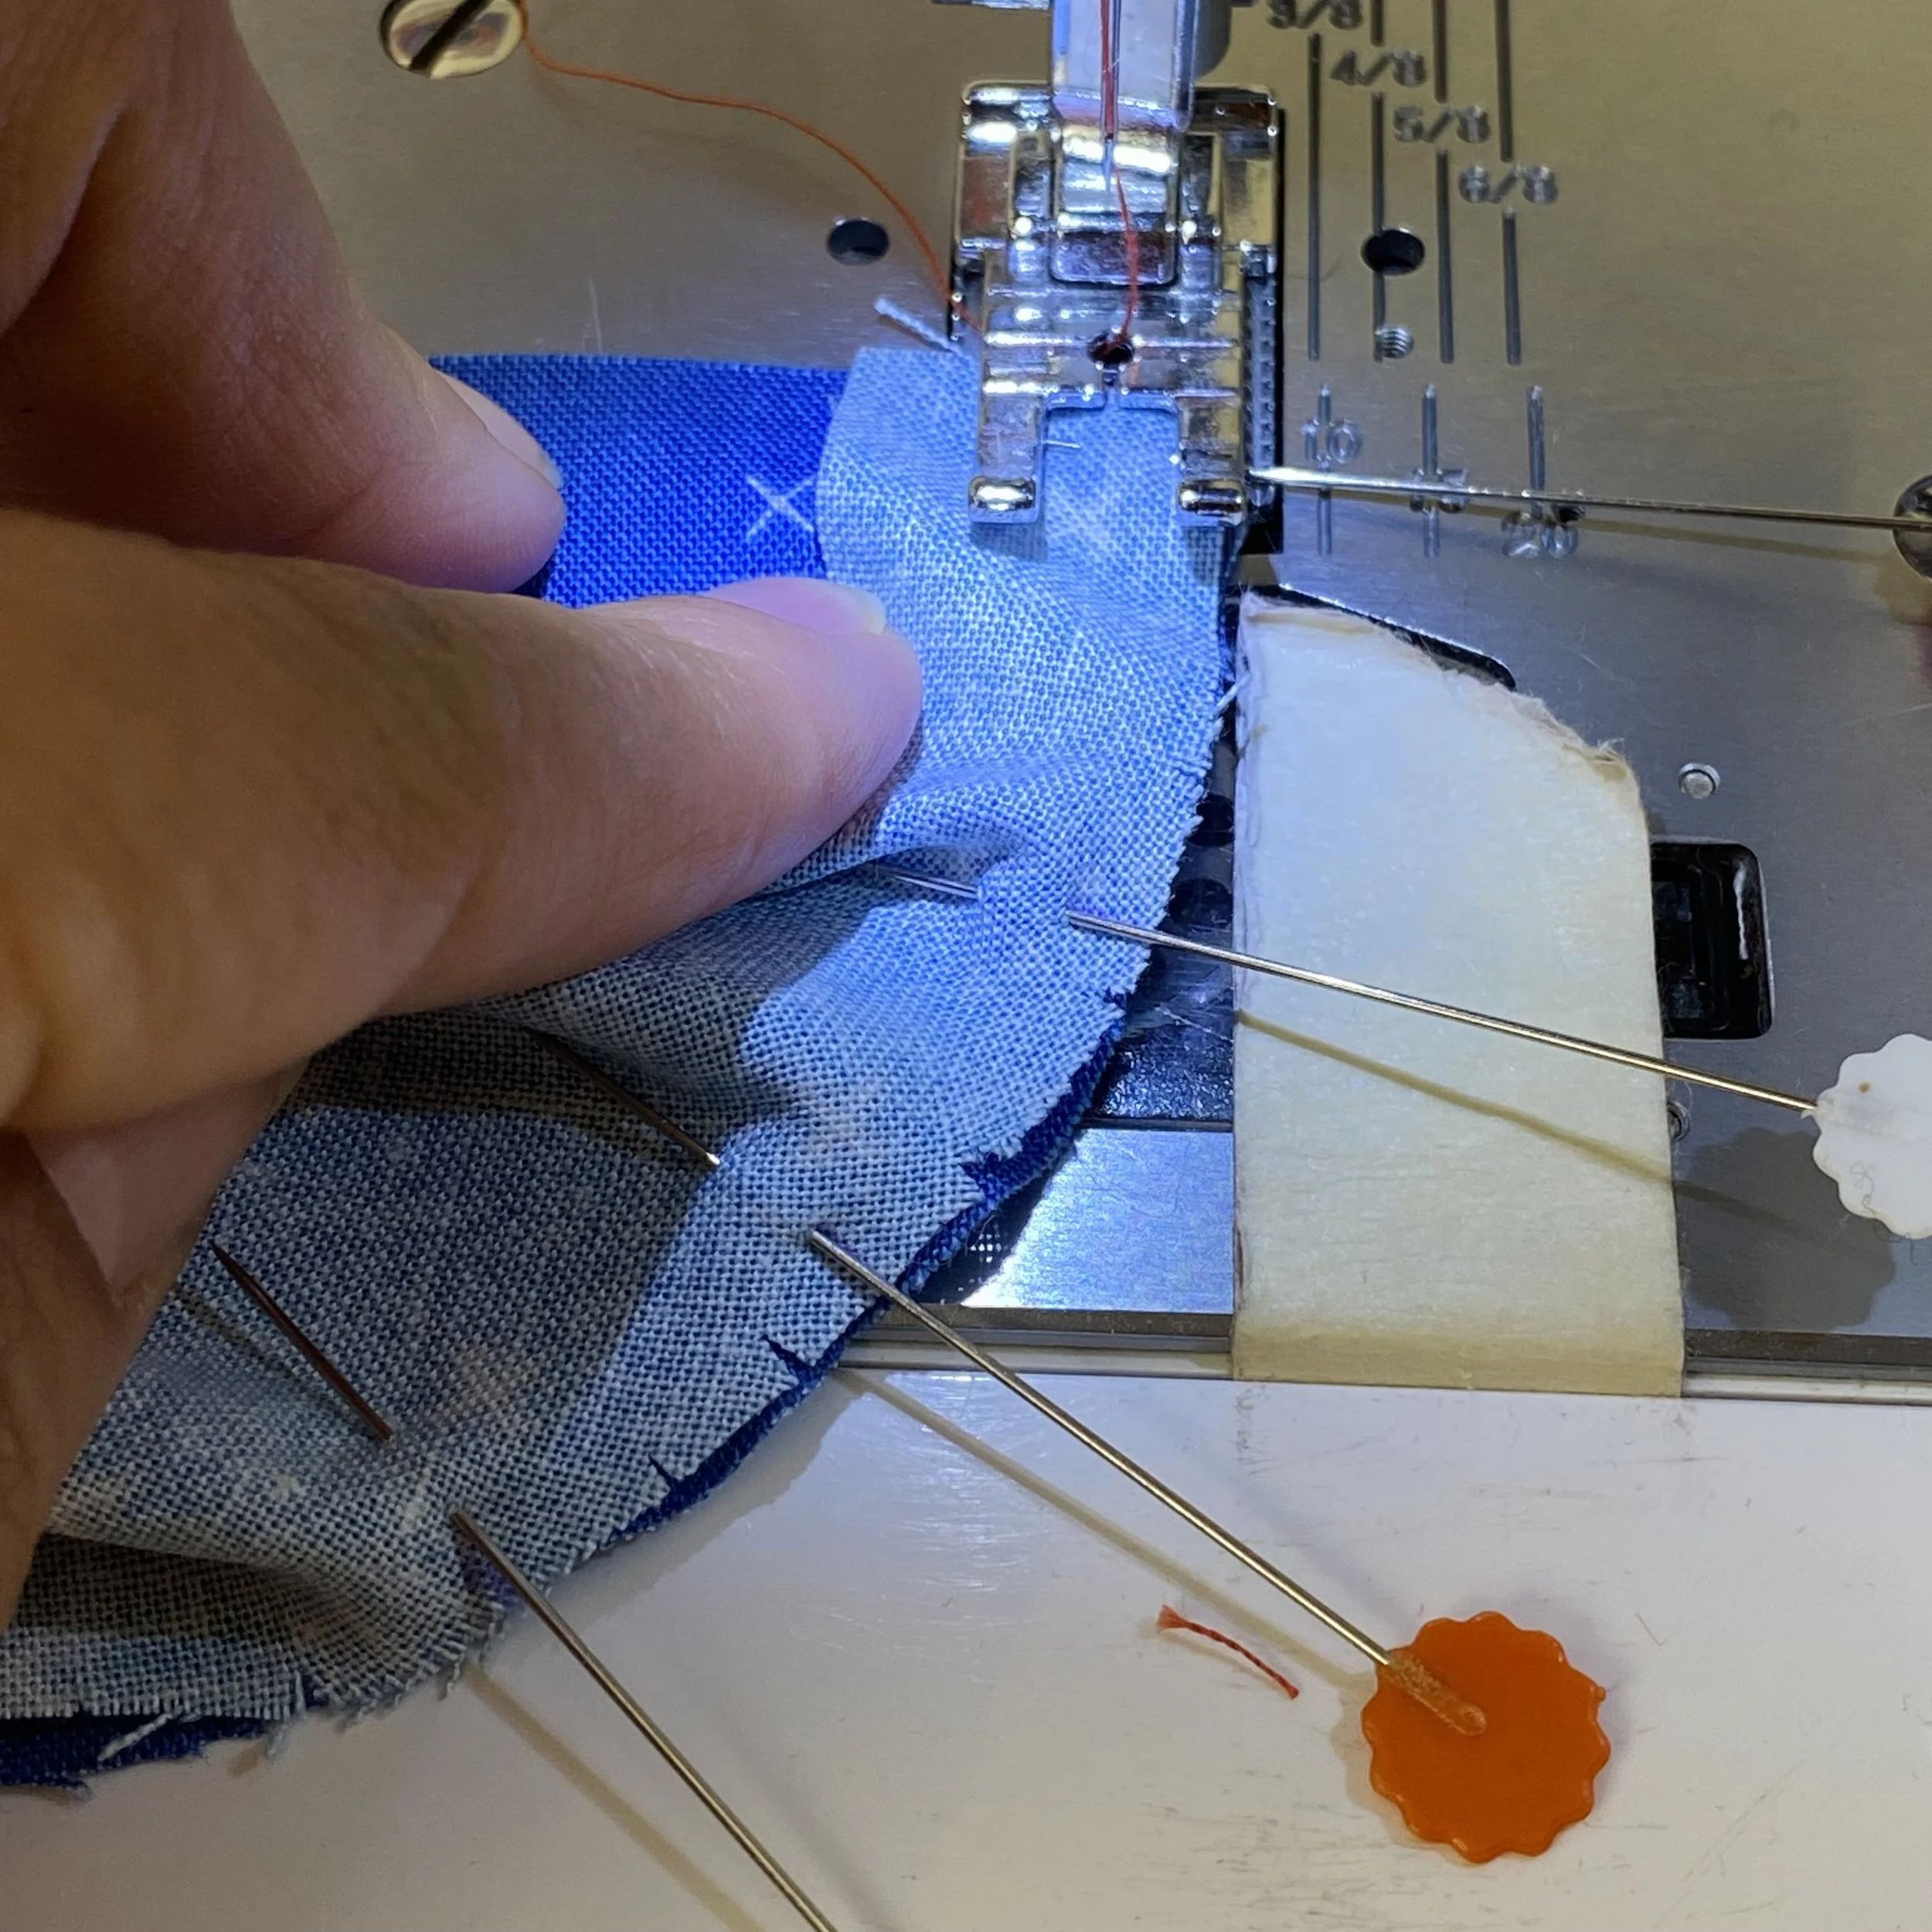
Once I’m at the machine, I have four factors I like to pay attention to. First, I like to test that the curves lay flat. With the small snips, see how neatly the fabric wants to snap into place?
Second, I make sure to keep the edges of both pieces aligned. It’s really easy to let the edge of the top, concave piece pull back from the edge of the convex piece. If I let that top piece pull back, it would mean that I’m not catching the full seam allowance of the concave piece. That extra fabric not sewn into the seam allowance ends up in the body of the block and will either make the block the wrong size OR introduce extra fullness.
Third, I make sure to sew with an actual ¼" seam allowance. Spend time setting up a sewing guide or learn the width of your presser foot. In this picture, I actually ended up adjusting my units a little to the right before sewing,
Fourth, see all the excess fabric under my finger? That’s the extra fabric we’re constantly manipulating when sewing curves. I like to keep that excess fabric “pointed” towards the middle of the curve. That means for the first half of the curve, I manipulate the fabric so the folds are towards the middle. (Remember, don’t sew over a fold!)
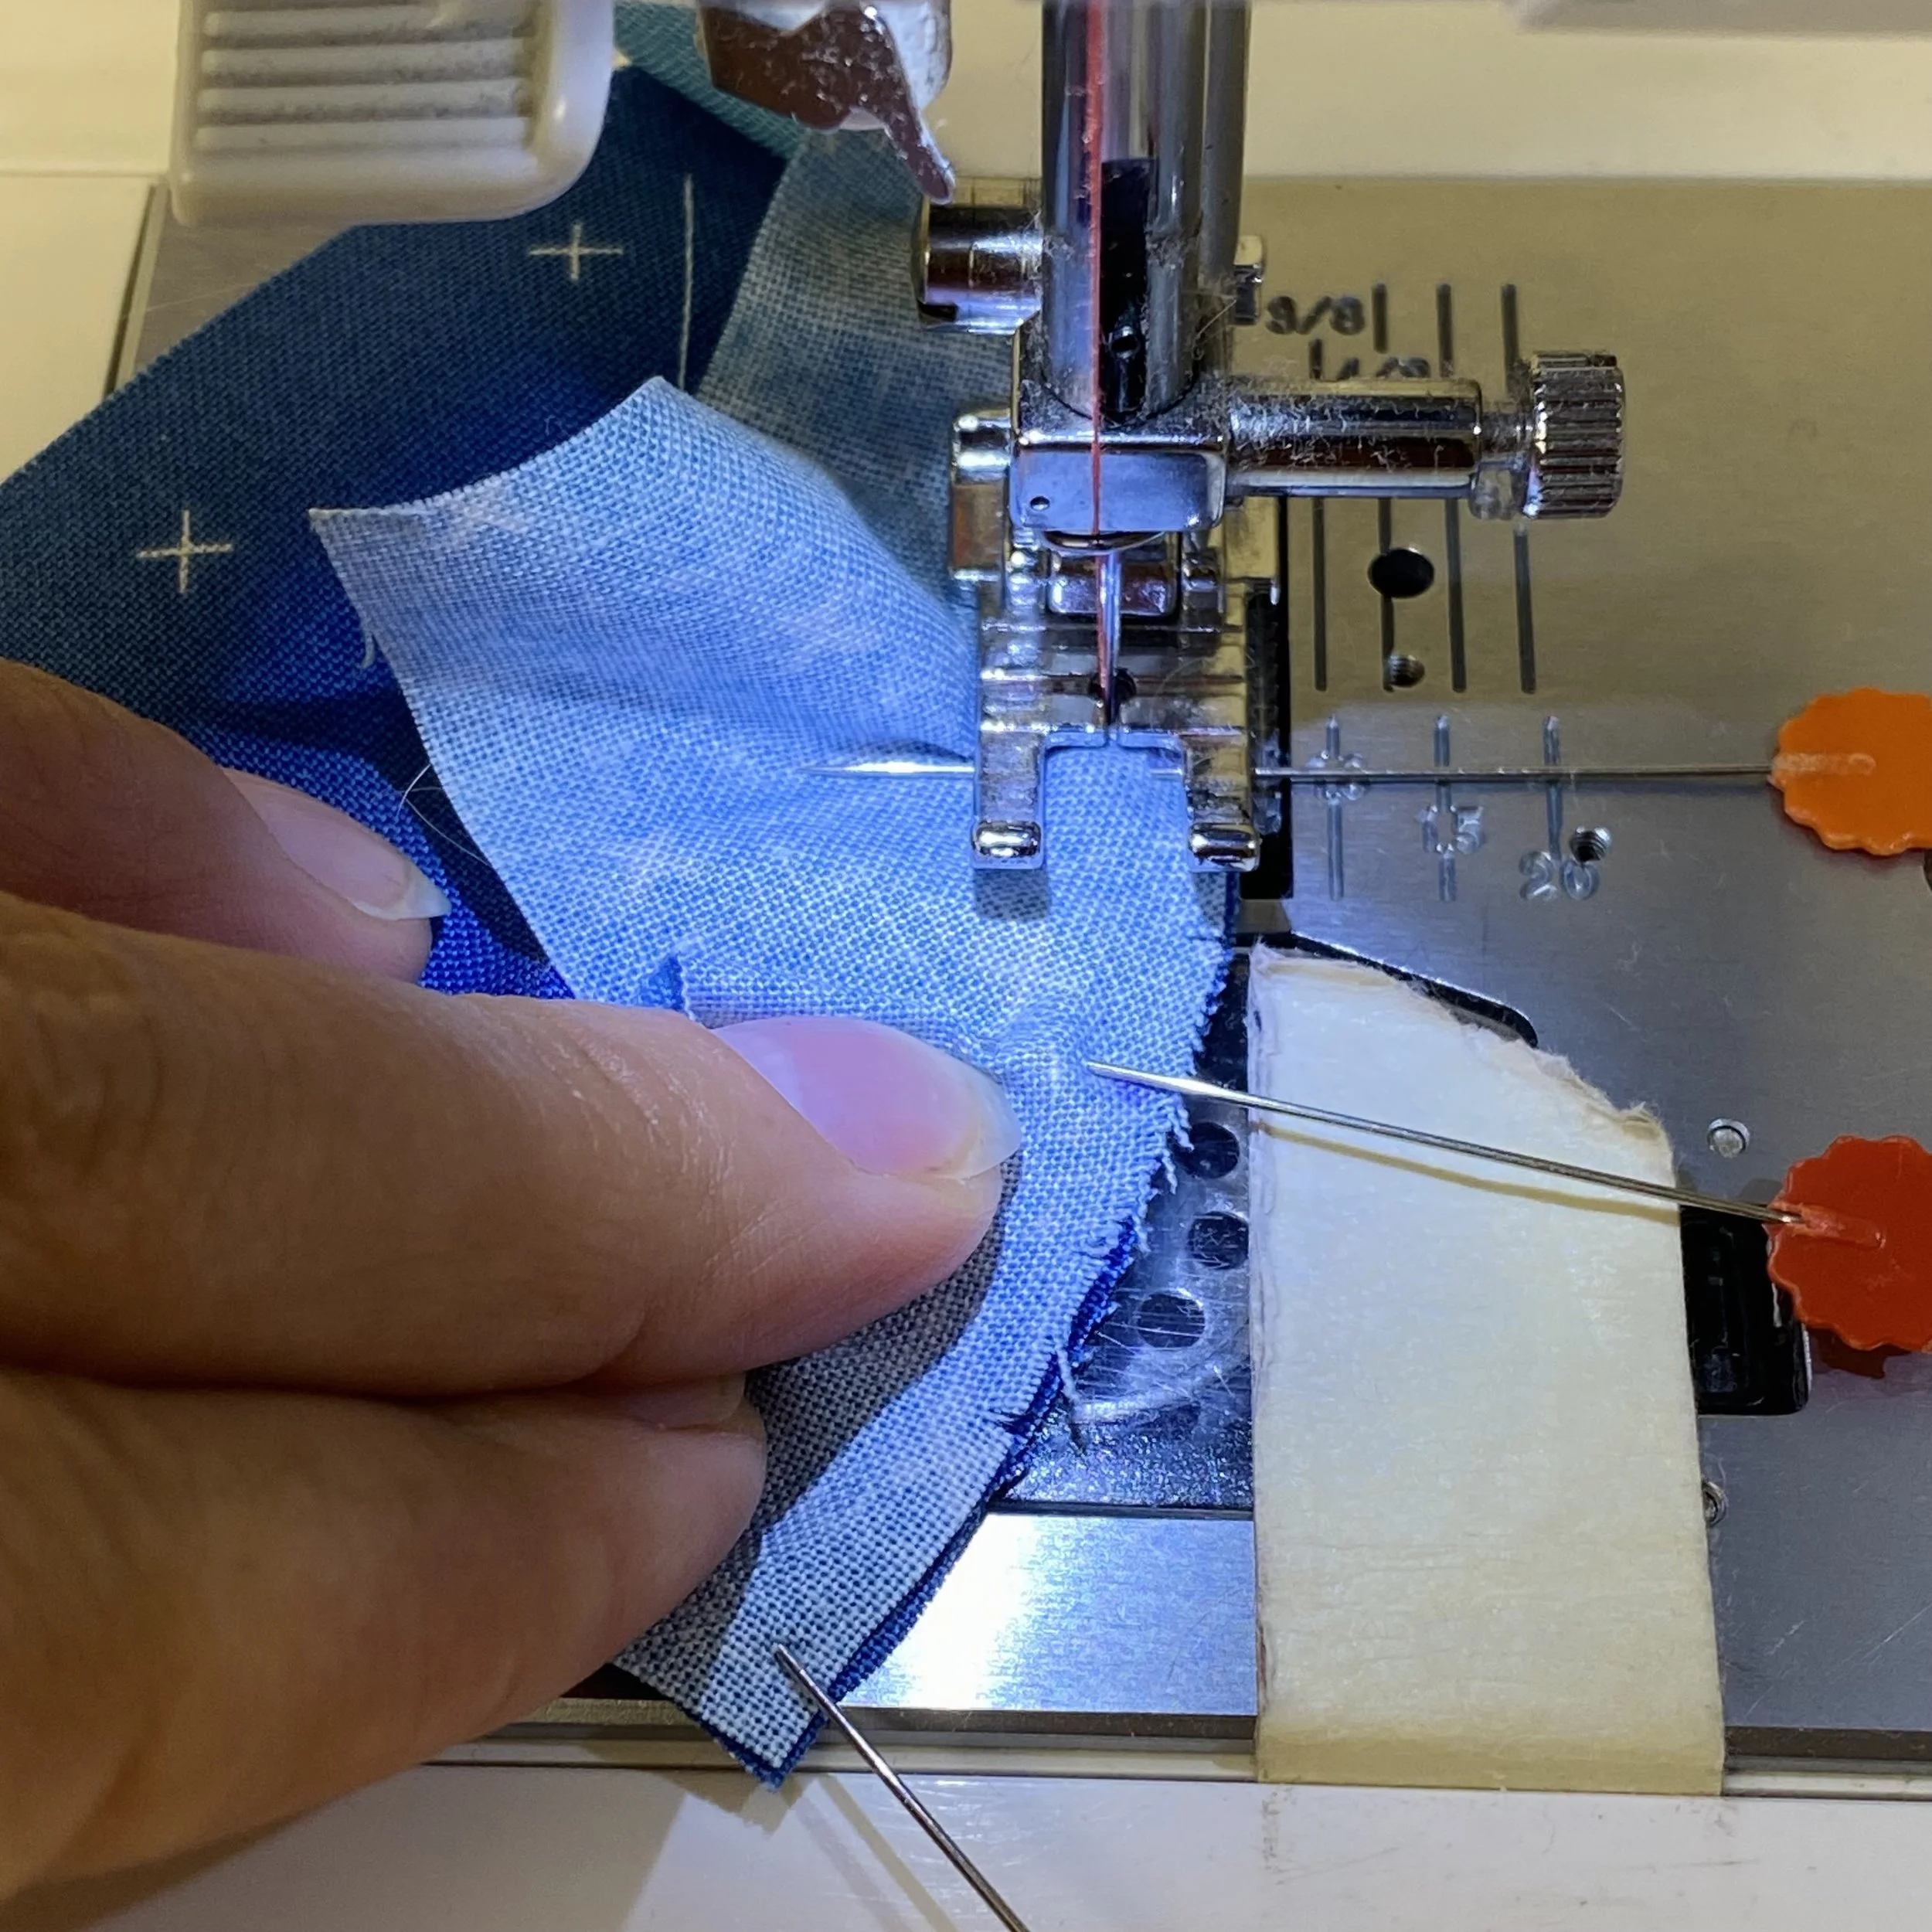
Once I reach the back half of the curve, I “point” the folds towards back towards the middle. I’ve found that this helps discourage the top concave piece from sneakily extending past the edge of the convex piece. This isn’t really a problem when we trim from all four sides of a quarter circle block. It’s mostly a problem when we trim from only the concave piece (as with the large quarter circle blocks in part 2 of the pattern).
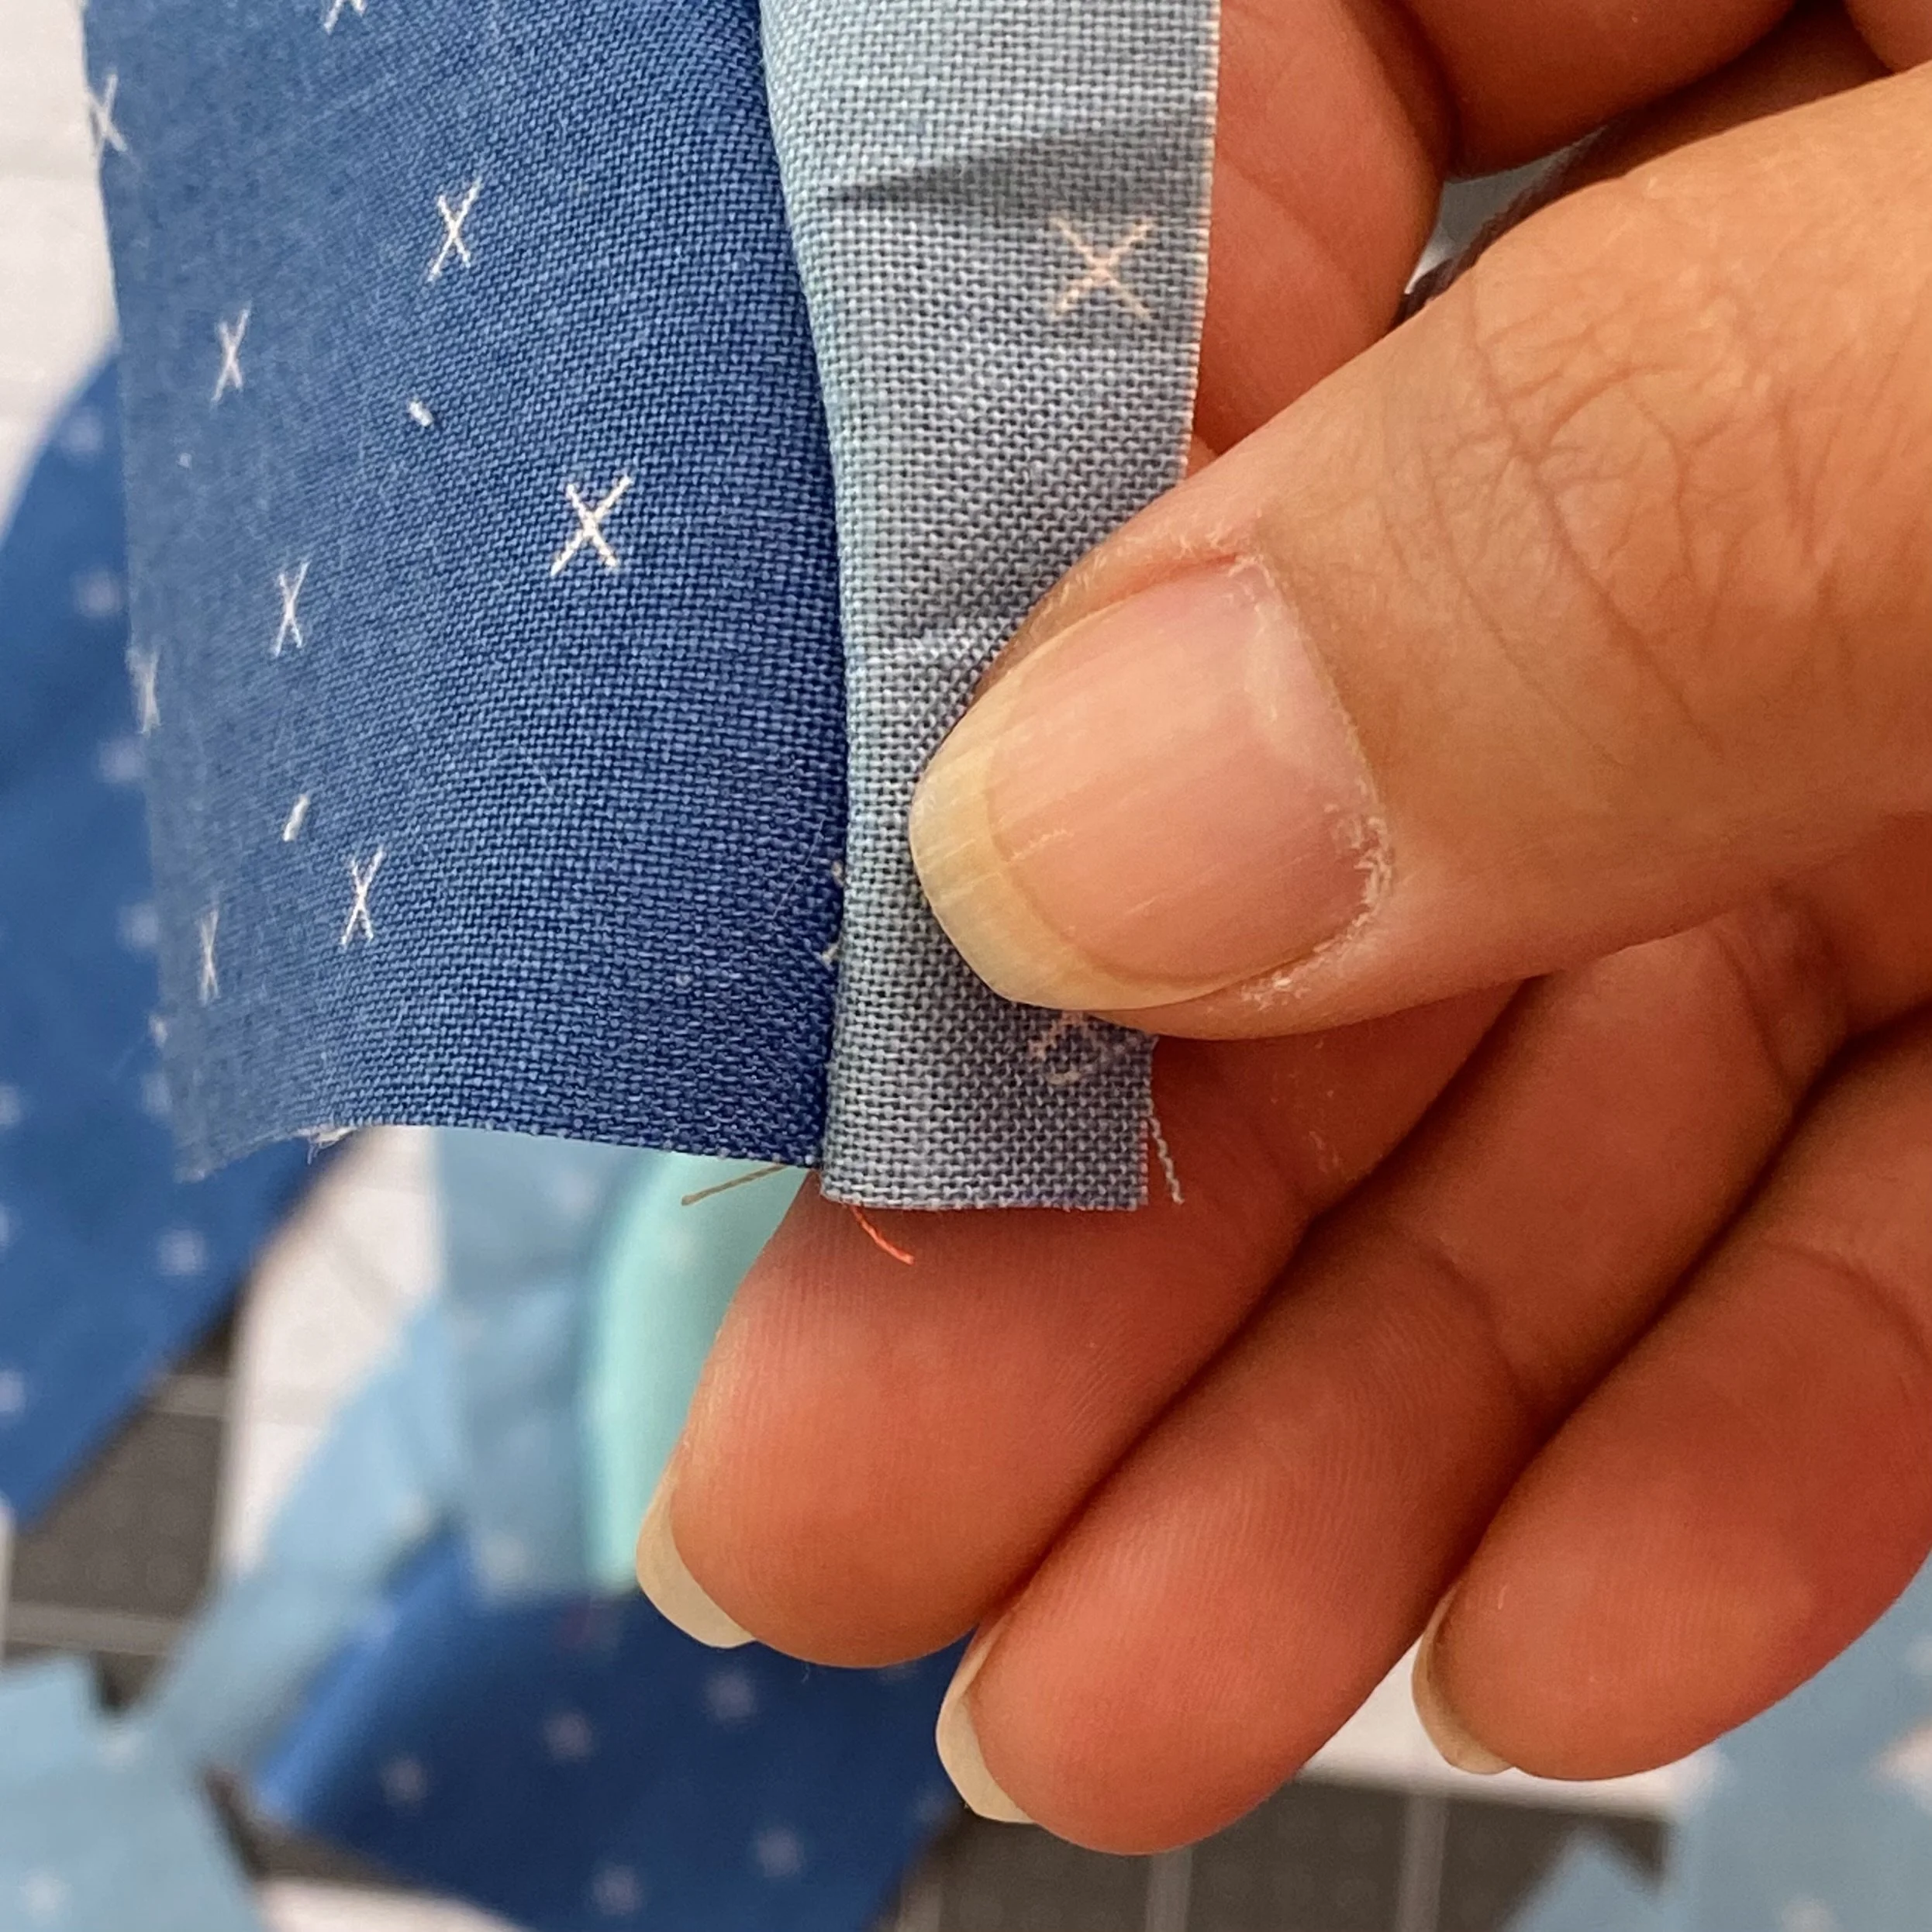
This photo is an example of letting the concave unit stretch and extend slightly past the end of the convex piece. This particular example is slight and wouldn’t impact piecing, but greater deviations could have an impact on other patterns. Since Bear Bloom lets us trim from all four sides on the small quarter circles, I encourage you to experiment with pinning and piecing these units to see how accurately you can get these edges aligned. If you make a big mistake, you’ll be able to trim it right off!
After all the practice with the small quarter circles, you’ll be prepared to accurately piece the large quarter circles.
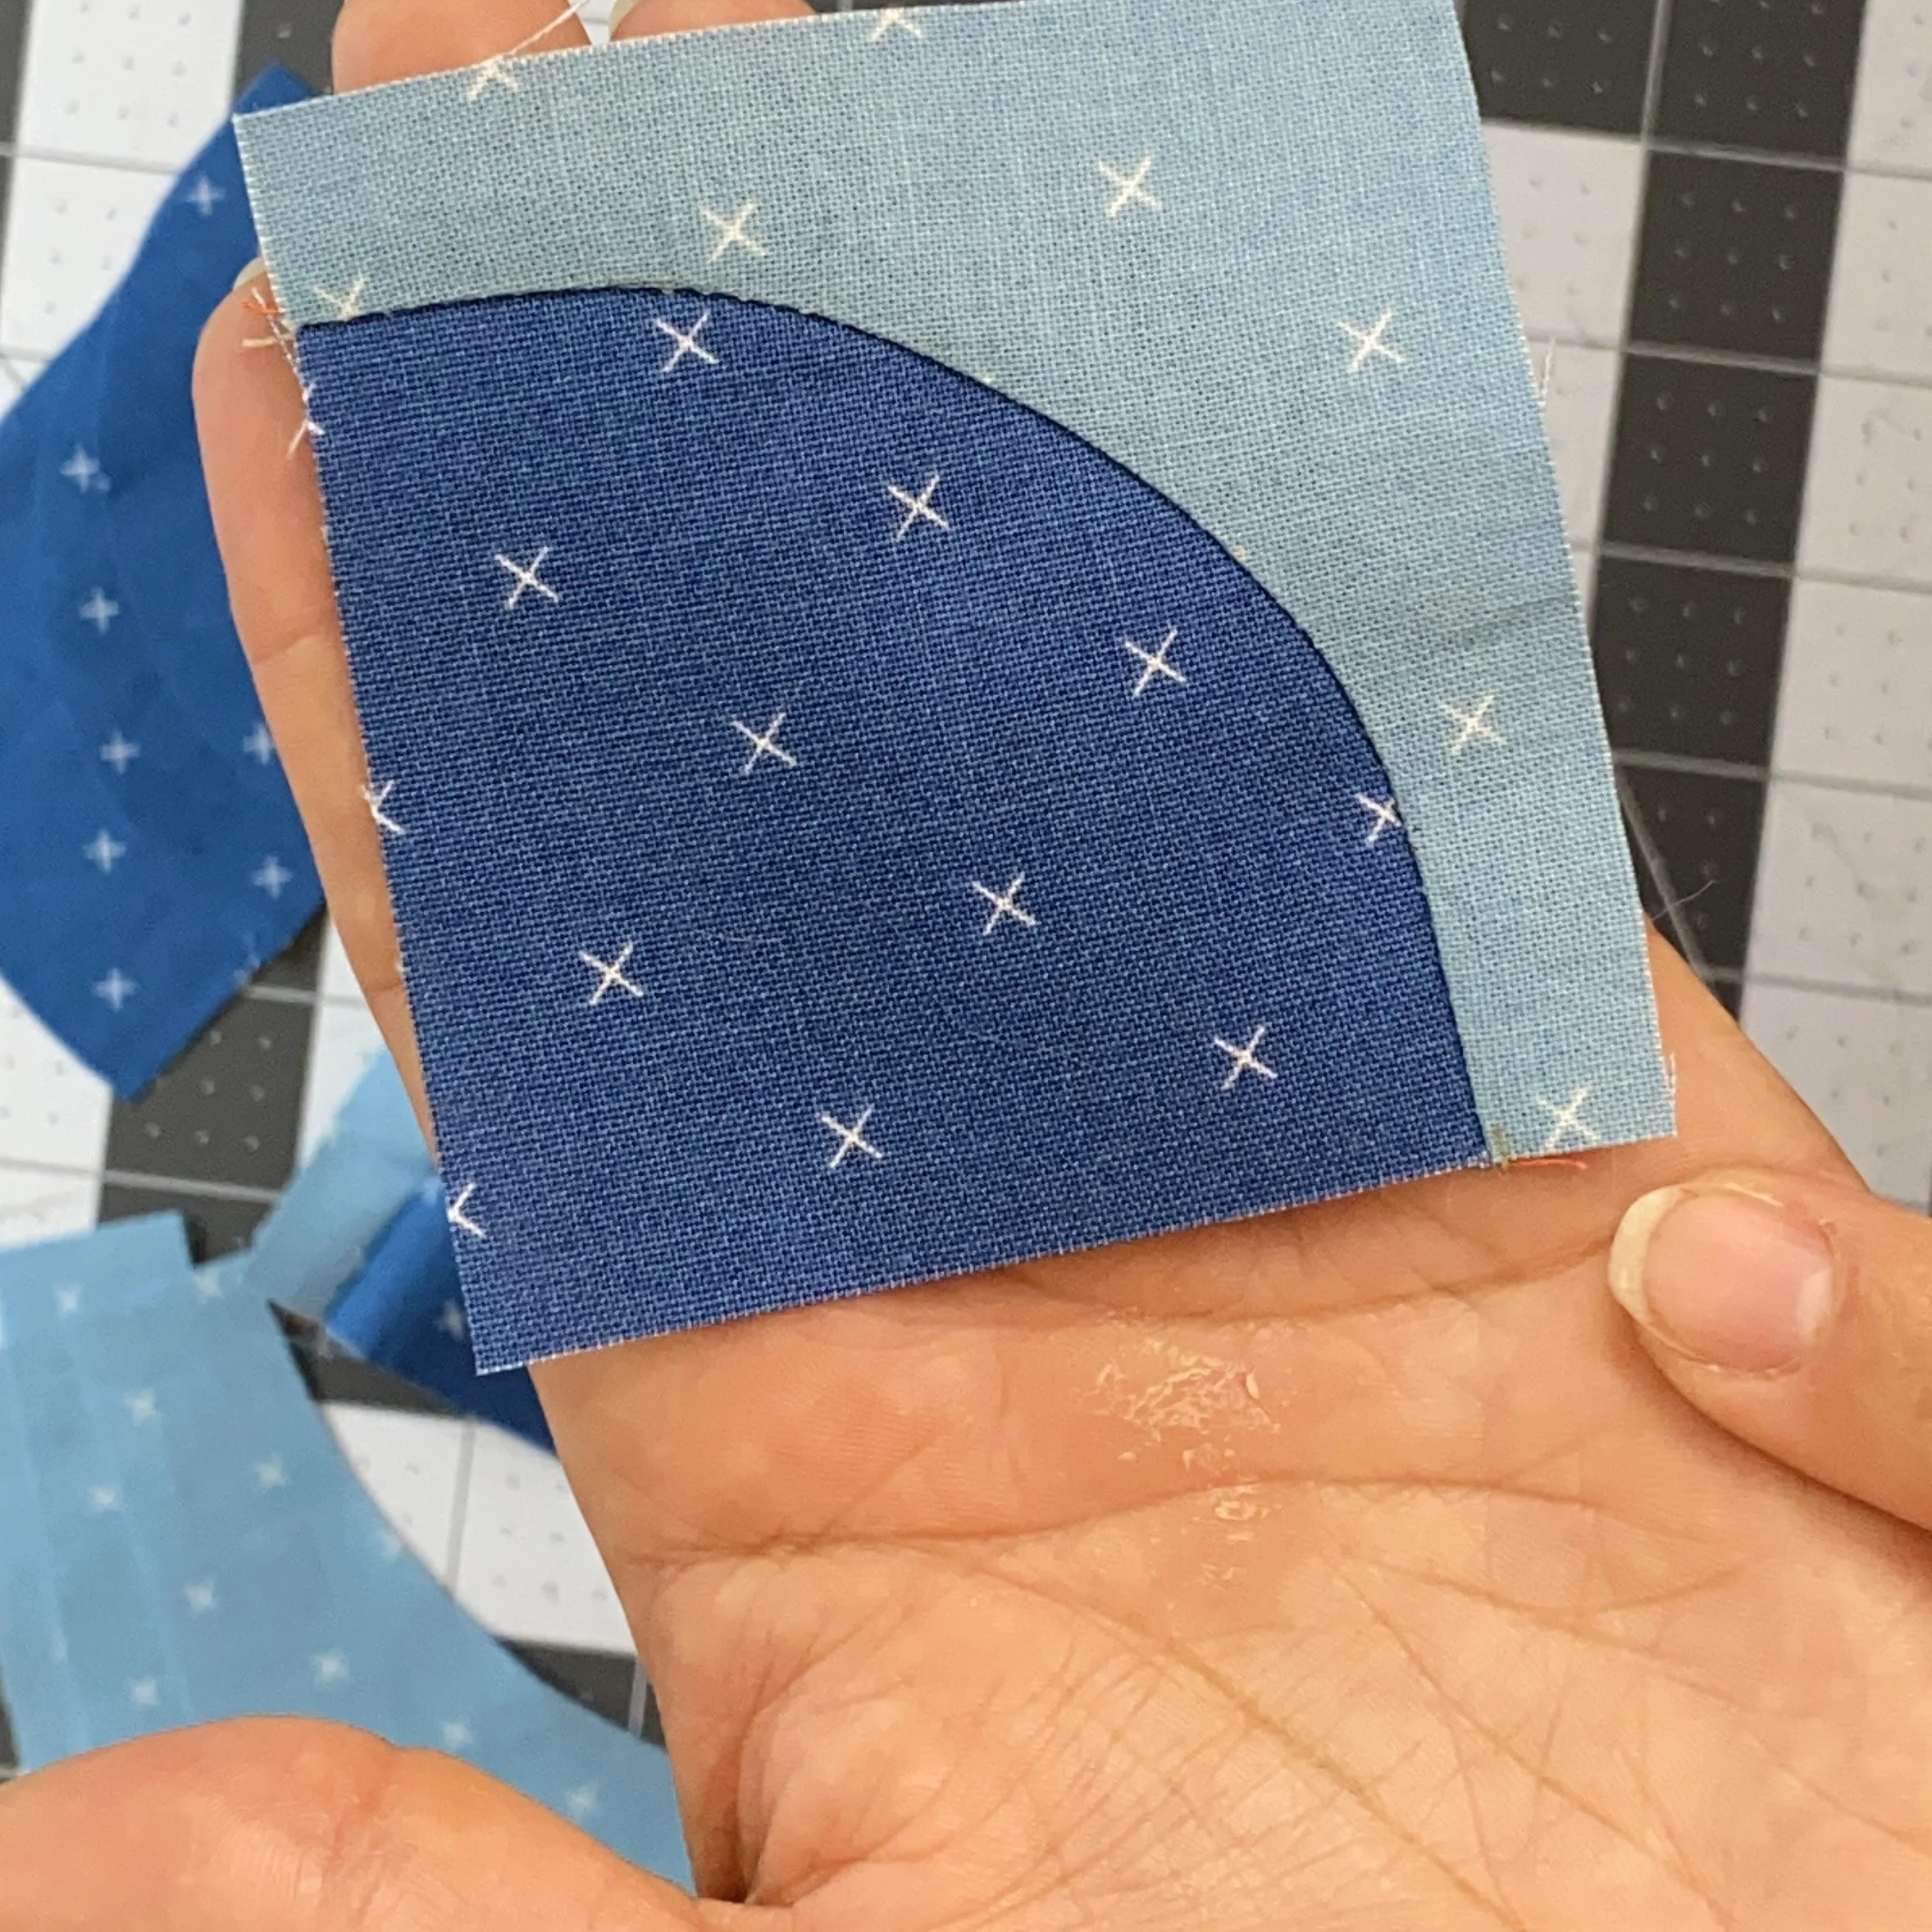
This is a quarter circle curve that I am much happier with!
Finally
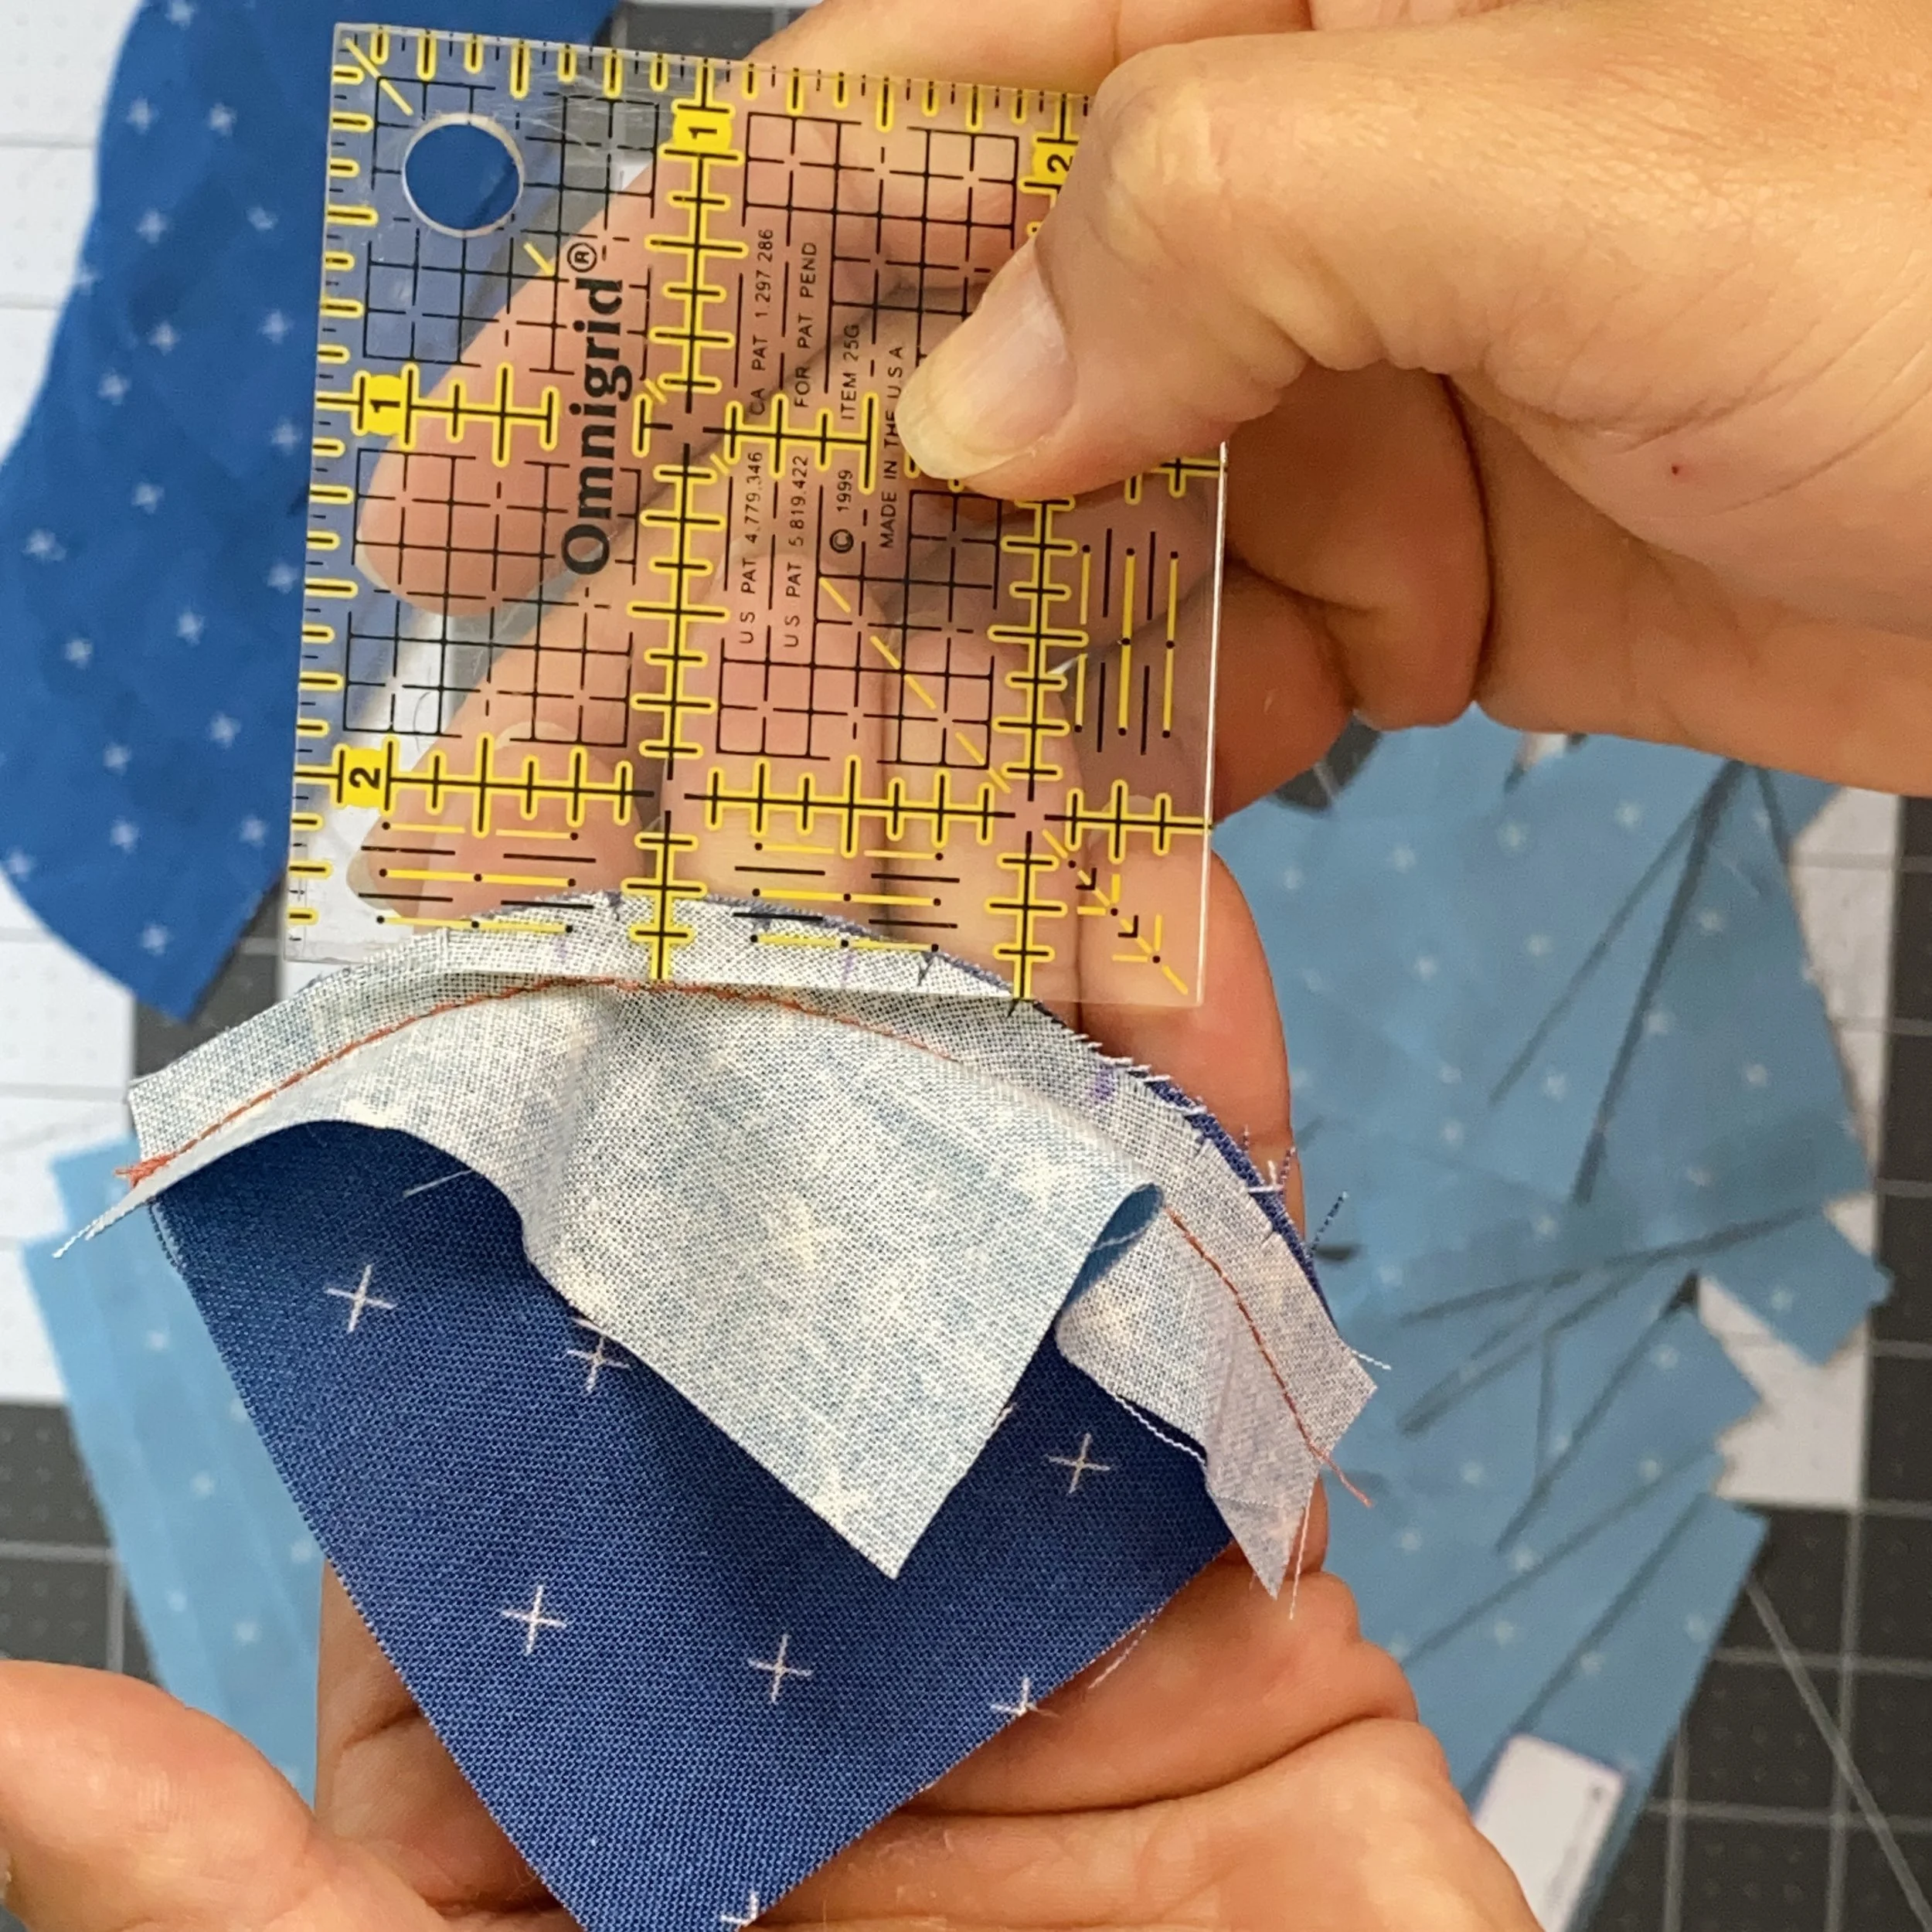
I like to double check my work and measure my seam allowance. This is really helpful for the first few blocks of a new curve template - it can help you get used to the template and the piecing, and make adjustments if things aren’t looking right.
I didn’t take too many pictures of the assembly - I put a lot of exttra information about how to nest your seams (or not) in the bonus sheet this month. I love a well nested seam and assembled my block to nest everything!
Tag me in your Instagram posts so I can check out your blocks! We’re using #learningcurvesBOM and #bearbloomquiltblock this month.
Happy quilting!