
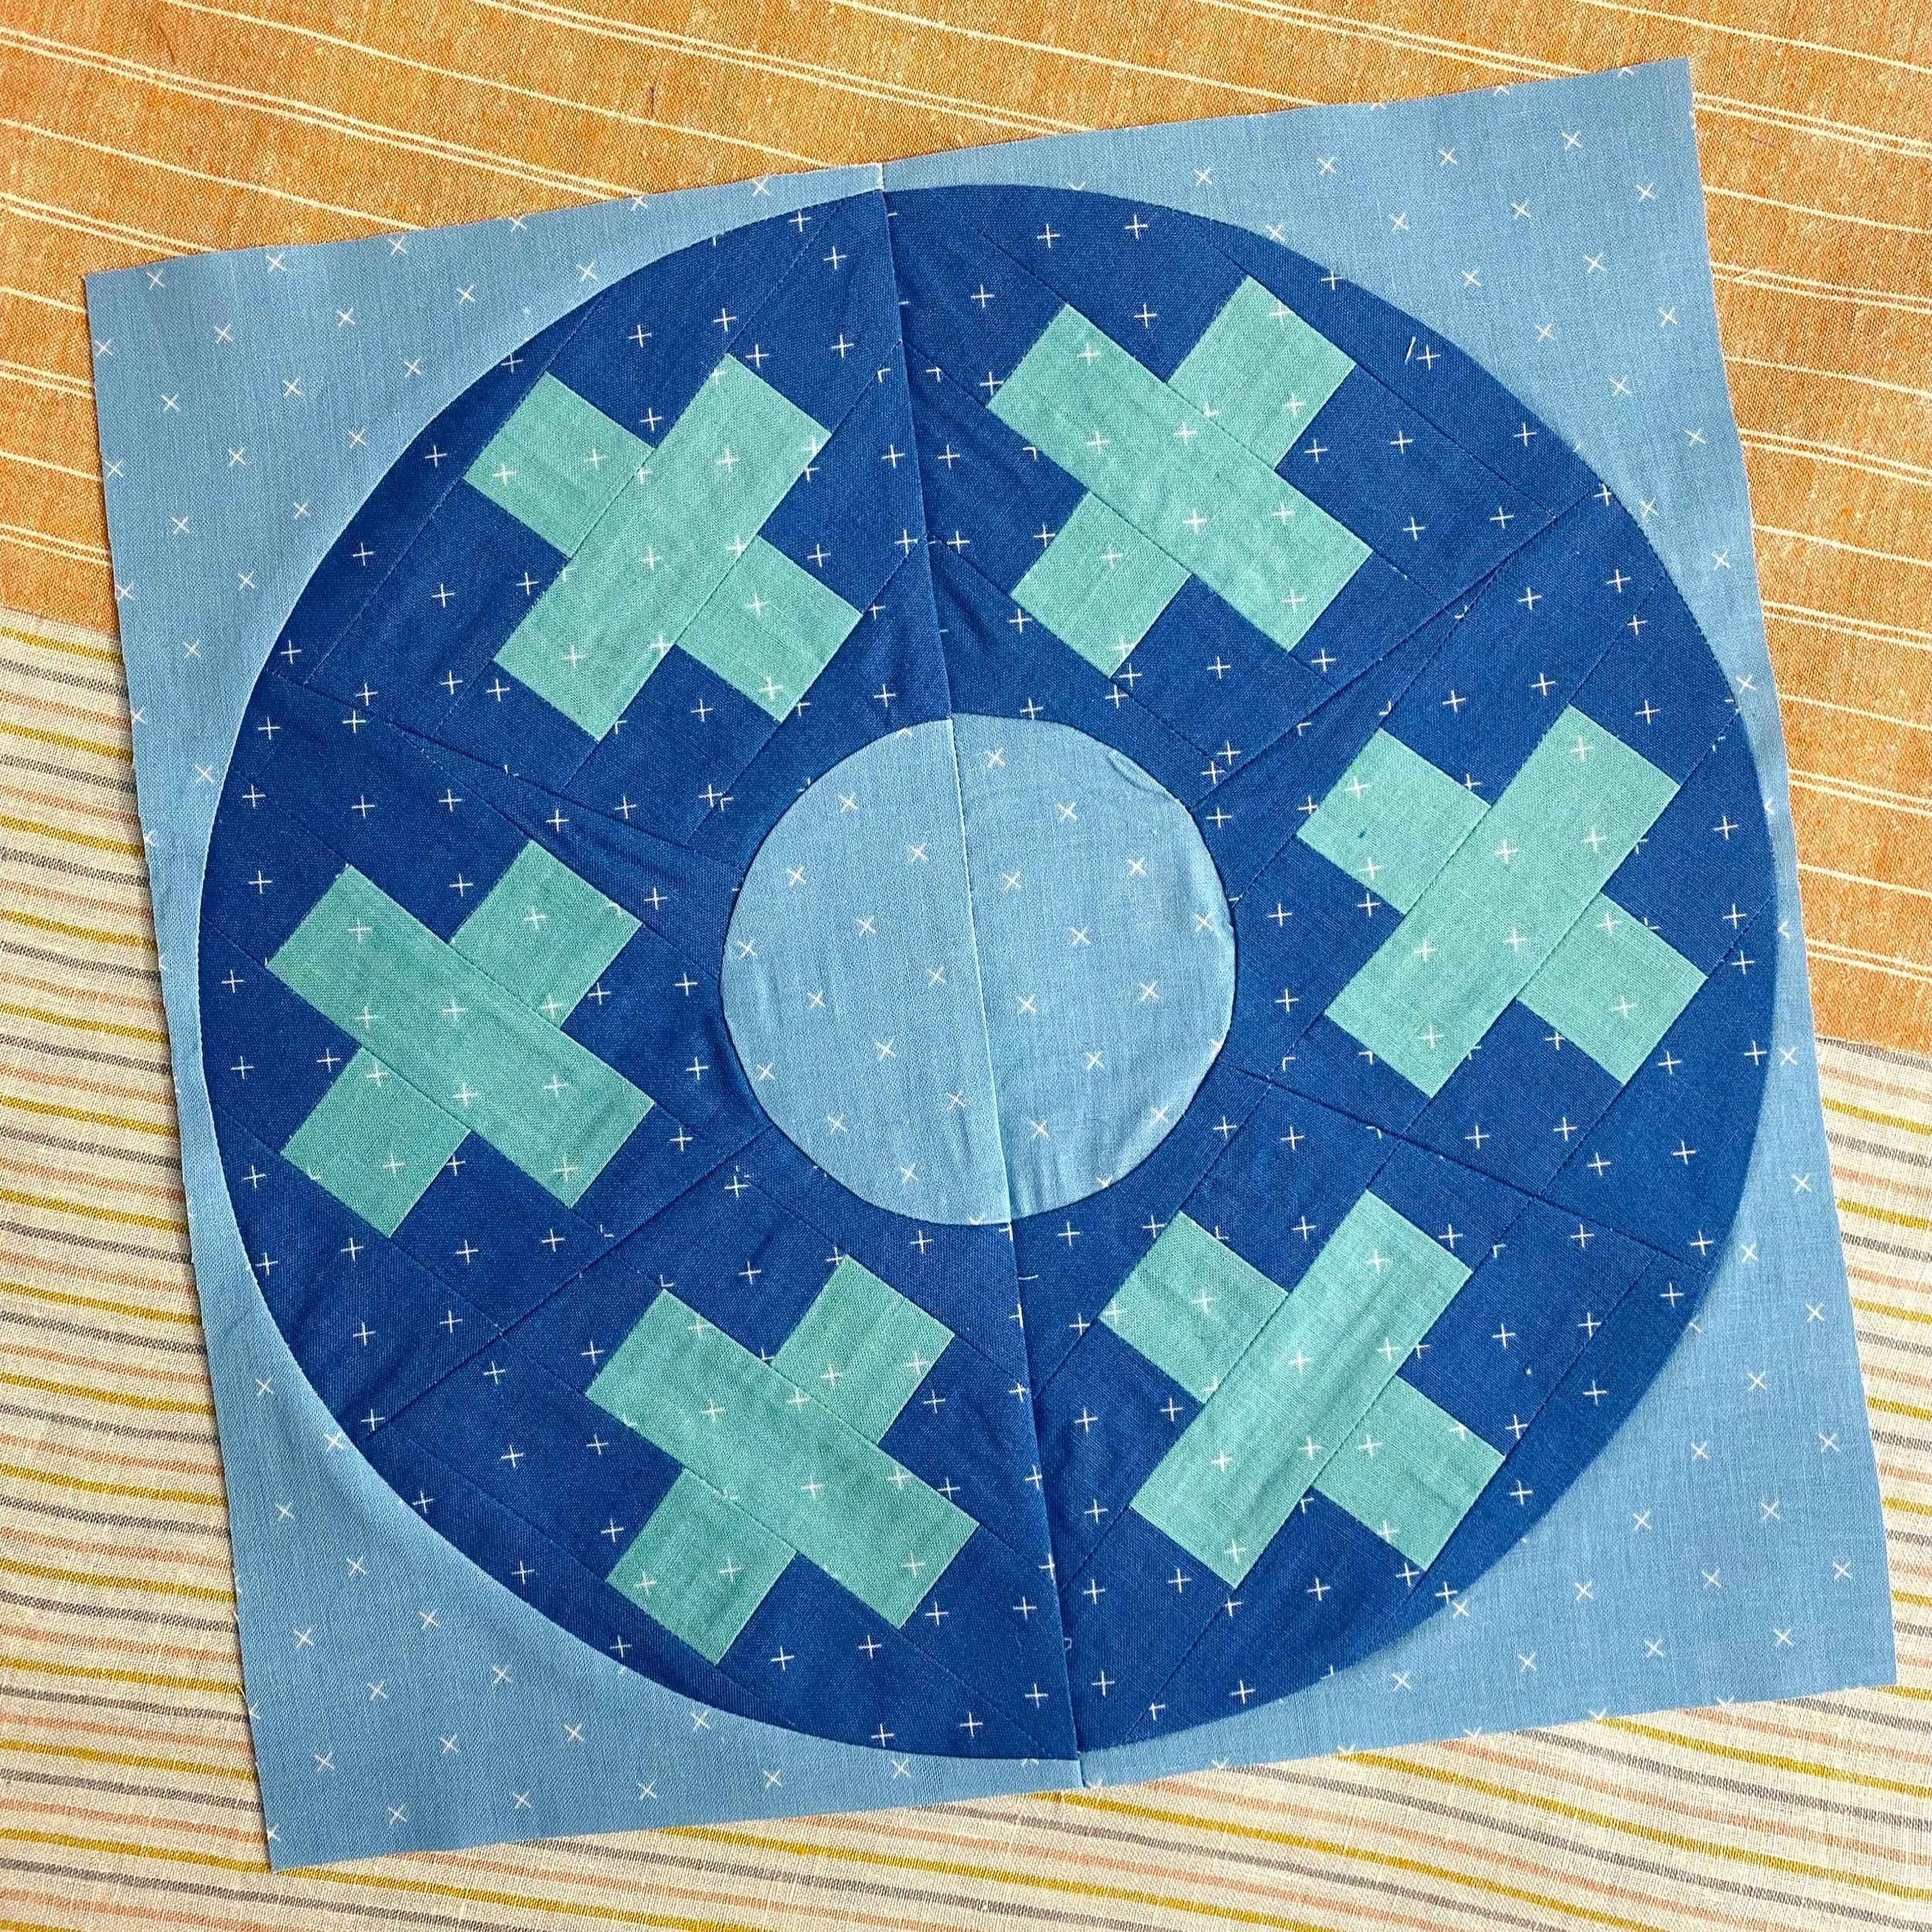
I’m so happy to introduce you to the Bobbin quilt block! It’s a small ode to that teeny tiny tiny sewing notion that always runs out at the most inopportune time!
This month, we’re tackling half circles, big and small. I have LOTS to share about sewing the small half circles, so keep reading!
The fabrics I’m using are Bee Cross Stitch, designed by Lori Holt for Riley Blake Designs.
Denim
Cottage
Soldier
Fabrics were provided by Riley Blake Designs.
I’ll share three things upfront.
First
I made this block over several days. There are lots of seams that intersect curved seams and I wanted to make sure that the block laid as flat as possible. So I sewed the strip piece units and left them under a heavy book overnight. Then I made the irregular units and left those under a book over night again. Then I made the half circles on a third day and left those under a heavy book…you get the trend here.
Second
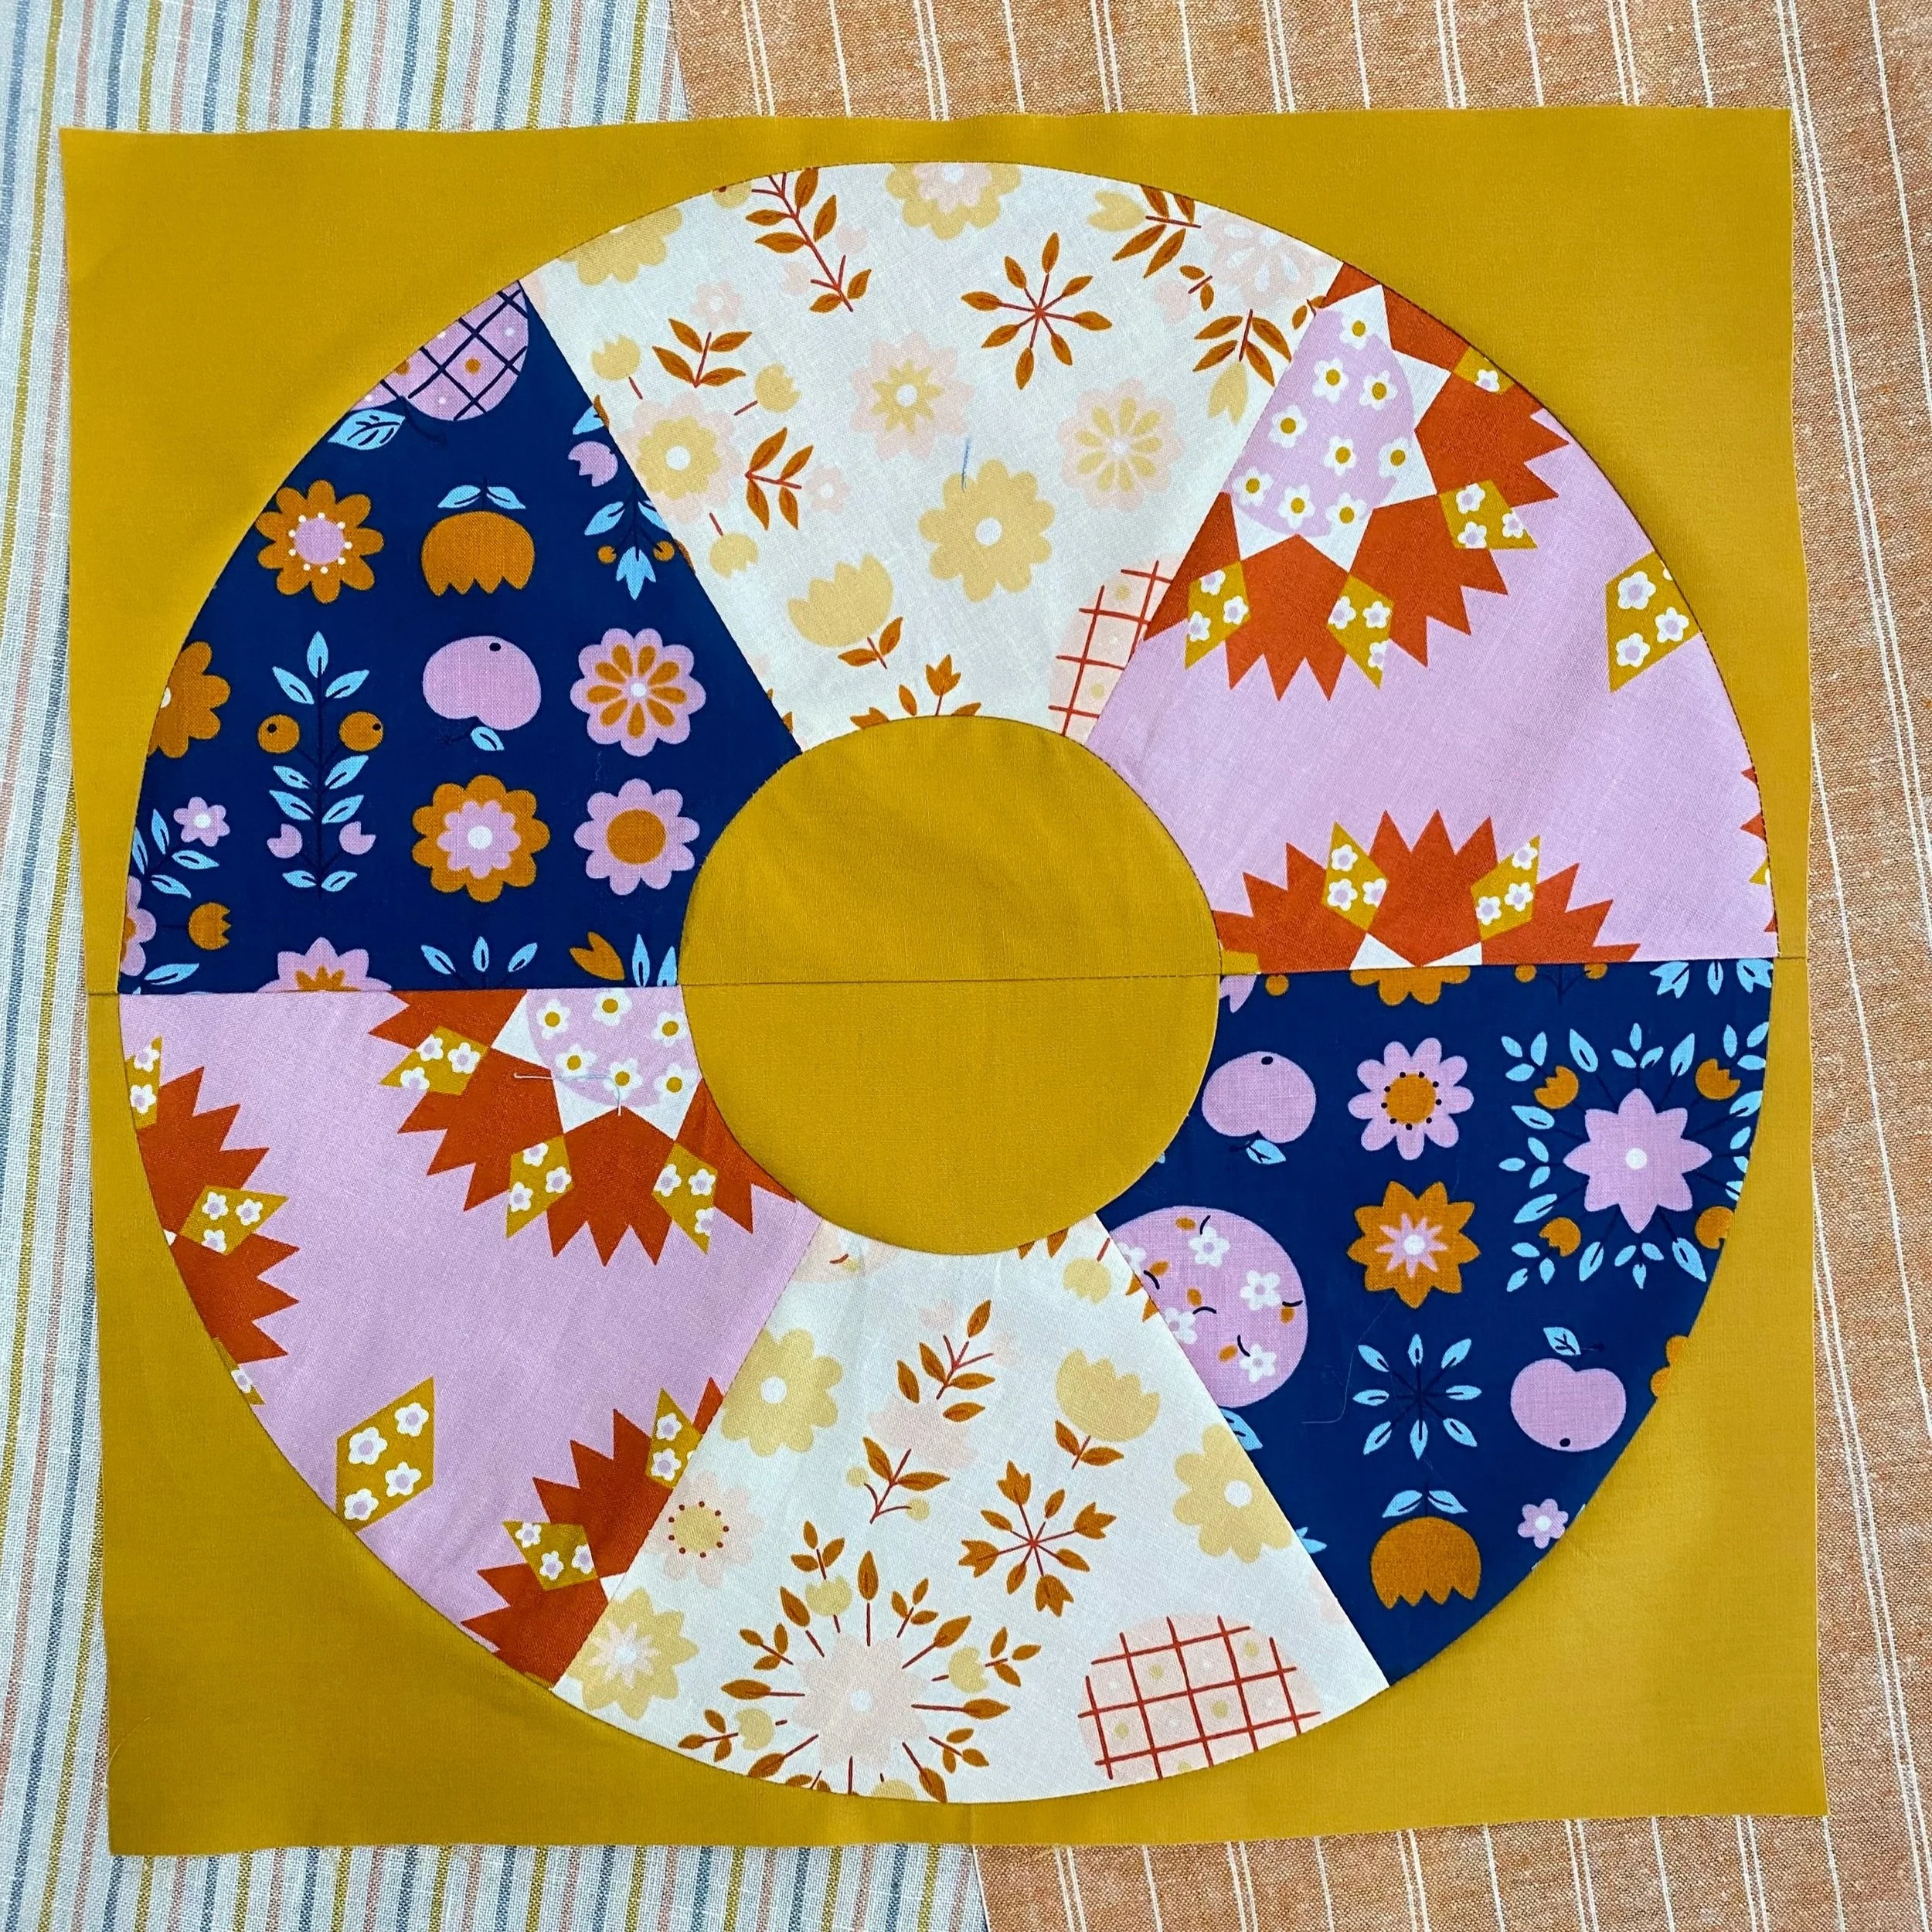
I’ve found that fabric selection matters in this block. Lighter quilting cottons like Art Gallery Fabrics and Ruby Star Society fabrics work nicely. I recommend staying away from heavier fabrics like Kona solids - they are beautiful but just make this block unwieldy.
Third
This is the first month where I suggest making the simplified block as outlined in the bonus sheet before (or dare I say instead of?) the patchwork block as outlined in the pattern. Making the simplified block will still get you the curve practice, but will eliminate the patchwork and extra bulk which makes the curves easier to sew.
If you are very comfortable with curves, you can handle the pattern as written. If you’re still building your confidence try the simplified block first.
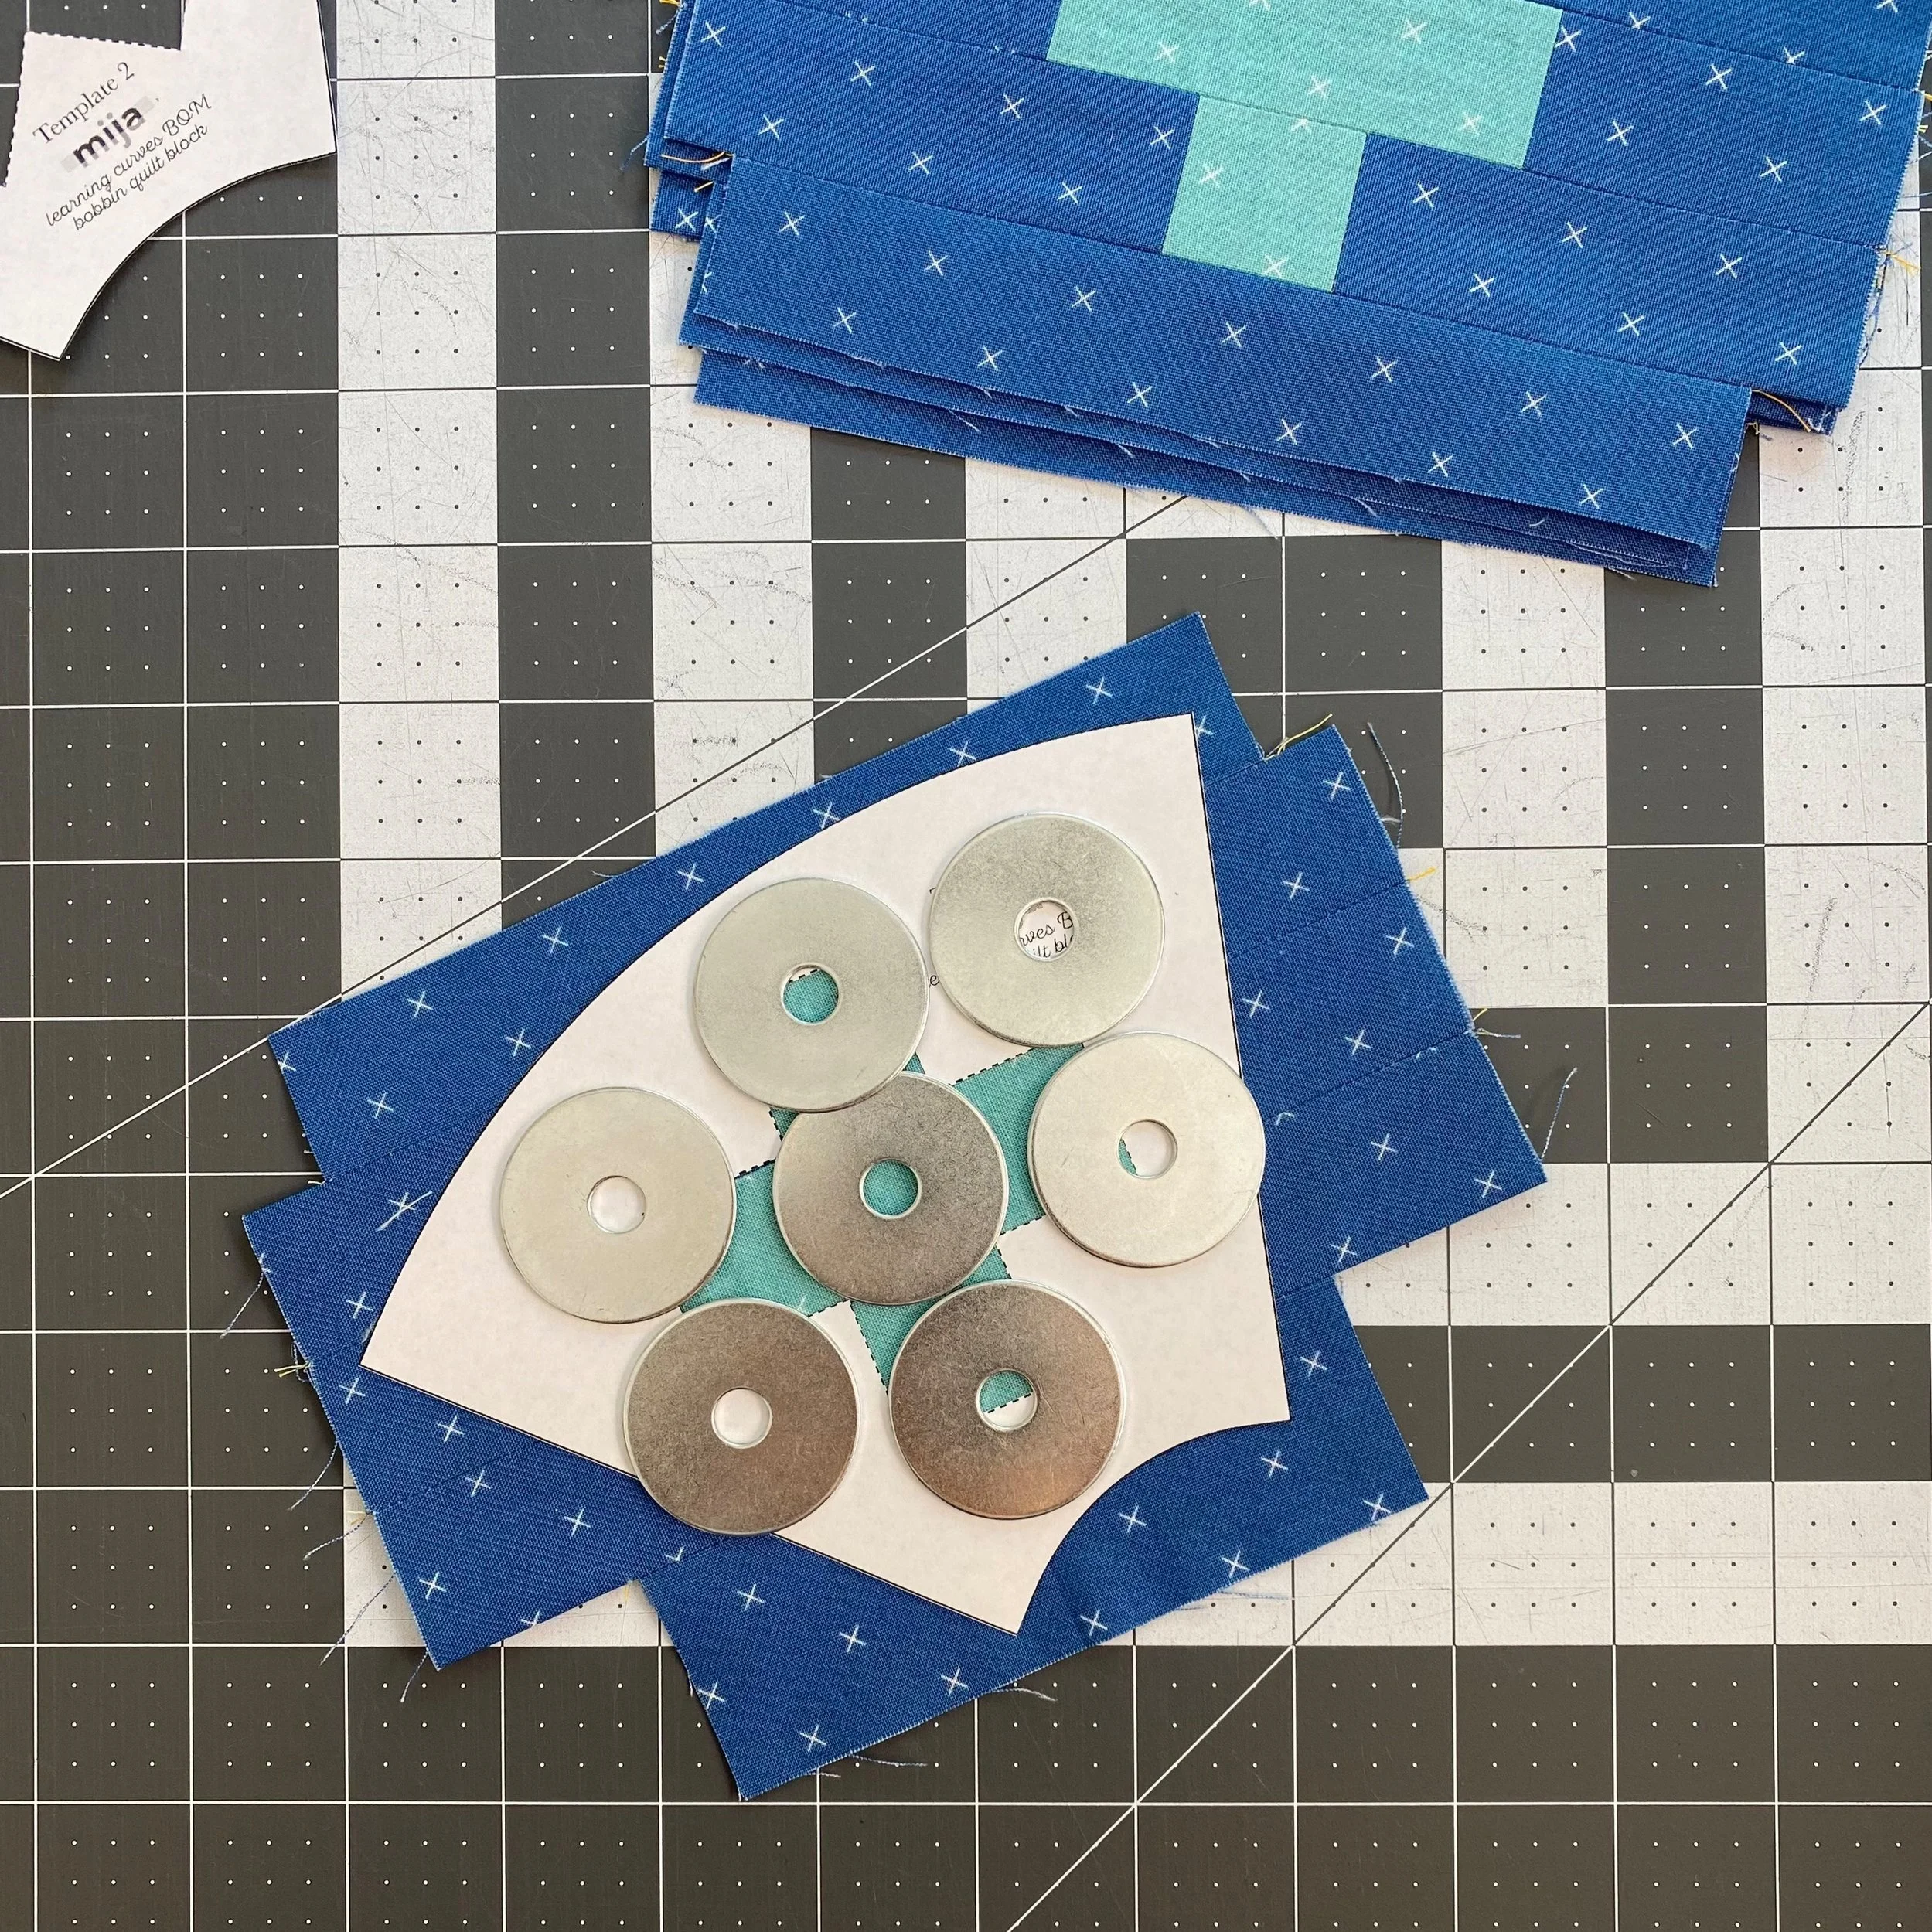
We’re going to jump straight to part 2 of the pattern. Technically, Template 1 and 2 are identical in shape. But we need to use the center X in specific orientations to keep the X oriented correctly in the block. So just pay close attention to the orientation of the templates, as illustrated in each step of the pattern.
You can see here that pattern weights will be your friend as you trim the arcs. I also made good use of my rotating cutting mat.
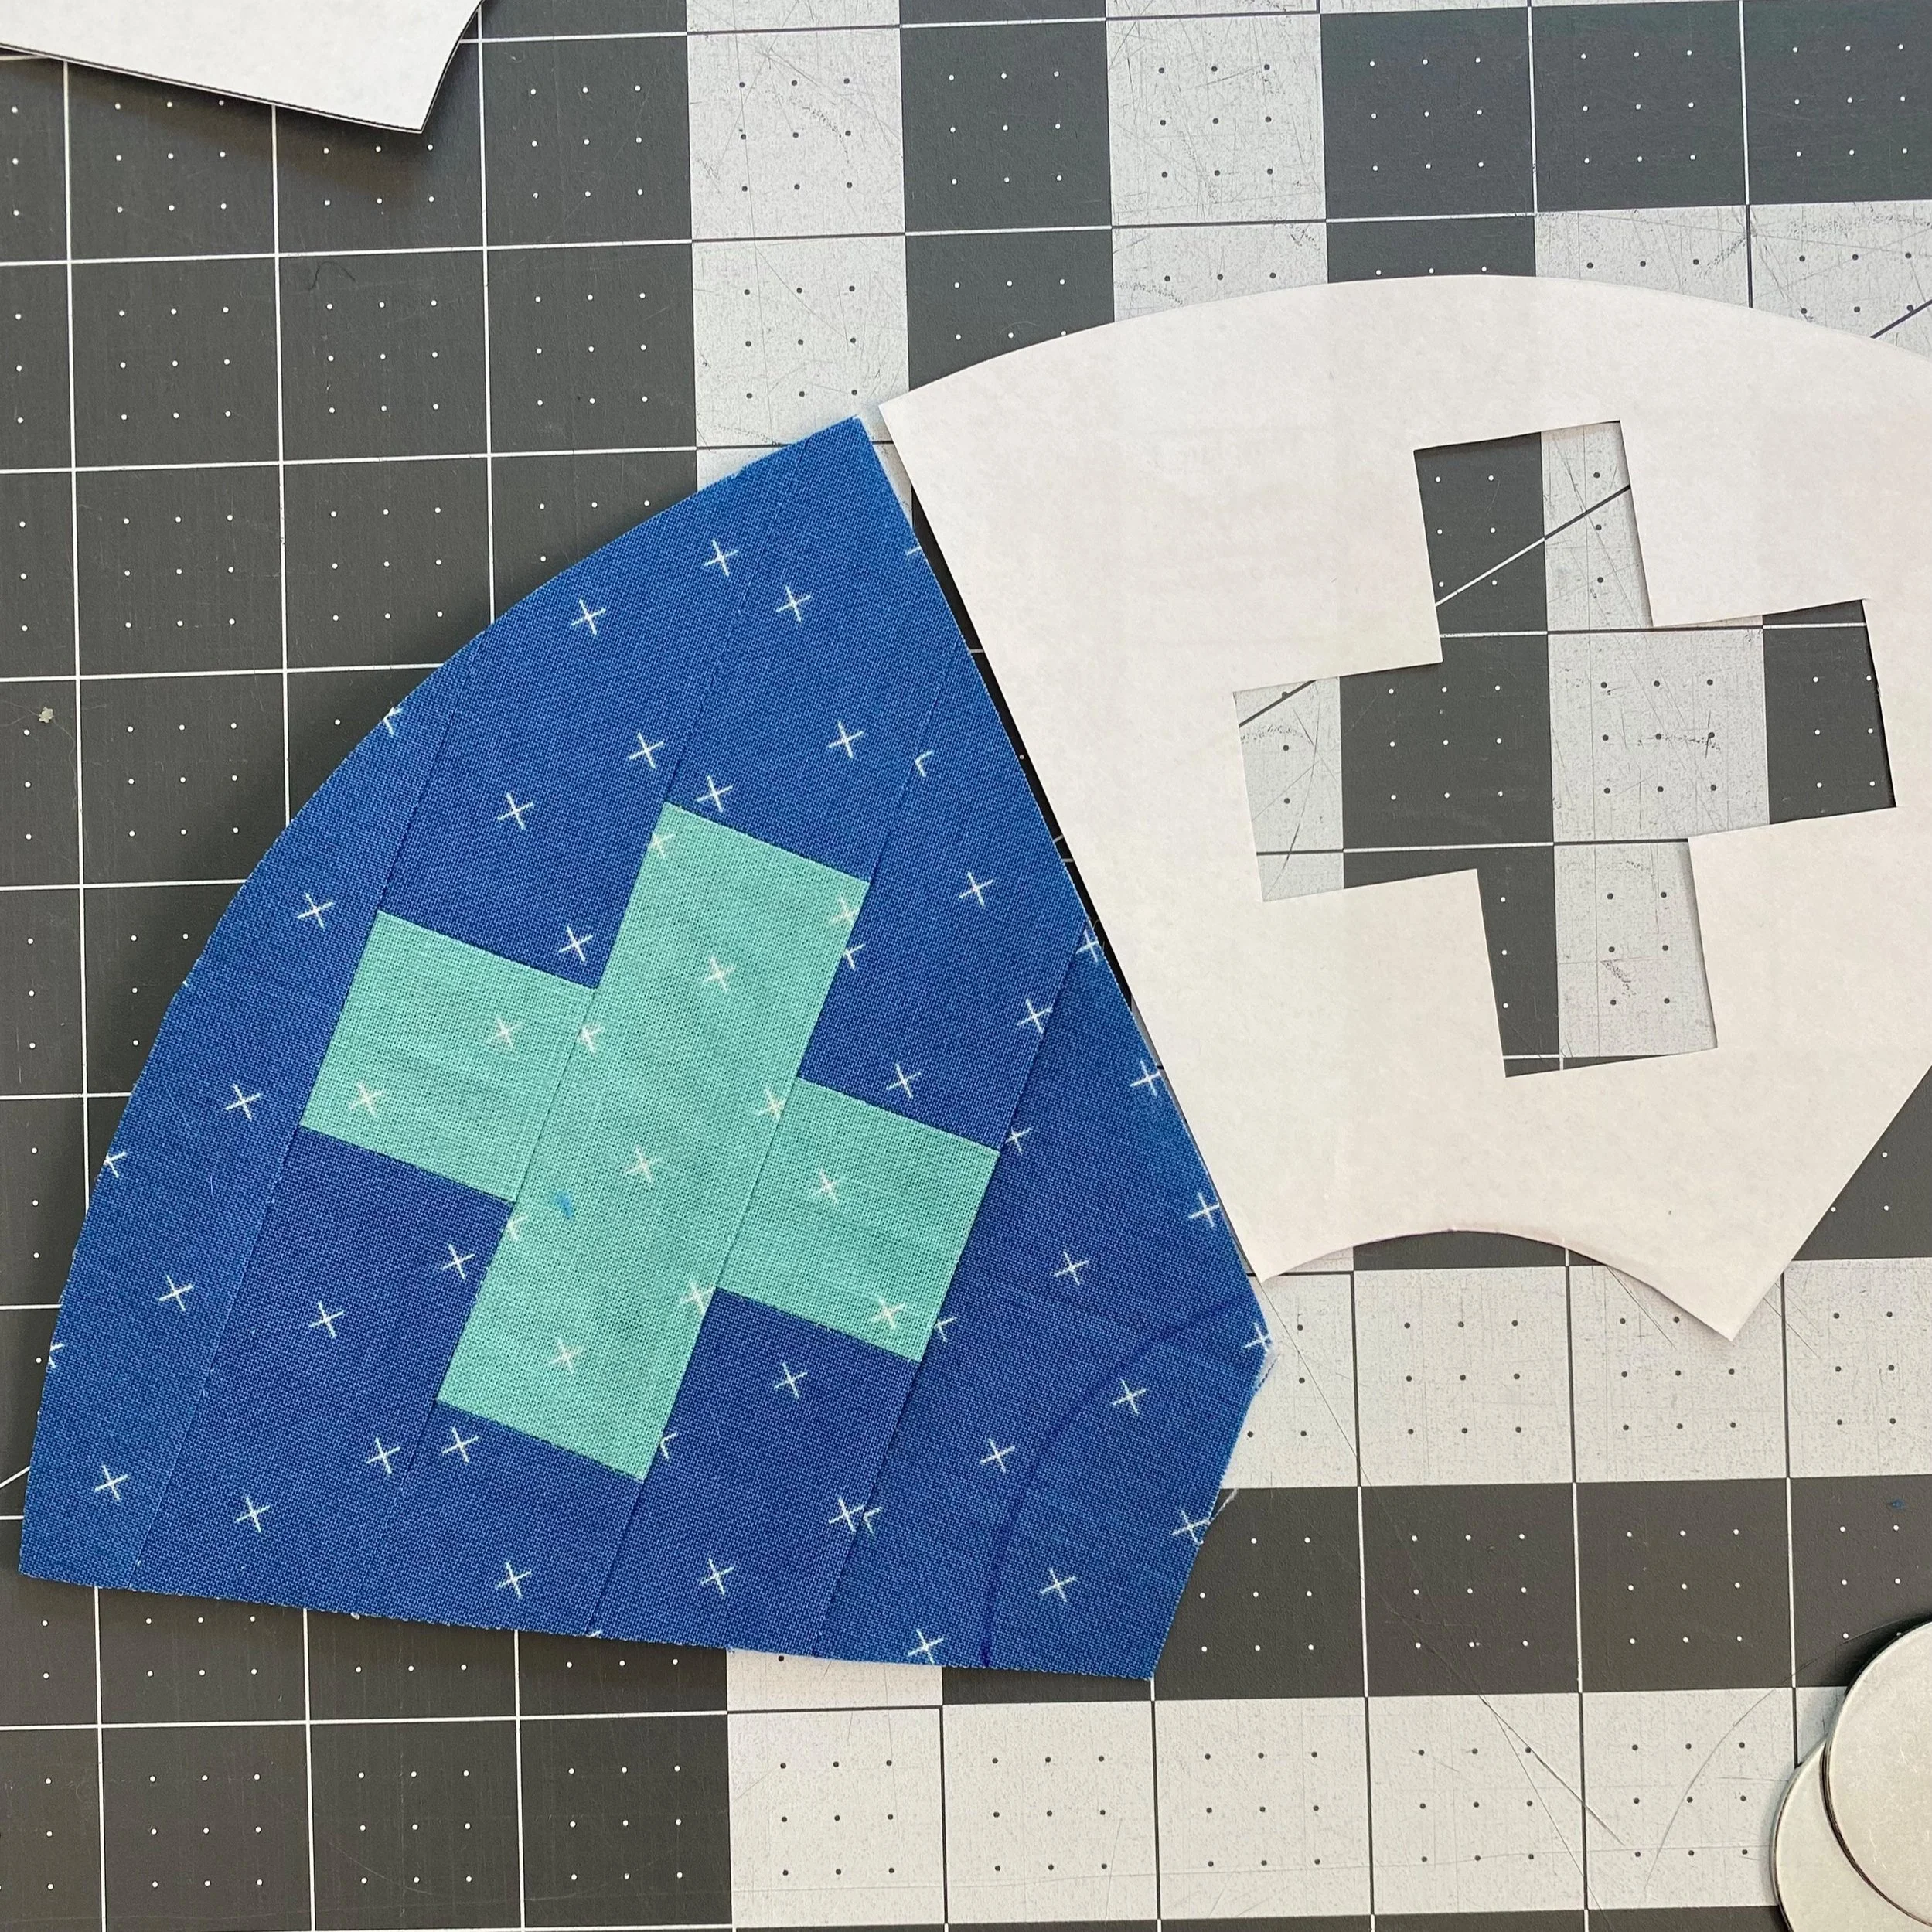
I used a rotary blade to cut three sides of the template, but found the small concave curve too small to comfortably cut this way. So I marked it with a pen and used my scissors to finish trimming.
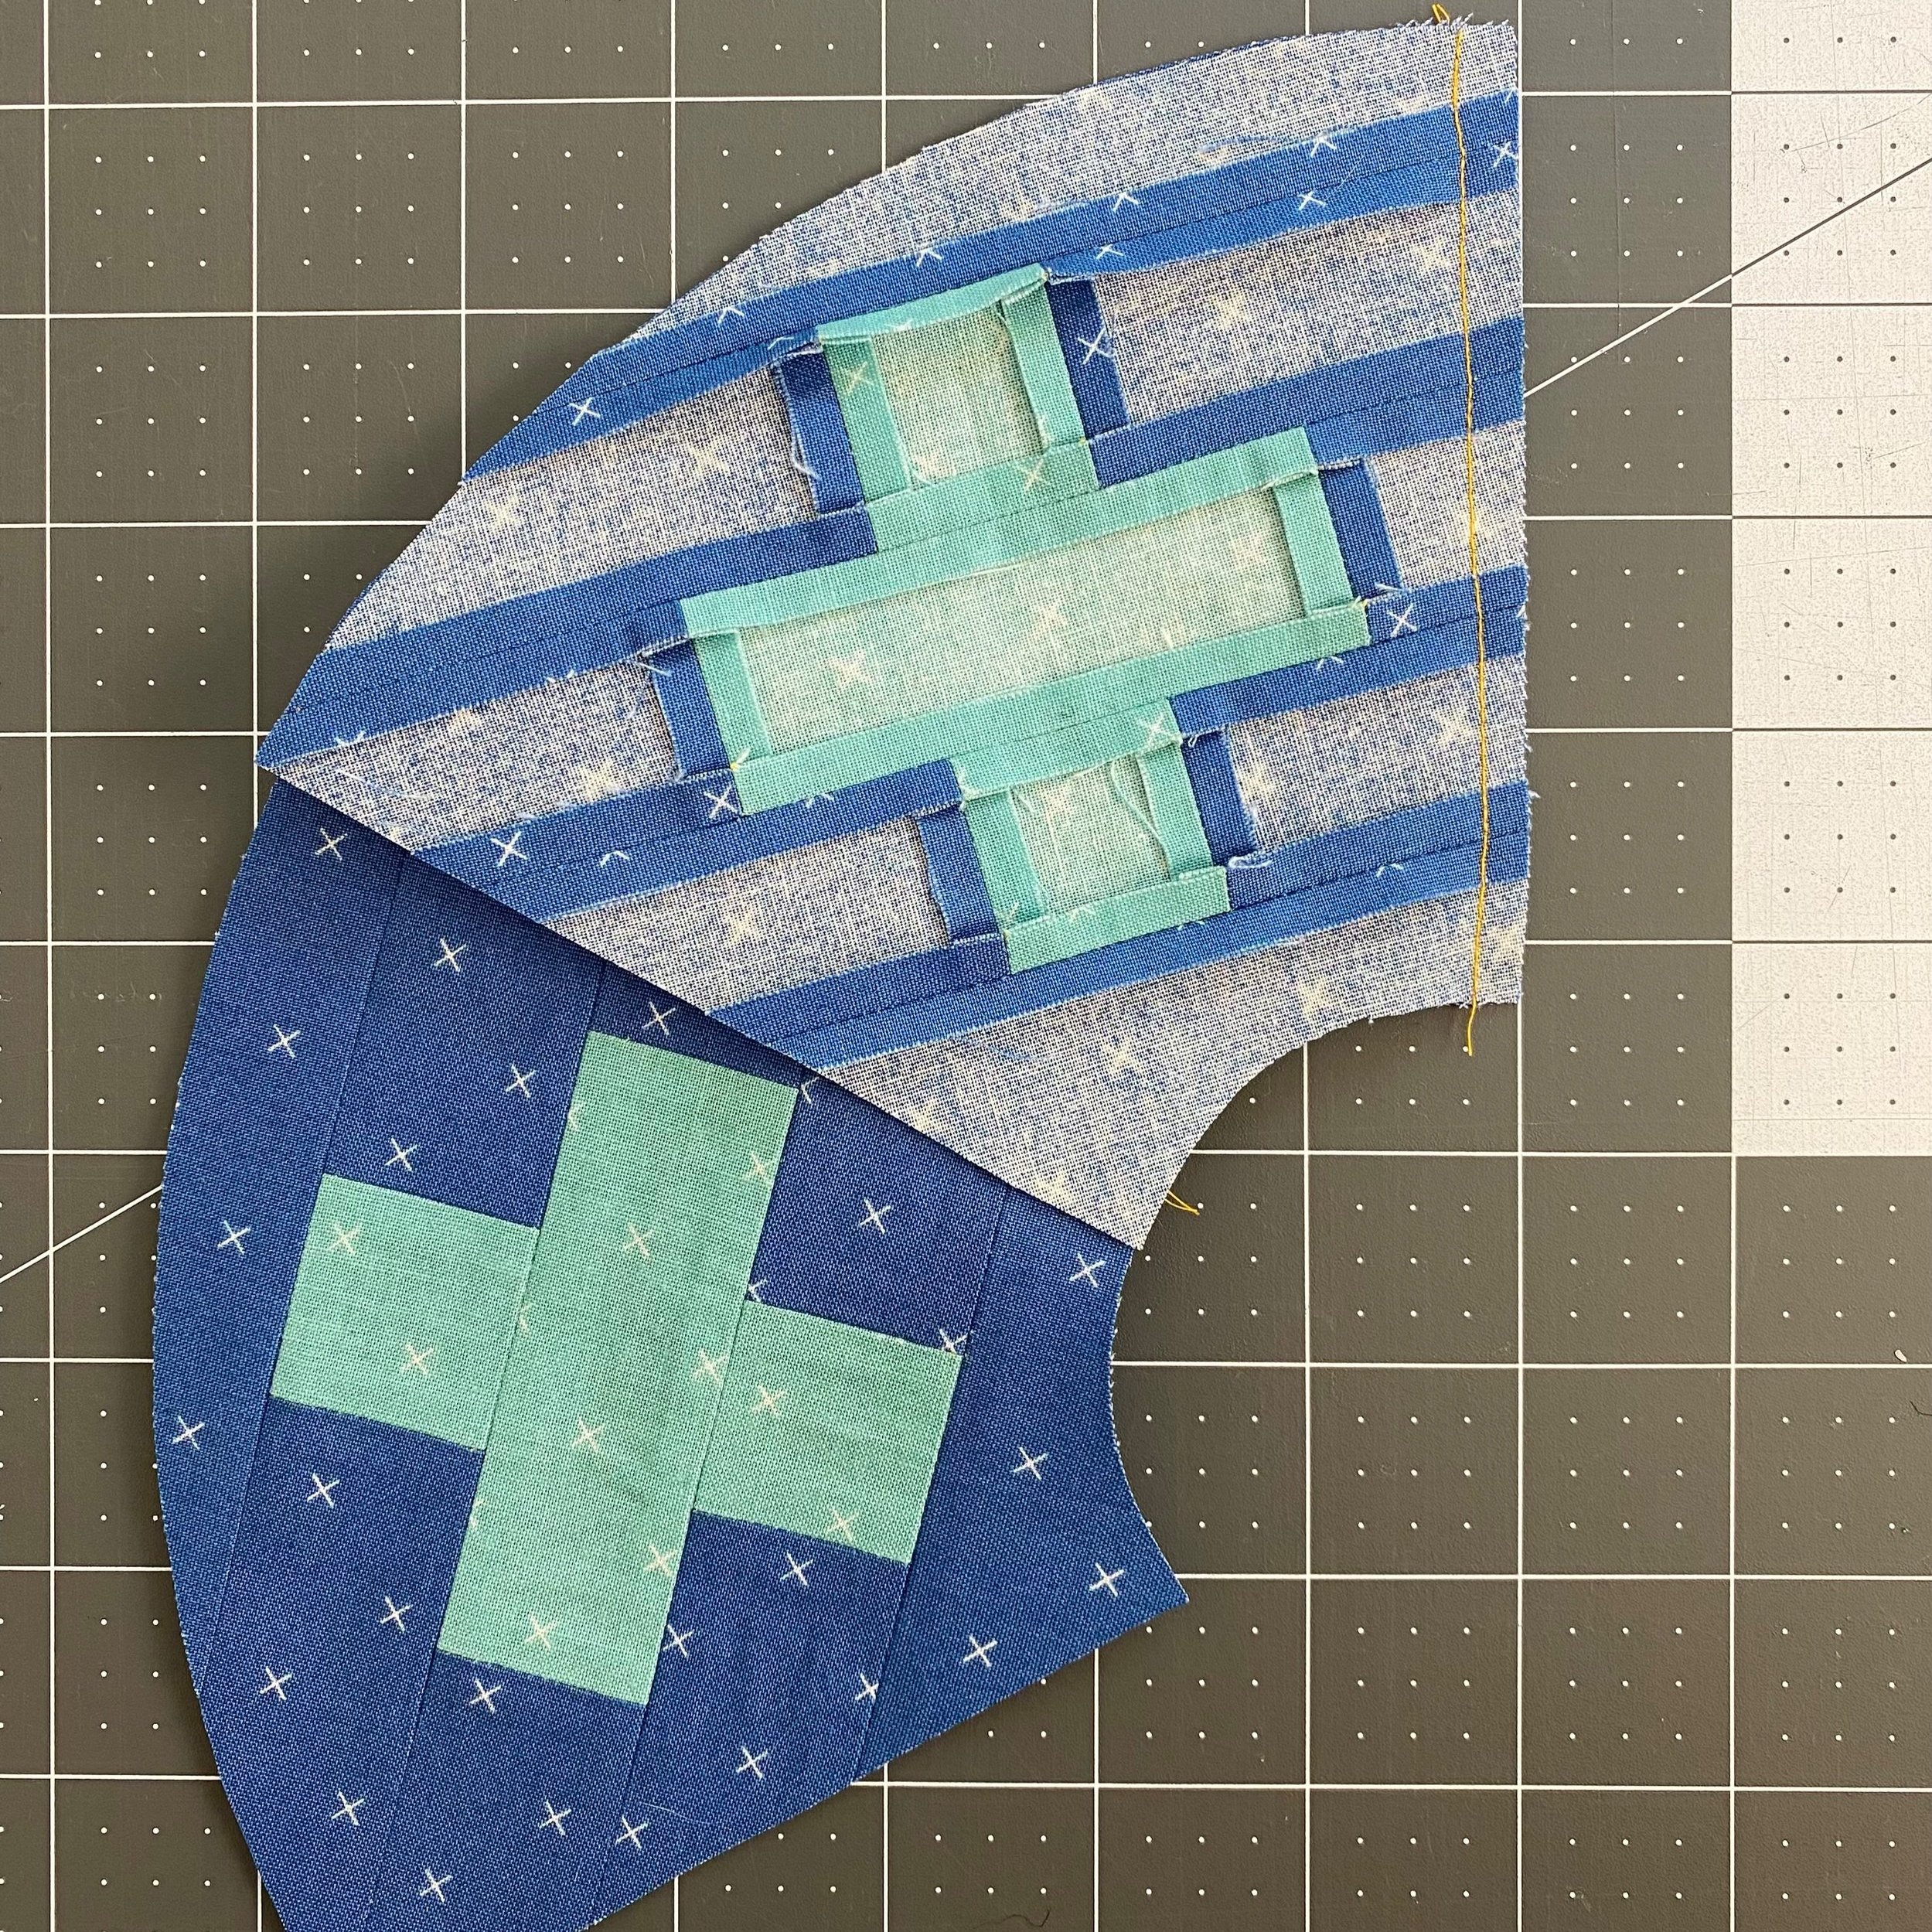
Once all the arcs are trimmed, it’s time to assemble. Sewing together the arcs is my favorite step of the whole pattern! When they are RST, they align perfectly - no futzing with overlapping corners or anything. So satisfying!
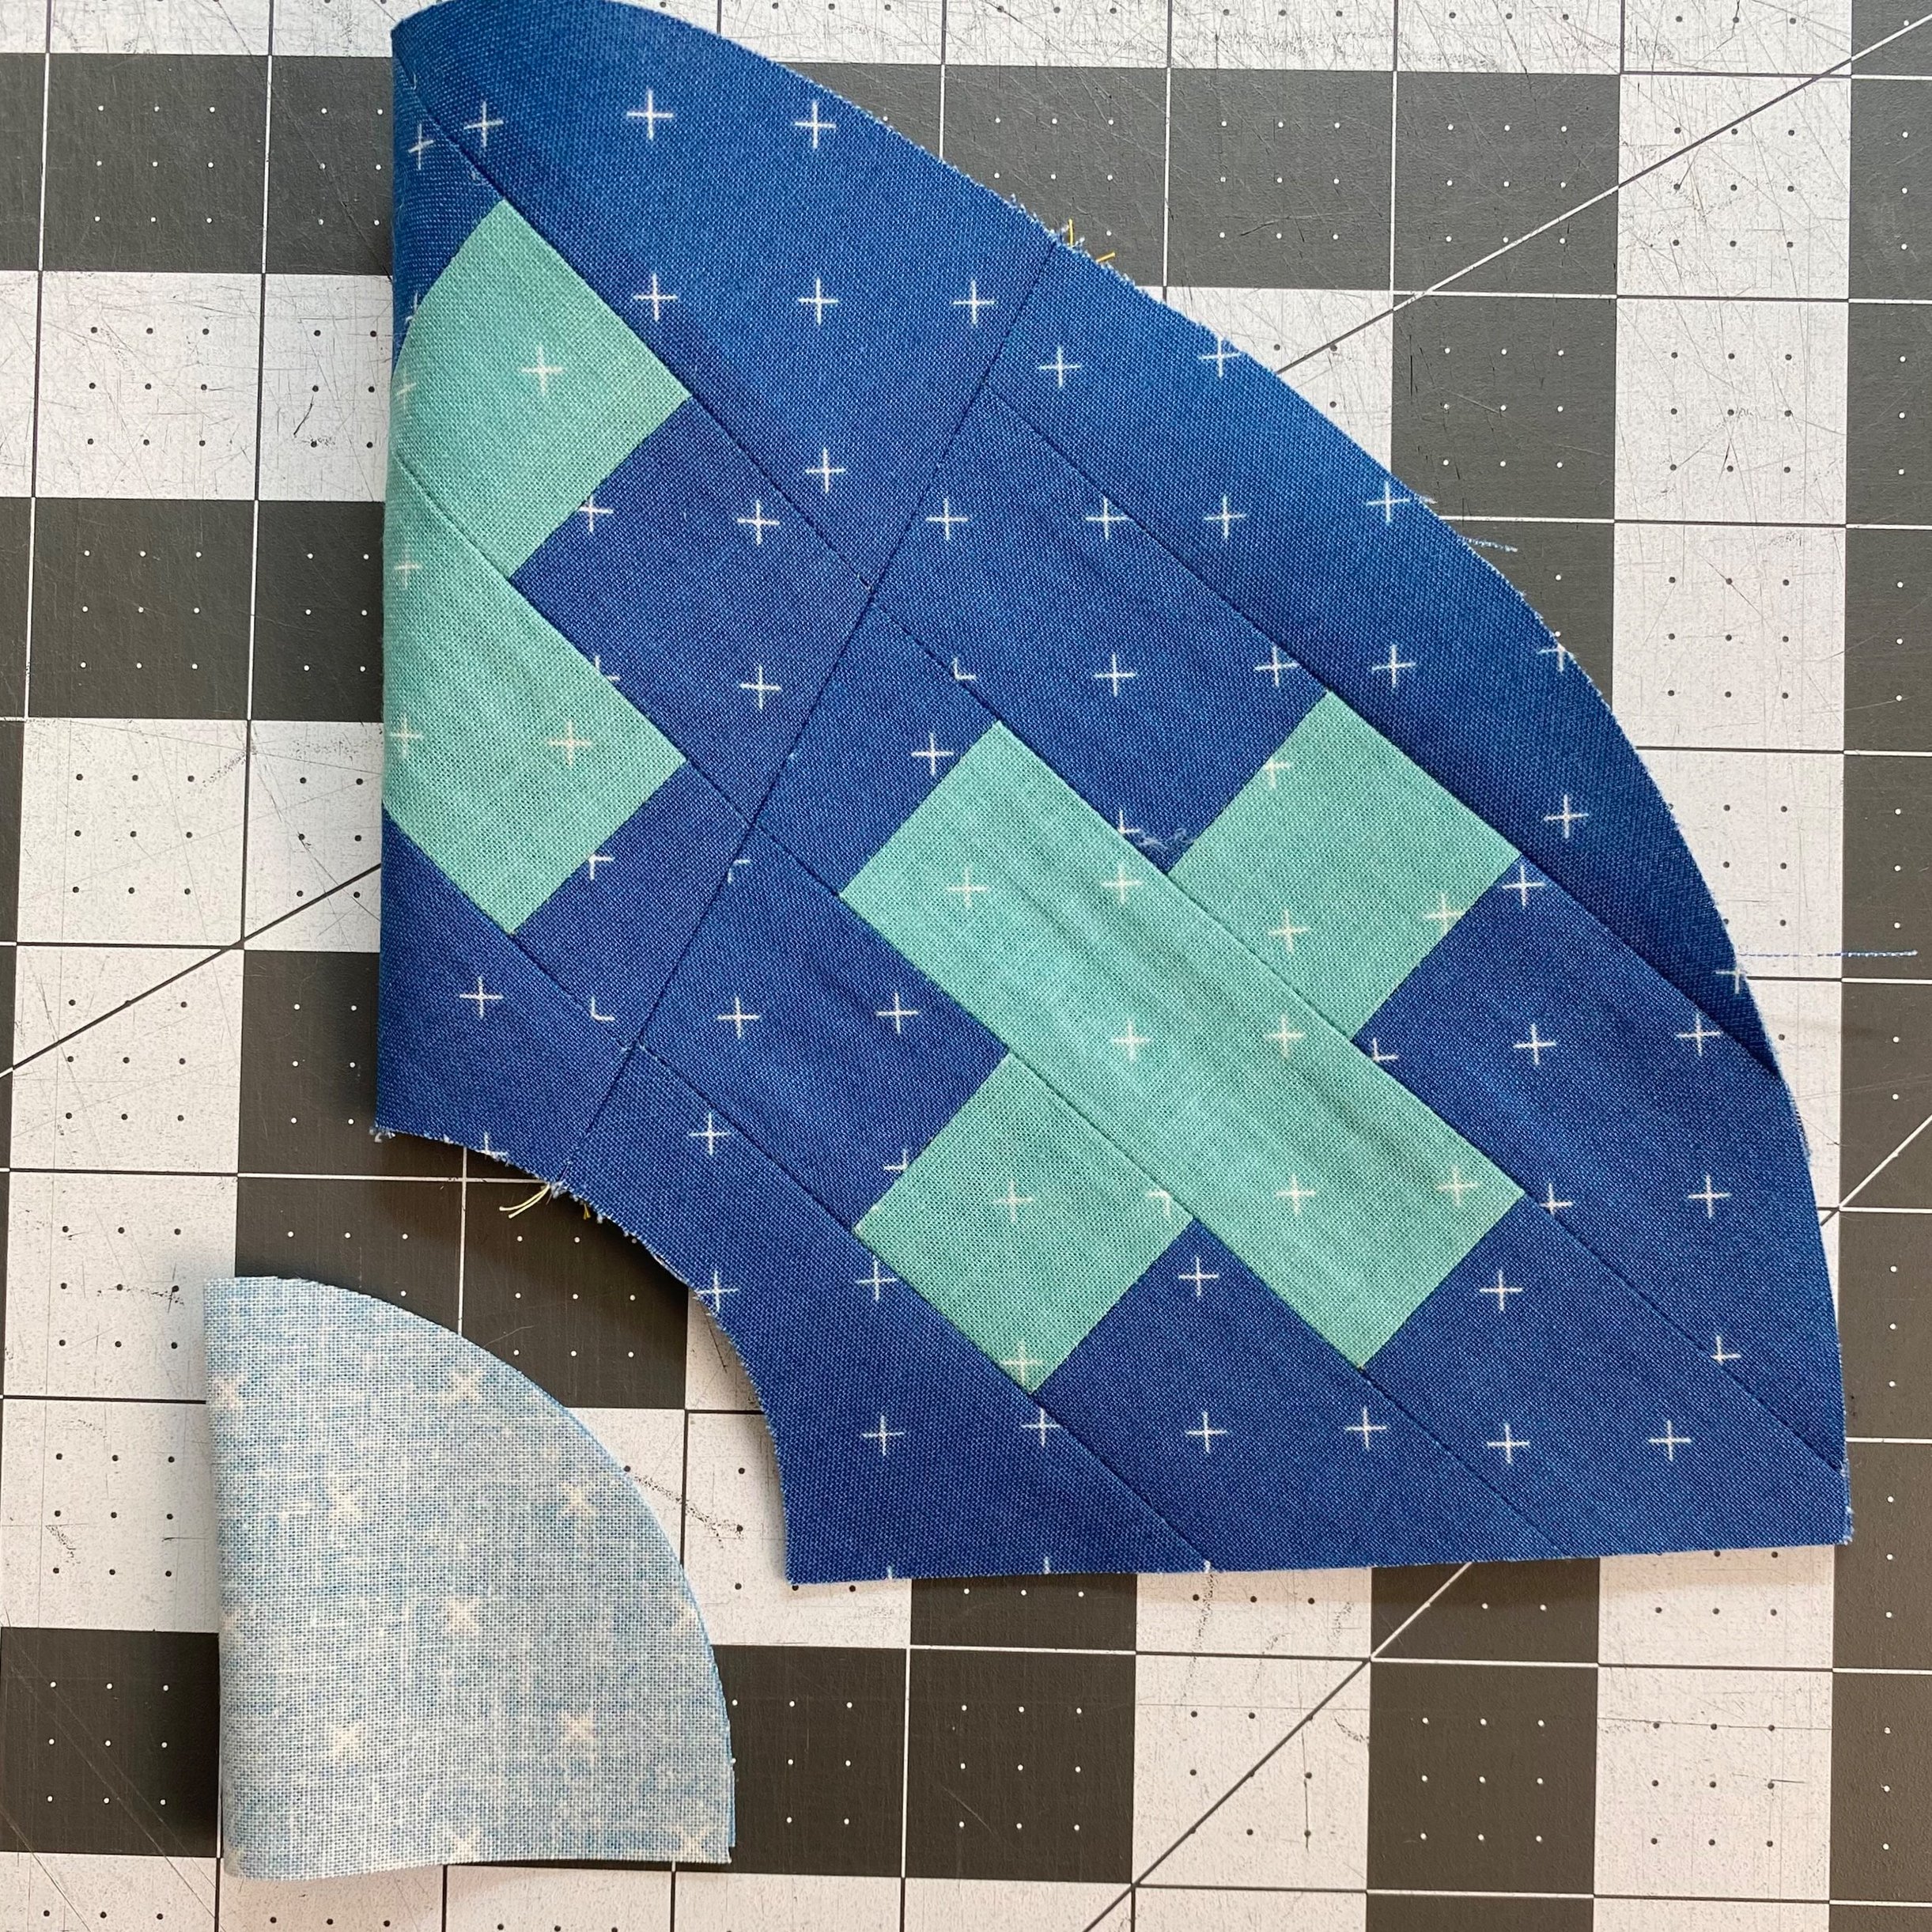
It’s time to take a deep breathe and prepare to be patient. This small half circle is the most challenging part of the pattern. The skill we’re practicing in this block is managing our piecing when the bulk of the unit is in the concave piece. Typically, the bulk of the fabric is in the convex unit. That’s not true in this block.
If you’re making the simplified block, you’ll have less bulk in the concave unit to manage.
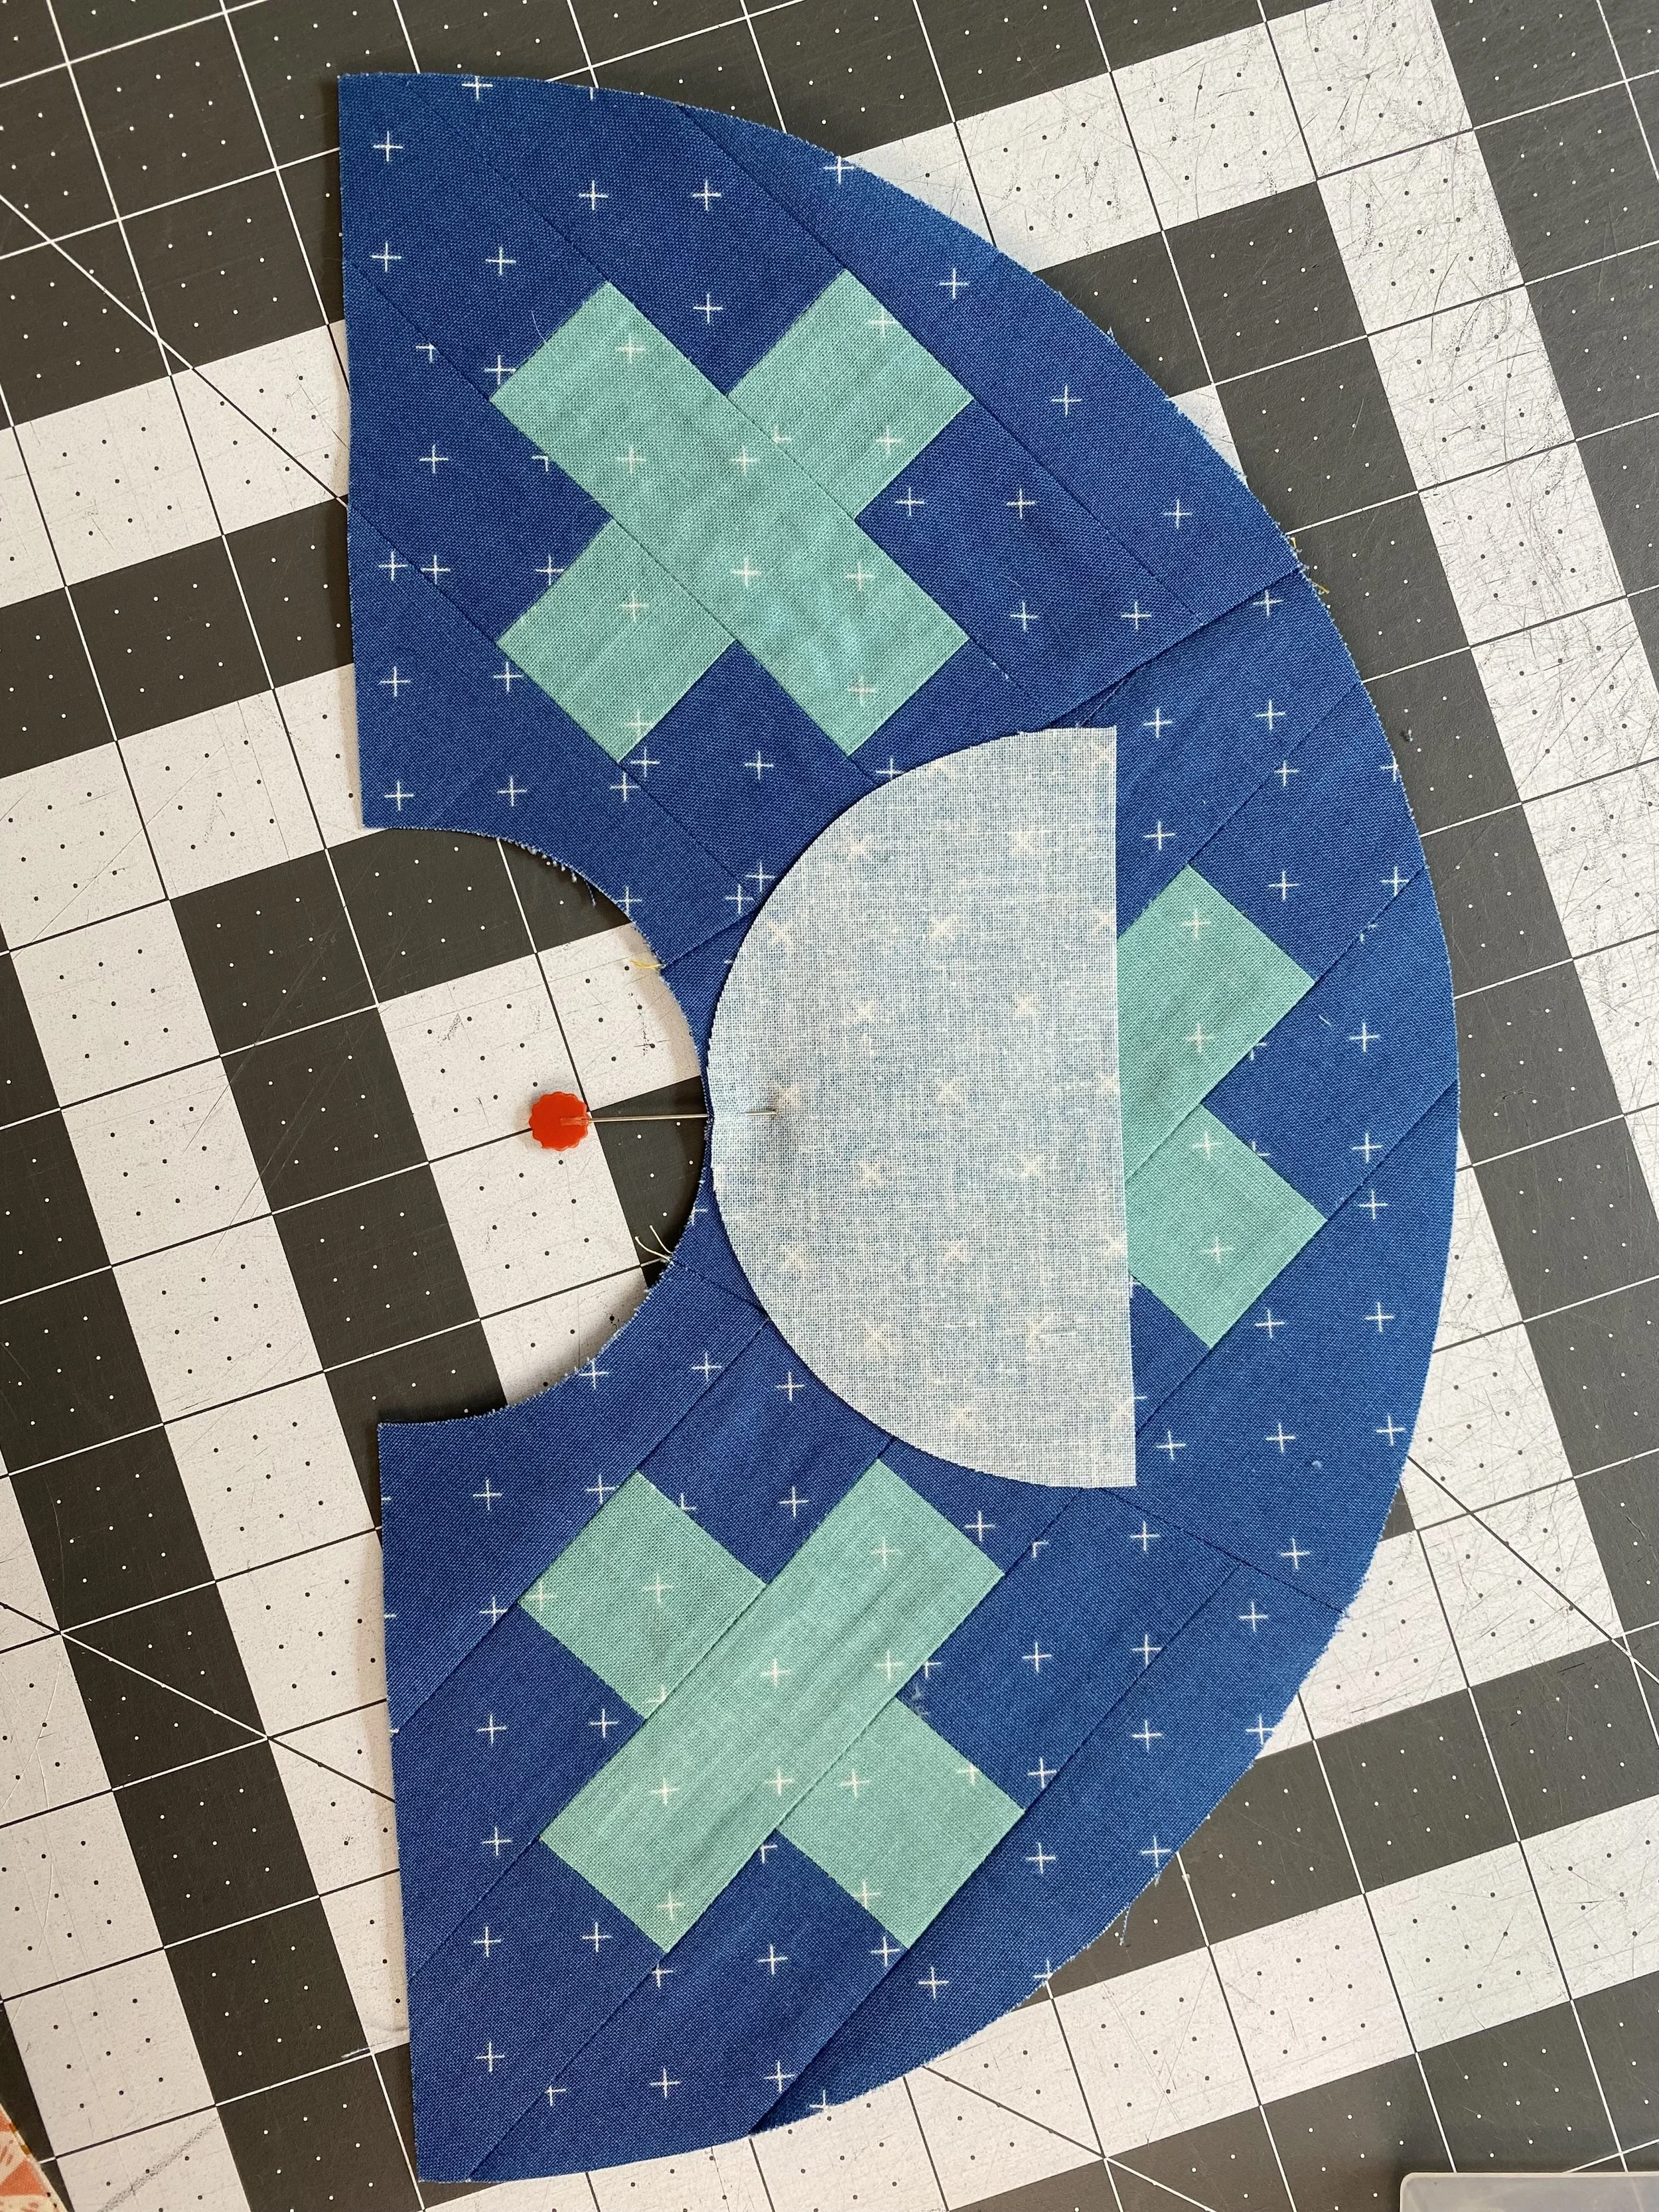
I start by pinning at center with the concave piece on top. In this photo, I’ve flipped the unit over so the convex piece is on top, just to check that things…look aligned.
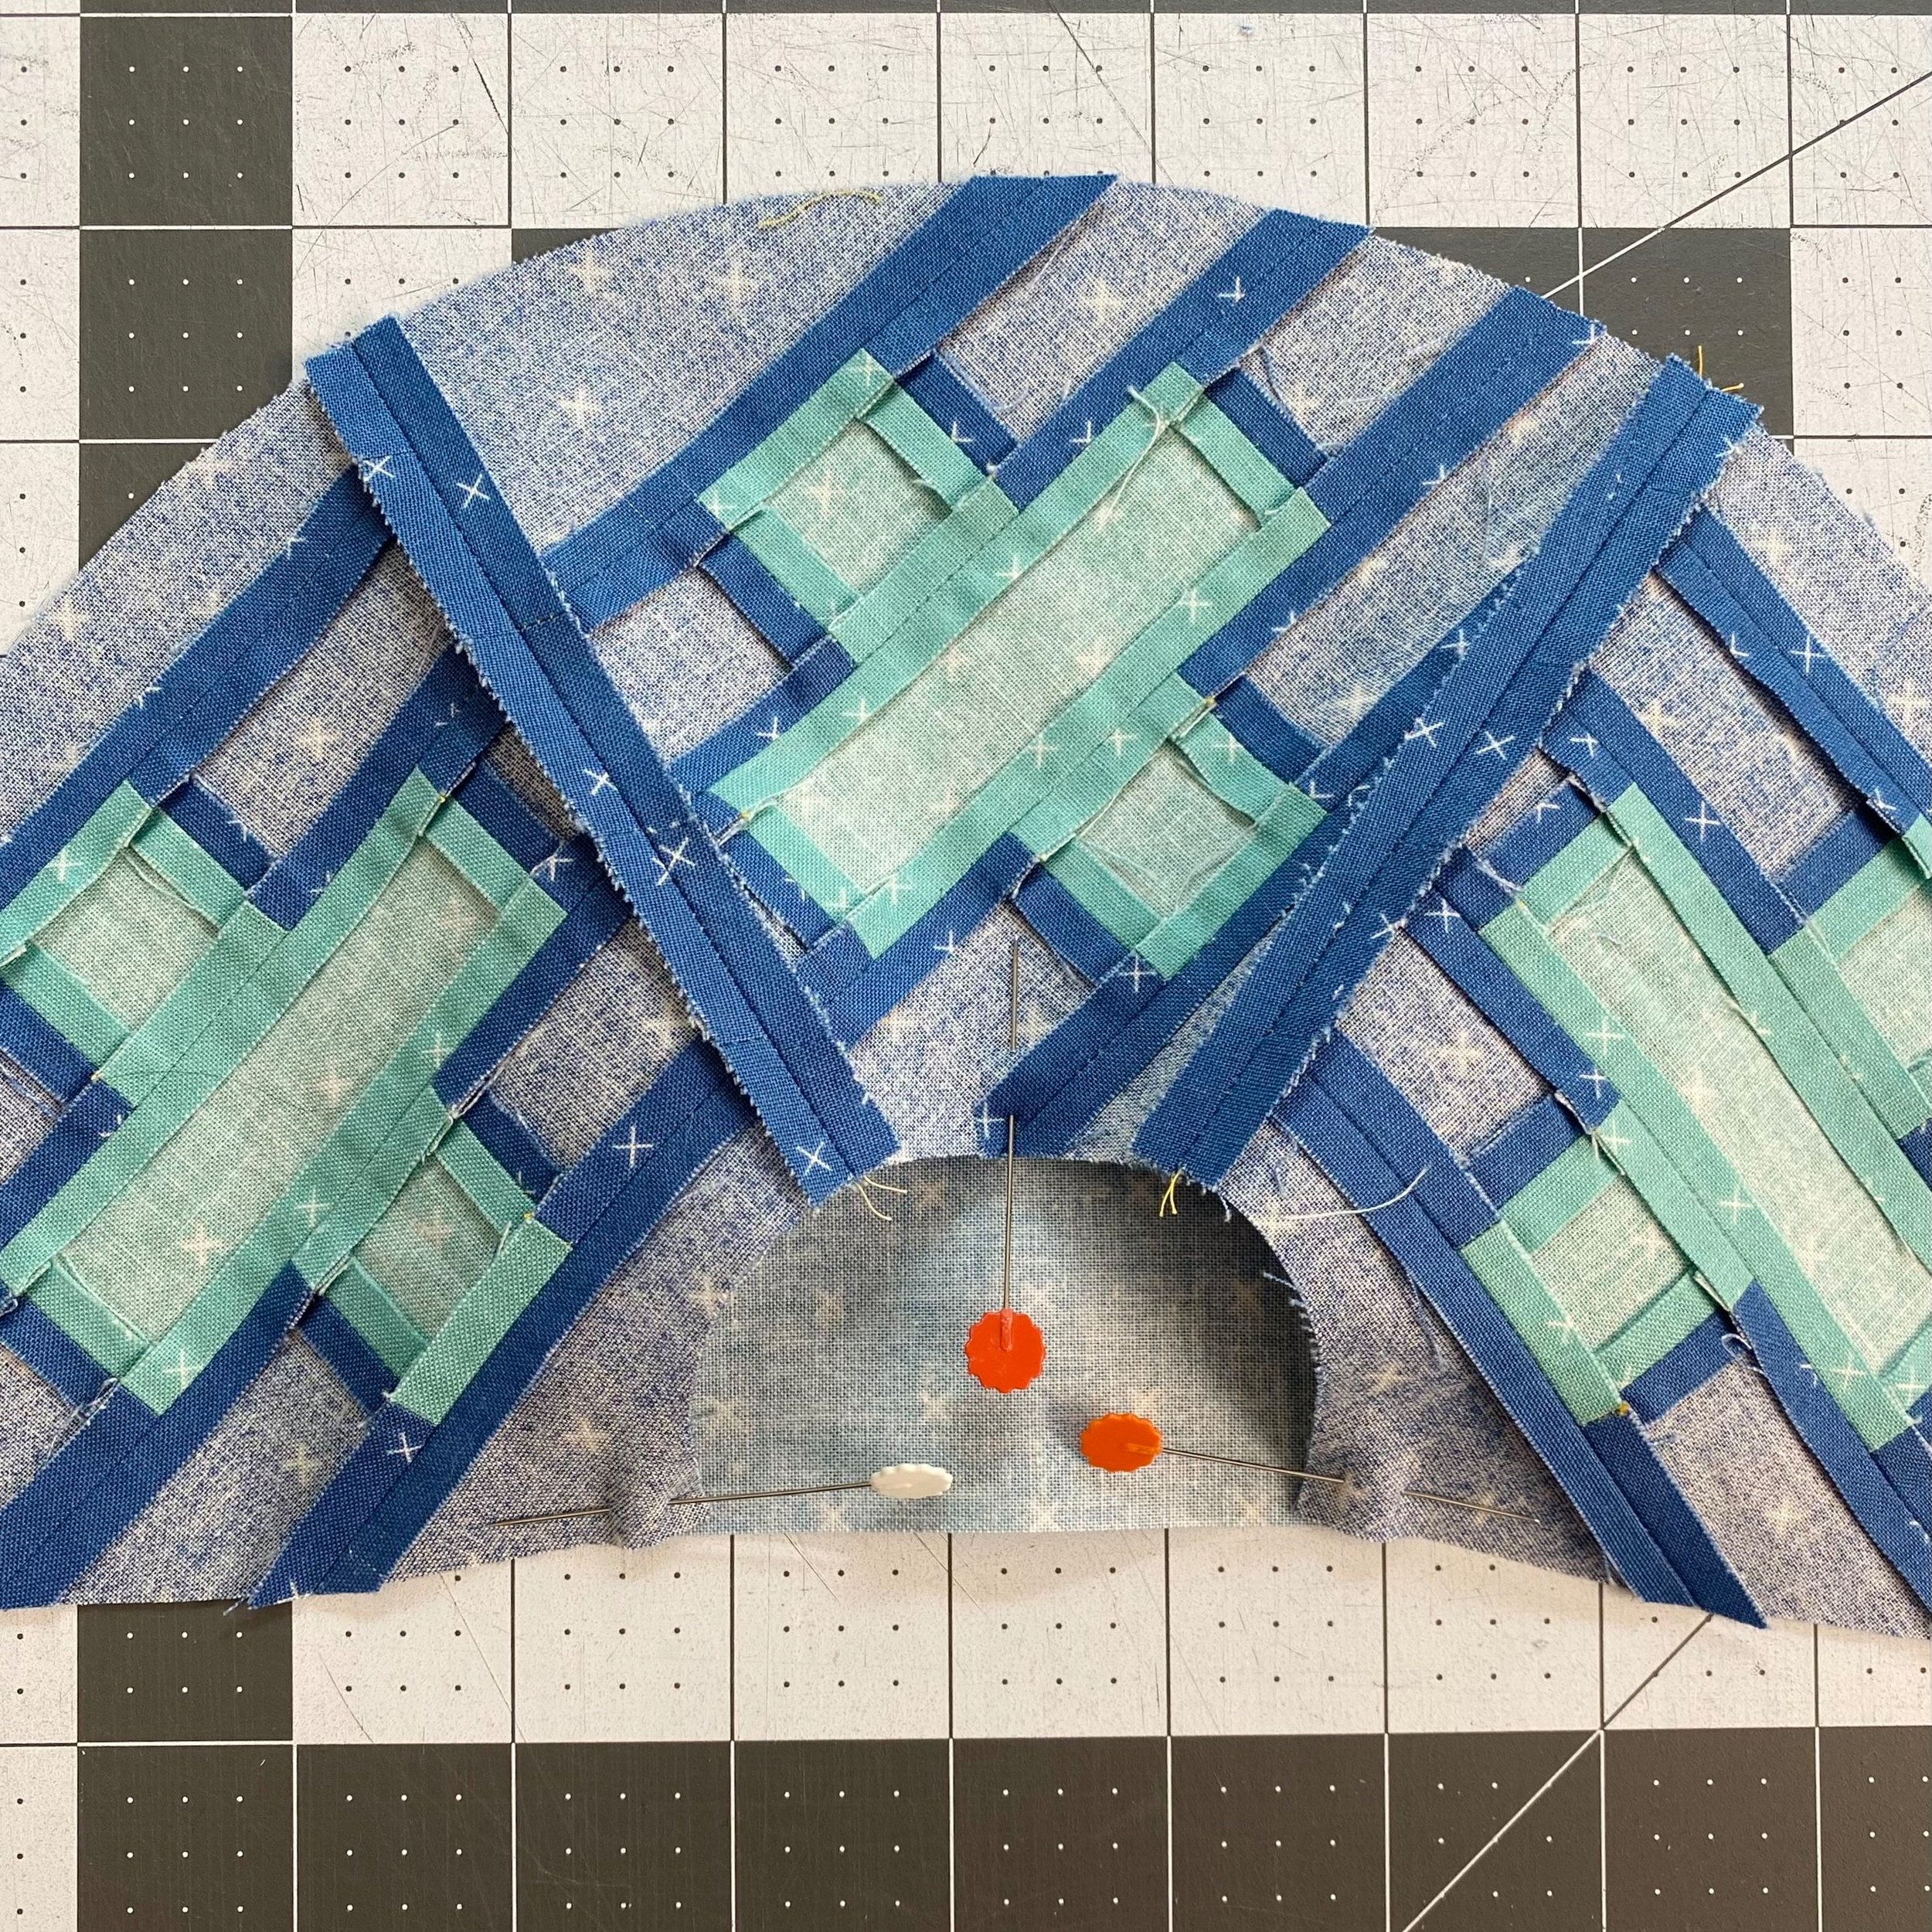
Here is what the unit looks like with three pins. I’ve long been an advocate for pinning to your heart’s content, but I will make an exception for this block. I preferred to use only three pins. I used multiple pins on one of these units and it did not turn out great (you’ll see in photos below).
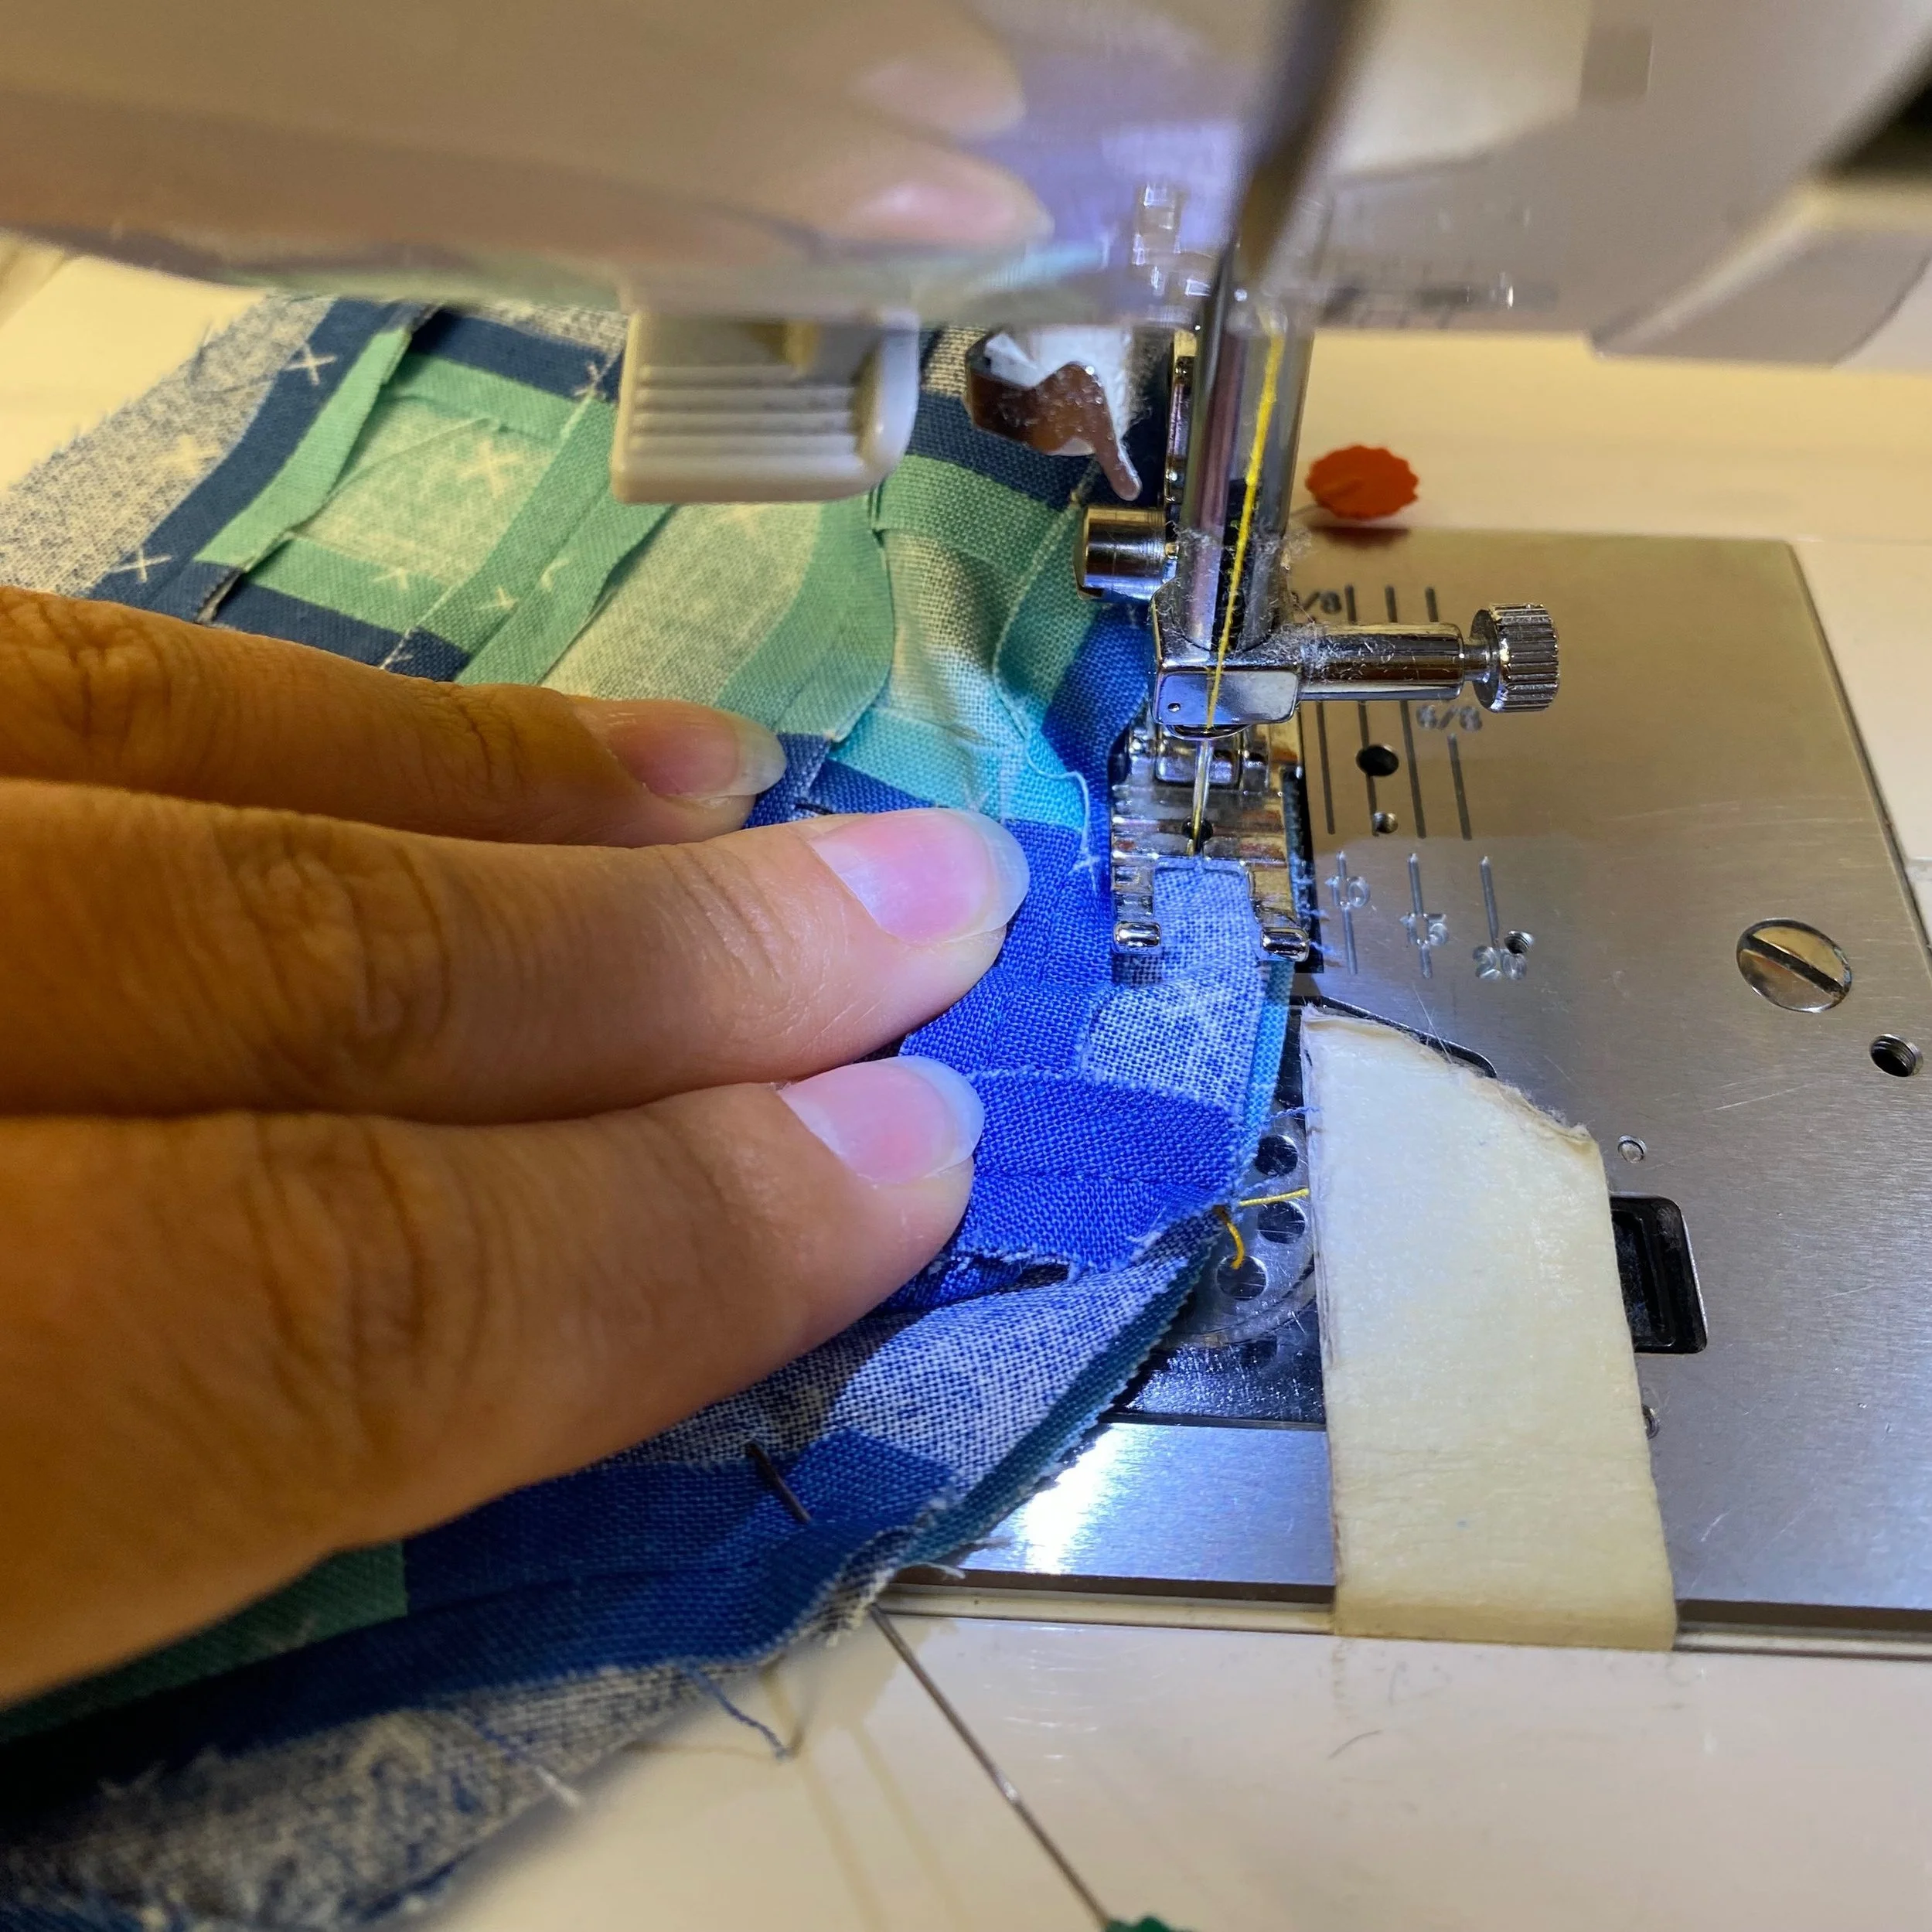
Be prepared to sew slowly. I even shortened my stitch length to 1.8, just to help slow me down. I also felt like this gave me greater control over my piecing.
In this photo, I’m actually being very forceful to the top unit, smashing it down to lay flat. You can see that the right edges of the top and bottom units aren’t very well aligned - make sure you pay attention to those edges!
If I wasn’t trying to photograph myself, my right hand would be managing the fabric right under the needle, and my left hand would be managing the bulk of the fabric, like the next picture.
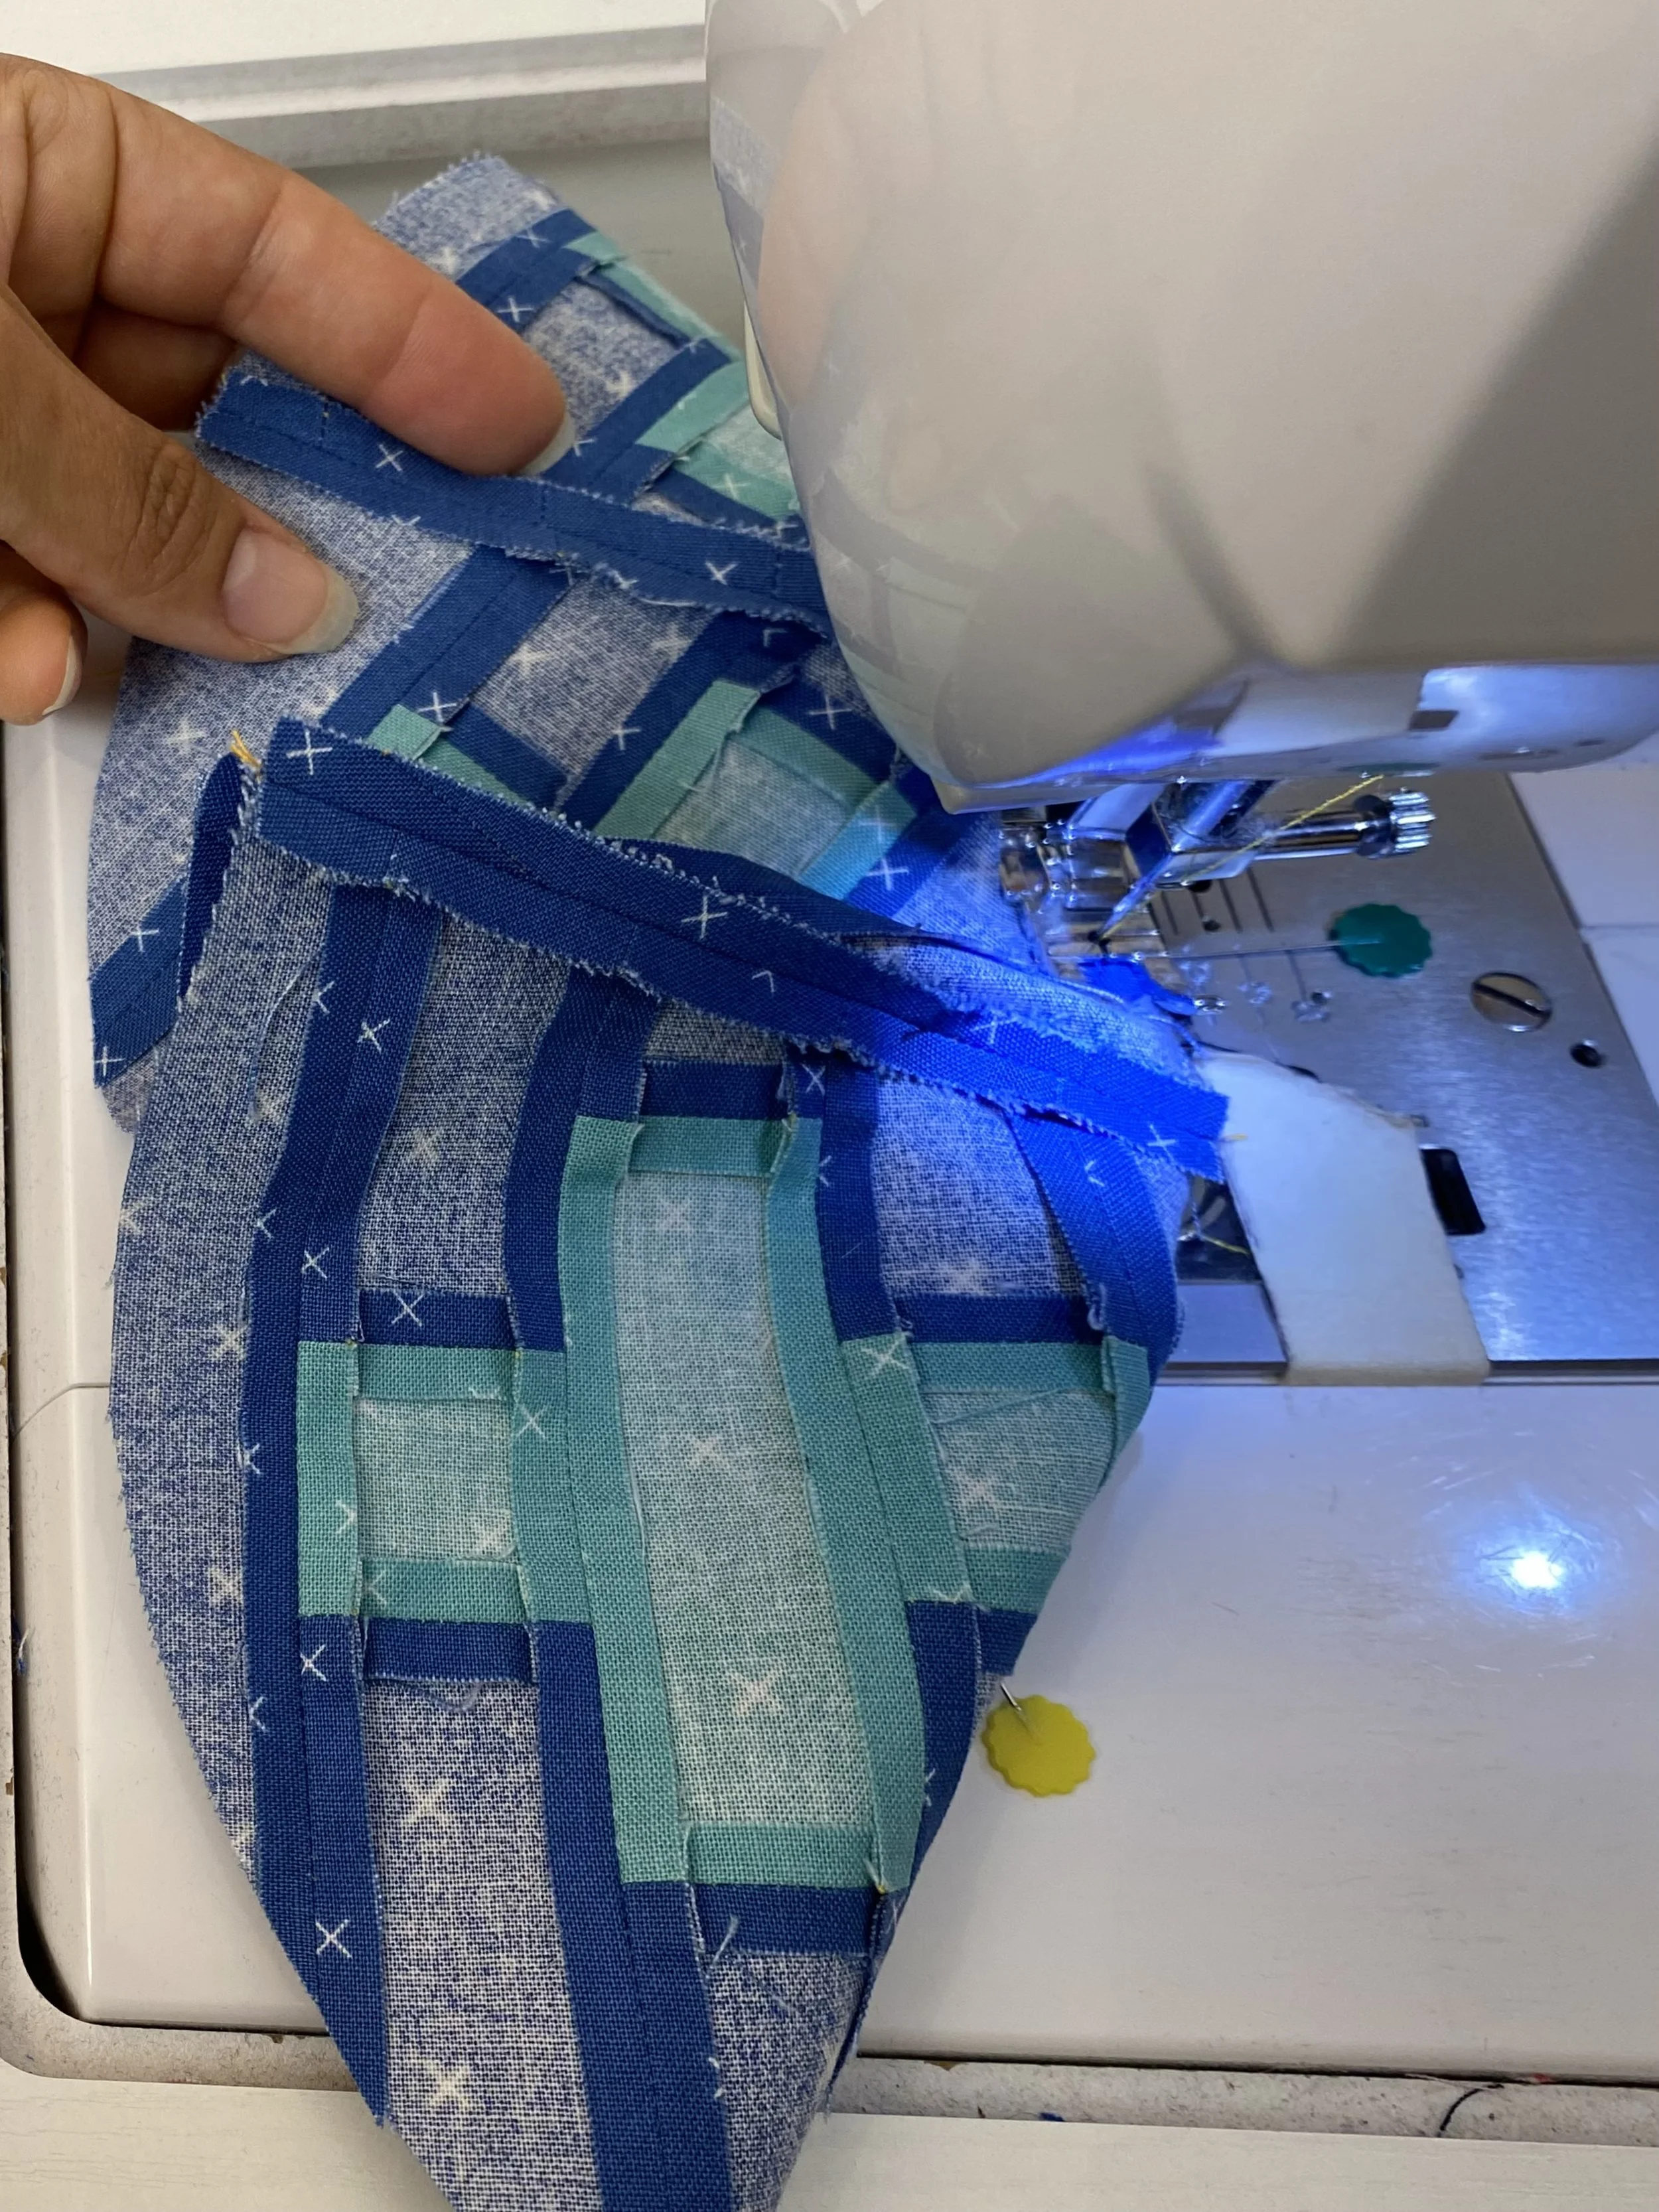
I want to highlight how much fabric there is to manage. I let the top concave unit bunch up and fold over as much as it wants to, as long as it is forward of the foot. You can see the seam between two arcs is quite high in the air. And see the yellow pin at the bottom? That’s the third pin on this unit - that’s how far the unit is tucked in under itself.
I’m only concerned about the fabric immediately to the left of the foot. I want that to lay relatively flat. To help with this, I guide the fabric under the needle with my right hand (not pictured), and I use my left hand to help ease the bulk on the left.
You can also see in the picture that barely an inch of the seam I’m sewing is visible. That’s due to the diameter of the circle we’re sewing and the large size of the concave unit. At times it felt like I was sewing blind because I could see so little of the seam ahead. But continue easing fabric and stitch slowly.
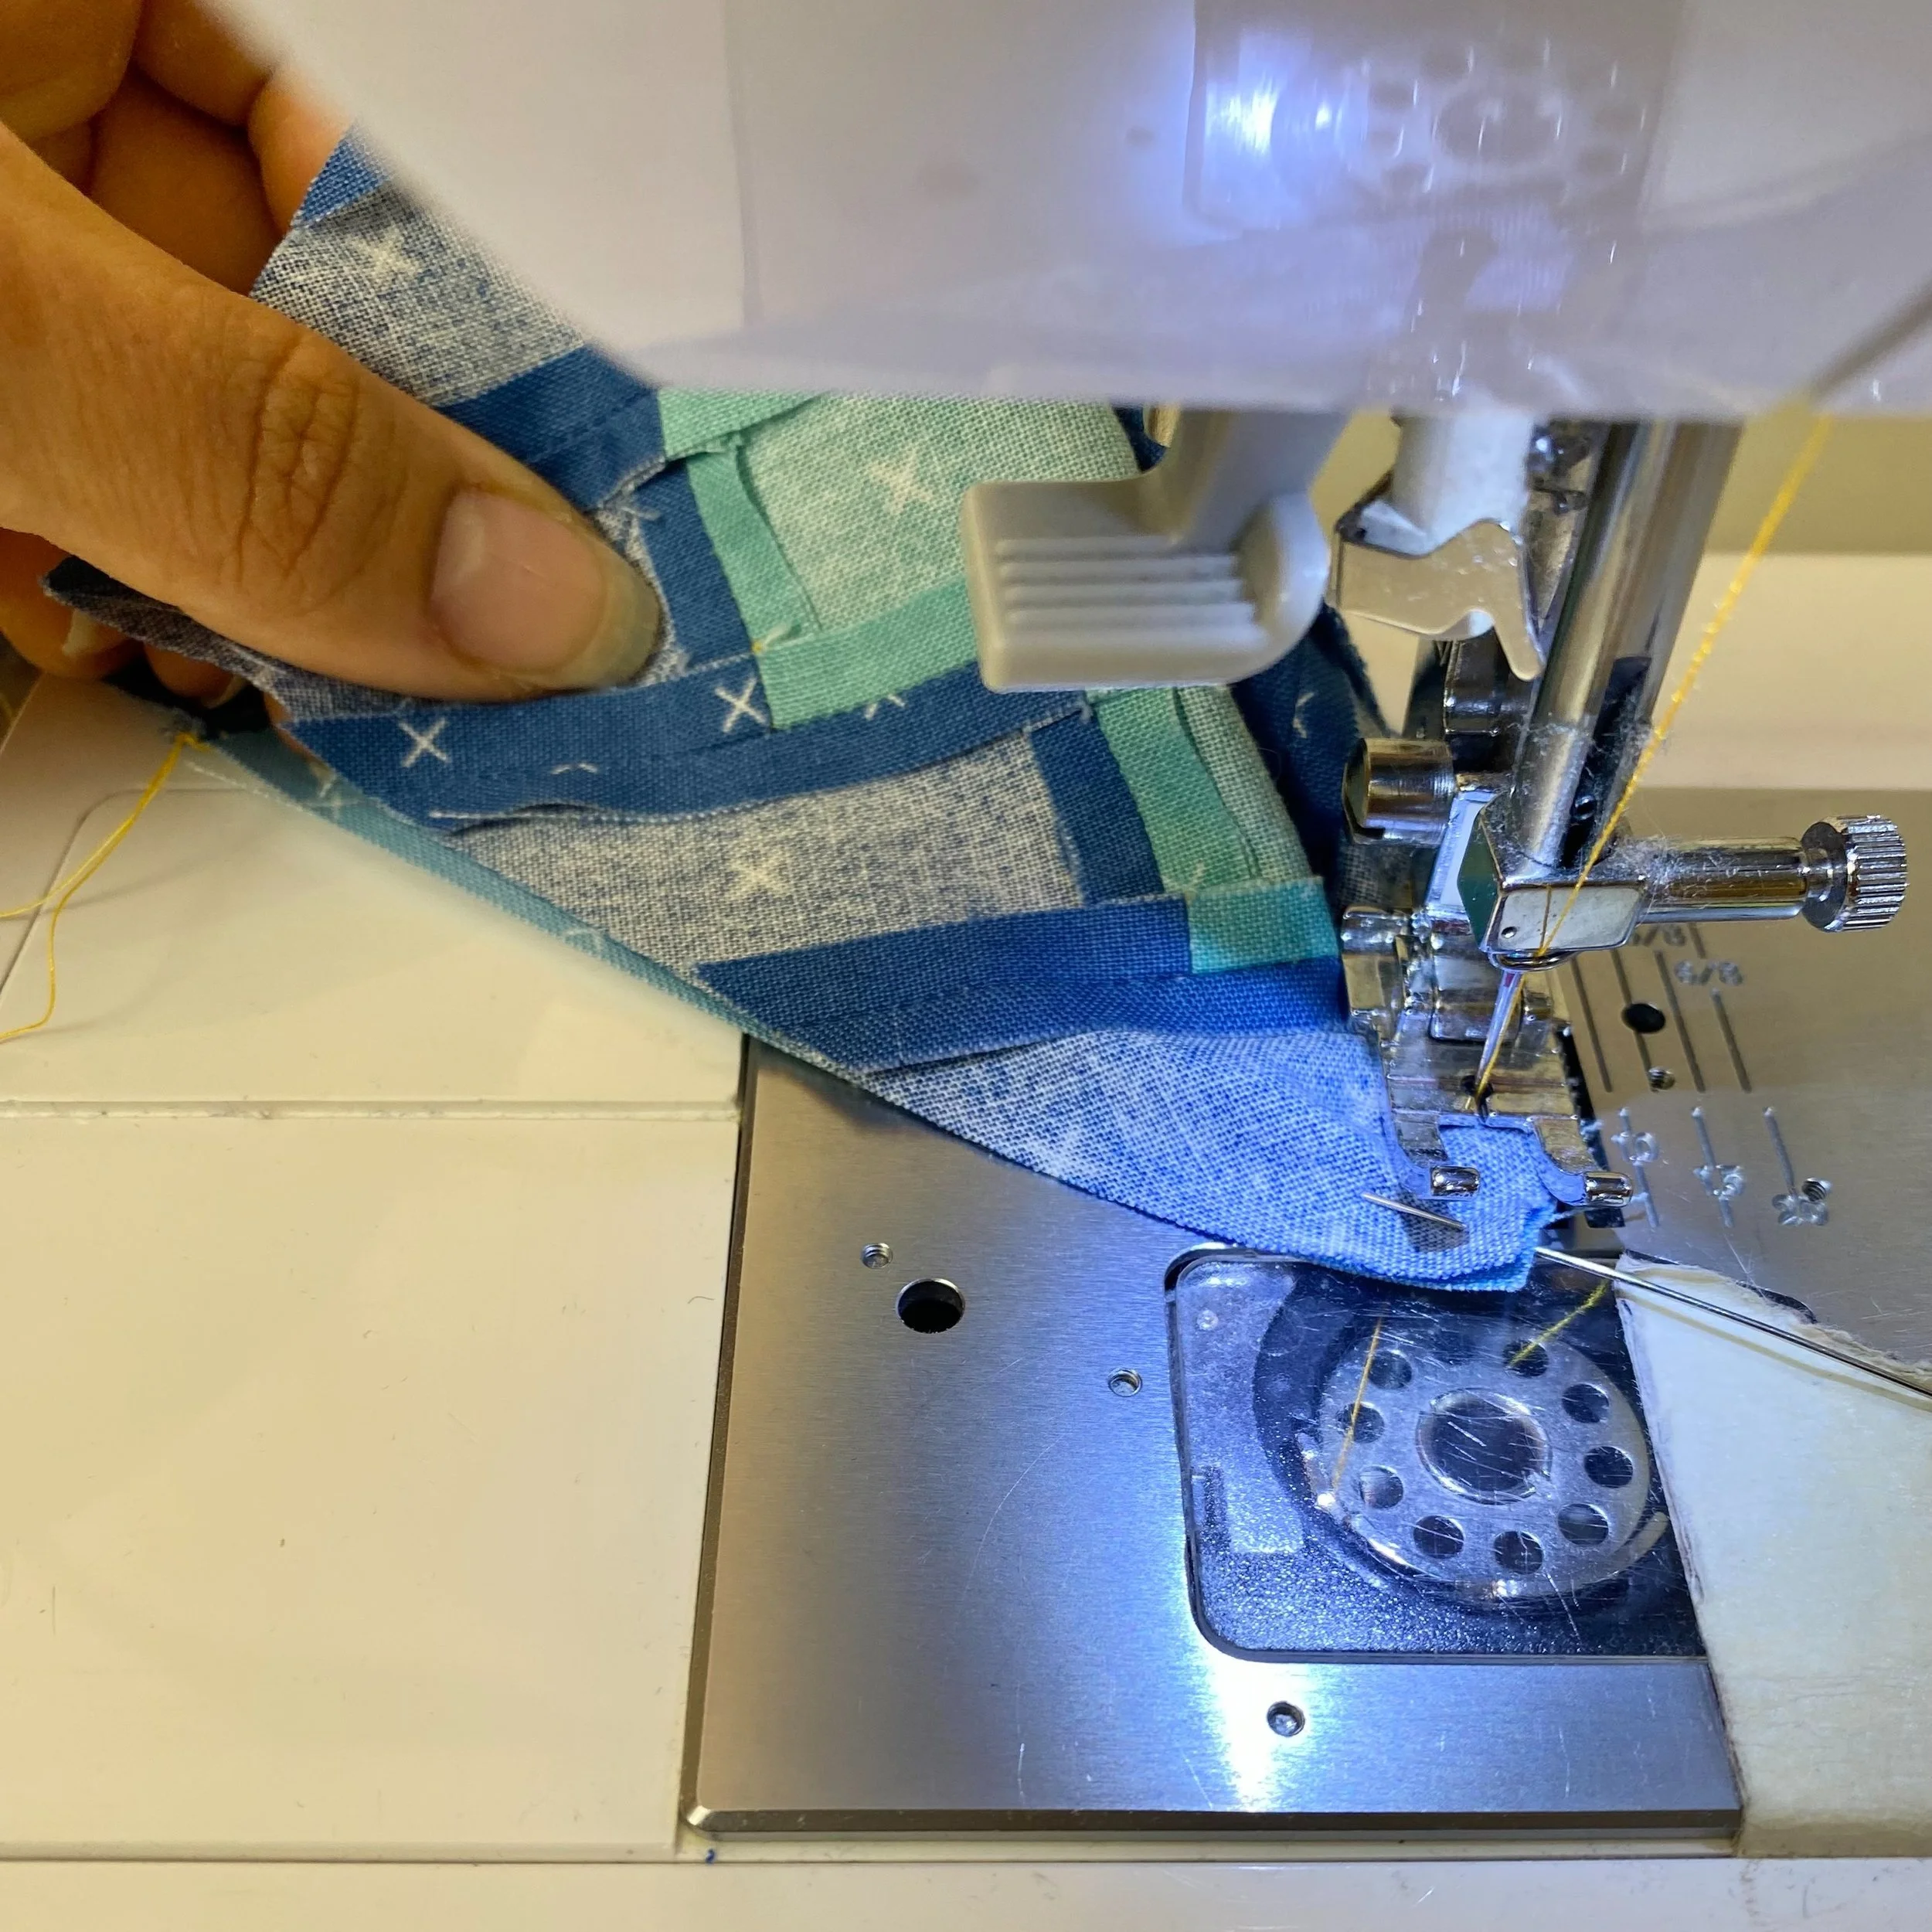
In this photo, I’ve reached the end of the curve - you can just see the bottom straight edge of my Template 3 unit (light blue fabric). I’ve eased the straight edge of the last arc to match the straight edge of the Template 3 unit. This helps make sure that when open the unit up, the bottom straight edge of the resulting half circle is even and straight.
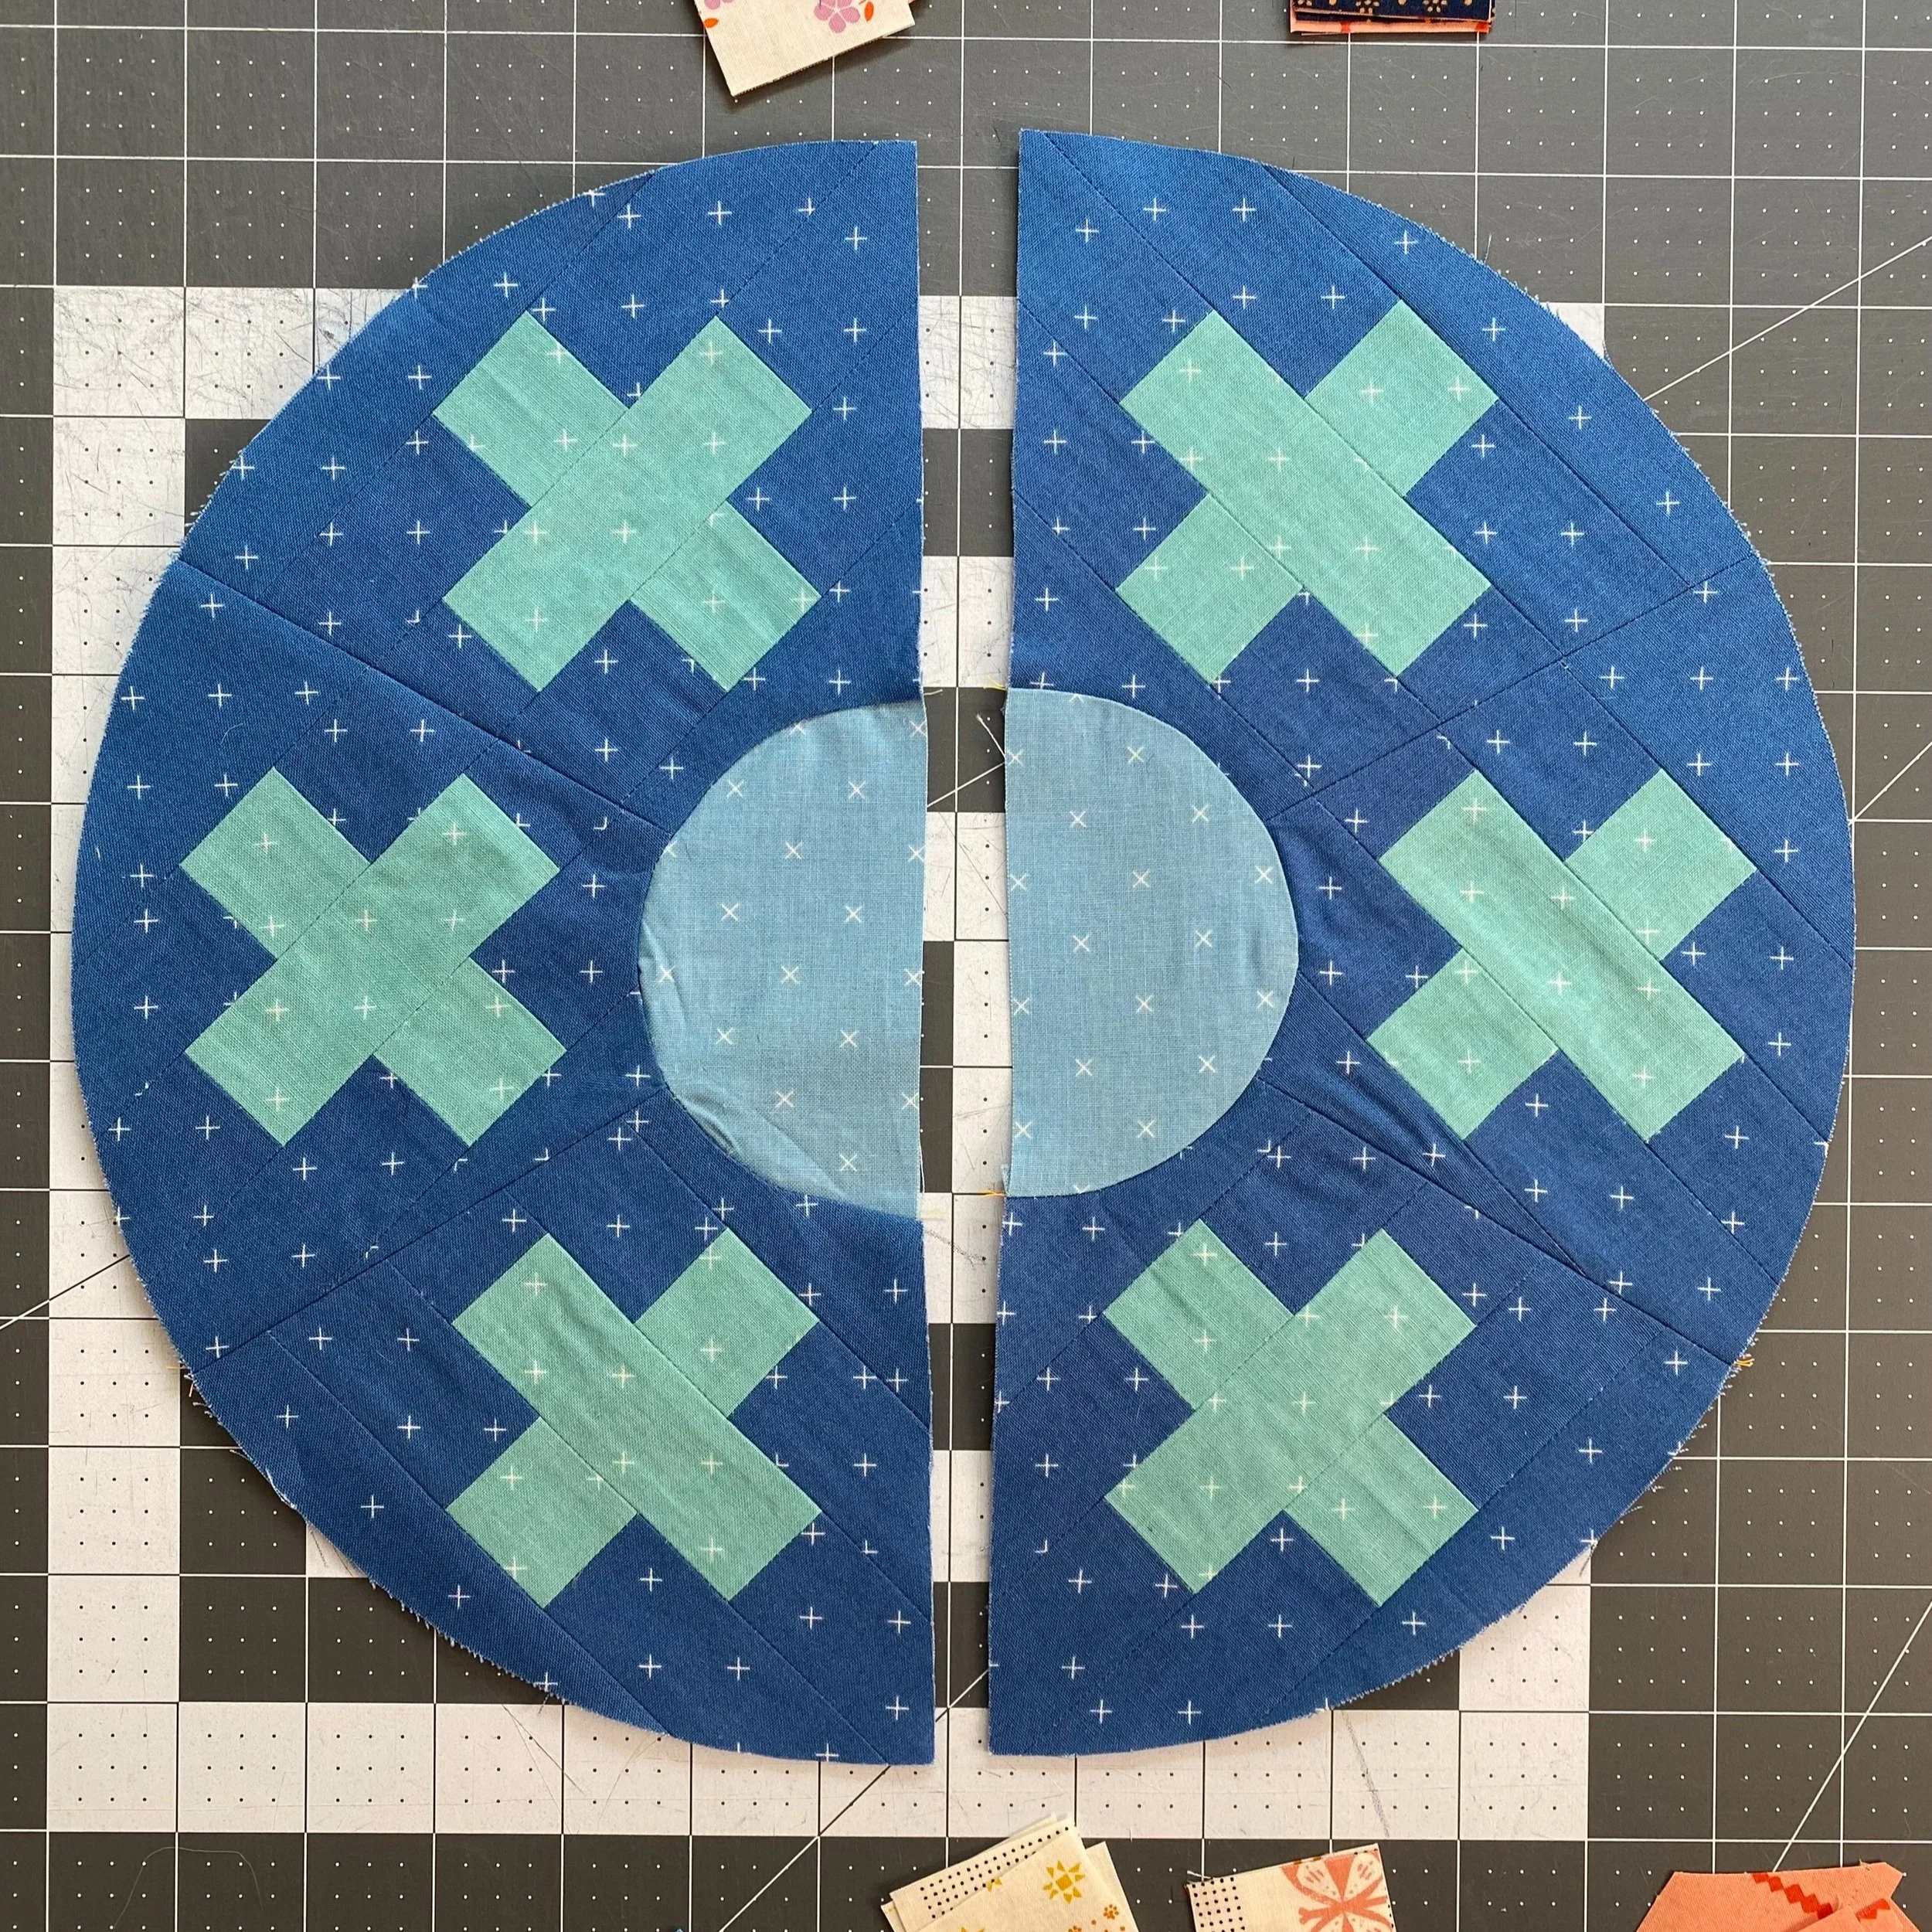
Here are my two half circles. The one on the left is the one where I used more than three pins, and I think we can agree it is the less successful of the two.
A quick note about pressing. I typically like to press outwards, but I also like nesting seams. I make a note in the pattern to consider alternating pressing directions of Template 3 . Pressing outwards makes the inner circle look sharp, but the seams in the patchwork make it bulky. Pressing inwards can really highlight how uneven the curved seam is, but helps reduce bulk. I’ll put up with these oddities for the nesting seams though.
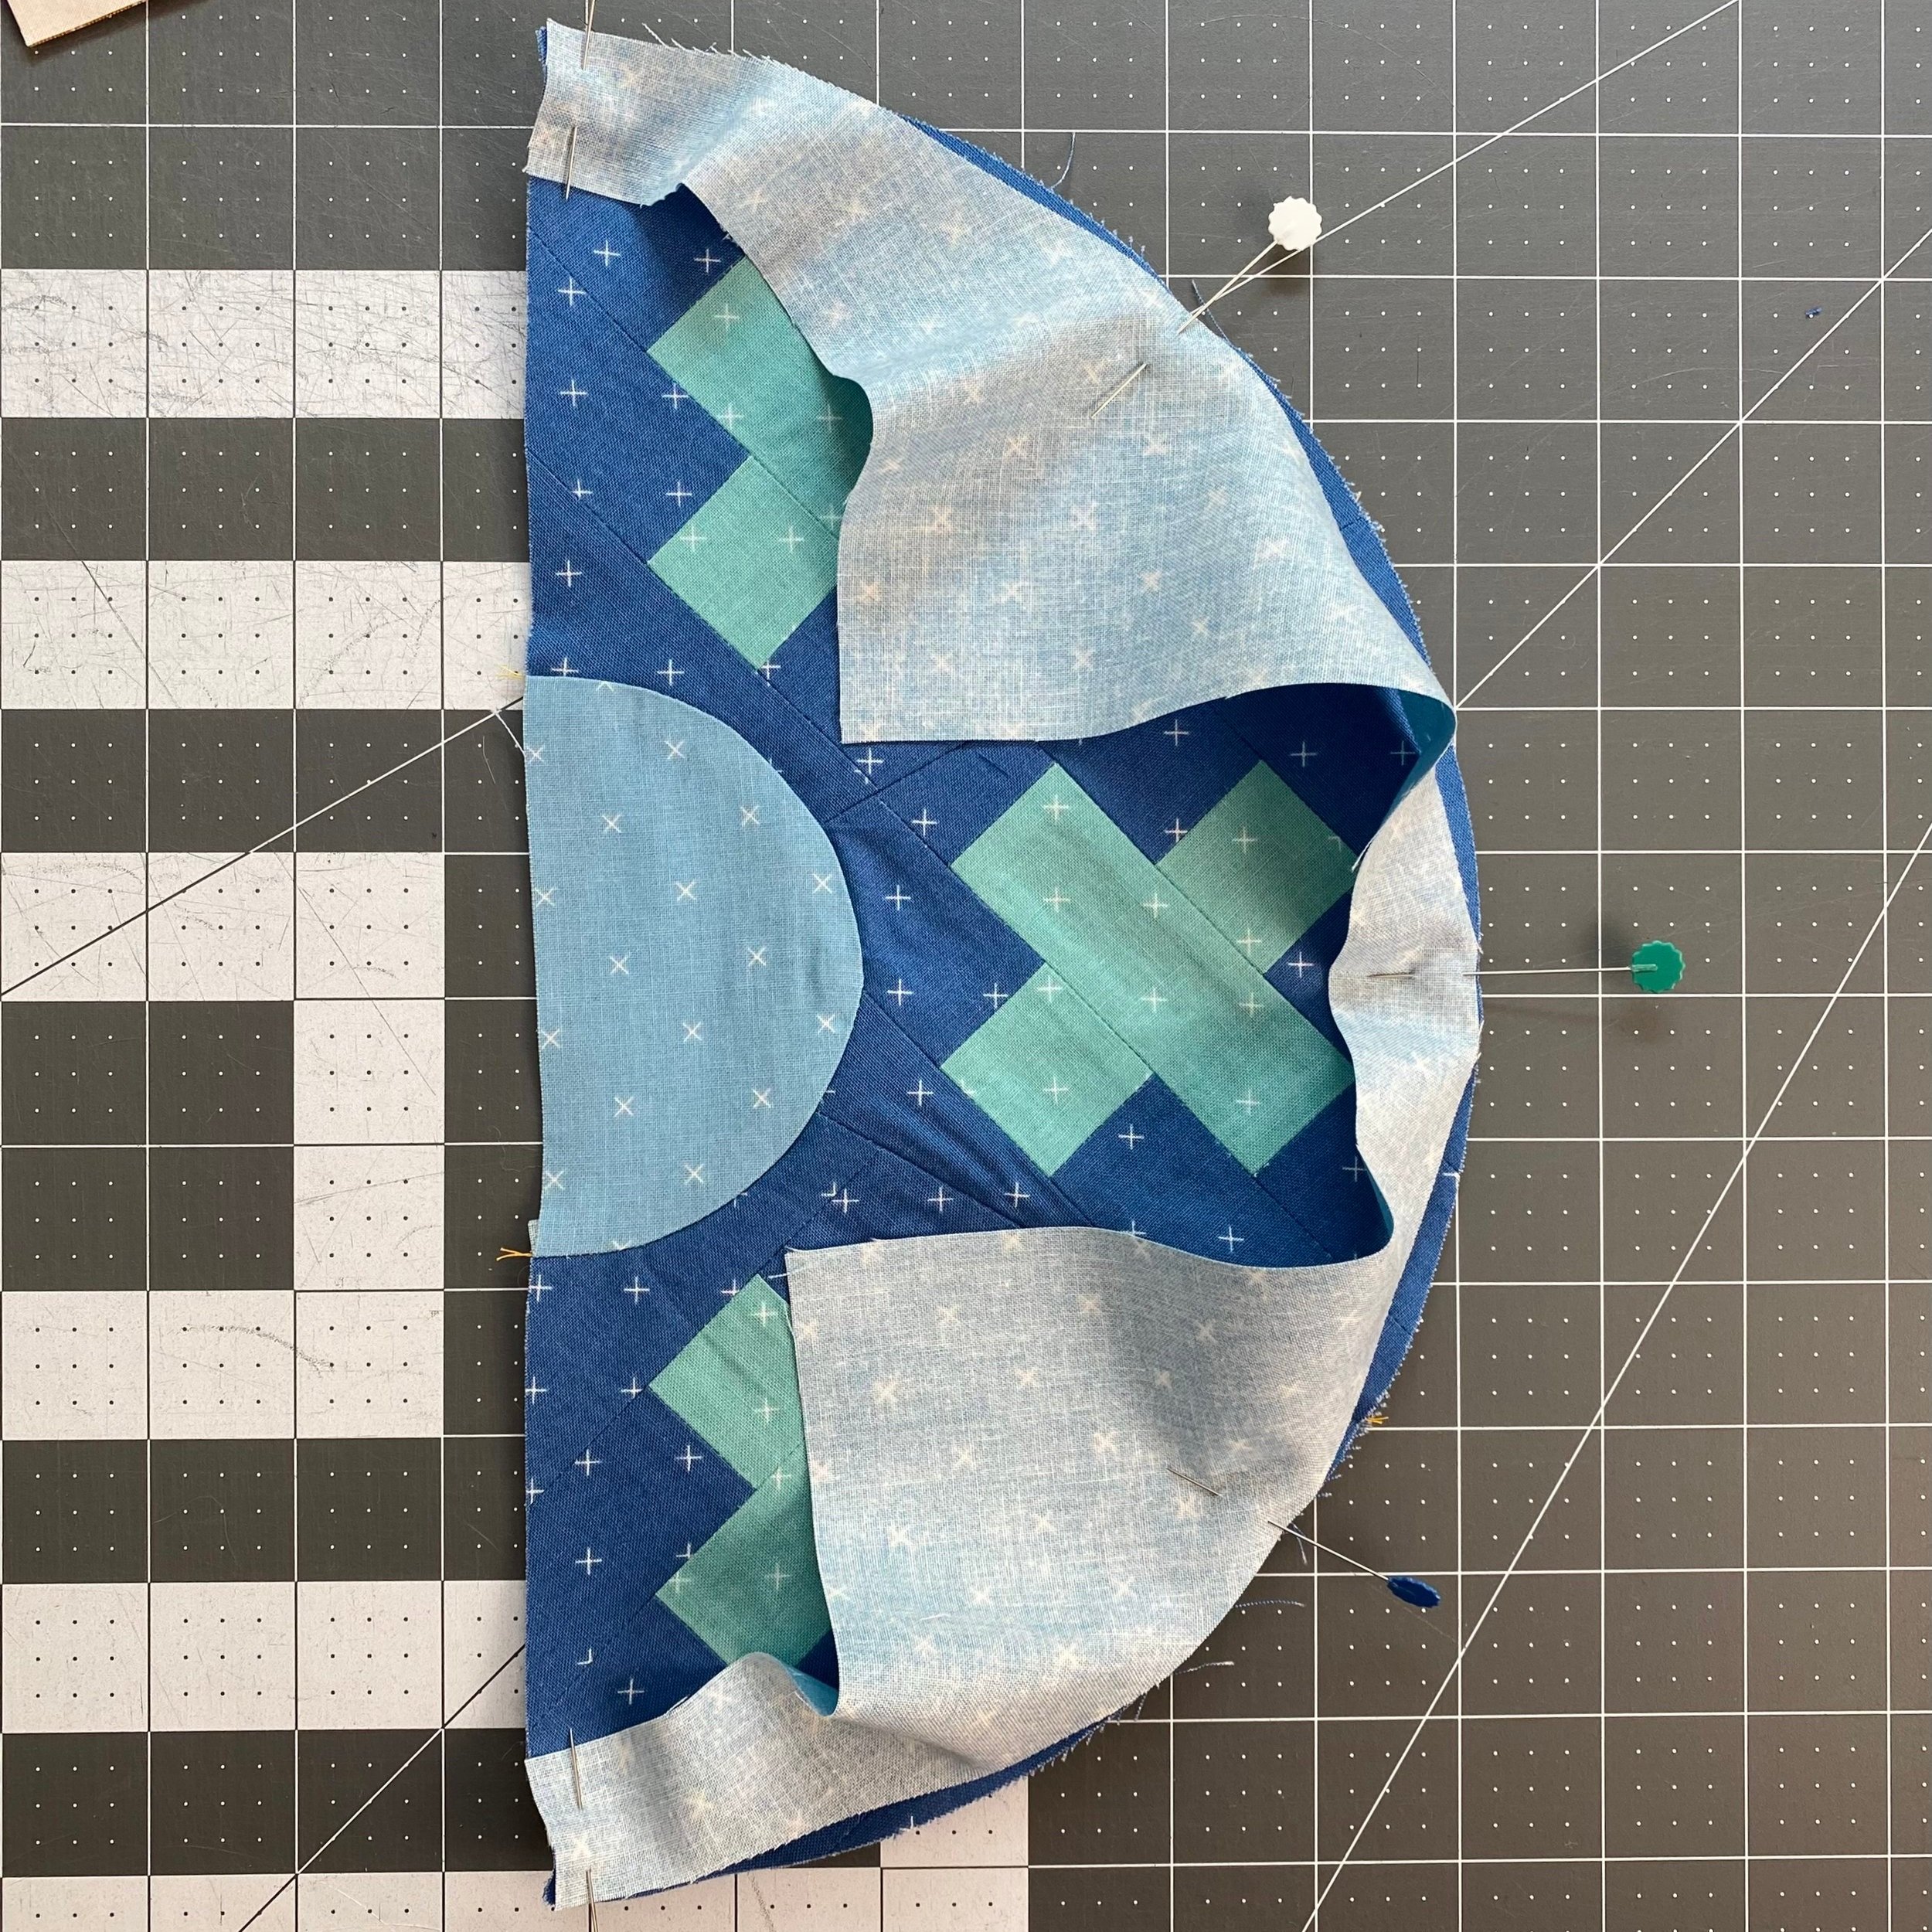
When you’re ready to sew on Template 4, you can return to using your preferred number of pins. This curve is much easier to sew! The large concave unit practically snaps into place and requires much less fabric management.
What I said above about pressing stands true here as well. There’s some give and take with pressing inwards and outwards.
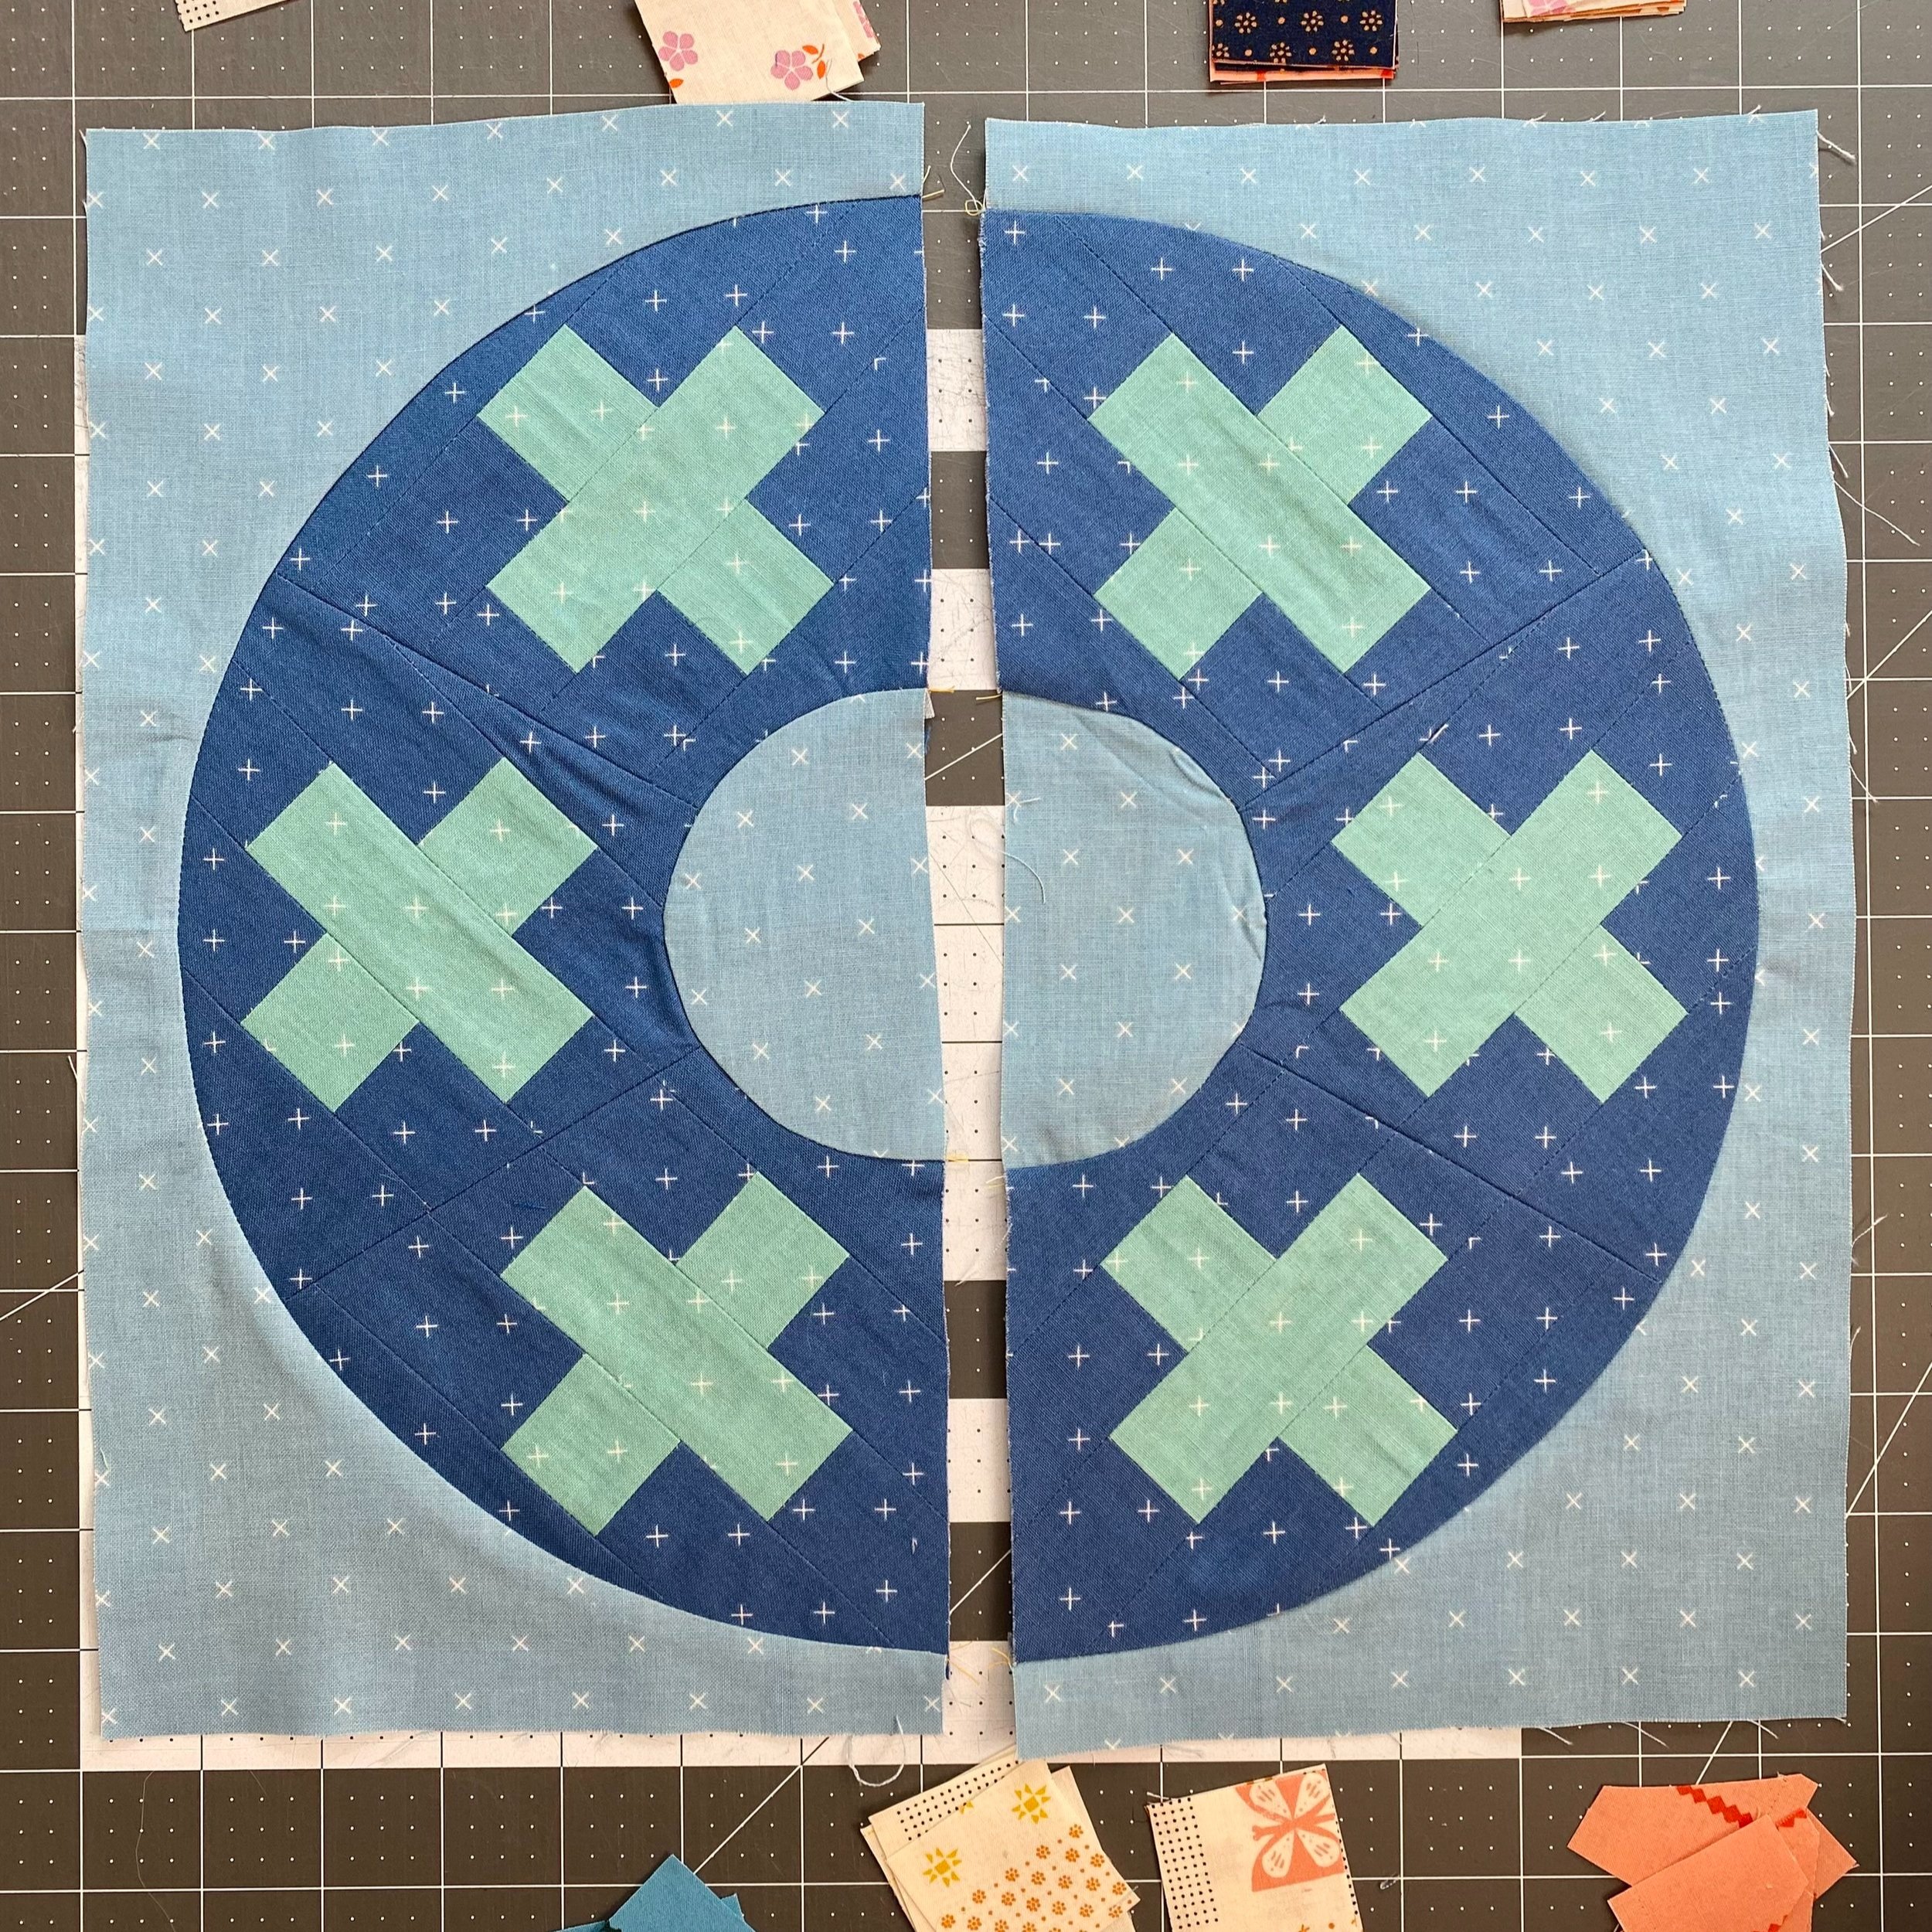
We’re at the last seam! Because we’ve alternated the pressing directions, this seam should be pretty easy to align. The block is slightly oversized, so just trim to 12½" x 12½" and you’re done!
Phew! That was a challenging block! I hope you’re ready for more - now that we’re sliding into the last six blocks, we’ll be turning up the skill level on our Learning Curves BOM blocks! Remember to share your progress and check out other folks' block on Instagram using #learningcurvesbom and #bobbinquiltblock.