
How To Use Directional Prints in Flying Geese
Directional prints are a cause of great distress and delight in my sewing room. I love how clean and geometric they can look, but figuring out how to account for their use in quilt patterns is…well it’s a challenge. So today, we’re going to take the time to figure out, once and for all, how to use directional prints in our most cherished quilt block, the flying geese block (FG).
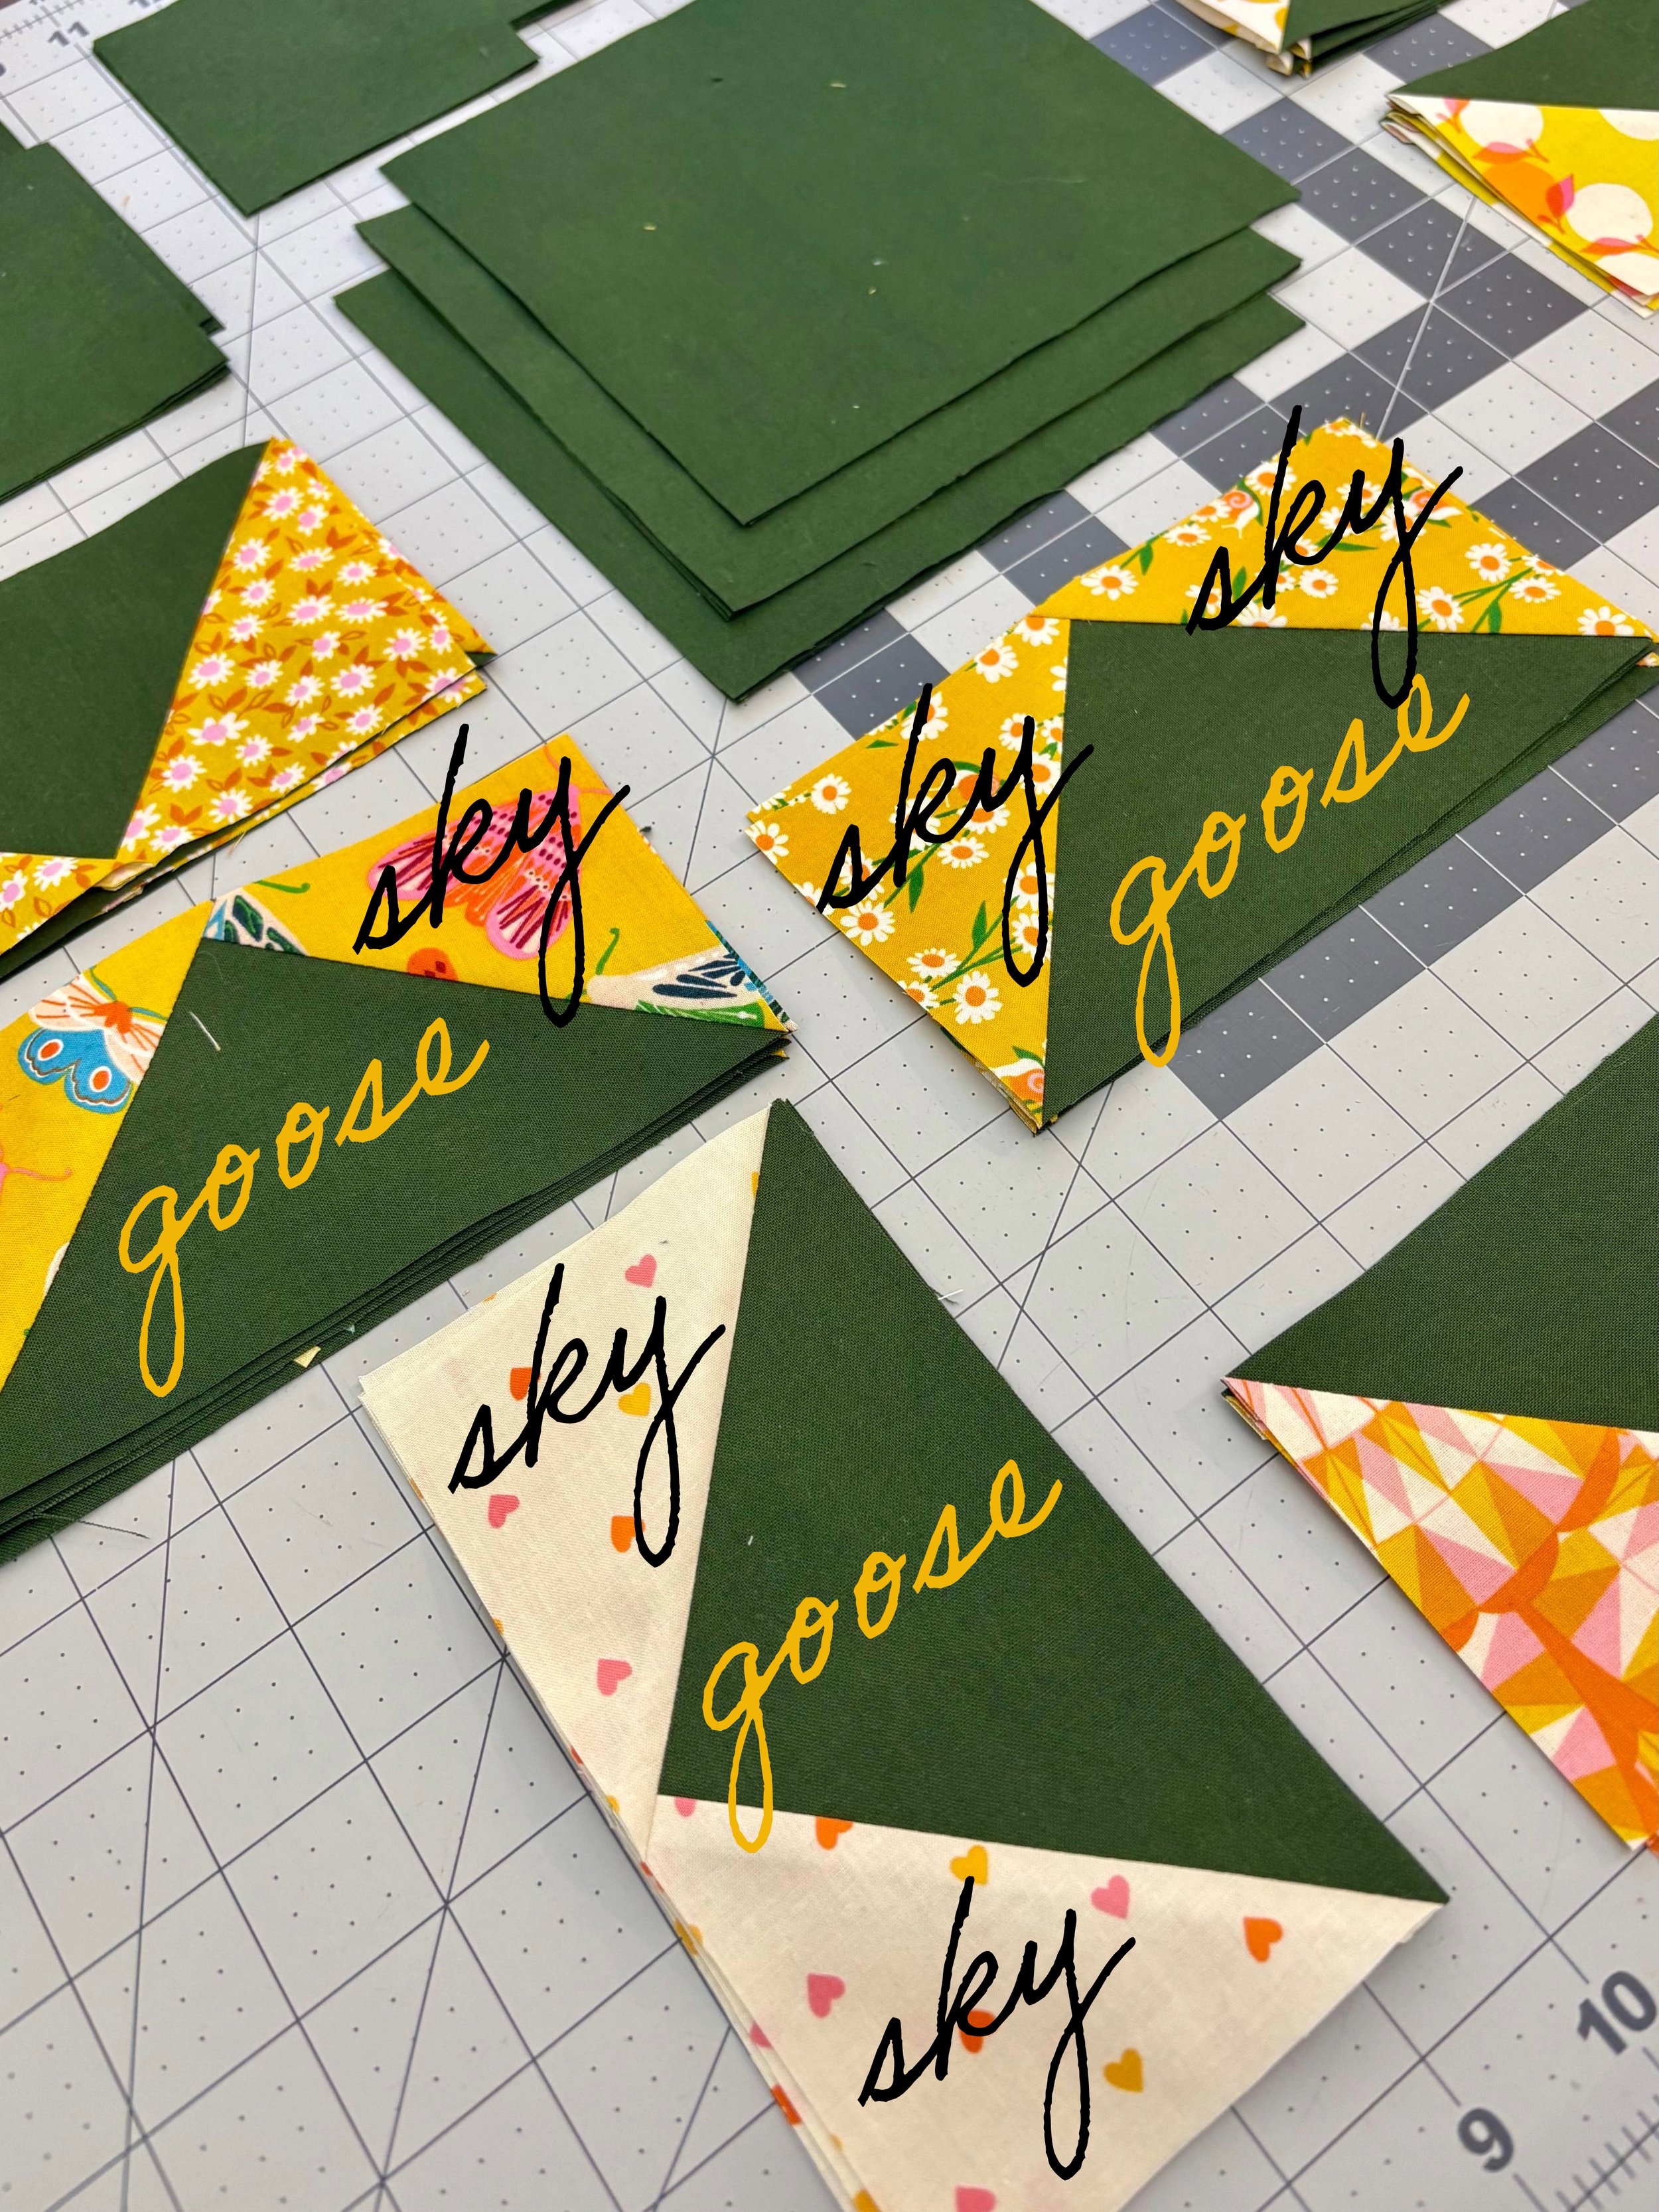
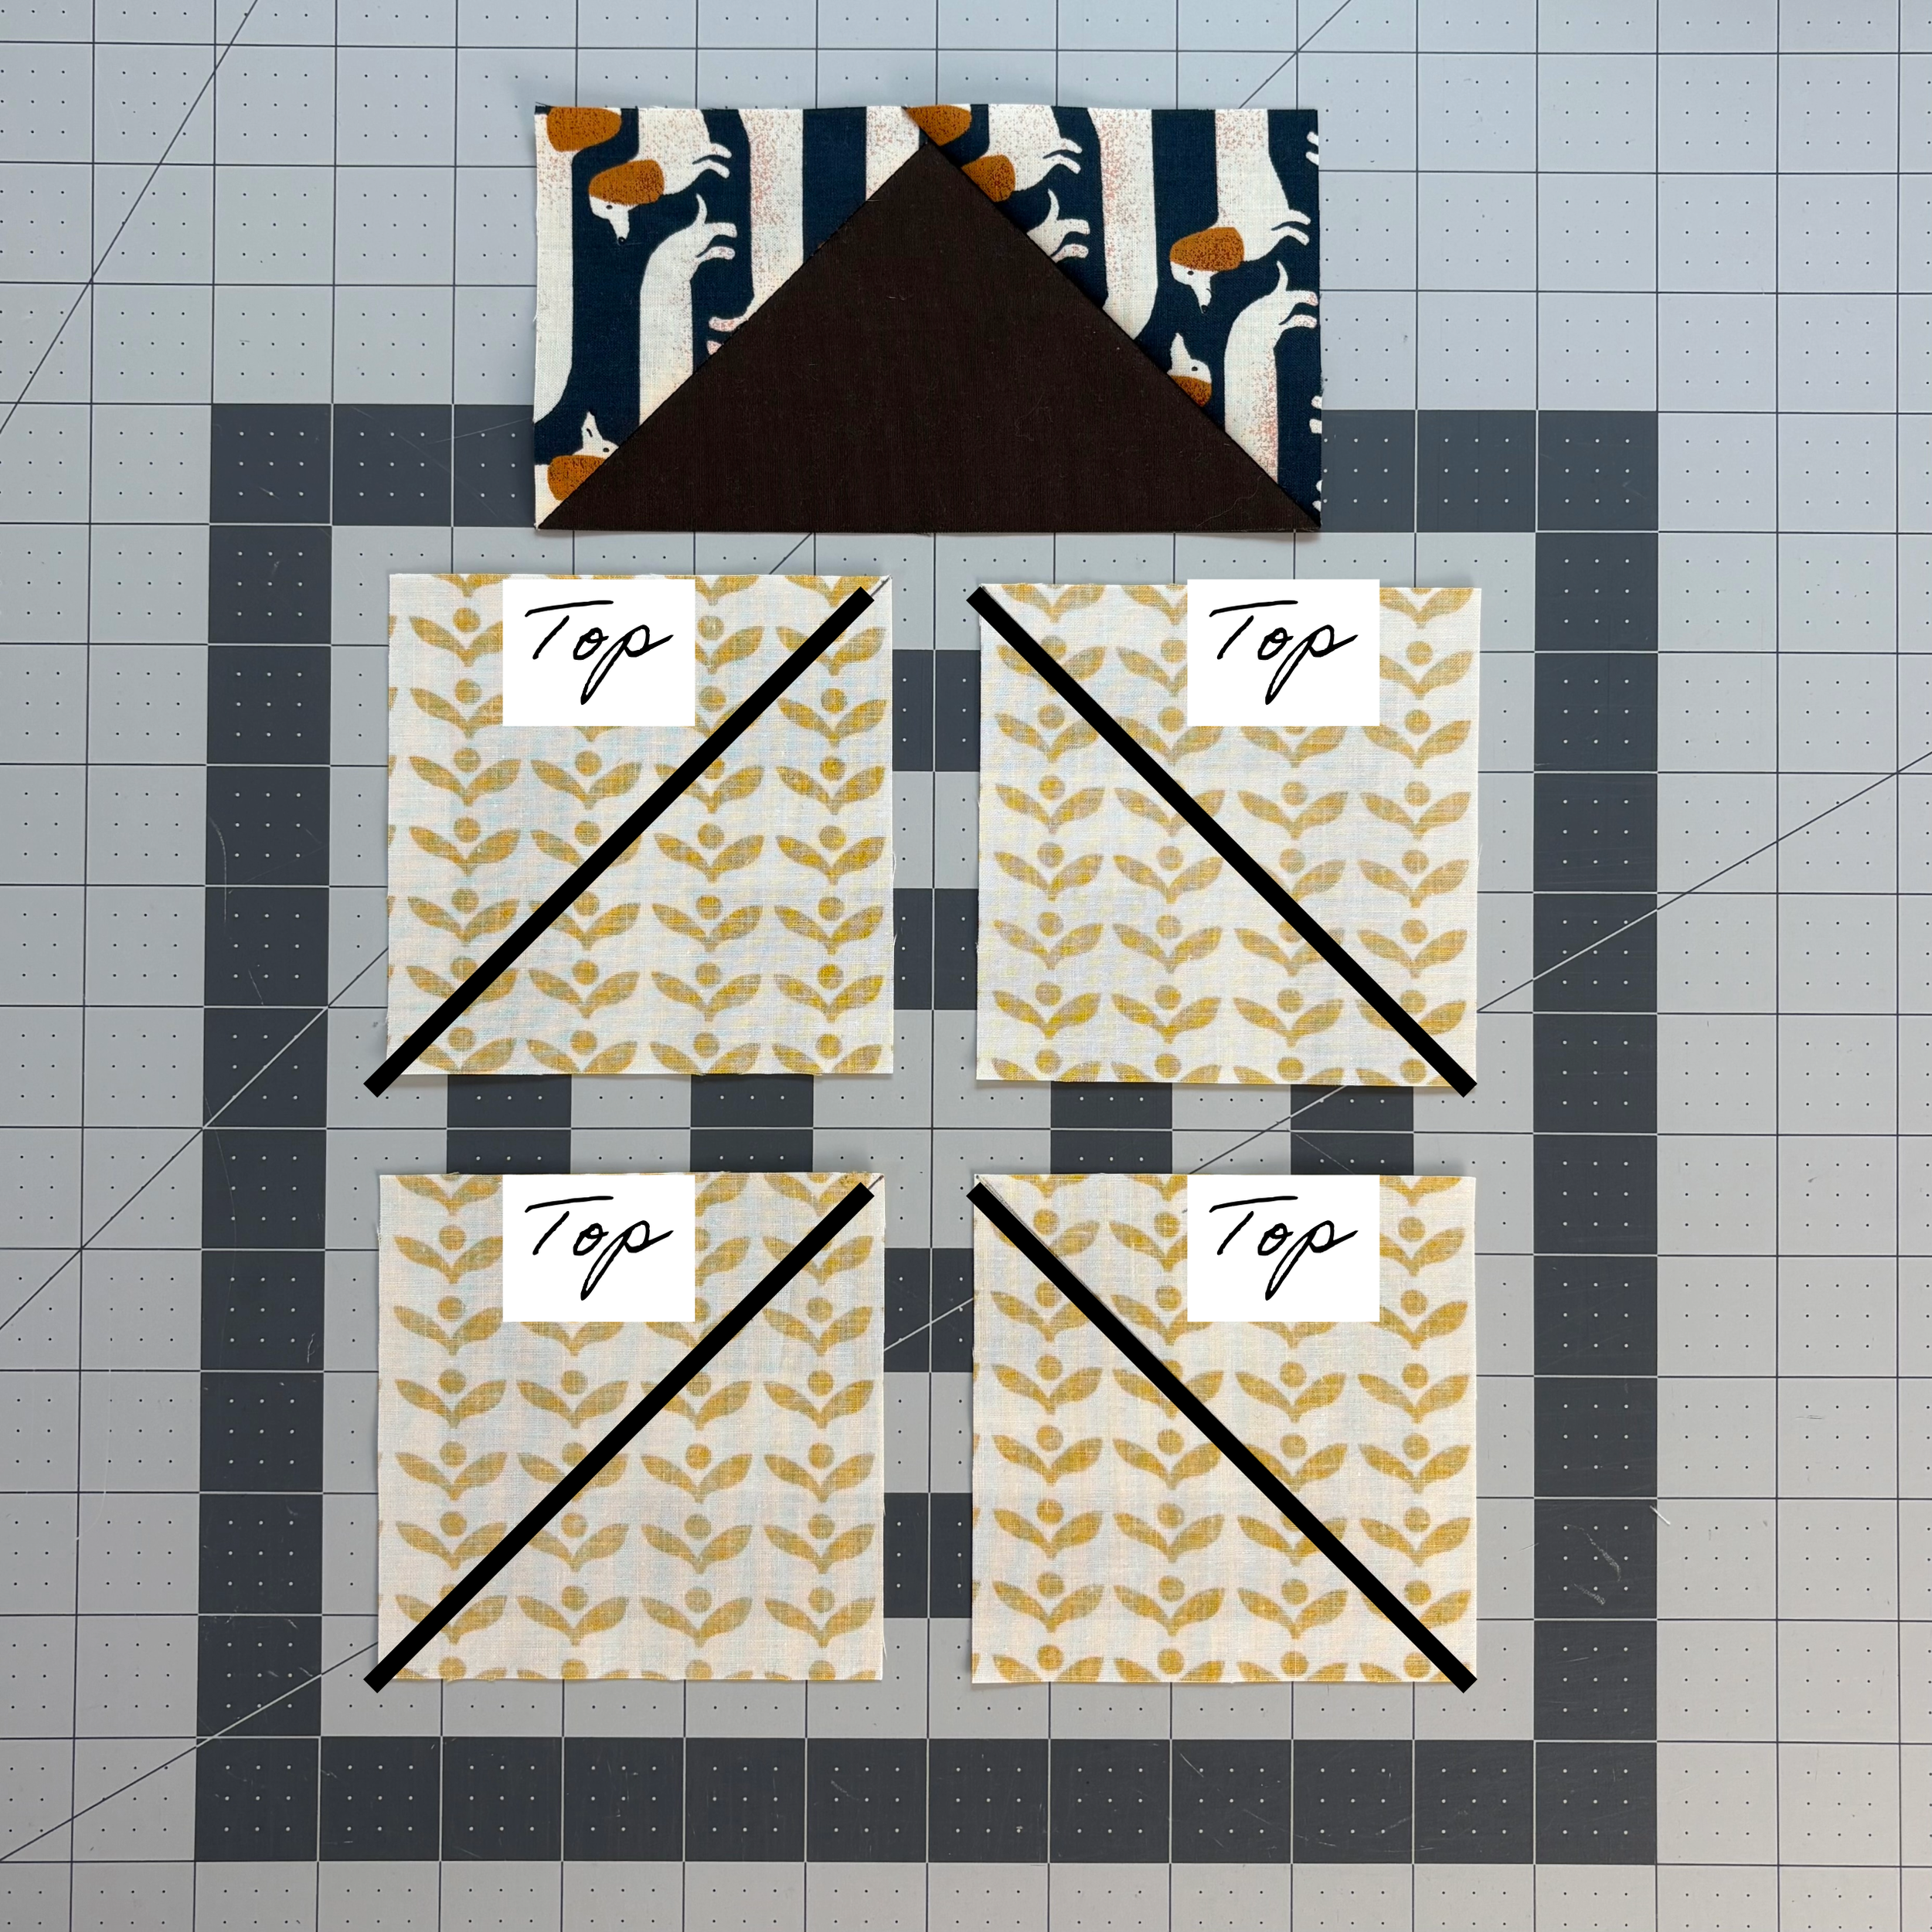
To start, we need to dissect the goose. Not actually, but we need to understand its anatomy. Different quilters have different names for these parts, but for the purposes of this blog post, we’re going to call the center triangle the goose, and the side triangles are the sky.
Now that we’re on the same page for the verbiage, let’s review what we’ll cover below:
Two-way directional prints in the sky (e.g. stripes)
One-way directional prints in the sky (e.g. landscapes)
Need a refresher on identifying two-way and one-way directional prints? Check out this blog post.
The units we’re about to make are perfect for quilt blocks like a sawtooth star. In a sawtooth star, some FG are used horizontally and some are used vertically, which means we need to make FG where the prints run both horizontally and vertically. If you are making a quilt that orients all the FG only horizontally or only vertically, the following methods may not be best for your project. Below, I assume some familiarity with the 4-at-a-time FG method. Follow along with me by collecting the following units:
Goose: one 7½" square
Sky: four 4⅛" squares
Two-way directional prints
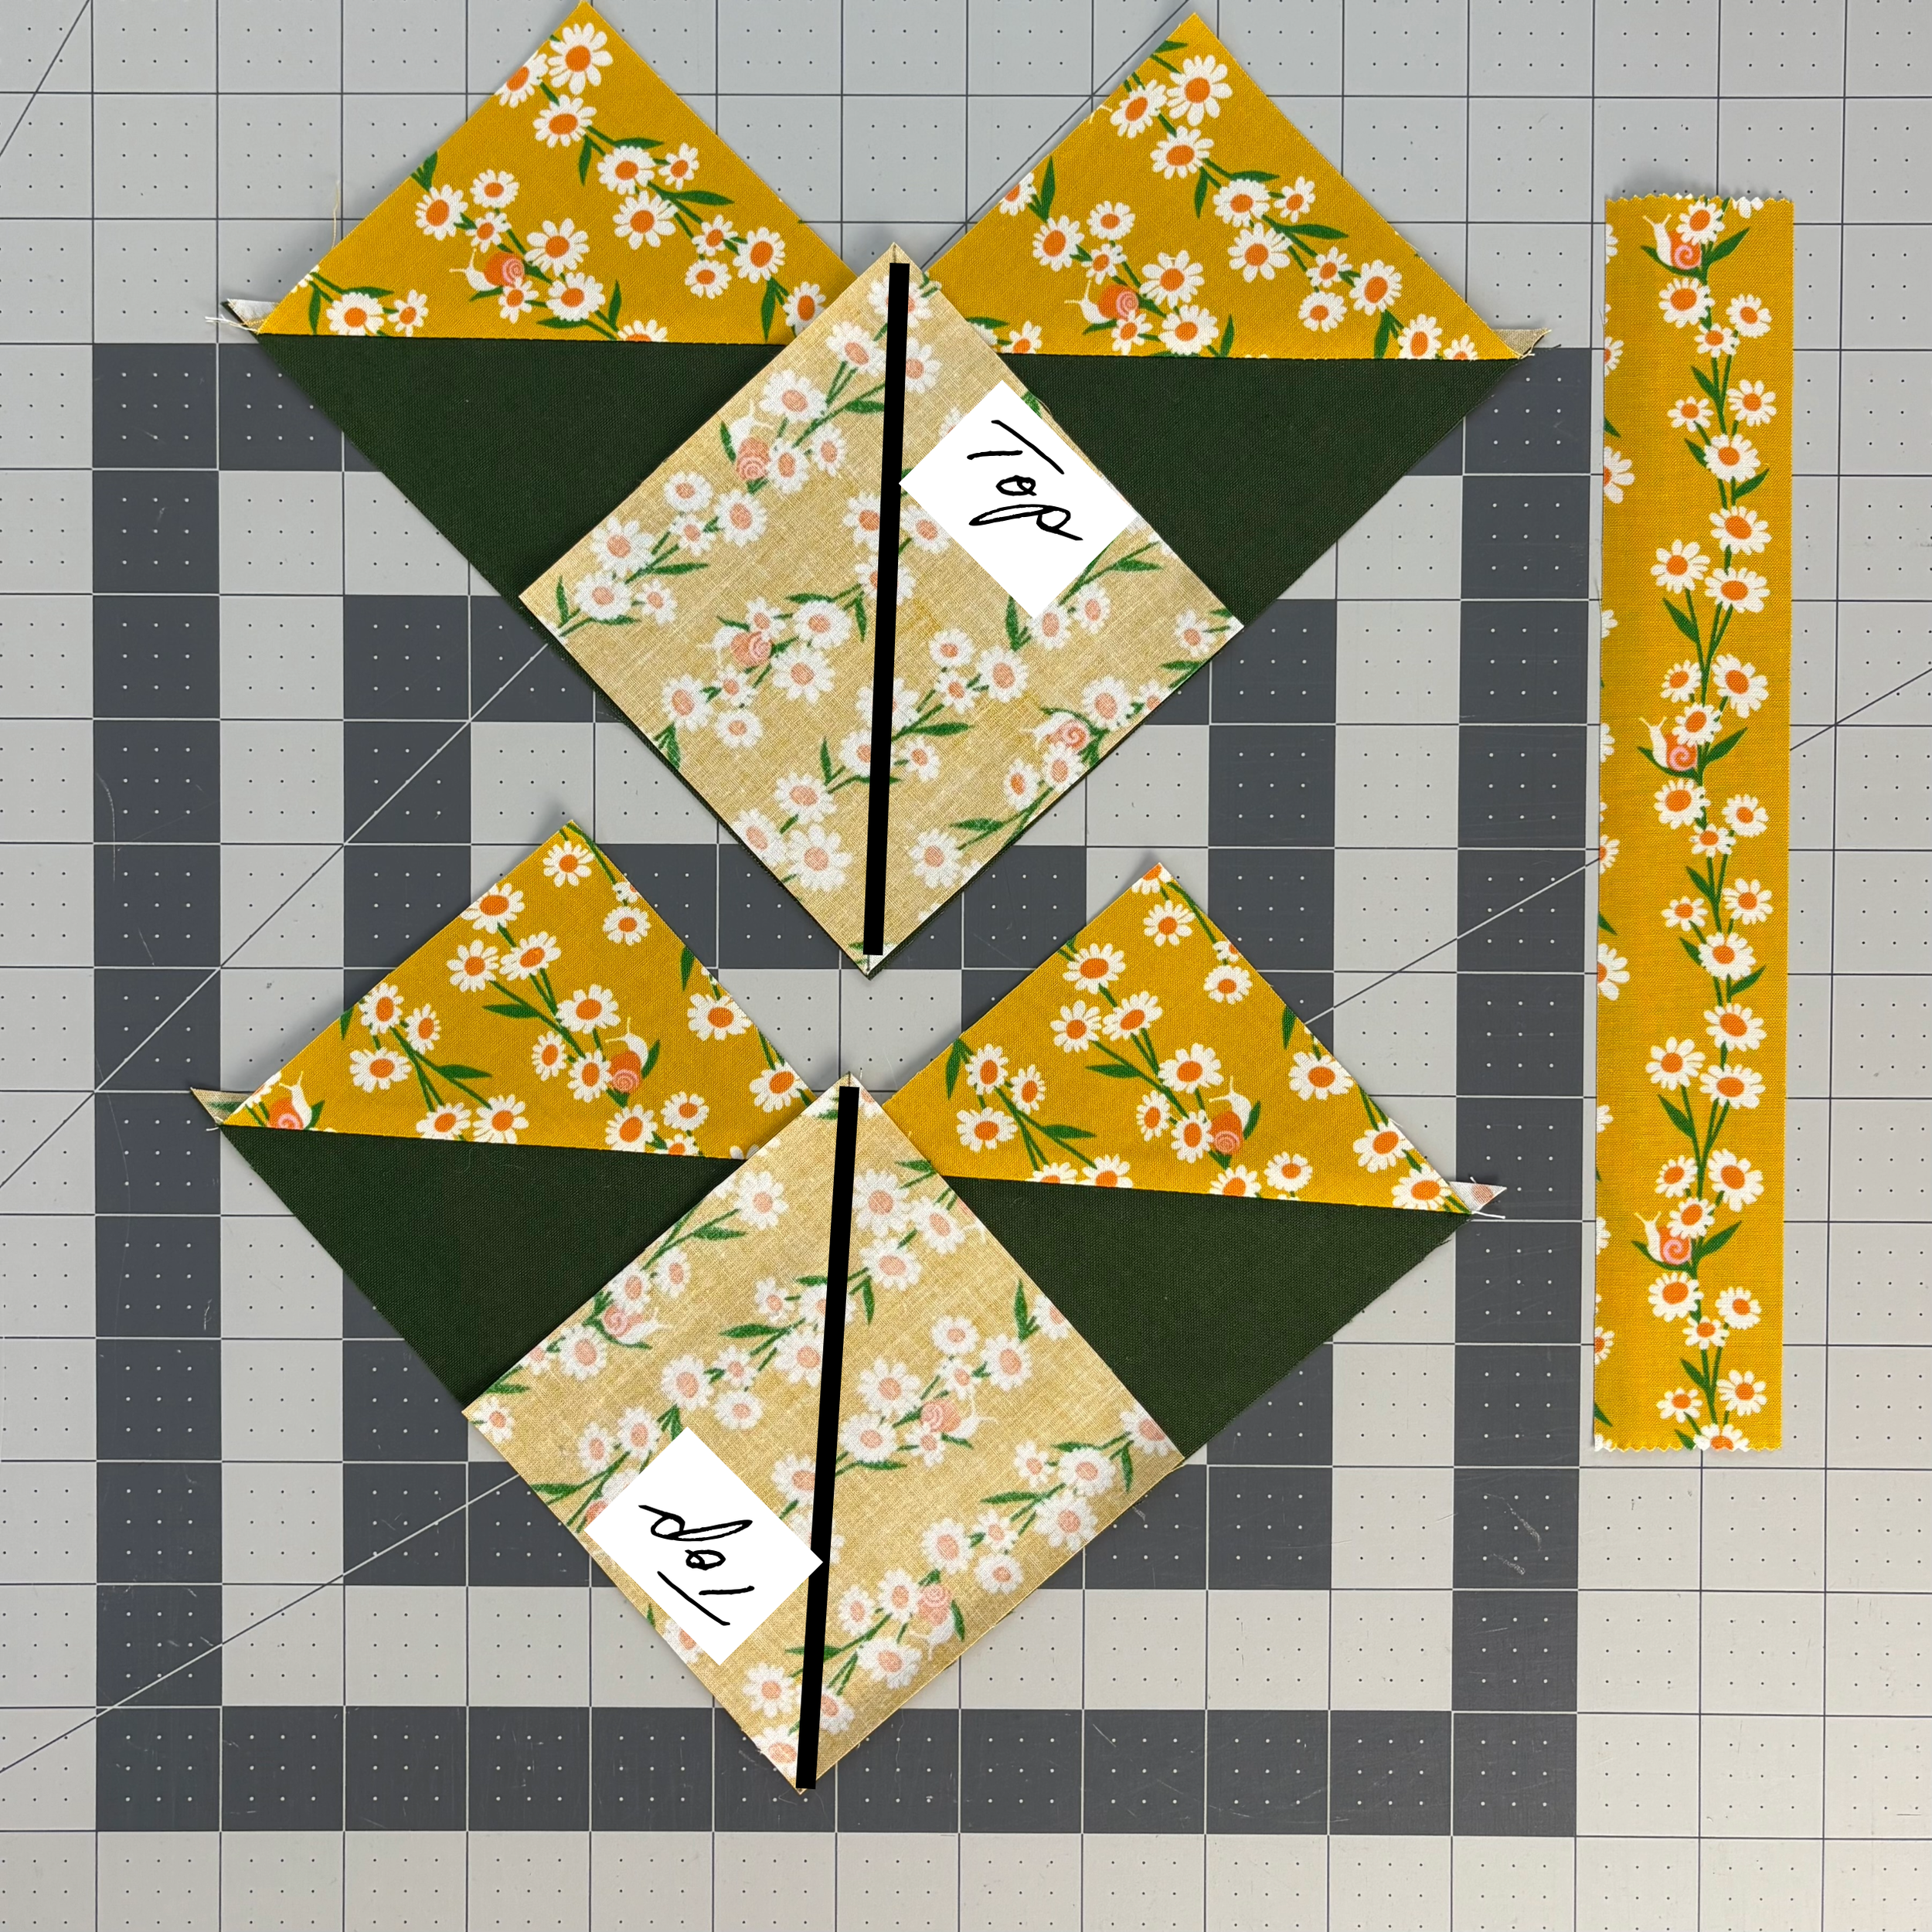
1) I like to start by marking the top of my sky squares - because this is a two-way directional print, “Top” could be the top or the bottom. (All marks are made on the wrong side of the units). Draw a diagonal line from the bottom left to the top right on half the sky squares. On the remaining half, draw a diagonal line from the bottom right to the top left. I remember this by picturing that the drawn lines echo the 45 degree lines of the final FG.
At this point, you could mark the ¼" lines on both sides that we’ll eventually sew down, but that’s personal preference.

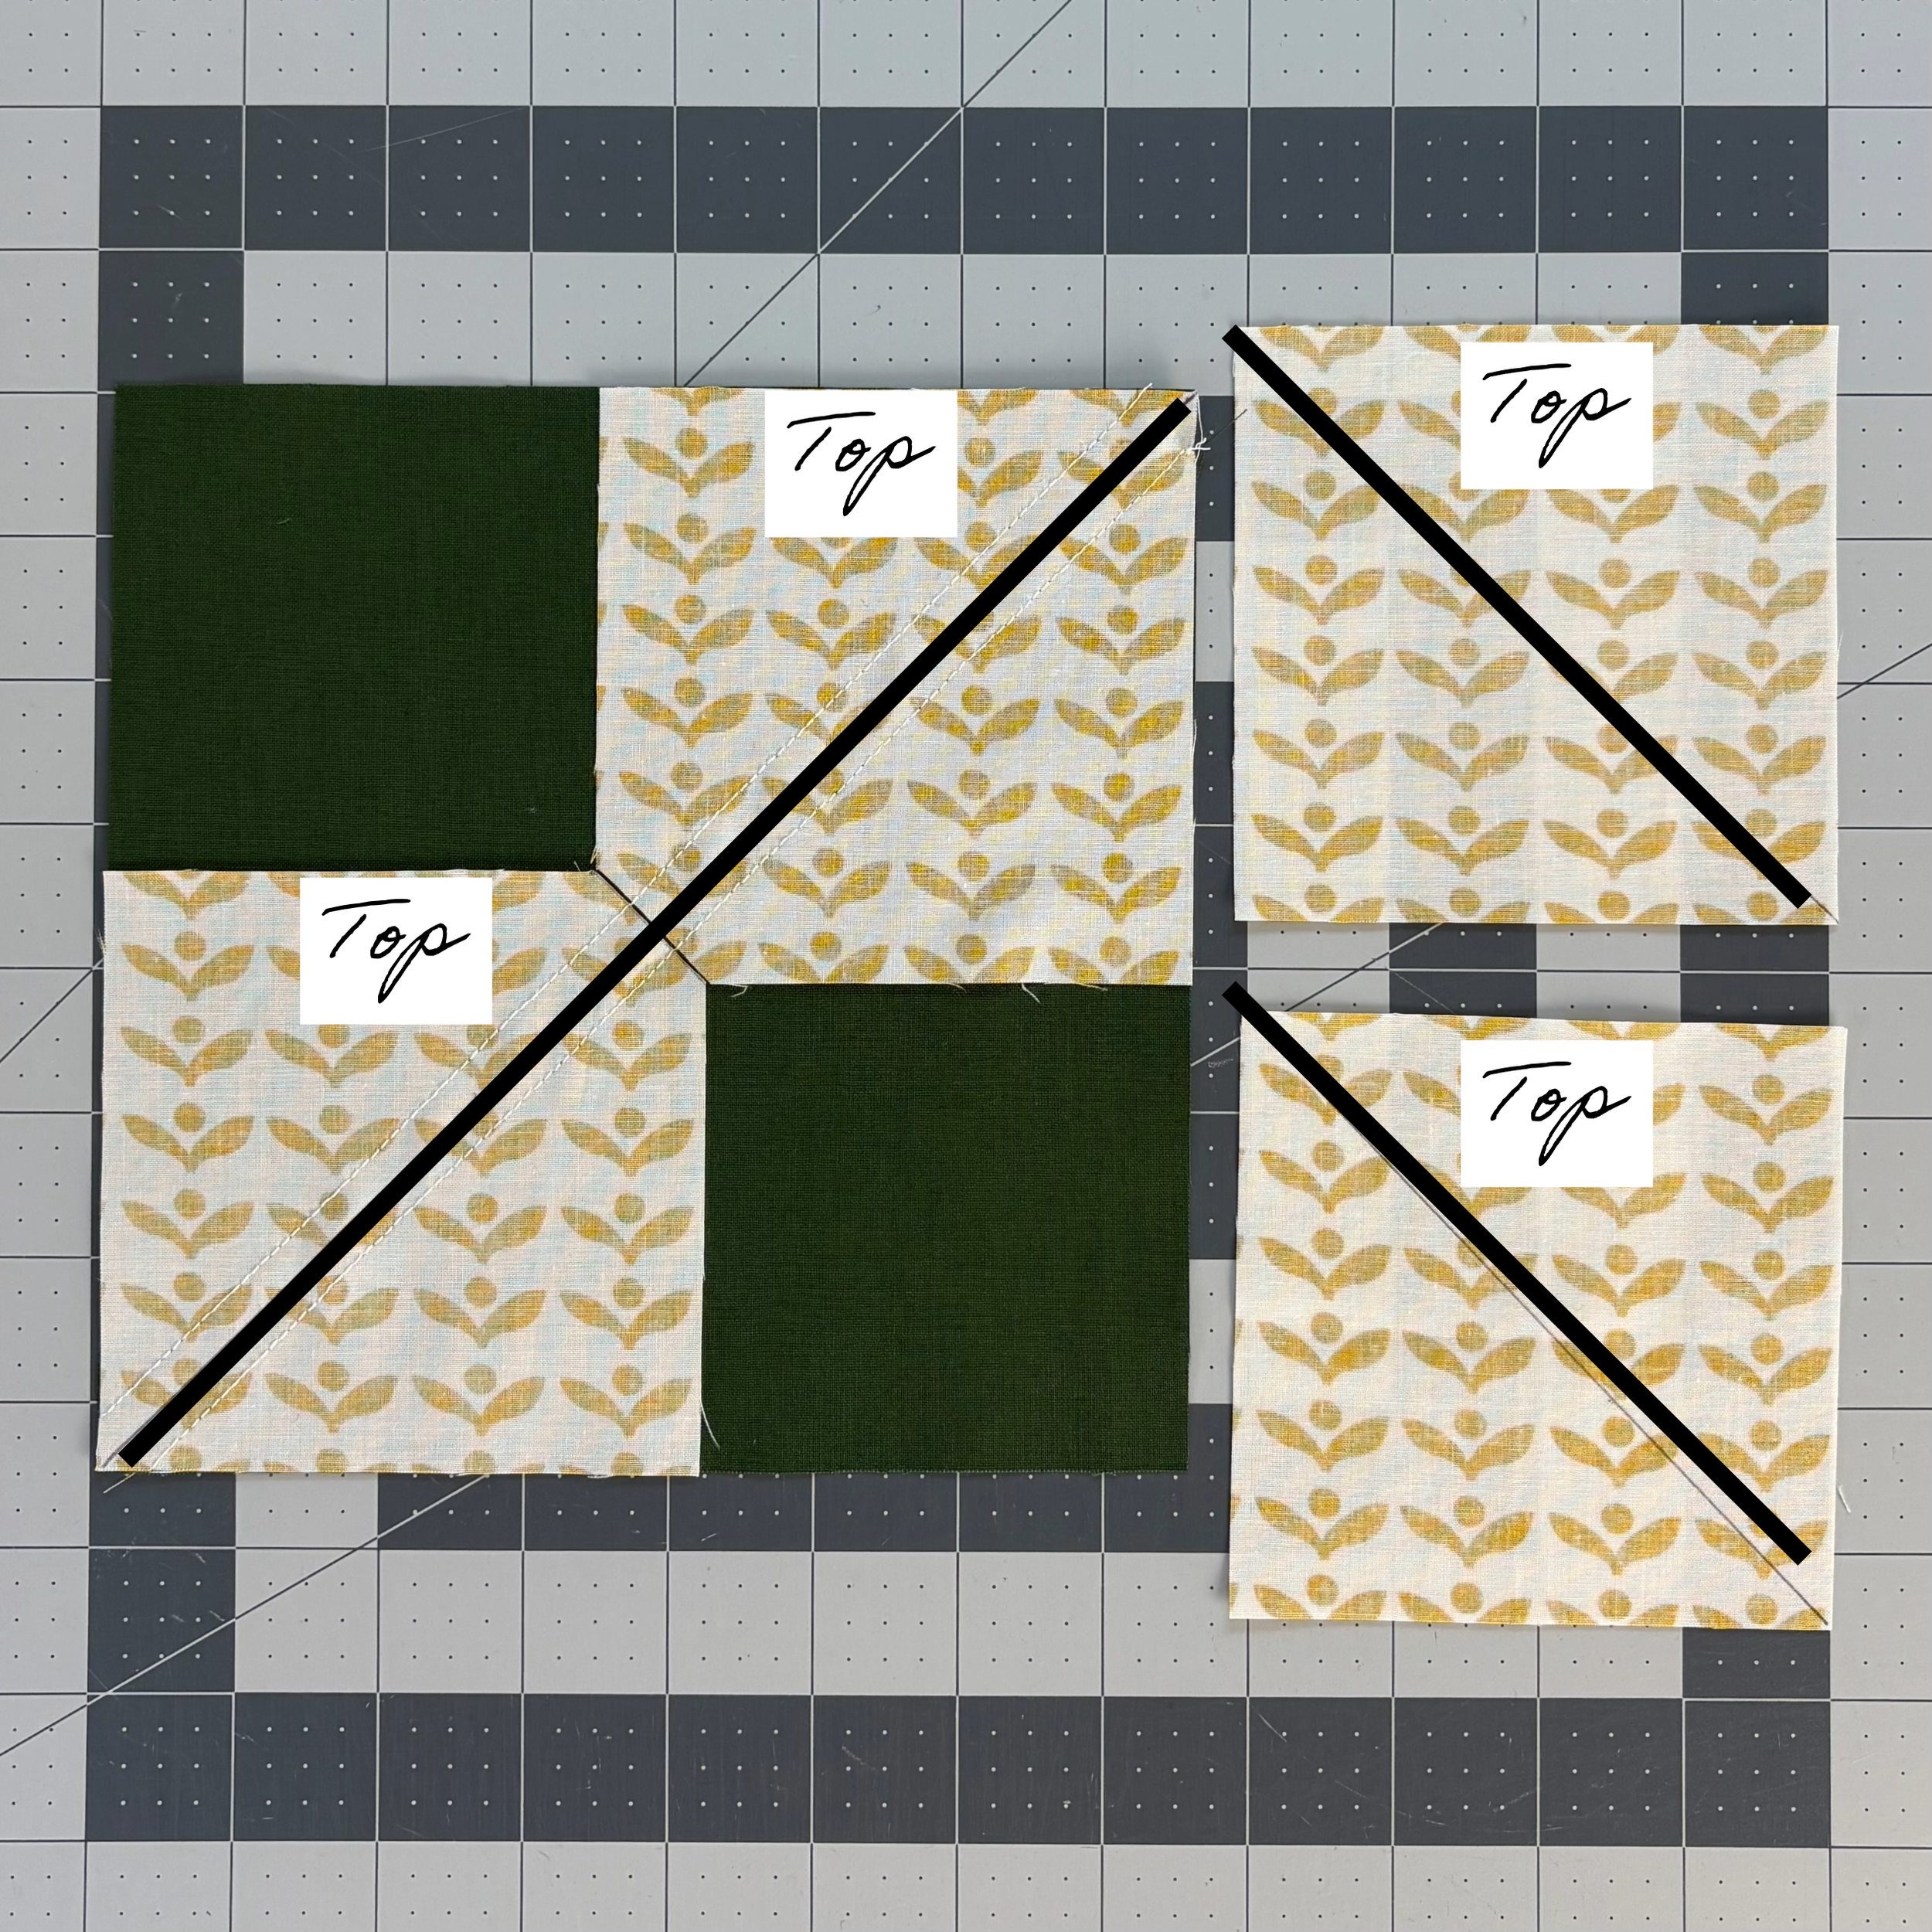
2) Using the sky squares on the left of the above picture (the sky squares with the lines drawn from bottom left to top right), we’ll put them in opposite corners of the goose 7½" square. Orient the sky squares so the Top is to the left of the drawn line. You’ll notice I cut off the corners of the sky squares where they overlap. I learned this tip from The Crafty Quilter; see the original blog post to learn more about how this reduces bulk in FG.

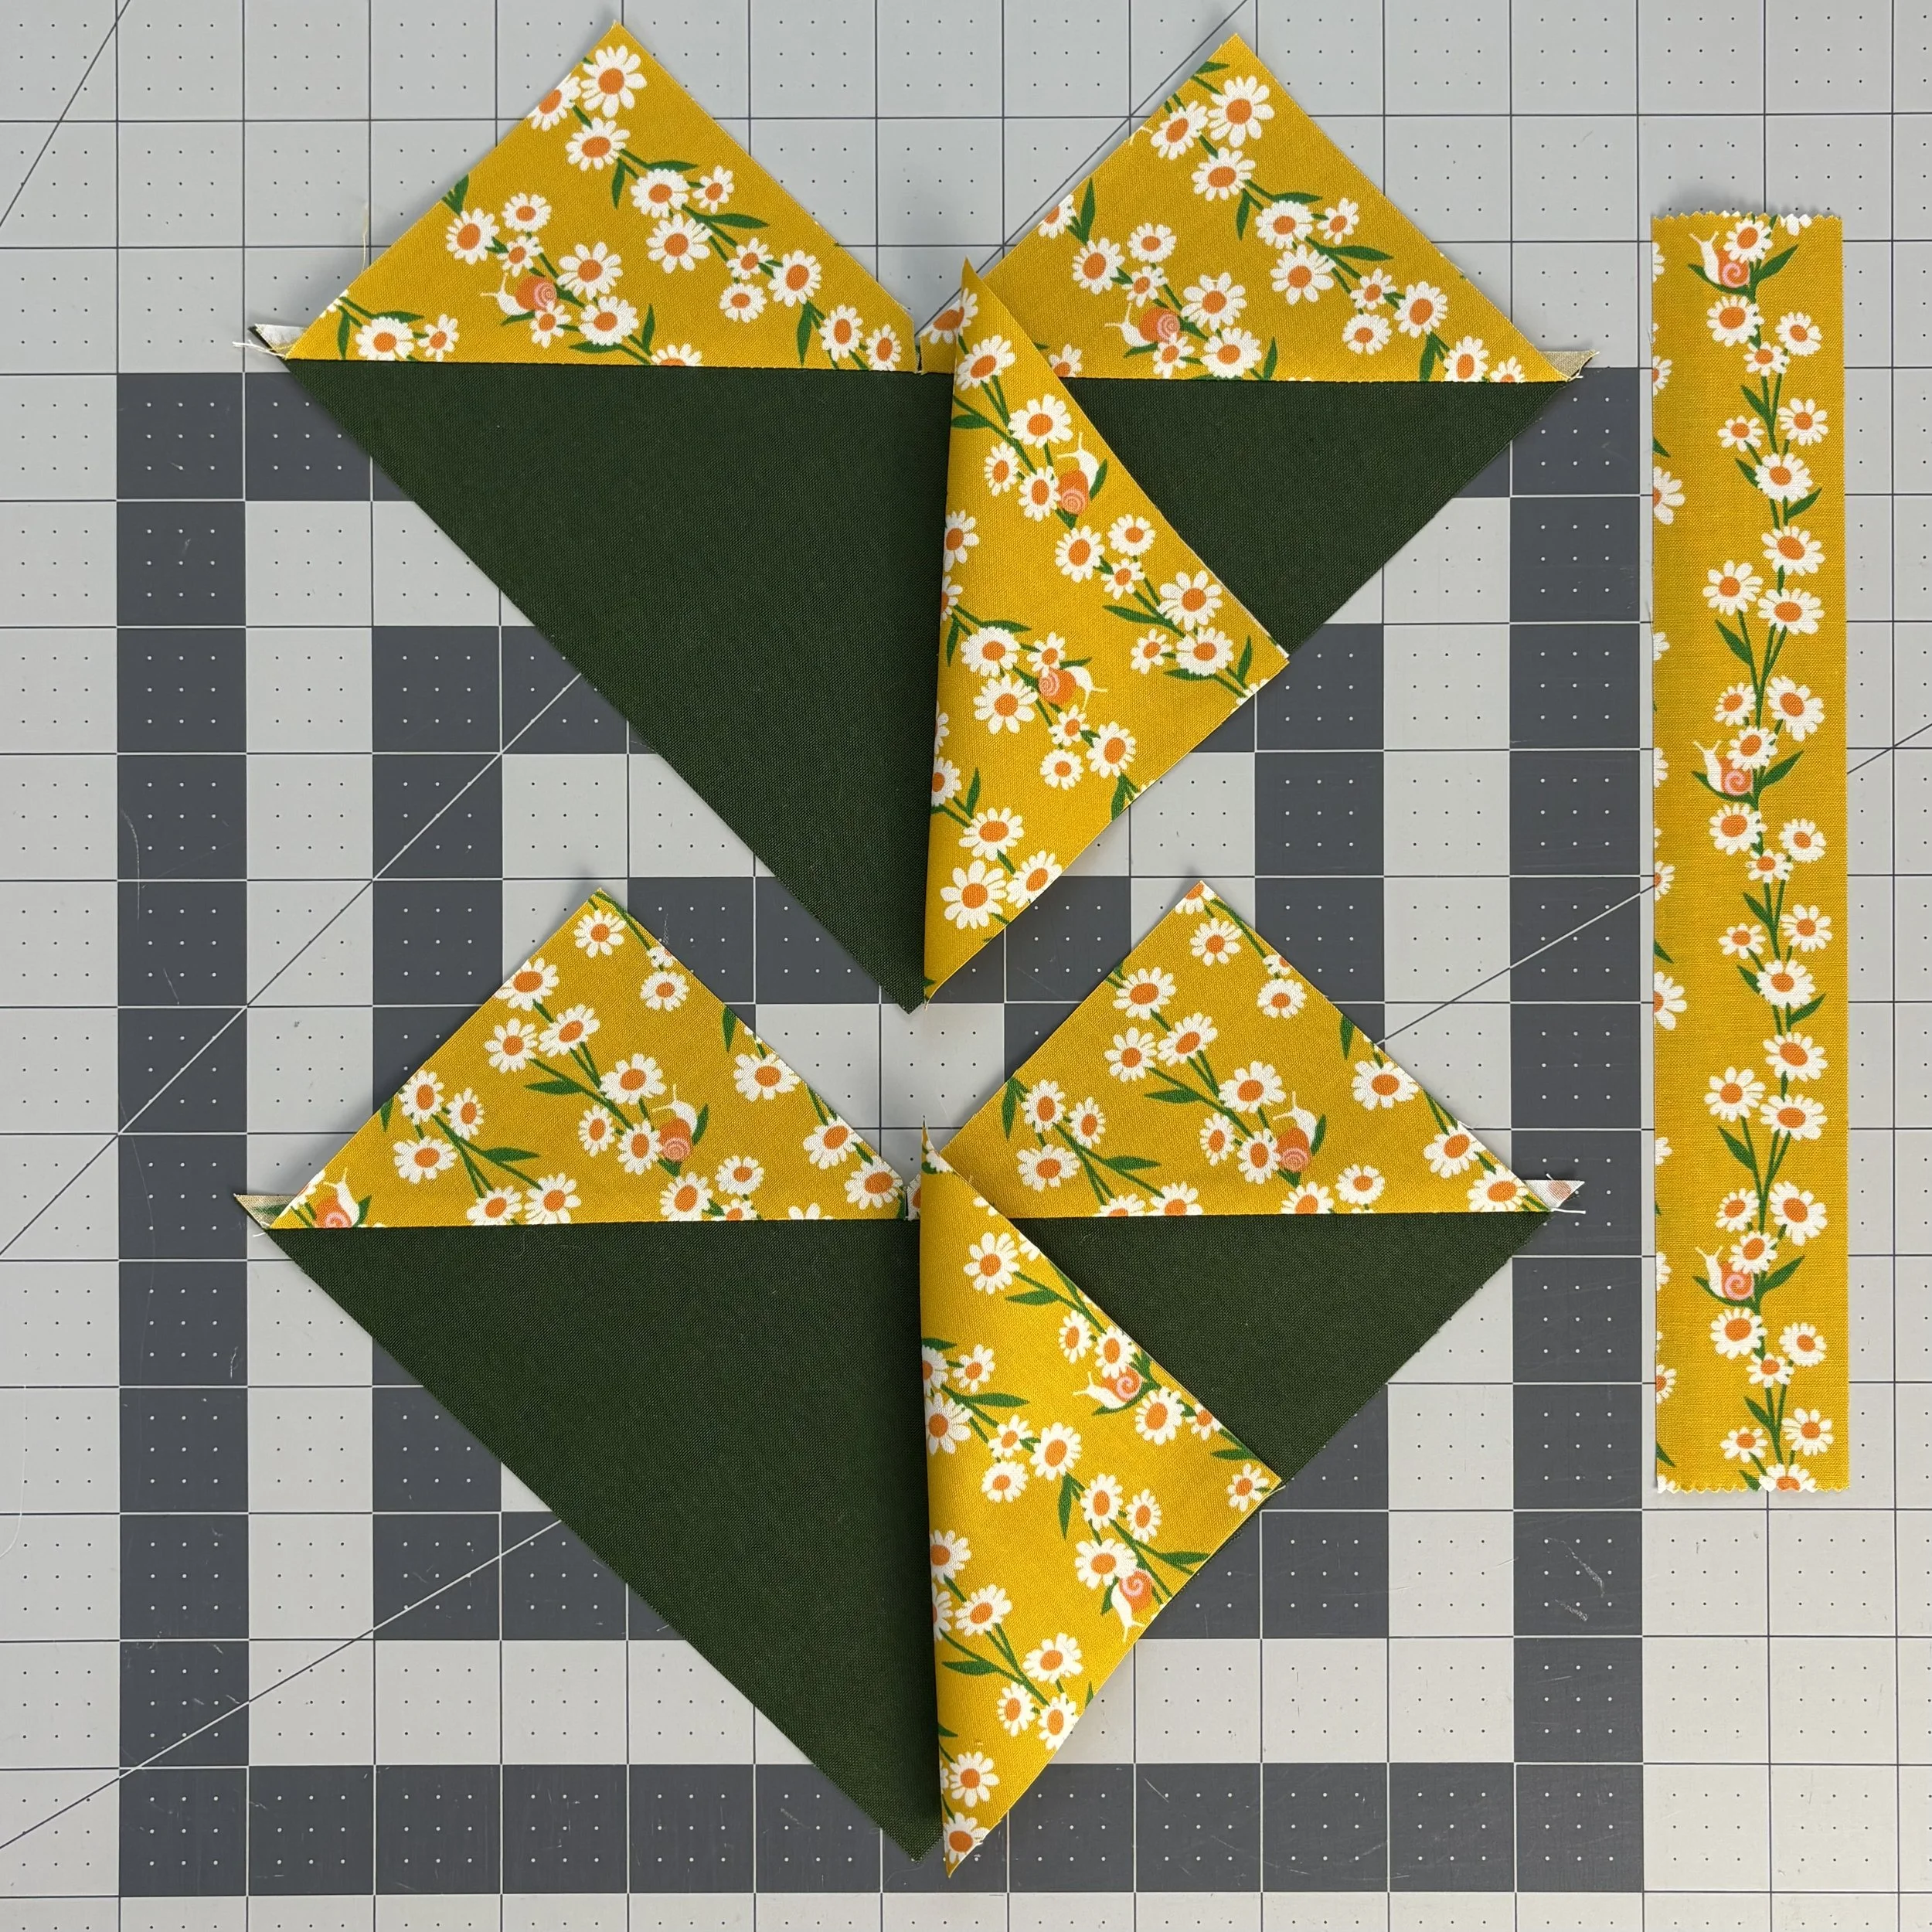
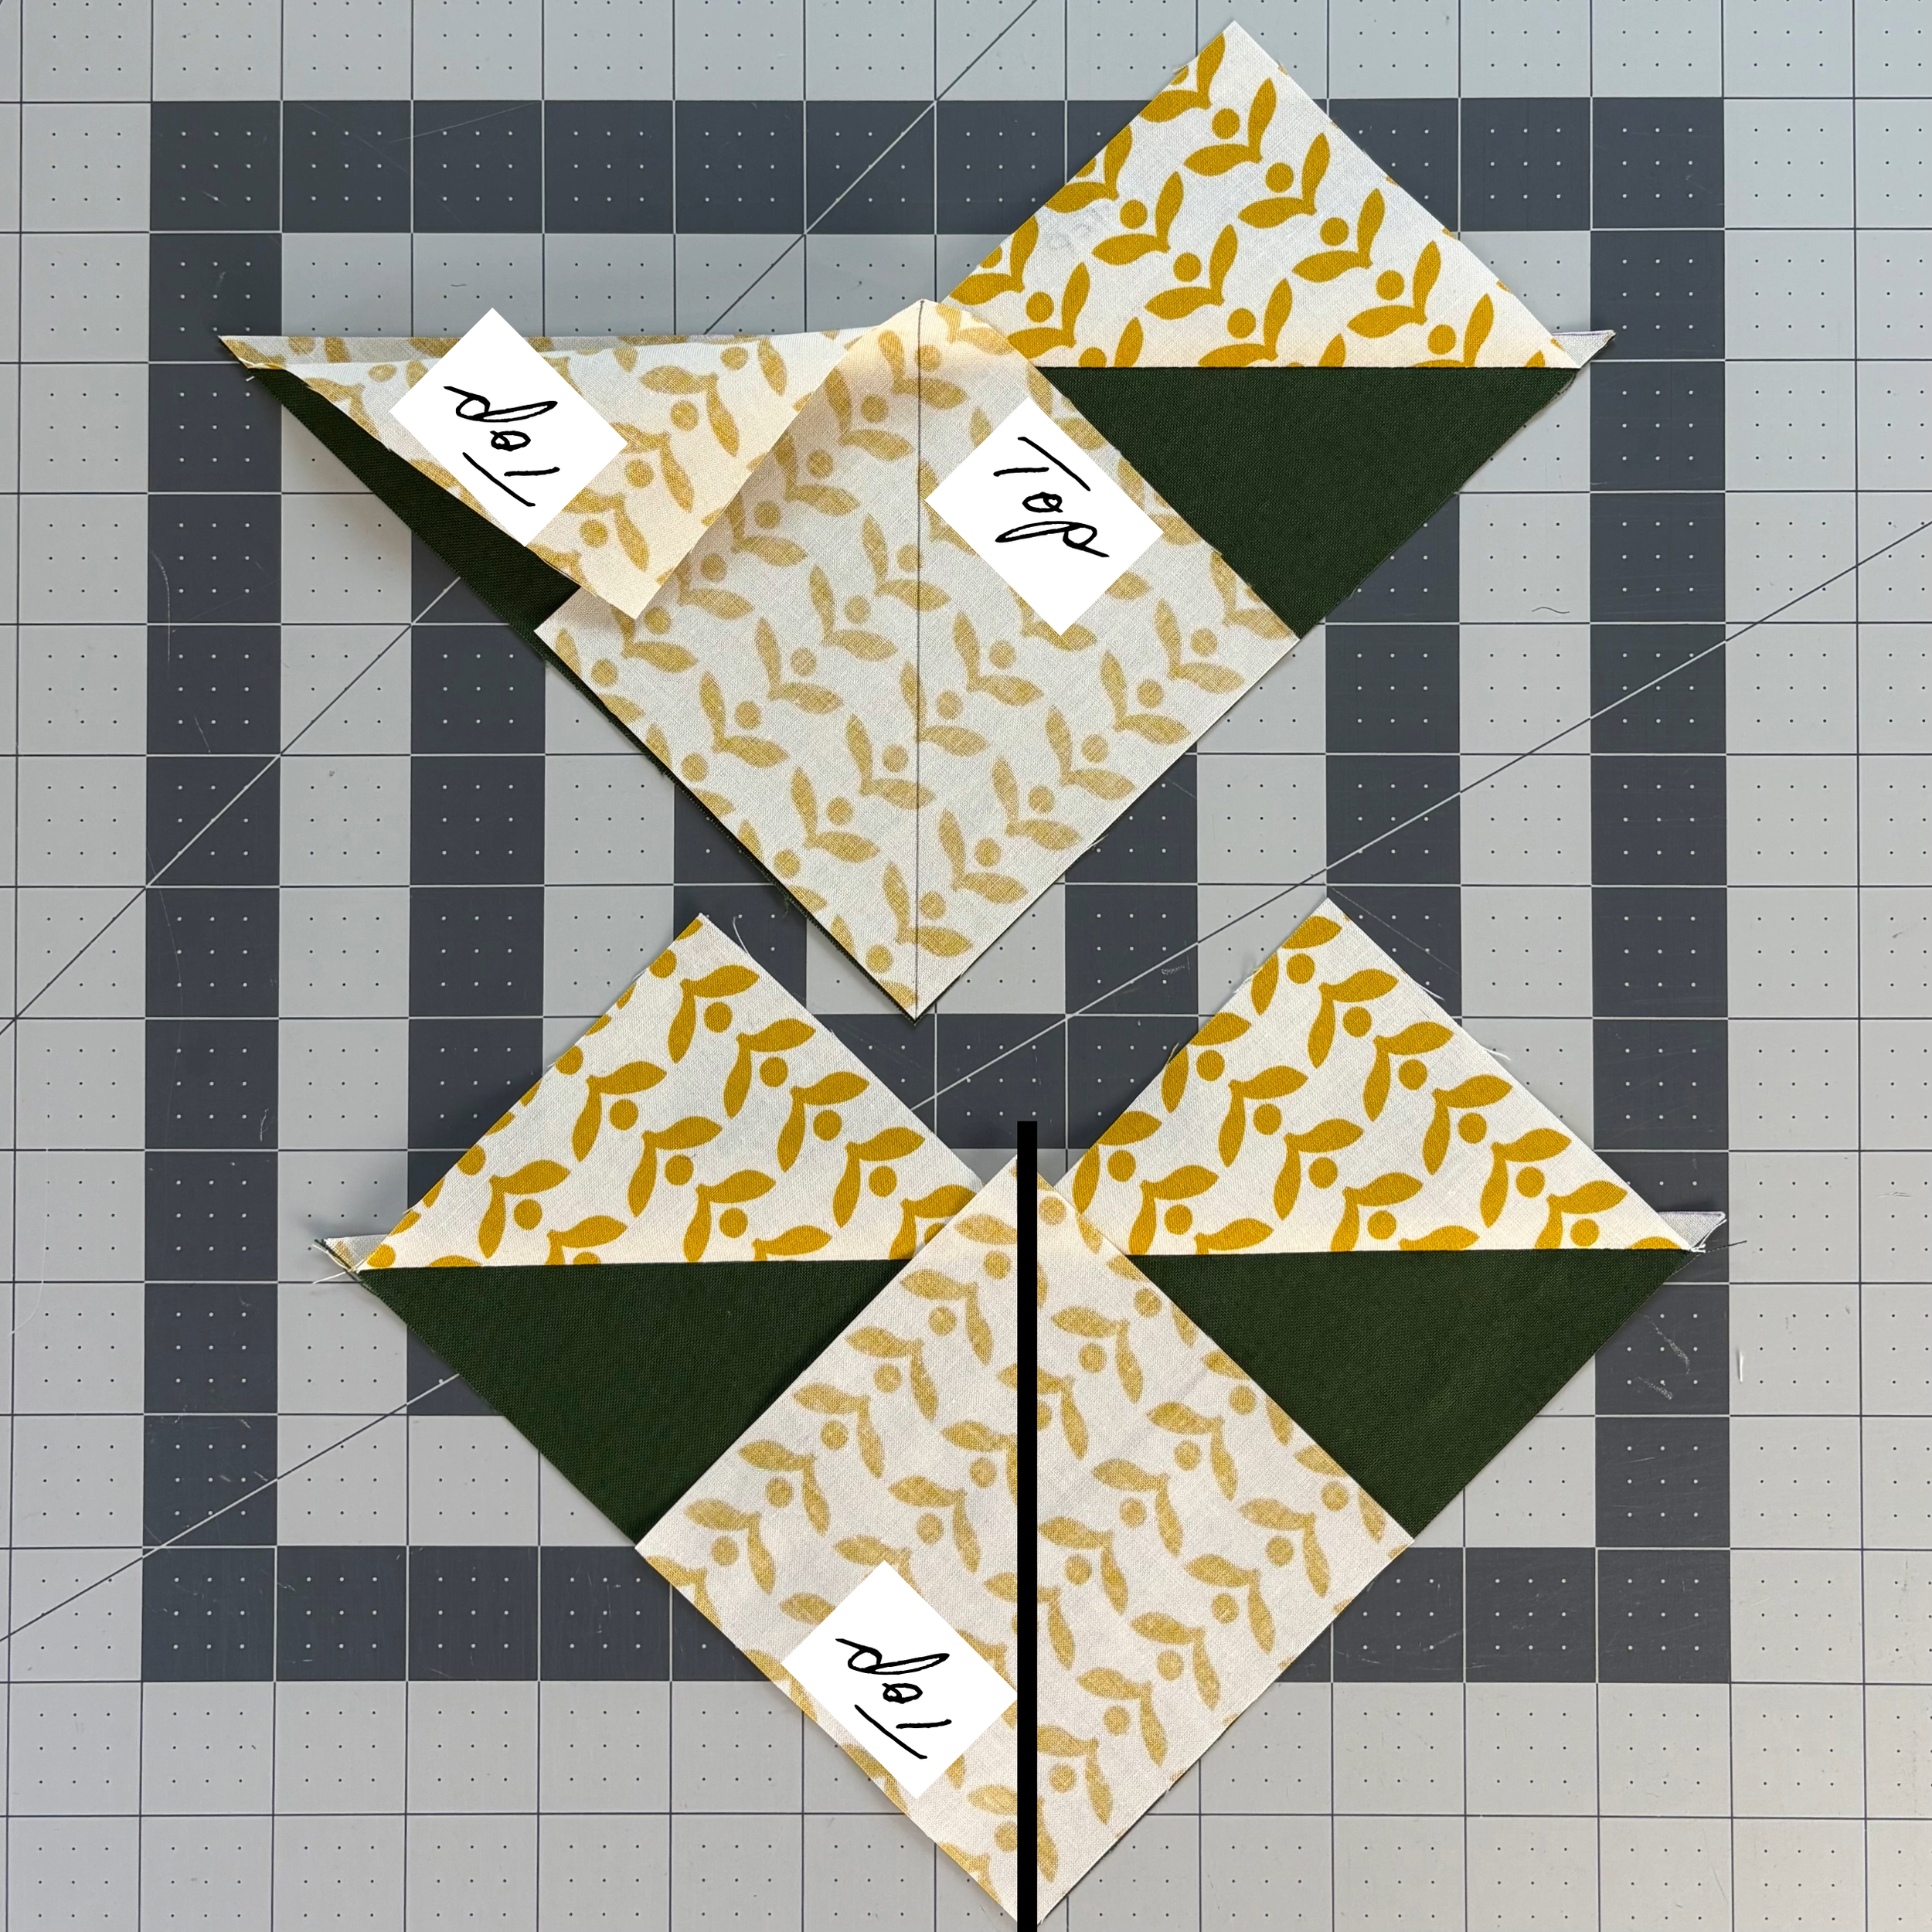
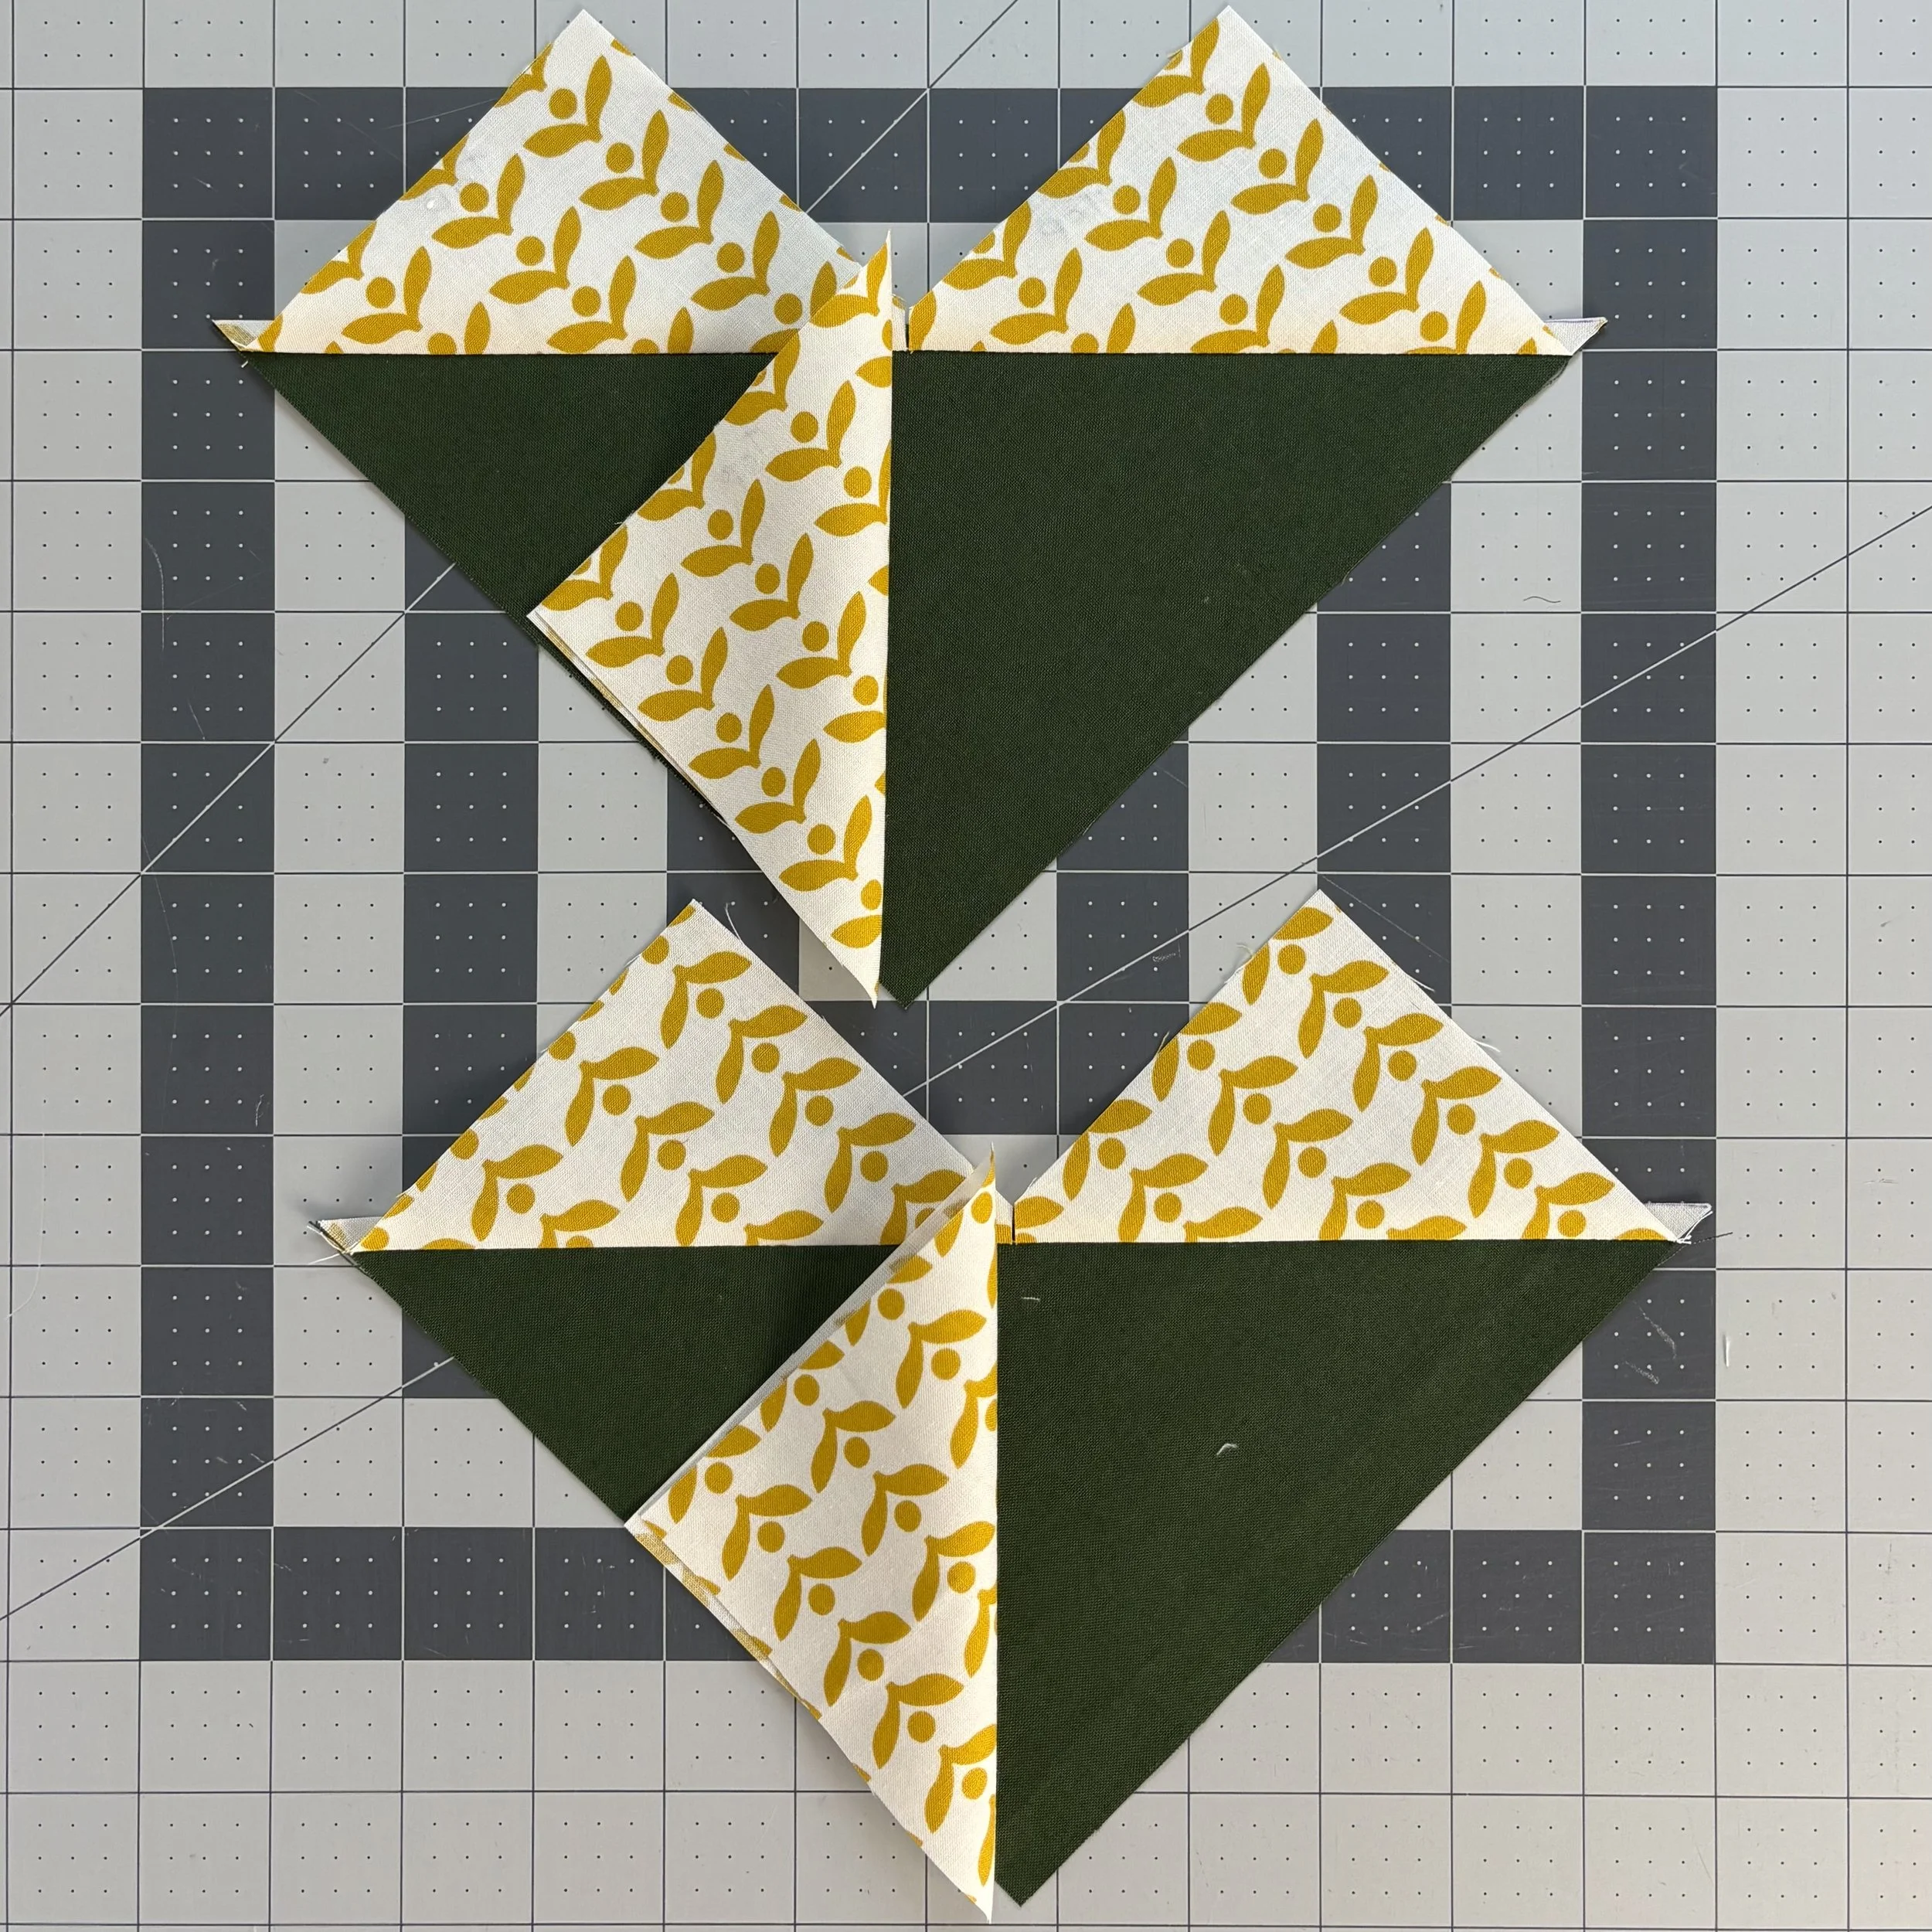
3) Once you’ve sewn ¼" away from both sides of the drawn line, cut down the drawn line and pressed your units, we’ll arrange the third and fourth sky squares. There’s almost nothing to think about in this step. Place each sky square so that the drawn line runs from the unsewn goose corner to the corner of the sewn sky squares. That’s it. But keep reading and I’ll explain the logic behind this step.
You’ll see in the first picture below, I’ve oriented the third and fourth sky square differently. In the top heart shaped unit, the Top is at the right of the sky square. In the bottom heart shaped unit, the Top is at the bottom left. Because this is a two-way directional fabric, it doesn’t matter which way the Top faces, as long as the drawn line is oriented correctly. We can check our work by flipping back the squares and previewing the orientation of the print.
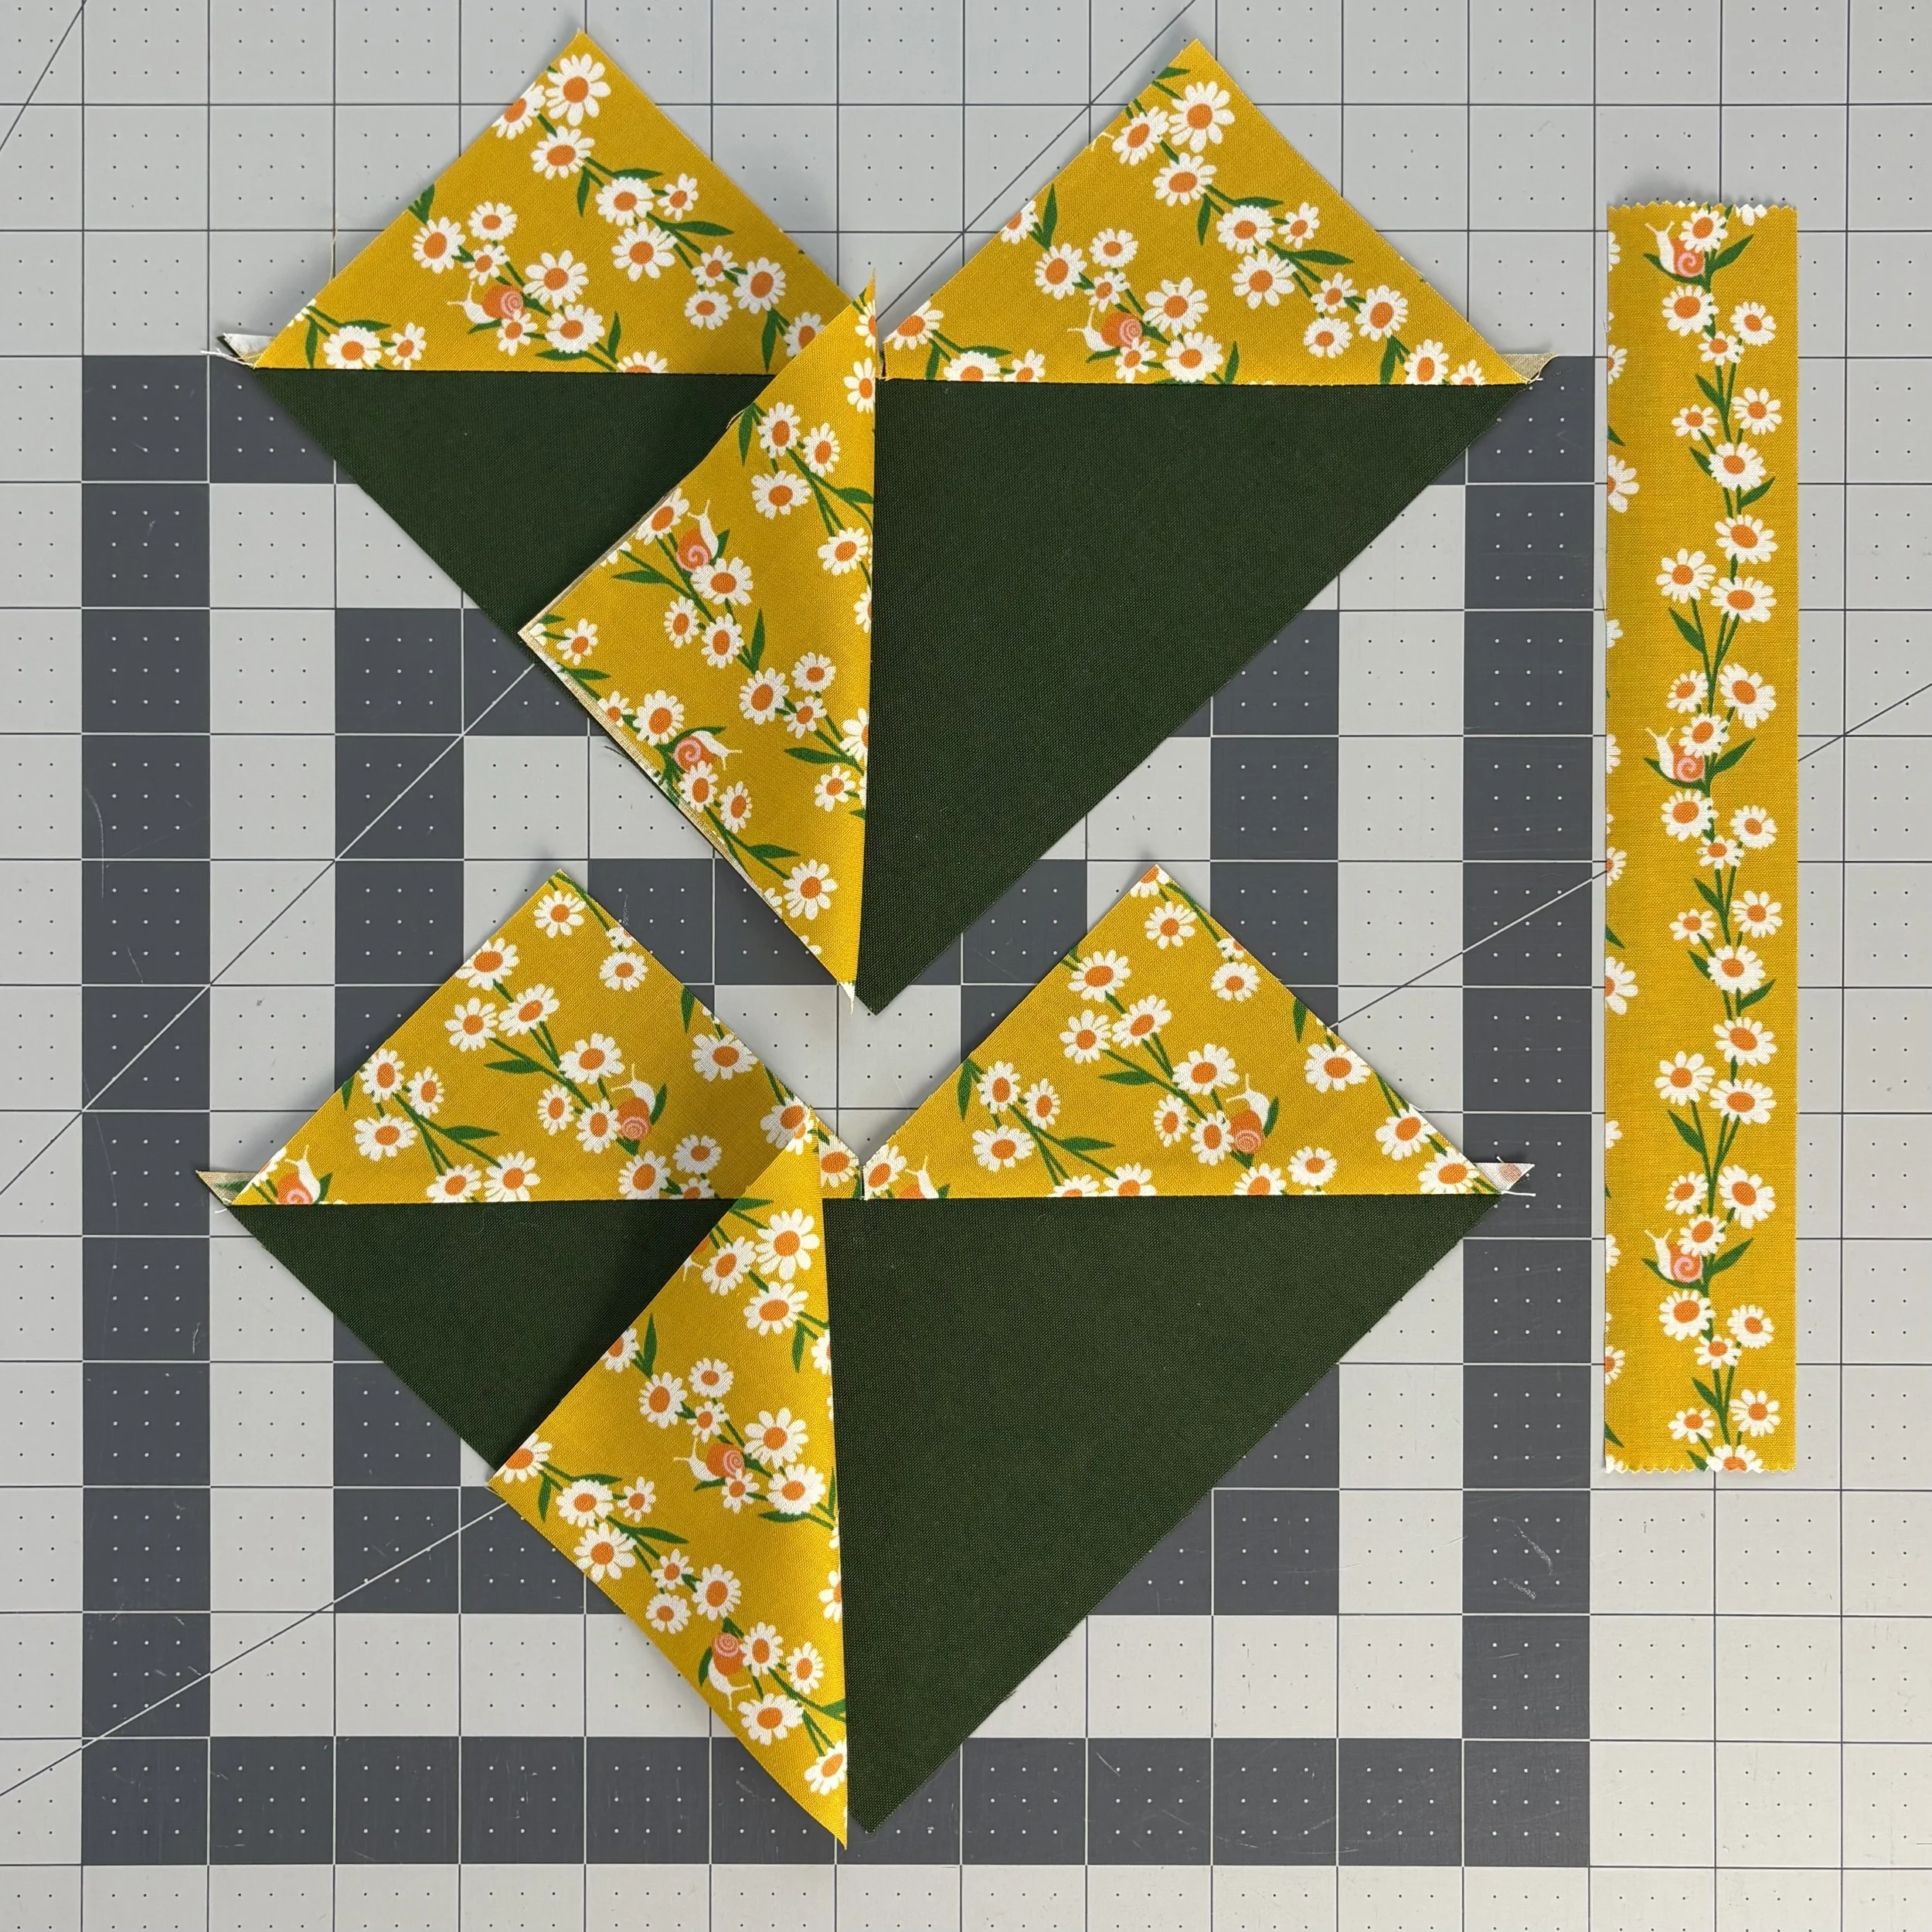
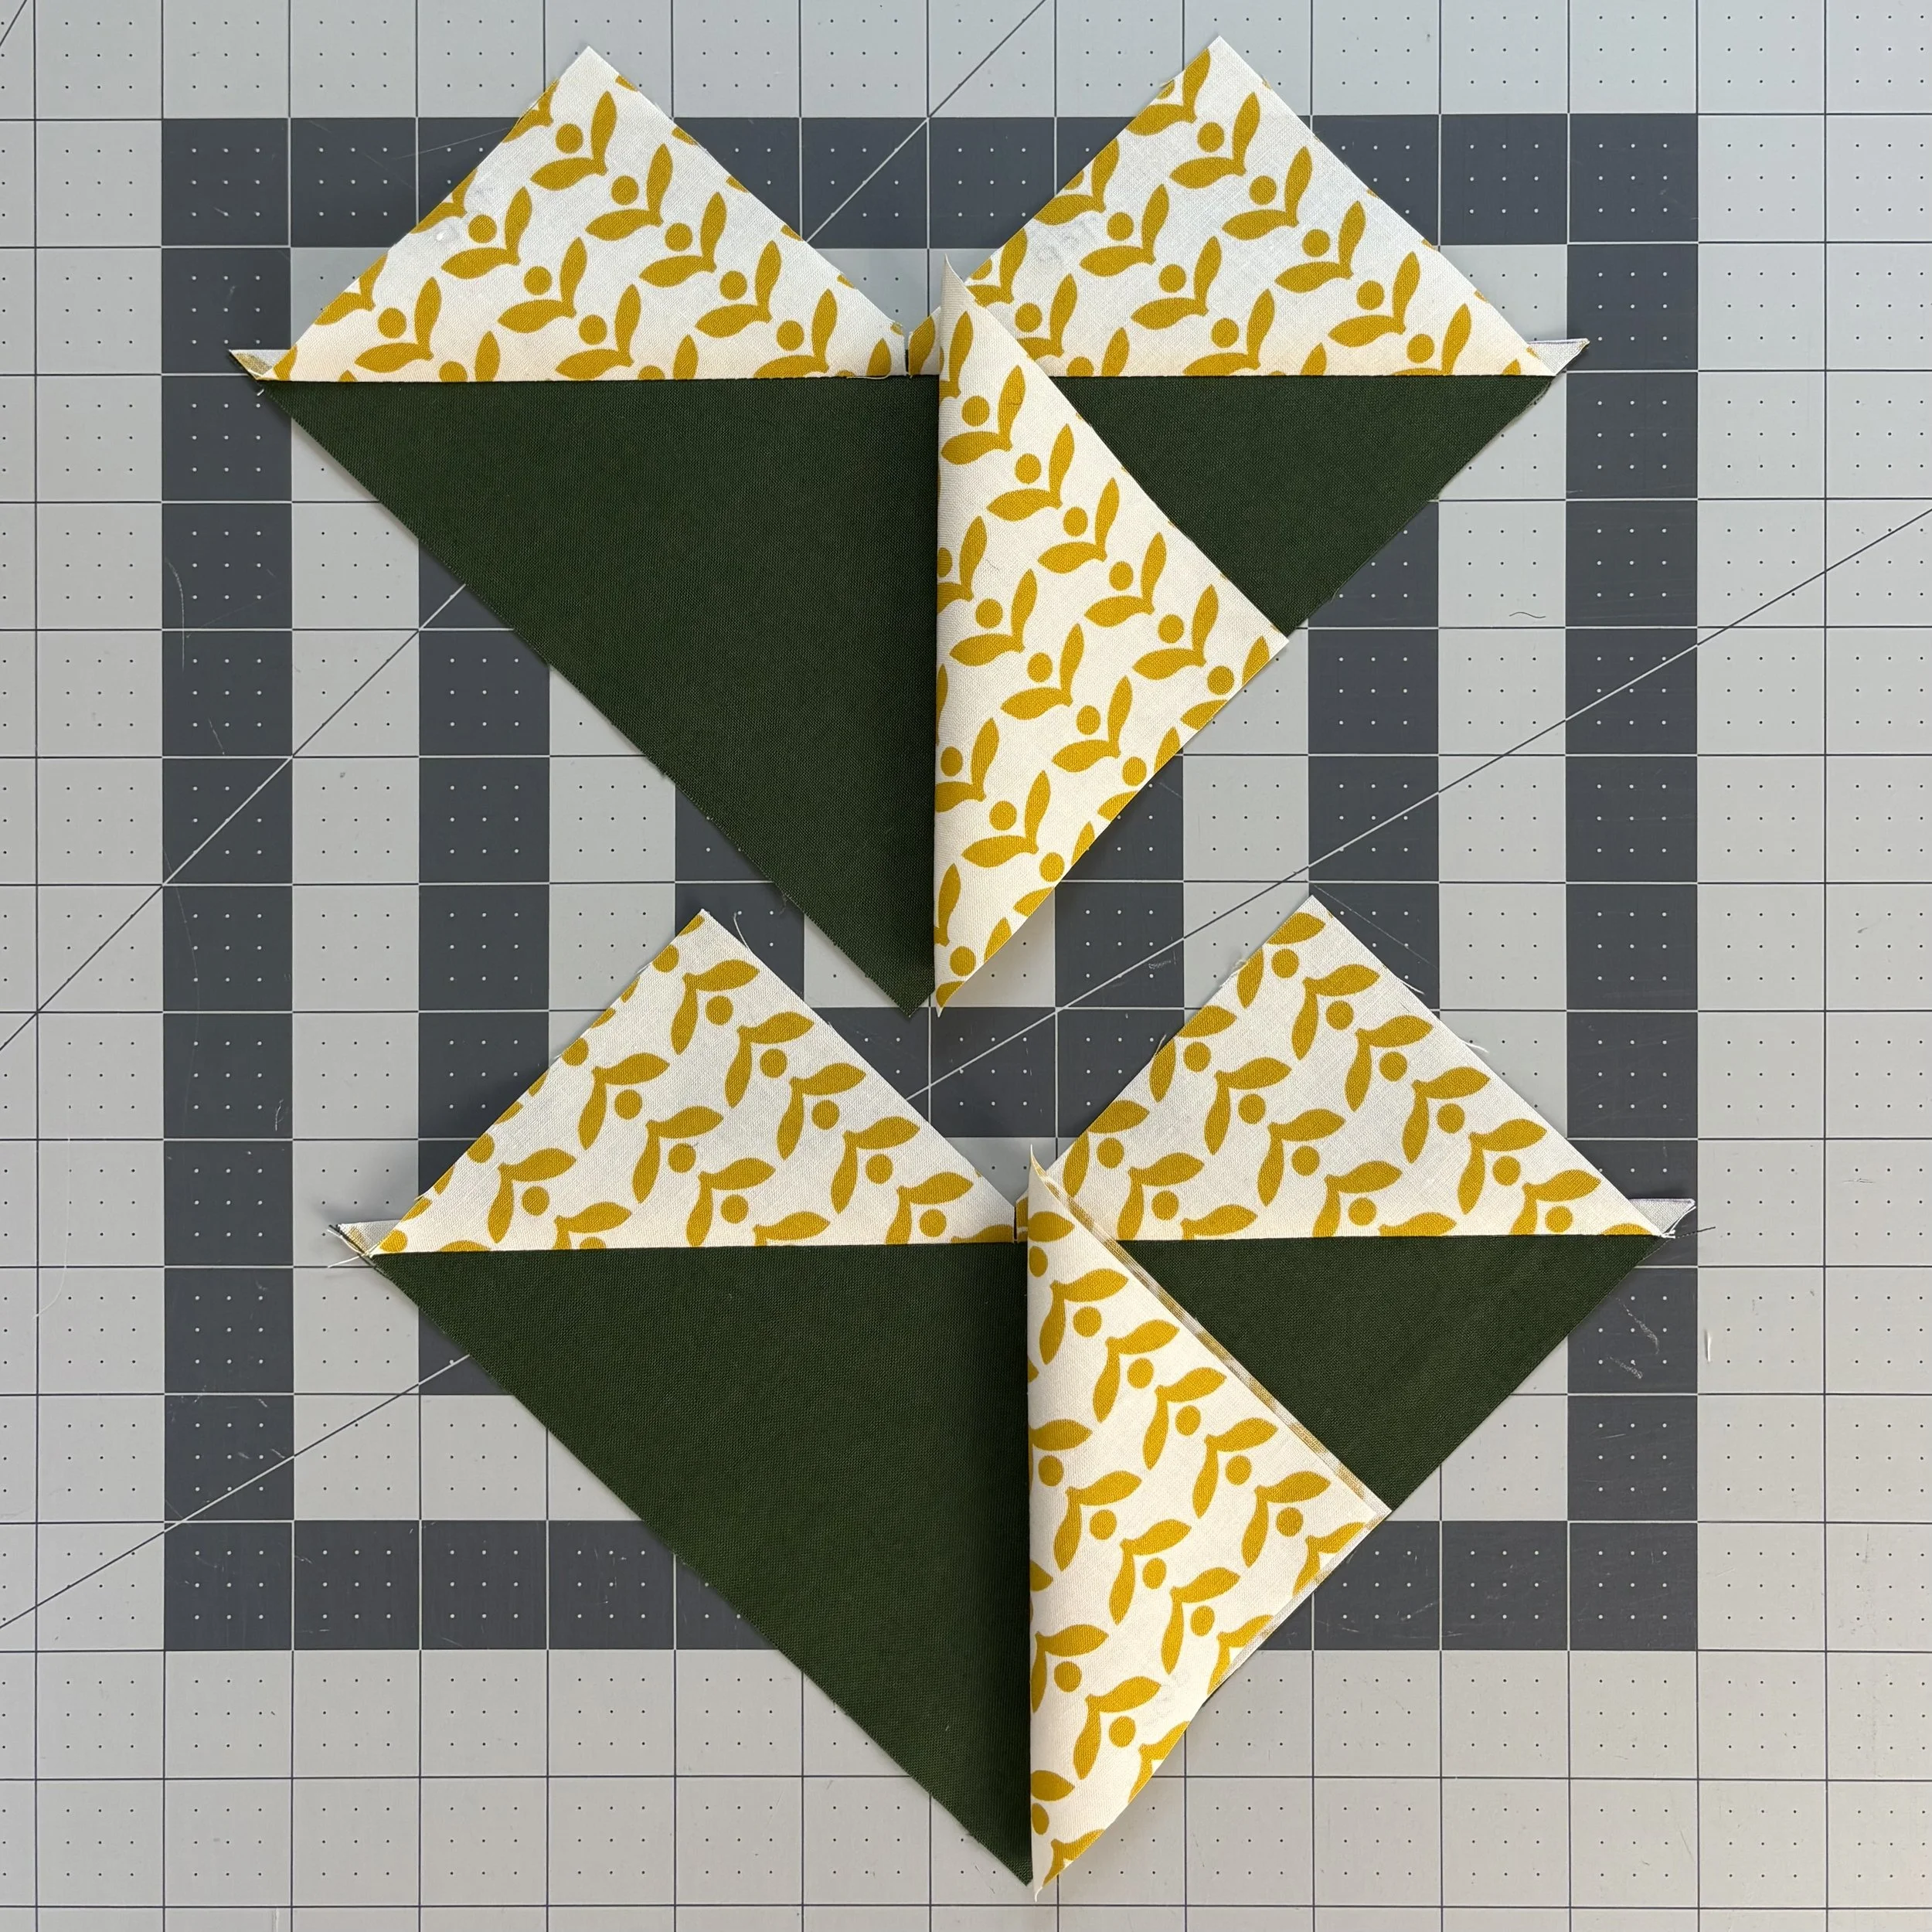
4) After you’ve sewn ¼" away from both sides of the drawn line, cut down the drawn line and pressed, you can check out your mastery of two-way directional prints. In the photo below, I’ve laid out the four FG on top of a scrap of the same fabric so you can see that the print all runs in the appropriate direction.

One-way directional prints
1) We start off exactly like two-way prints. Note or mark the top of sky squares. On half of the units, draw a diagonal line that runs from the bottom left to the top right corner. On the remaining half, draw the line from the bottom right to the top left corner. Again, the drawn lines echo the final shape of a FG.
2) Using the sky squares on the left of the above picture (the sky squares with the lines drawn from bottom left to top right), we’ll put them in opposite corners of the goose 7½" square, making sure the Top is to the left of the drawn line.
3) Once you’ve sewn ¼" away from both sides of the drawn line, trimmed and pressed, we need to pay attention to the orientation of the third and fourth sky squares. One of the heart shaped units will have sky squares with the Top markings. The second heart shaped unit will not have any Top markings.
On the unit with the Top markings, the next sky square must be oriented so that the Top marking is to the right of the drawn line.
On the unit without the Top markings, the next sky square must be oriented so that the Top marking is to the left of the drawn line.
We can check our work by flipping back the squares and previewing the orientation of the print.
4) After you’ve sewn ¼" away from both sides of the drawn line, trimmed and pressed, you can check out your mastery of one-way directional prints. In the photo below, I’ve laid out the four FG on top of a scrap of the same fabric so you can see that the print all runs in the appropriate direction.

If you’ve followed along with your own units, you can now trim them to 6½" x 3½". I hope you find this explanation useful! If you make FG using these directional print tips, I’d love to see what you stitch up!